Fixing up an older pickup truck, part 8
Hello, and welcome to my page!
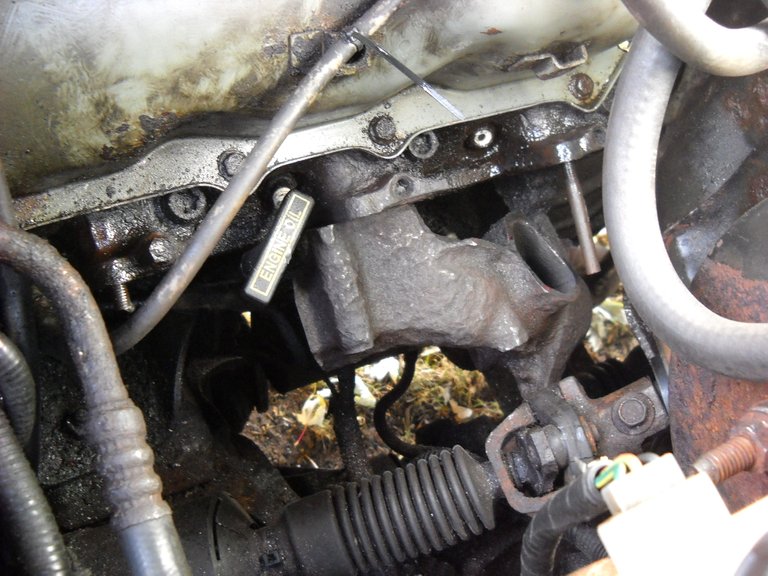
At the end of my previous post about my pickup truck, I talked about the need to get the exhaust manifolds off the engine so that I could either replace the exhaust pipe bolts, or replace the manifold. I can't put an exhaust pipe on the manifolds because the bolts are rusted into the manifold and can't be removed from under the vehicle. After getting a good look at the exhaust pipe mounting end of the manifolds, I knew I would have to take the manifolds off to repair them for new bolts.
I started with the driver's side manifold, it's easier to get to. The manifold bolts have a 10 mm head, so I had to buy a net 6 point socket to work on them. I knew that I would just strip the bolt heads with a 12 point socket. The truck has 160 thousand miles on it and the manifolds have probably never been removed, so I knew the bolts would be difficult to get out.
Since the above freezing weather had been holding , I decided to start on the process of removing the manifold. I was able to get 2 of the 6 bolts out without too much trouble, both of those bolts were on the lower side of the manifold , on at each end. The lower middle bolt became a problem because I accidentally stripped the head of the bolt with the socket when the socket came off the head at an angle. The upper 3 bolts screw into a flange on the head that the hole goes all the way through. Those bolts were subject to rust from water getting into the threads from the back of the flange. I managed to break off the bolt on the upper front of the manifold, and the other 2 were not cooperating to get them loose. I tried using penetrating oil on the back side of those bolts, but wasn't getting any results. This was about 3 afternoon's worth of work.
After the lack of success on the 2 remaining upper bolts, I decided to try heating the flanges that the bolts were screwed into, in an attempt to break the rust bond between the bolt and flange on the head. If I could apply the heat directly to the flange so that it would heat up faster than the bolt, the different expansion rates could help to loosen the bolt threads. I decided to use my braising torch to heat up the flanges. Of course, with the torch, there is a risk of setting something on fire inside the engine compartment, so I had a fire extinguisher close by, and I moved all the spark plug wires and other things out of the way before starting the process. After heating the flanges, I sprayed penetrating oil on the back of the flange in the hope of getting some of it to soak in around the bolt threads. I tried removing the bolts after the heating process with no success several times in a row, until I finally got the upper center bolt to turn. I worked it back and forth until I got enough penetrating oil into the threads to be able to turn it out of the flange. T was not successful with the other bolt. That left me with 3 bolts removed, 1 bolt broken off, and 2 bolts still stuck.
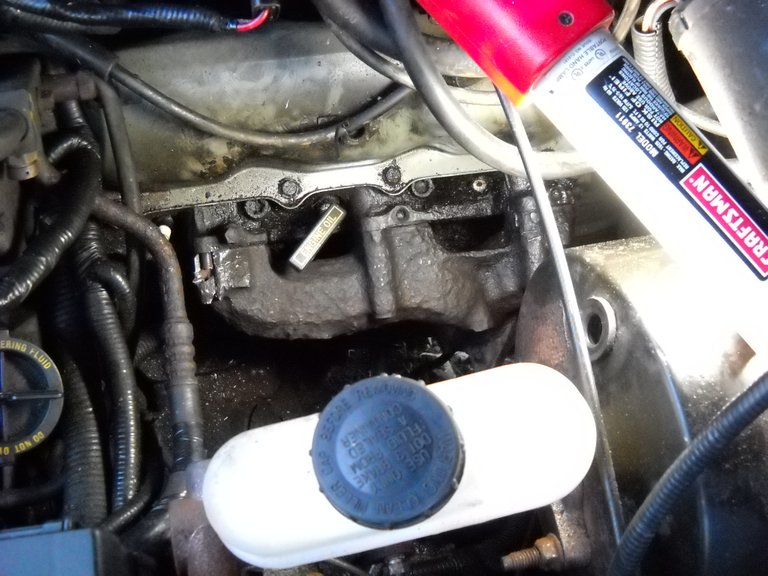
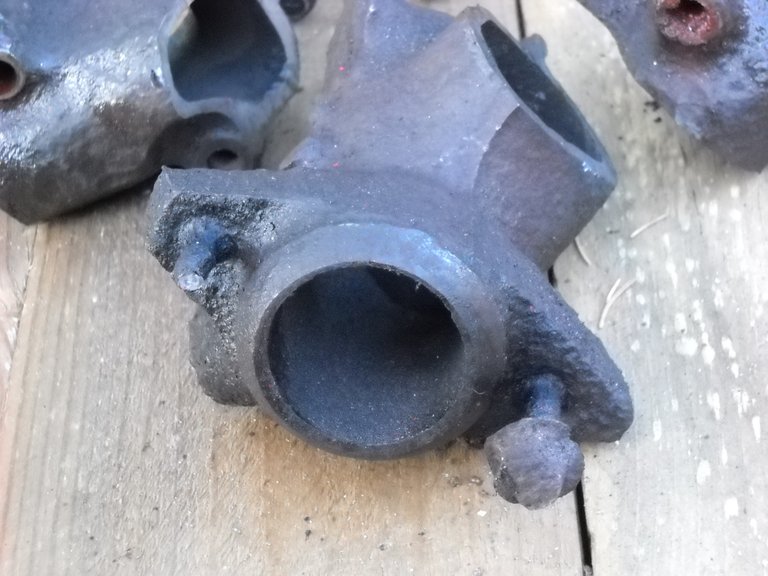
It was at that point that I decided that the only way that I was going to get the manifold off the engine was to destroy it in the process. I thought about cutting the heads off the 2 remaining bolts, but I couldn't see the lower middle bolt to get at it. I was still hoping to be able to get the remaining upper bolt loose. I figured that if I could get that bolt loose, I could turn the manifold to get at the lower bolt, and that turning the manifold might loosen the lower bolt enough to be able to get it loose. I knew that the broken bolt was not broken off right at the head, so I had to break the manifold where that bolt goes through it in order to be able to turn the manifold, if I got the other upper bolt out. I used my air hammer with with a chisel tip to cut open the hole that the broken bolt goes through. That was when I remembered to take a picture.
Close up of the opened up hole. You can see the broken bolt in the hole. It broke off where the threads start.
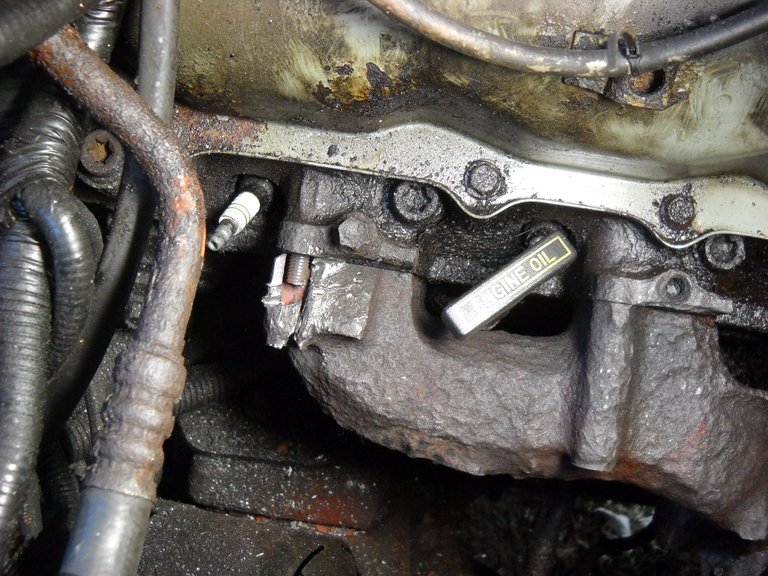
Here is the upper bolt that was still stuck in the head. The other stuck bolt is the lower bolt of the middle set. If I could get the upper end bolt out, I could turn the manifold to attempt to loosen the lower bolt. You might notice that I broke off a spark plug while trying to work on the bolts.
After more unsuccessful attempts to get the bolt out, I decided to take the extreme option of cutting the manifold into 3 pieces, and then cutting the head off the stubborn bolt to get that piece of the manifold out. I used my reciprocating saw with a good metal cutting blade to cut the manifold into 3 pieces. Before I cut the manifold, I put all the bolts back into it to hold it in place while I did the cutting.
After that, I cut the head off the upper bolt and removed the 2 end pieces of the manifold. The middle piece was still held by the lower bolt.
I was having some problems with turning the middle piece to get at the lower bolt because of the lower [part of the manifold interfering, so I decided to cut that part off also. After cutting off the lower part, I was able to turn the center piece of the flange enough to see the bolt head. I decided to try the bolt again to attempt to get it out, now that I could see the head to get the socket onto it and aligned with it. To my surprise, the bolt came loose without too much further effort. With that, I was able to get the last piece of the manifold out. That left me with 2 bolts to remove, the broken bolt and the bolt with the head cut off.

Here's the manifold, in pieces, along with the 4 bolts that I was able to remove in 1 piece.
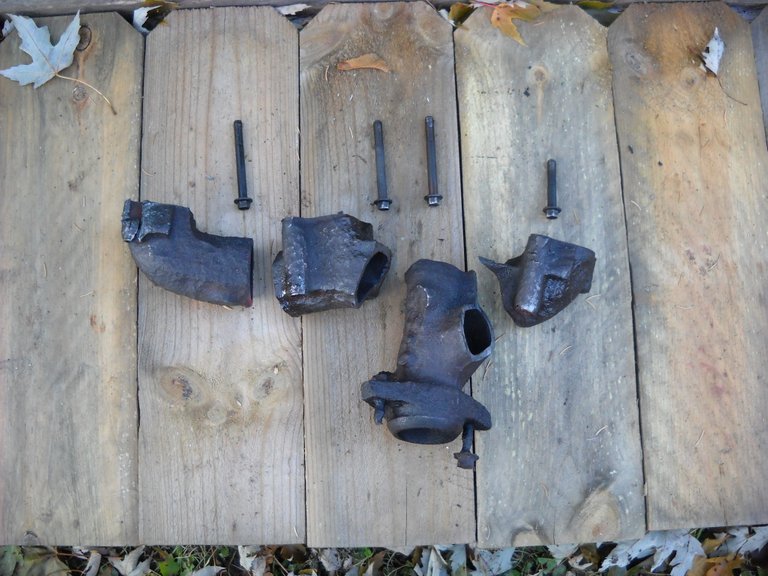
The reason that I decided that it was worth destroying the manifold to get it off the engine was because I knew that it would probably not be possible for me to replace the 2 bolts that hold the exhaust pipe onto the manifold. There's just too much rust damage where the bolts attach, and the bolts are rusted solid into the manifold. At least with a new manifold, I won't have any problem with putting the exhaust pipe on it.
I did manage to get the bolt with the head cut off out of the flange on the head. I clamped the vicegrips on it and worked it back and forth until I got it to turn a tiny bit. From there, it was just a matter of applying more penetrating oil to it and continuing to work it until I was able to get it to turn out of the hole. I tried to to that with the broken bolt also, but I couldn't get a good grip on that bolt with my vicegrips, they don't close quite small enough to get a trip on the threads. I bought another vicegrips yesterday that I'm going to modify so that it will close on a smaller diameter piece so that I can get a good enough grip on the bolt to get it to start to turn. Perhaps all the penetrating oil that I sprayed on it will also help. I didn't work on it today because my body hurt from bending over the fender of the truck and working on the bolts. Hopefully I'll be able to get back to it later in the week. I really don't know how the guys at the muffler shops deal with this kind of stuff considering all the stuff I had to do to get this manifold off.
That's all I have for this post, thanks for stopping by to check it out!
Aren't old truck restorations wonderful! [Sarcasm].
Seems like you didn't have much choice in destroying the manifold and I'd say you certainly gave it a good go prior to taking that extreme action. What's the plan for the manifold moving forward? Weld or new/replacement?
I'm going to replace the manifold with a new one, and probably all new bolts also.
Best way to go probably. Thanks for replying. (Many don't for some reason).
This post was shared in the Curation Collective Discord community for curators, and upvoted and resteemed by the @c-squared community account.
If you are a community leader and/or contest organizer, please join the Discord and let us know you if you would like to promote the posting of your community or contest.
@c-squared runs a community witness. Please consider using one of your witness votes on us here
Thank you for using the #diy tag. This post has been manually rewarded with BUILD tokens in the form of an upvote with our @build-it.curator account. You can buy, stake, and exchange our "BUILD" tokens for steem on steem engine and Steem Leo's exchange
Build-it is a central hub for DIY and How-To projects. It's an opportunity to find and share the latest in DIY, and How-To tutorials. The recommended tags required when creating a DIY article are #diy, #build-it. #how-to, or #doityourself.
Chat with us on our discord and telegram channels Discord, Telegram. Are we adding value ? your witness vote will be appreciated! Click here to vote