[ Game Art Series ] Isometric 2D Game Assets Painting - Resources [ Wood ] by a Colorblind Artist
Hello welcome to another Game Art Post. In this post I am going to go through the step by step process of making a wooden block for 2D Games. This type of assets are so useful in 2D games. In this case this wood is a resource material visual for players to collect in-game. In my previous post I made a 3 different house designs for players to build and upgrade. In order to do that we need a resource item to build the house. This is the first one. II will make other resource items as well ( stone , iron etc )
You will need a graphic tablet for this tutorial. Lets jump into the tutorial.
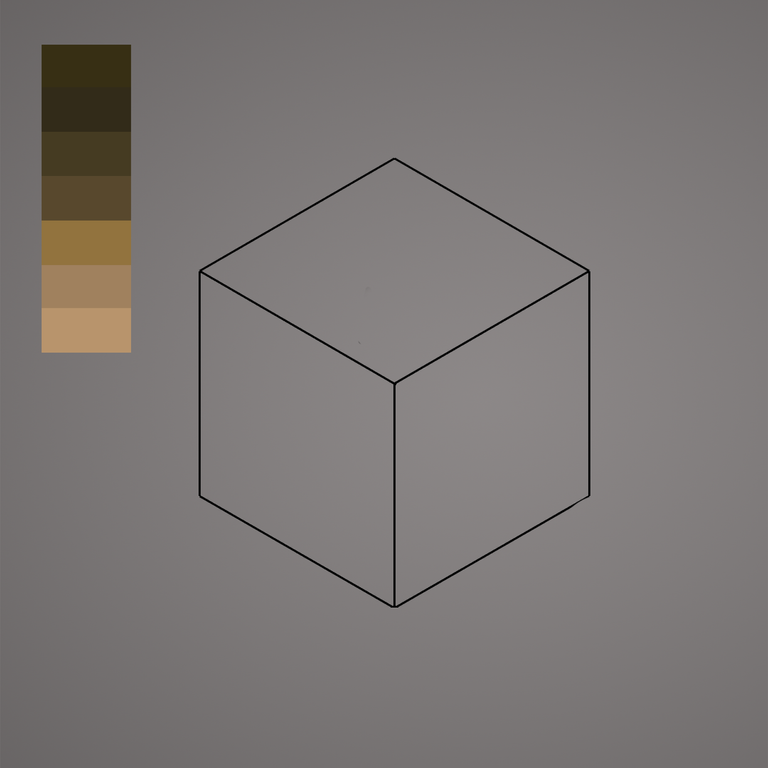
The first thing you need to do is draw or download an isometric cube. Its pretty simple. I recommend you to find an existing one on the internet for convenience. Because I am colorblind ( strong protan ) I can't pick colors just by looking at the "color picker". So I need to prepare my colors before hand. I select these colors from an existing drawings of a wooden object. It goes darkest to light. We will use most of them. You can use different shades of one color depending on your painting. I like to keep the colors as simple as possible. Colors are scary for me.
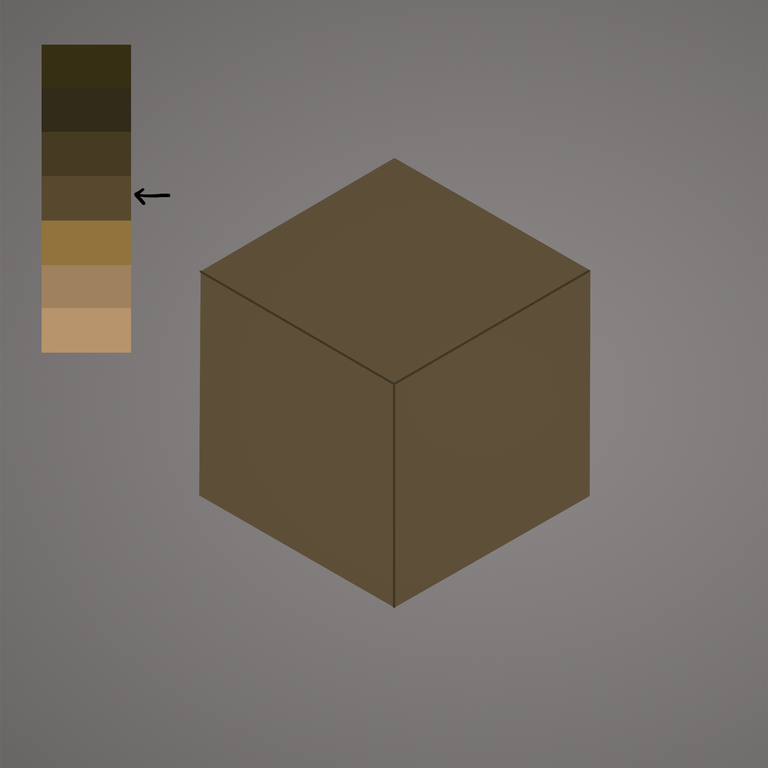
Go ahead and create a new layer ( always create new layers when you are making different thing ) and paint the cube with the middle color. And define the lines with darker color. If you want to draw a straight line in photoshop. Select a brush ( press B ) and click the place you want your line to start and hold SHIFT and click the place that you want your line to end. This way you can draw perfectly straight line in photoshop.
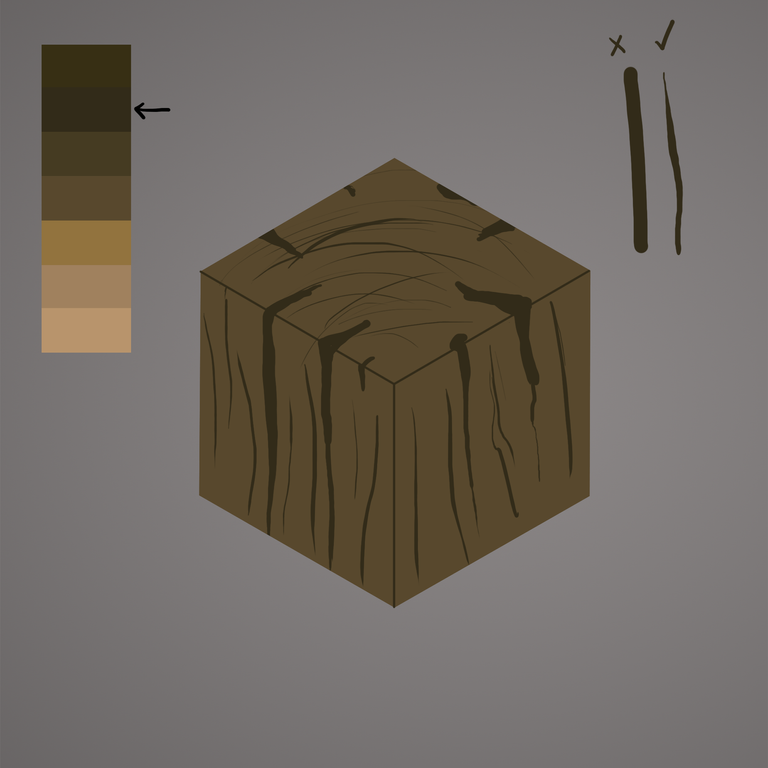
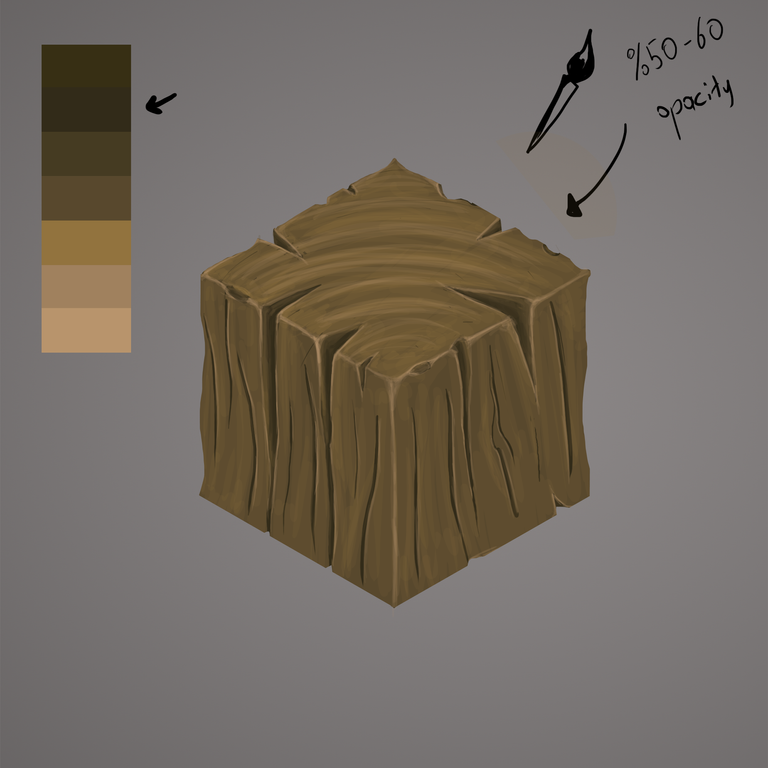
You can see which color I am using in each step by looking at he color pallet. And information on the top right corner. So in this step we are gonna create the wood effect. Go ahead and pick the dark color and draw some cracks and lines. Be creative and try different shapes. Its your block of wood you can do whatever you want to it. Keep in mind that your lines should not be the same thickness.
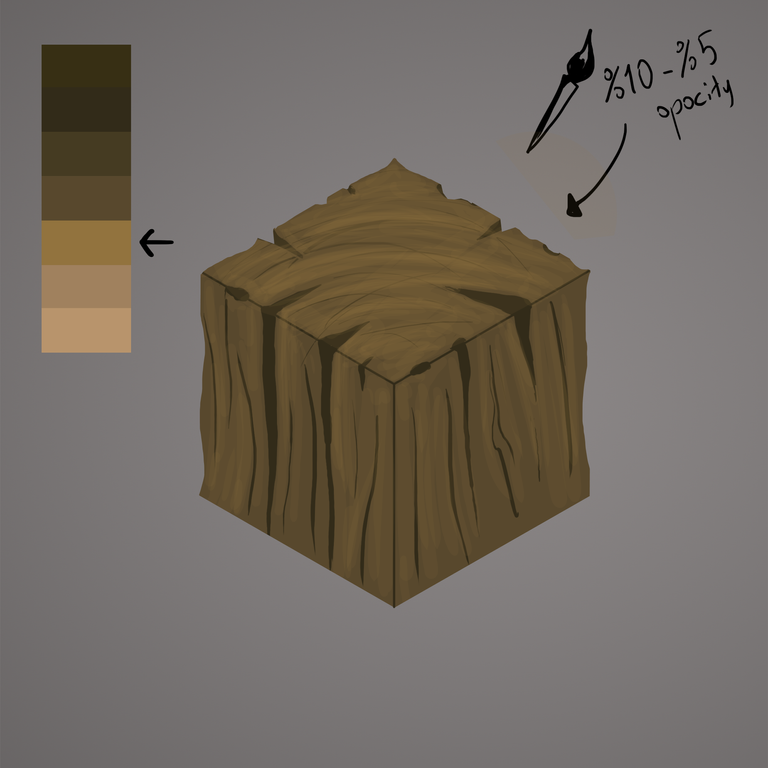
Before you paint anything , select Lasso tool ( L ) and cut away the cracks and re-shape the wood. Try to make it not so sharp as a cube and try to give it more natural shape. Pick the color and make your brush opacity %10 and slowly paint close to the darker lines. it's all about light and dark. You will use lots of brush stroke here. Do not rush ,take your time and slowly paint. You can decrease or increase your opacity while painting by pressing 1 -9 numbers on the keyboard 1 = %10 9 = %90 .

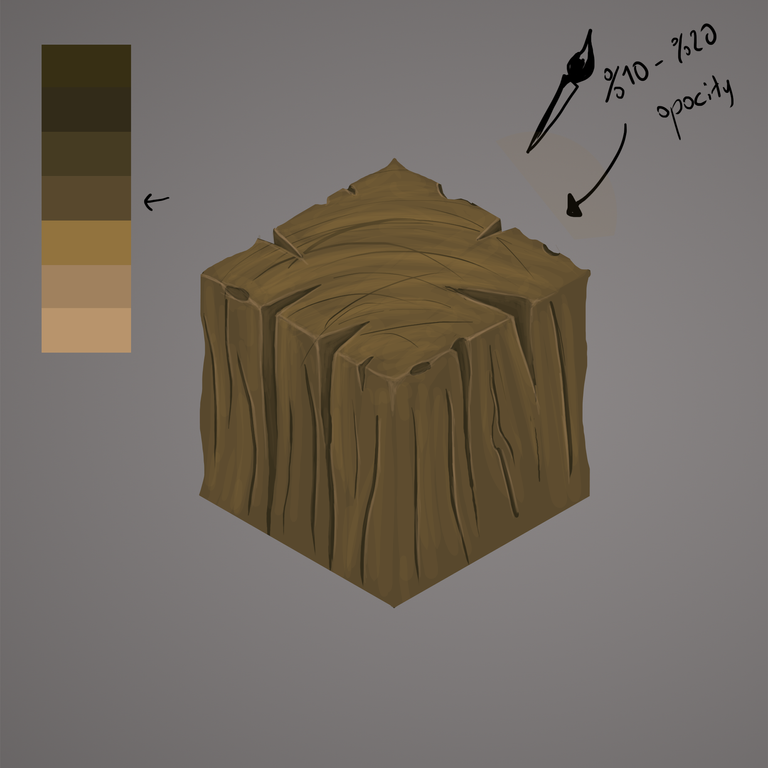
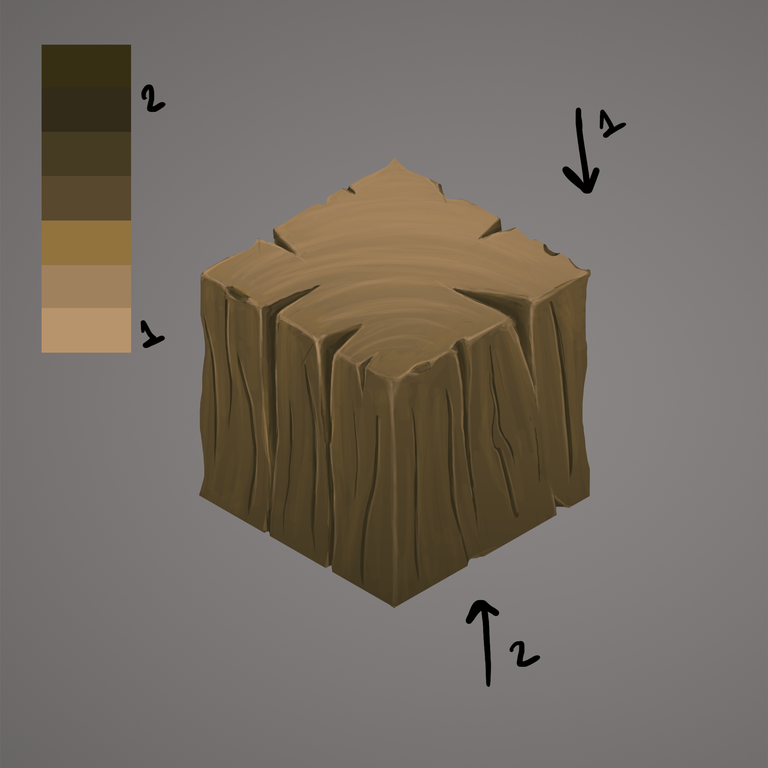
Lets add some light to the edges. Again make your brush around 10 or 20 percent opacity and slowly paint on the edges. Keep your brush size relatively small. Paint only the edges of the darker areas. Its starting to look something which is good.
Pick the original middle color ant paint over the dark areas to blend them to the rest of the painting. Leaving them flat dark color doesn't look good. Dont paint too much we still need those areas to be dark.
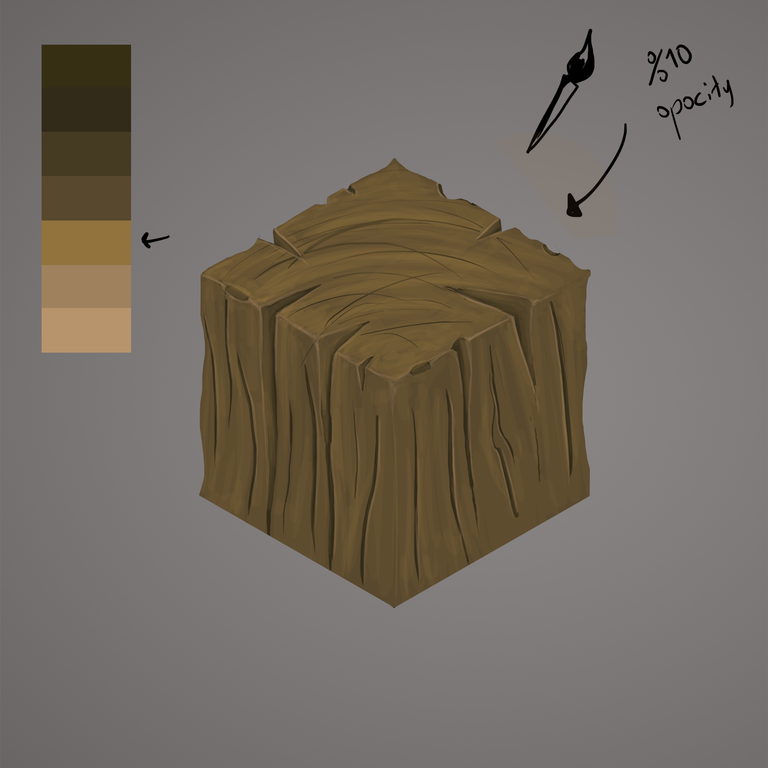
Add some more colors , and paint over the darker areas as well to blend them even more. Keep the deep areas darker.
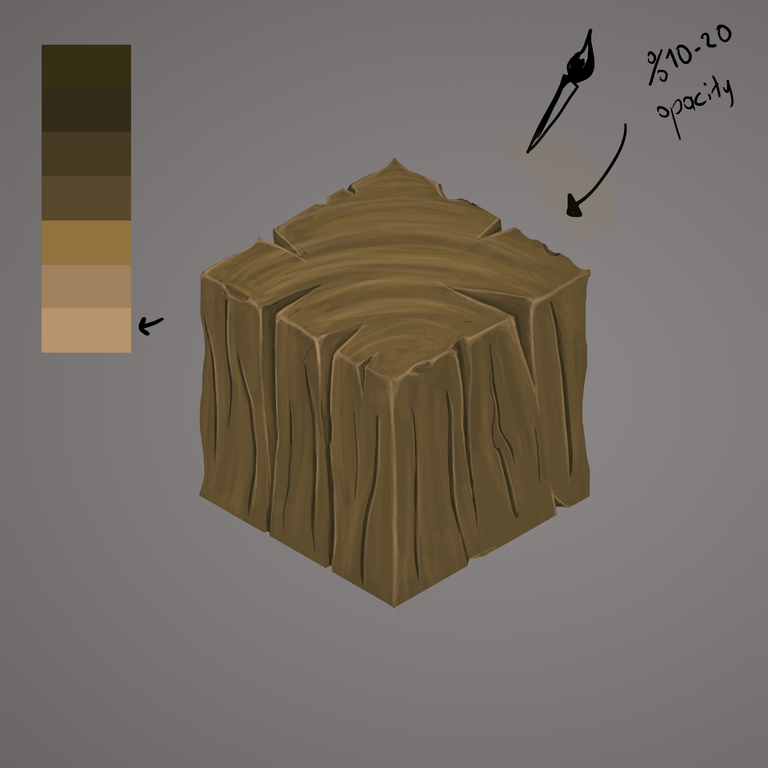
Let's add more light. Pick the lightest color and paint over the edges again. This time make your brush a little bit bigger and soften the edges. Repeat this step as much as you like. Make sure to set your brush opacity to %10 and paint slowly.
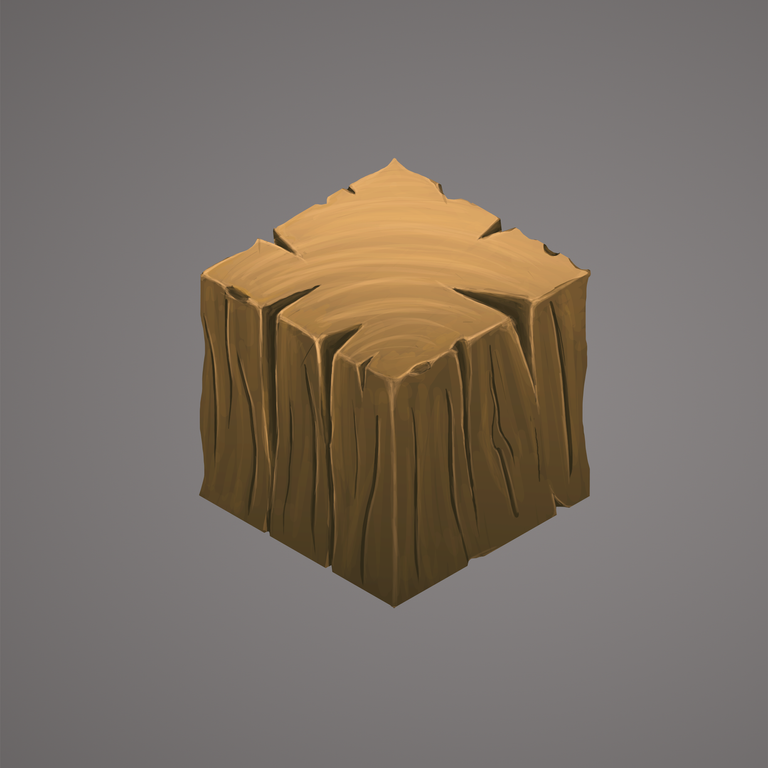
Digital painting like this has lots of repeated steps. Go back and forth and repeat some steps until you happy with the result. In this step let's go back to the darker color and paint over the cracks and make them darker. Paint deeper areas more dark.
Pick Lasso tool ( L ) and make a selection of the top lane. Dont select the cracks only the top plane. Create a Clipping Mask layer and create a gradient( color to transparent ) with color(1). The direction of the gradient is top down. We need to make the top lighter and other sides darker. Make a selection of the other two sides without cracks and apply the same thing with the color(2). The direction of the gradient is bottom to top.
After some contrast and brightness adjustment here is the result.
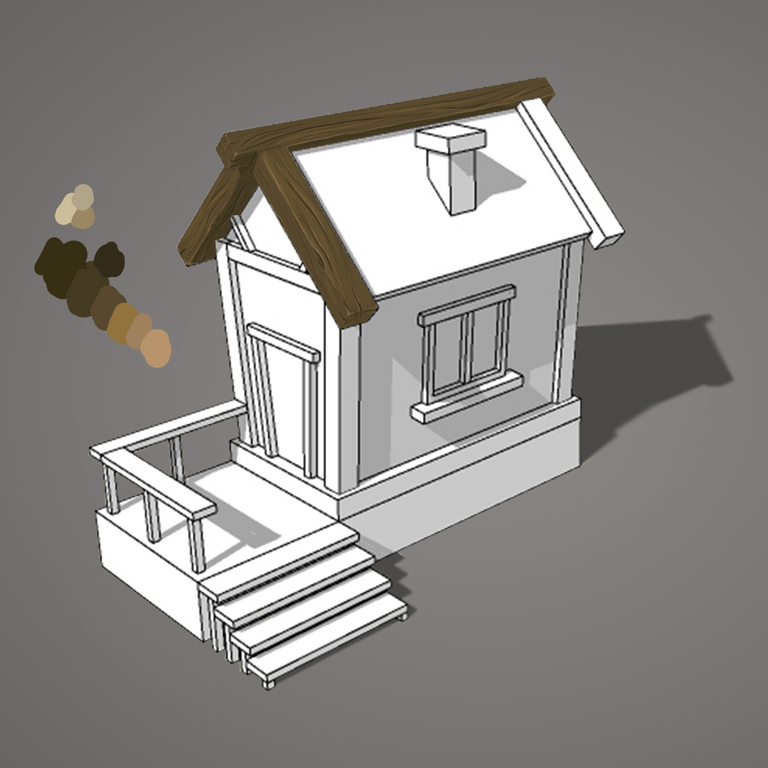
Lets apply this process into something and see it on the model. I take the Level 2 house from the previous post and paint part of the wooden roof. I'll share the house when I finish the whole thing.
Watch Tower
Stone House
Warrior
Temple
Houses

Hello!
This post has been manually curated, resteemed
and gifted with some virtually delicious cake
from the @helpiecake curation team!
Much love to you from all of us at @helpie!
Keep up the great work!
Manually curated by @veryspider.
@helpie is a Community Witness.
This post was shared in the Curation Collective Discord community for curators, and upvoted and resteemed by the @c-squared community account after manual review.
@c-squared runs a community witness. Please consider using one of your witness votes on us here