[ESP-ING] DIY: Blusa para dama con volantes en la mangas. || DIY: Lady's blouse with ruffles on the sleeves.
¡Hola comunidad de Hive!
Hello Hive community!
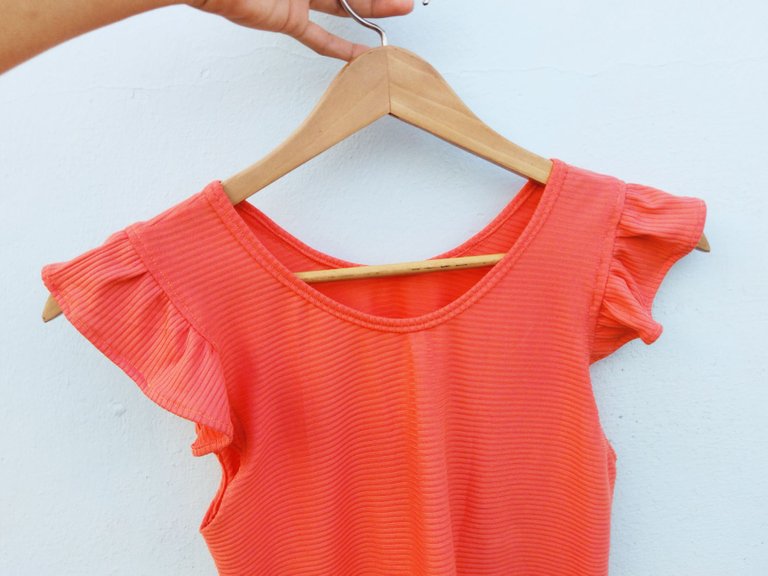
Hola queridos amantes de la costura, espero estén bien, feliz mitad de semana para todos. Hoy les traigo este diy de una blusa para damas con volantes en las mangas, en lo personal no soy fanática de este tipo de mangas por qué a mí no me favorecen, pero está blusa fue un encargo que no hizo mi tía Ana María, ella compro está tela de micro rib en color guayaba que me encantó y en específico me pidió que le hiciera este tipo de manga así que me puse manos a la obra y el resultado final fué mejor de lo que me esperaba, acá les dejo el proceso y espero que les guste.
Hello dear sewing lovers, I hope you are well, happy midweek to all. Today I bring you this diy of a ladies blouse with ruffles on the sleeves, personally I am not a fan of this type of sleeves because I do not favor me, but this blouse was an order that my aunt Ana Maria did not do, she bought this micro rib fabric in guava color that I loved and specifically asked me to make this type of sleeve so I got down to work and the end result was better than I expected, here I leave the process and I hope you like it.
Necesitaremos || We will need
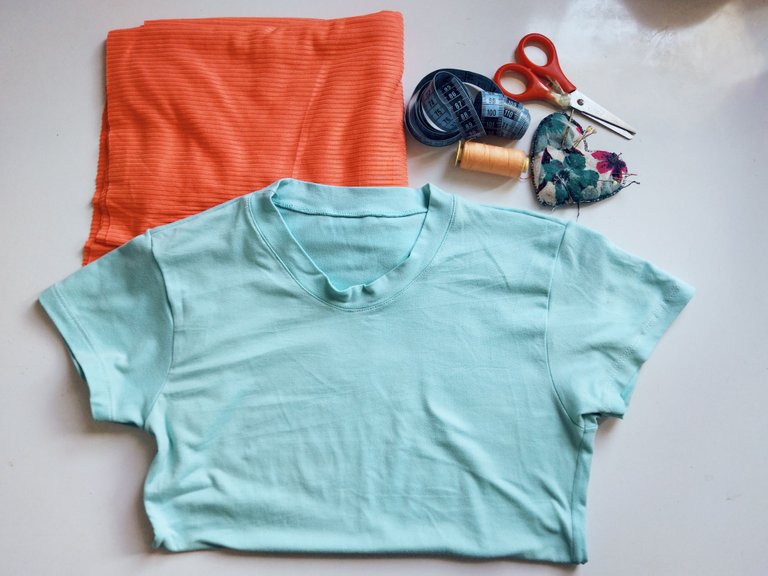
- Tela micro rib
- Hilo a tono
- Blusa molde
- Alfileres
- Tijera
- Cinta métrica
- Aguja y máquina de coser
- Micro rib fabric
- Matching thread
- Molded blouse
- Pins
- Scissors
- Tape measure
- Needle and sewing machine
Paso 1 || Step 1
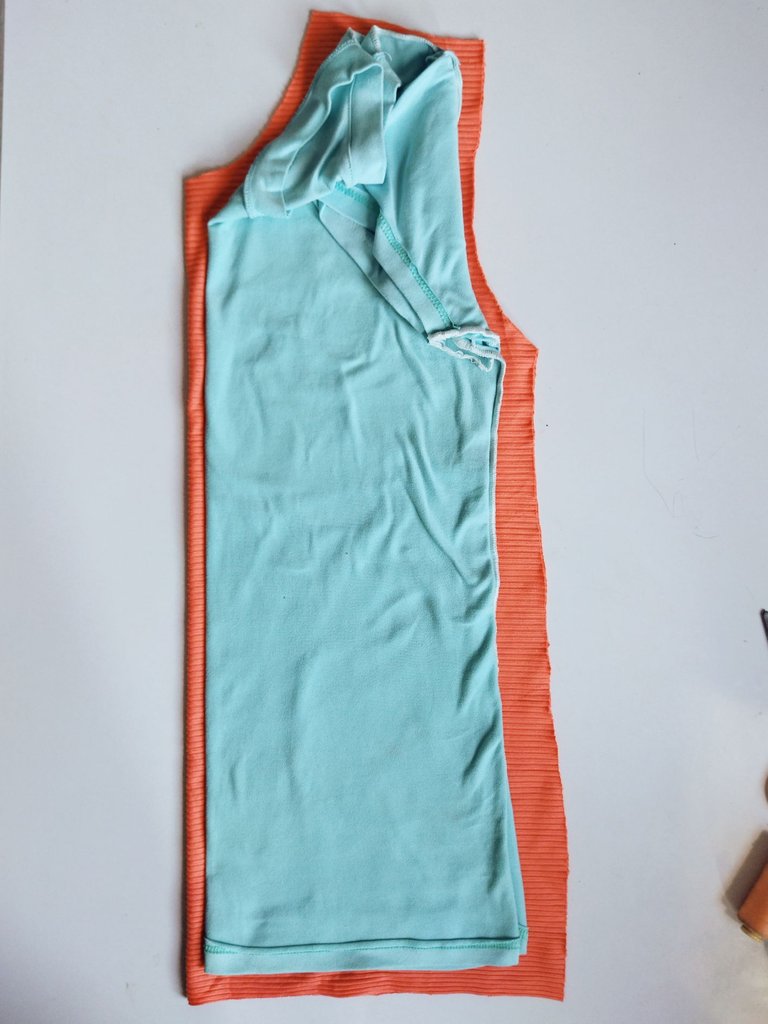
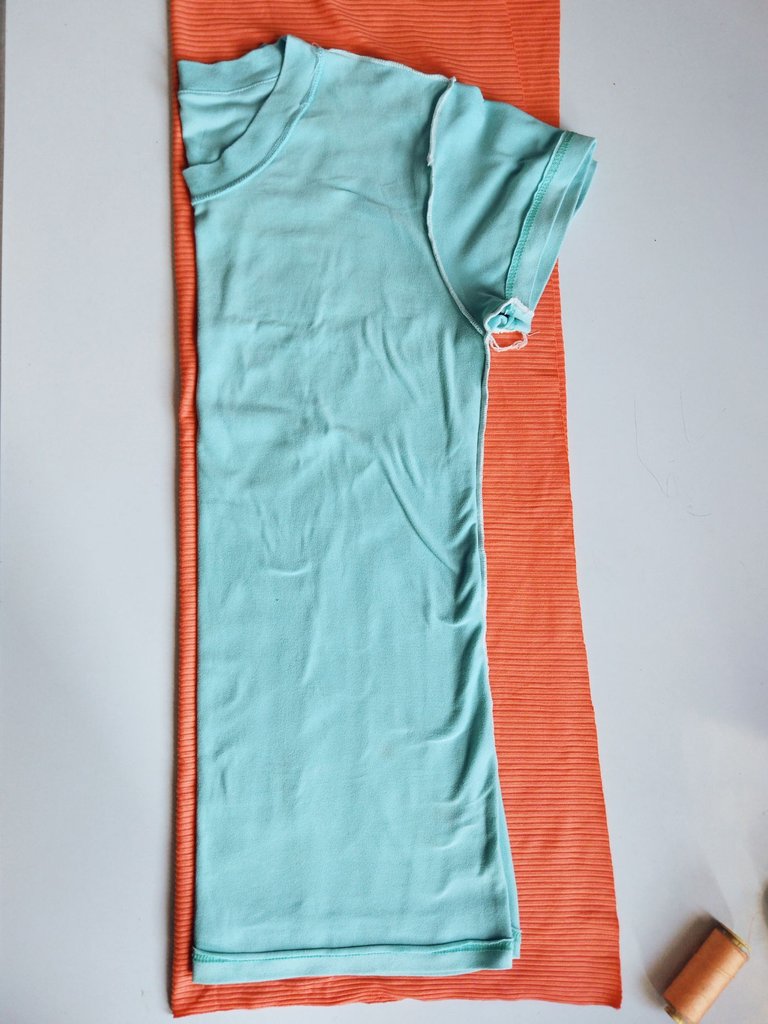
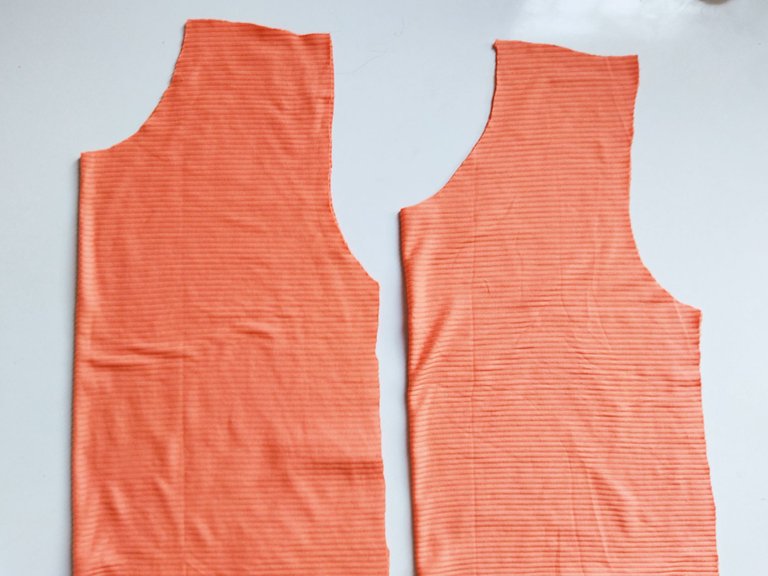
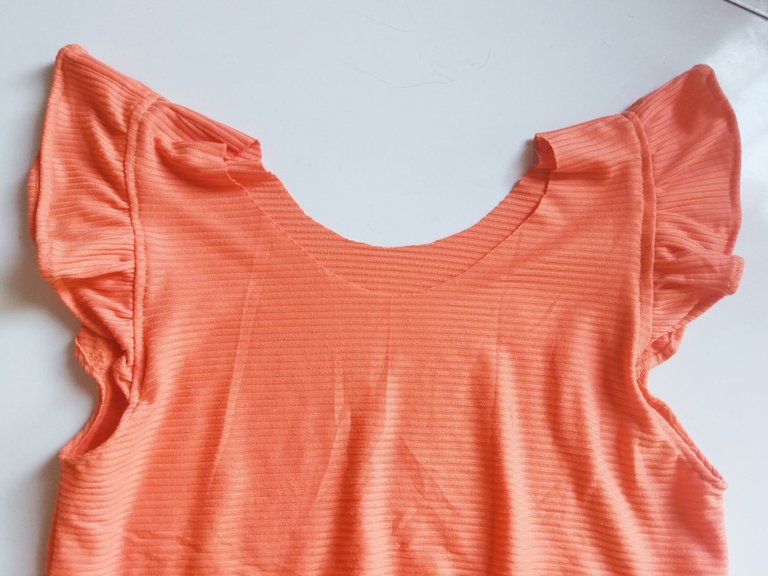
Comenzamos colocando la camisa modelo sobre la tela, vamos a cortar de la tela micro rib colocando el lado que más estira de dirección horizontal, necesitamos sacar dos piezas para la camisa (1 delantera y 1trasera), Debemos tener en cuenta que el contorno del cuello de la pieza delantera es más bajo que el de la pieza trasera , al igual en la sisa delantera debemos cortar 1cm hacia adentro.
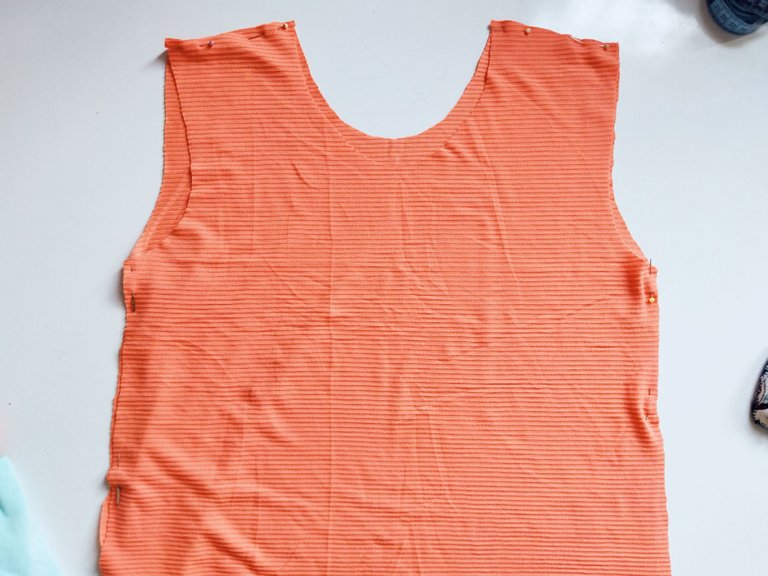
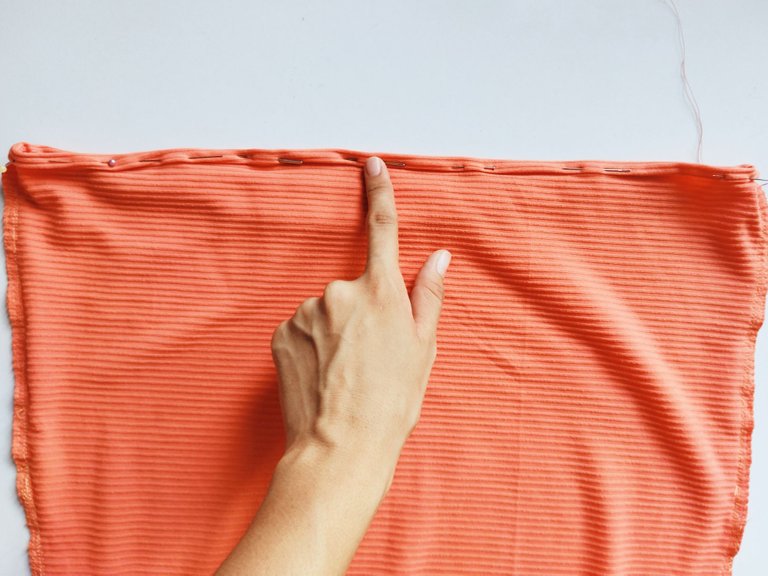
Después de tener la dos piezas cortadas (Delantera y trasera), enfrentamos los derechos de las piezas. Cosemos los costados de la camisa y la parte de los hombros como te muestro en la imagen. Pasamos costura recta y luego zigzag para rematar la costura.
We start by placing the model shirt on the fabric, we will cut from the micro rib fabric placing the side that stretches more horizontally, we need to get two pieces for the shirt (1 front and 1 back), we must take into account that the contour of the neck of the front piece is lower than the back piece, as well as in the front armhole we must cut 1cm inward.
After having the two pieces cut (front and back), we face the right sides of the pieces. We sew the sides of the shirt and the shoulder part as shown in the picture. We sew a straight seam and then zigzag to finish the seam.
Paso 2 || Step 2
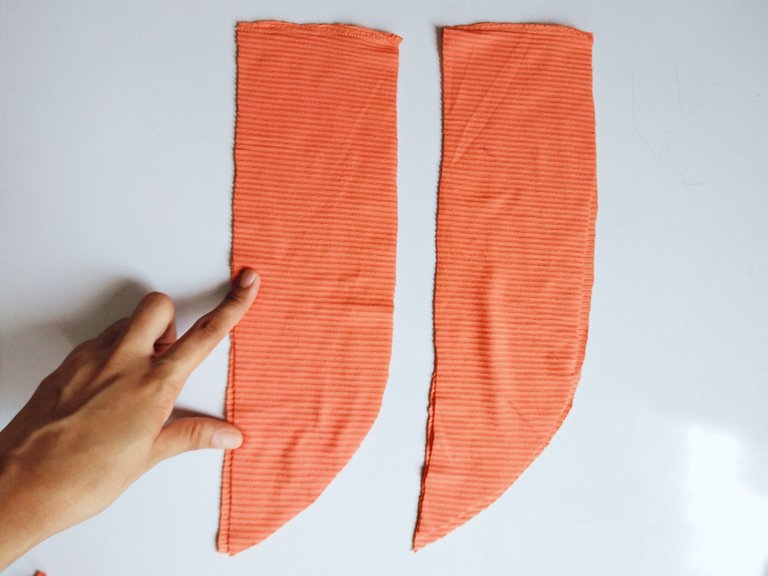
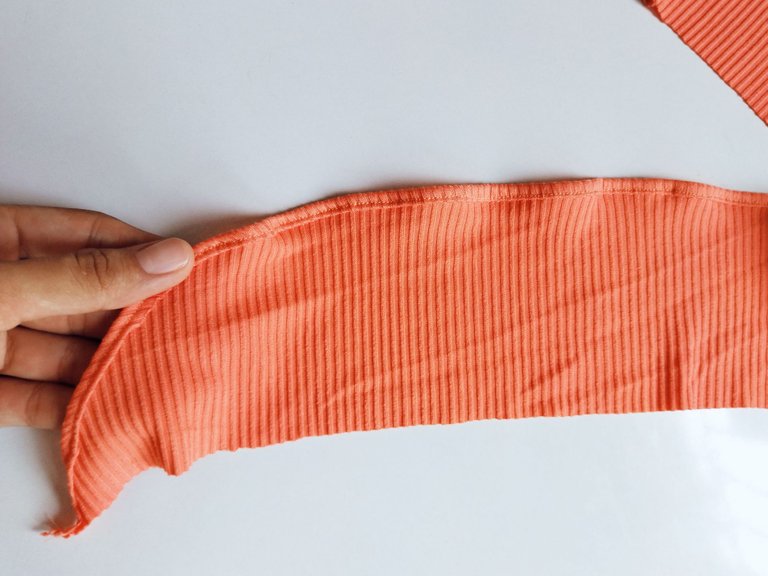
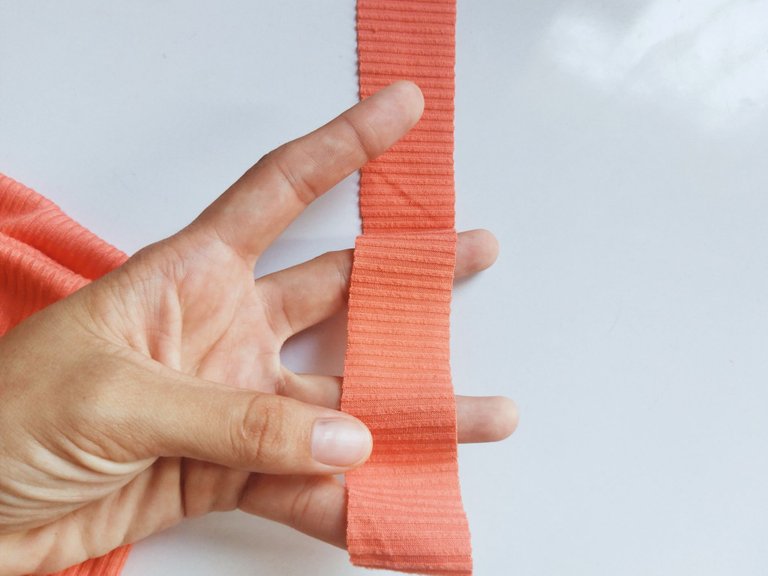
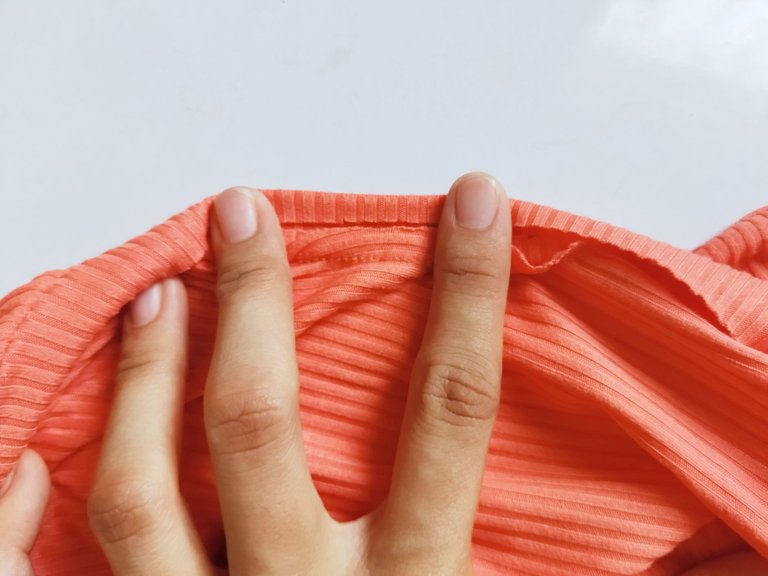
Ahora vamos con los volantes de las mangas, para esto necesitamos cortar dos tiras de 22cm de largo y 7 cm de ancho, cada tira por individual la doblamos a la mitad y vamos a cortar en una una de las puntas un curva con te muestro en la primera imágen 👆👆👆
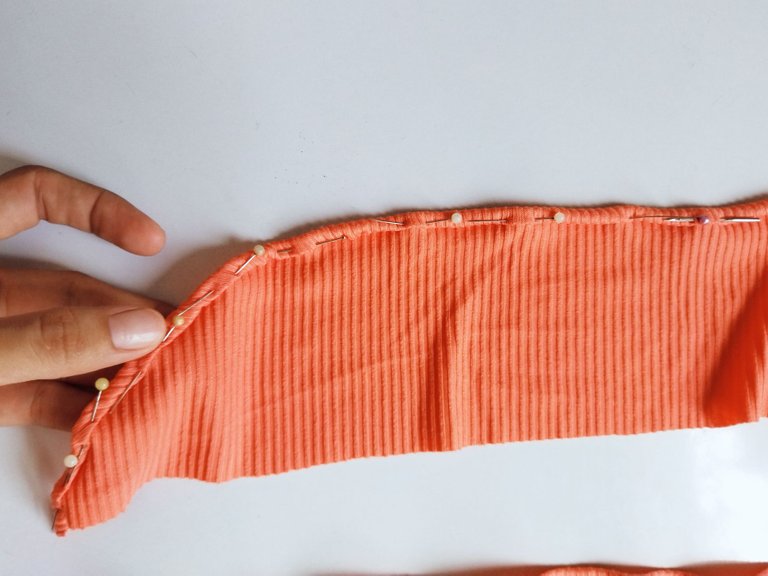
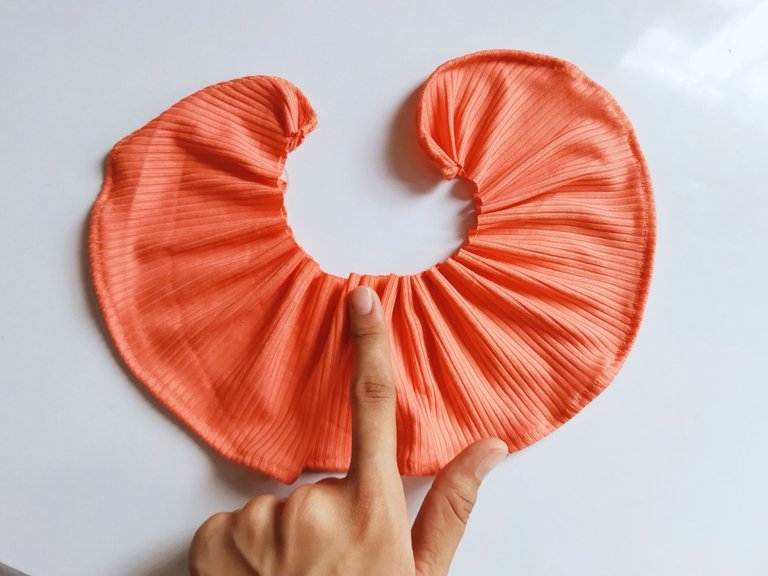
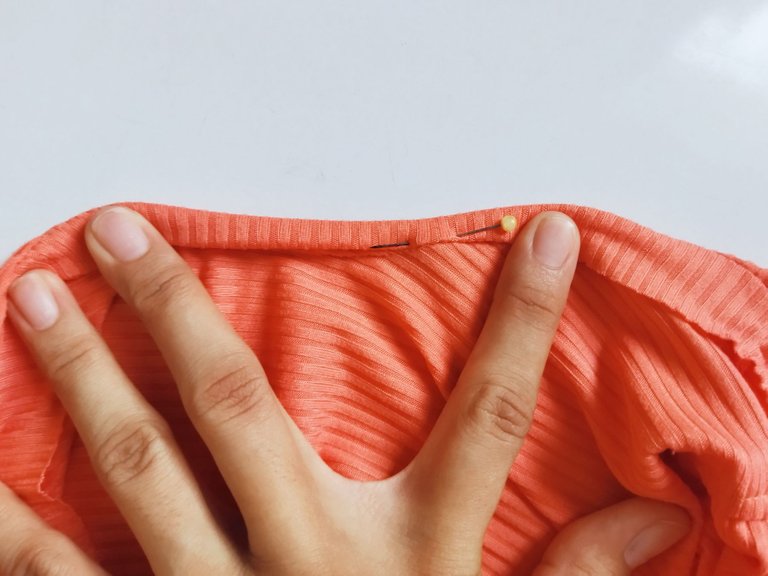
Luego doblamos la orilla que cortamos con la curva y sujetamos con alfileres para coser, pasamos costura recta (👀 OJO!!! Muy pendiente de la dirección de la tela, el derecho y el revés), luego de tener cosida las tiras vamos a bastear con puntadas grandes por el lado que no está cosido, y fruncimos como te muestro en la última imágen 👆👆👆
Now let's go with the ruffles of the sleeves, for this we need to cut two strips of 22cm long and 7 cm wide, each strip individually fold it in half and we will cut in one of the ends a curve as I show you in the first image 👆👆👆👆👆👆.
Then we fold the edge that we cut with the curve and fasten with pins to sew, we sew straight stitch (👀 EYE!!! Very aware of the direction of the fabric, right and back), after having sewn the strips we will baste with large stitches on the side that is not sewn, and gather as I show you in the last picture 👆👆👆👆👆👆
Paso 3 || Step 3
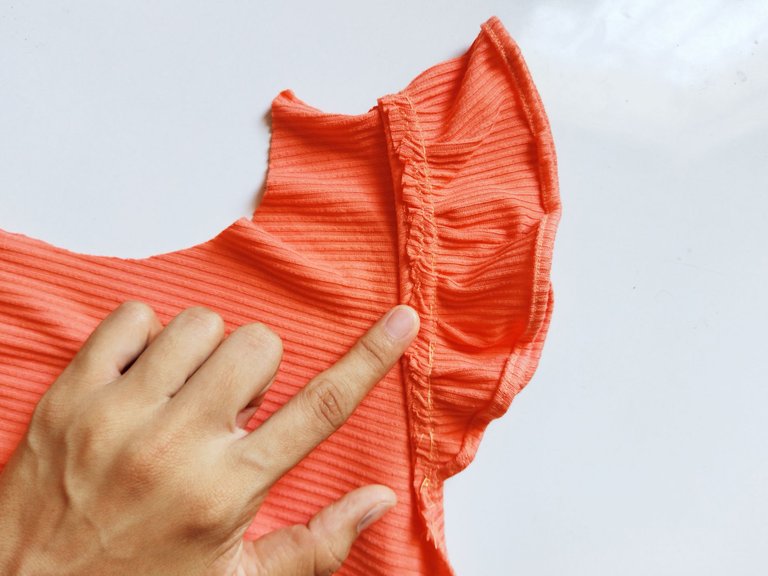

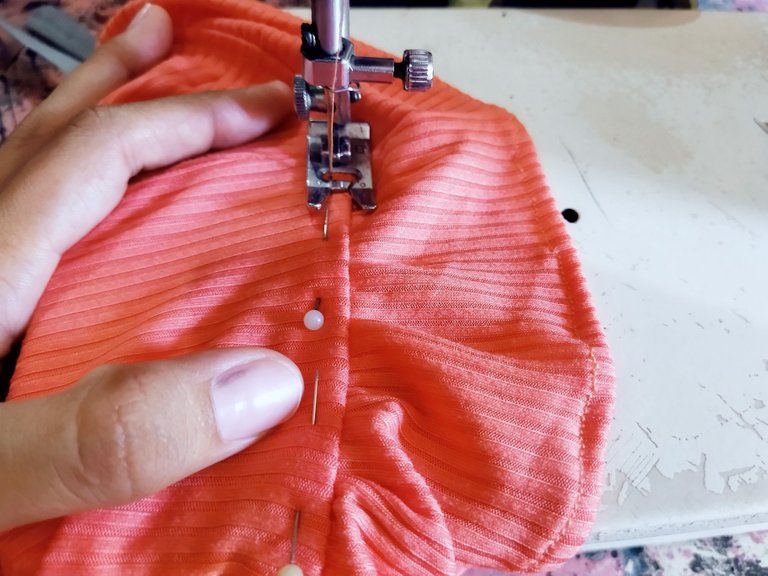
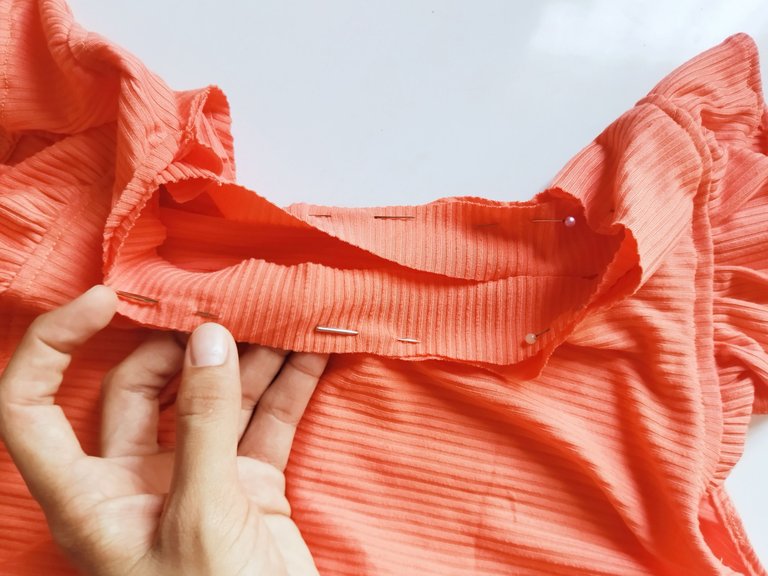
Procedemos a ubicar los volantes fruncidos a la sisa de la camisa, enfrentamos el derecho de los volantes con el derecho de la camisa y sujetamos con alfileres para luego coser a 1 cm de margen de costura, rematamos con costura en zigzag, ahora volteamos la camisa y pasamos costura recta por toda la sisa en la parte externa.
We proceed to place the ruffles gathered to the armhole of the shirt, we face the right side of the ruffles with the right side of the shirt and fasten with pins and then sew with 1 cm seam allowance, we finish with zigzag stitching, now we turn the shirt over and sew straight stitching along the entire armhole on the outside.
Paso 4 || Step 4
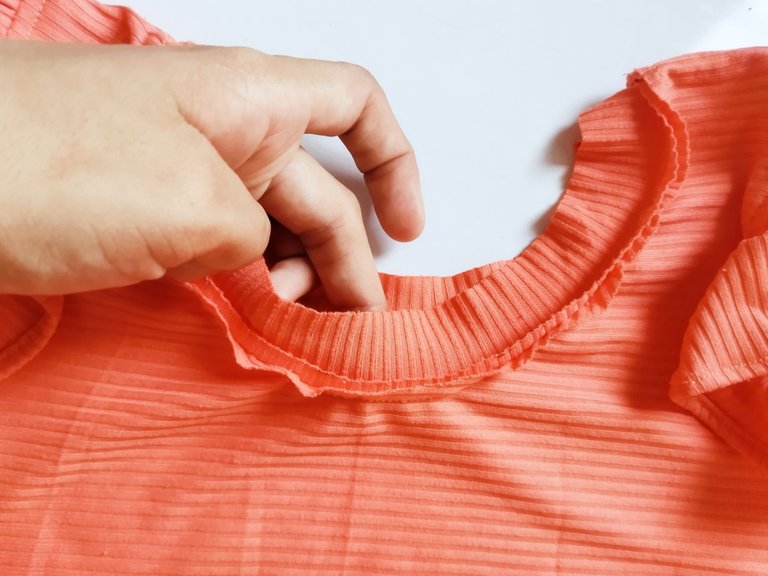
Cortamos una tira de 3 cm de ancho para coser el vivo del cuello, colocamos la tira al contorno del cuello, cosemos con el derecho de la tira hacia el revés del cuello de la camisa, luego de tenerlo cosido vamos a doblar la tira a la mitad, doblemos nuevamente hacia el contorno del cuello y sujetamos con alfileres para luego coser y ya tendríamos el viví del cuello listo, por último nos faltaría coser la orilla de la camisa, hacemos dos doblez hacia el revés de la camisa y pasamos costura recta.
We cut a 3 cm wide strip to sew the collar bivouac, we place the strip to the contour of the collar, we sew with the right side of the strip to the back of the collar of the shirt, after having it sewn we will fold the strip in half, fold again to the contour of the collar and fasten with pins and then sew and we would have the collar bivouac ready, finally we would have to sew the edge of the shirt, we make two folds to the back of the shirt and pass straight stitching.
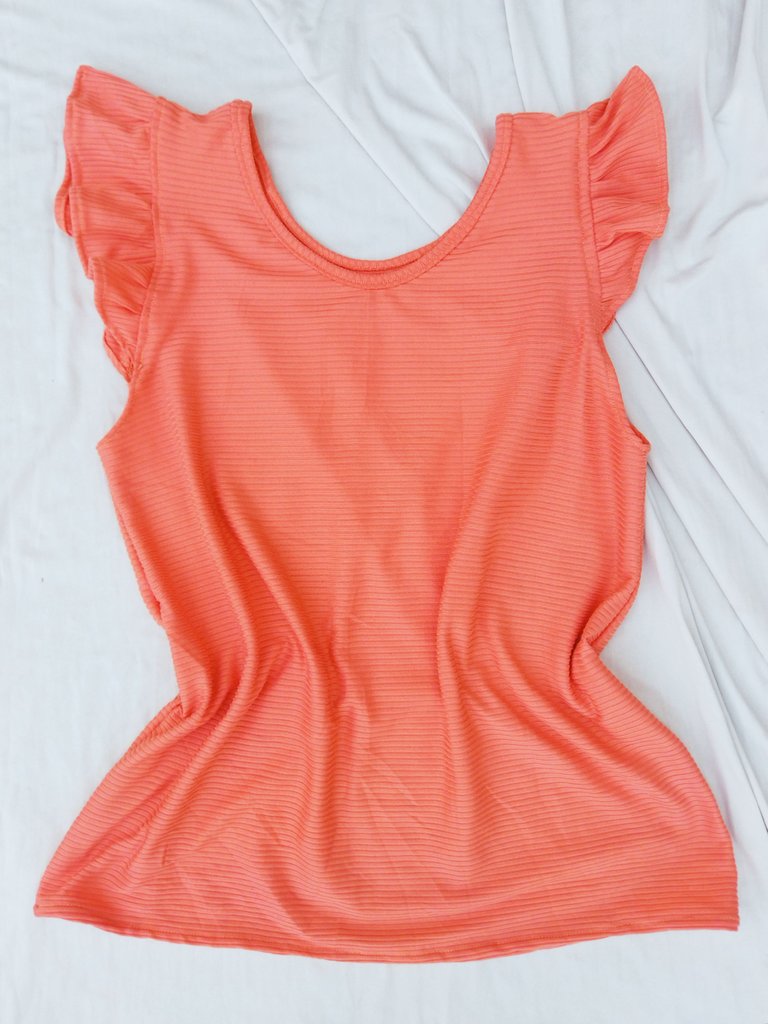
Resultado final.
Final result.
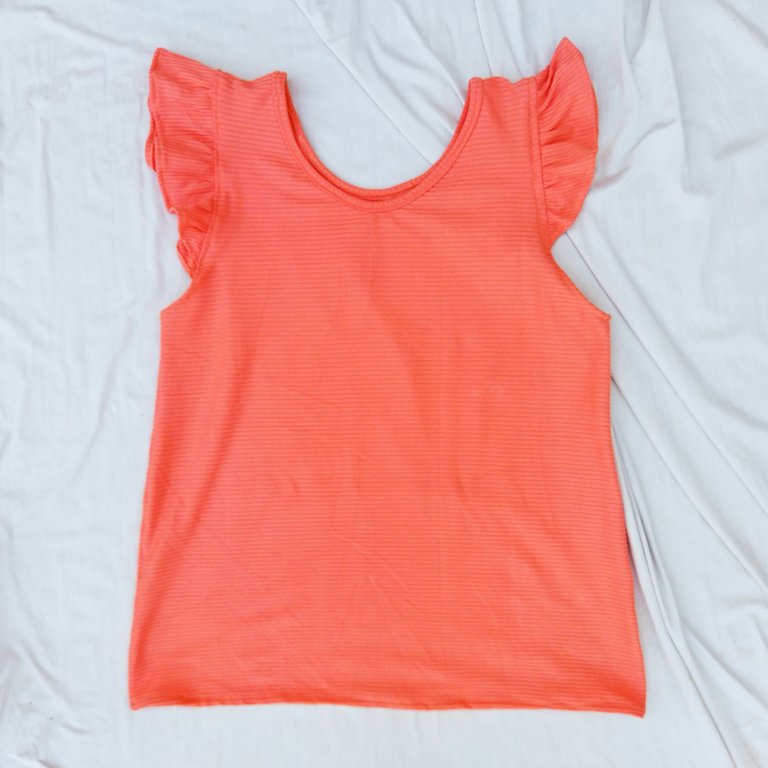
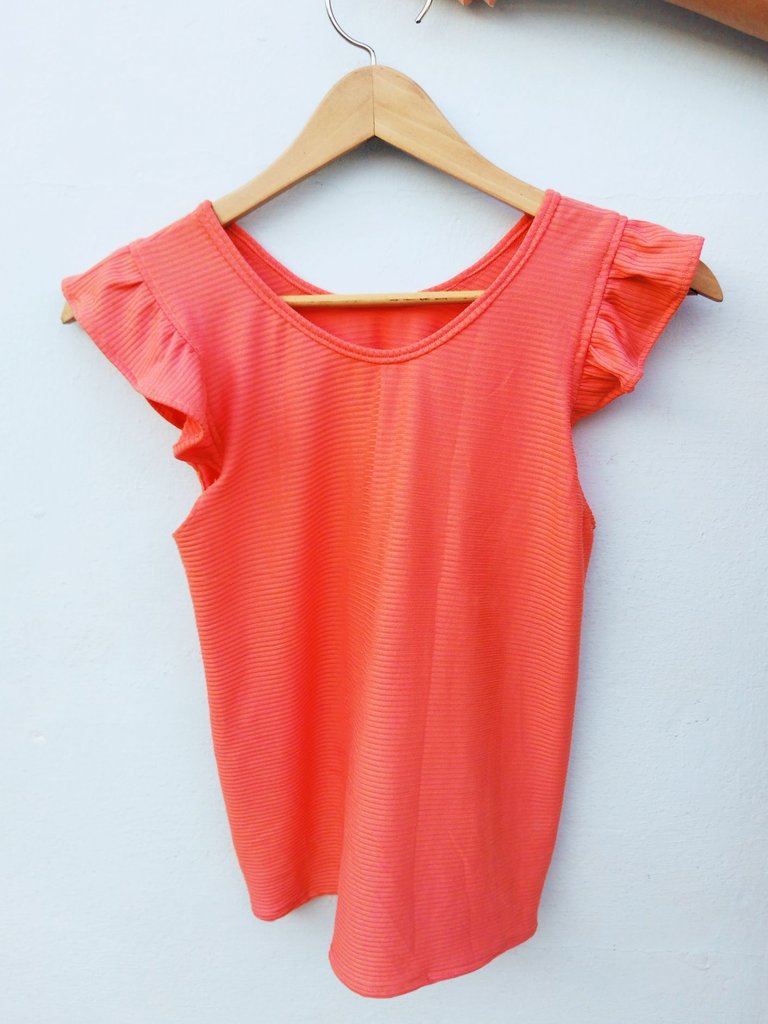
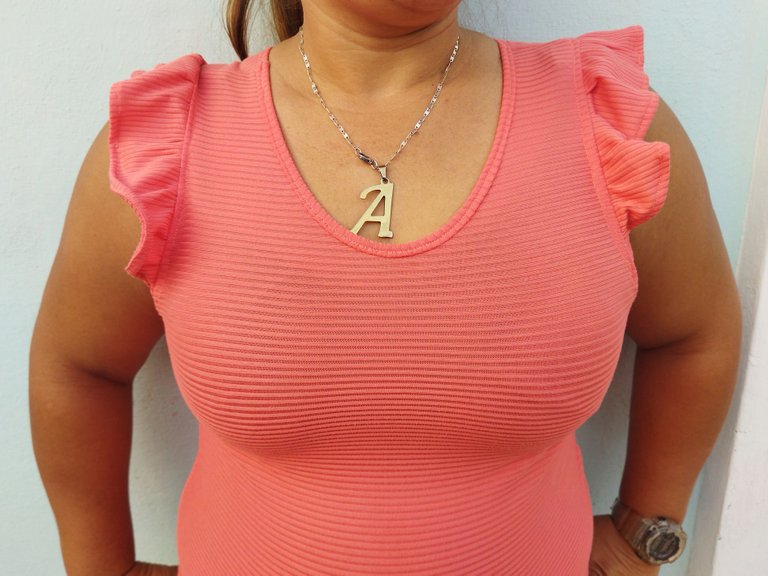
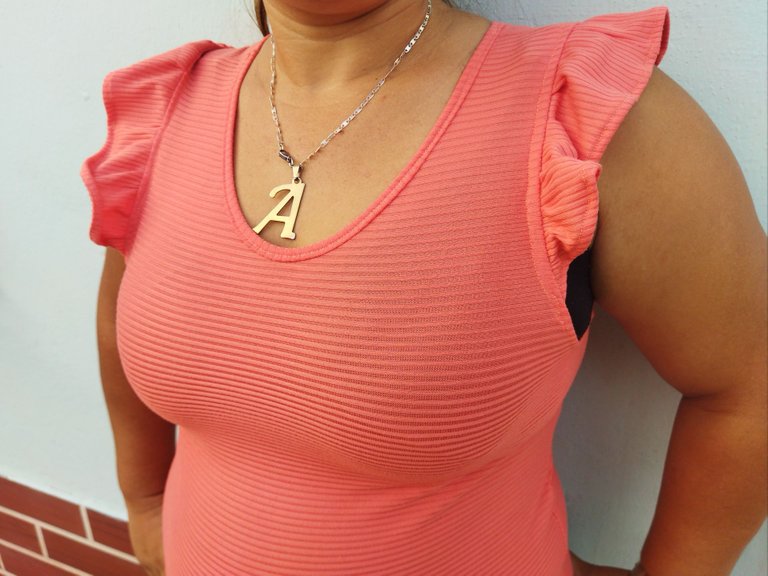
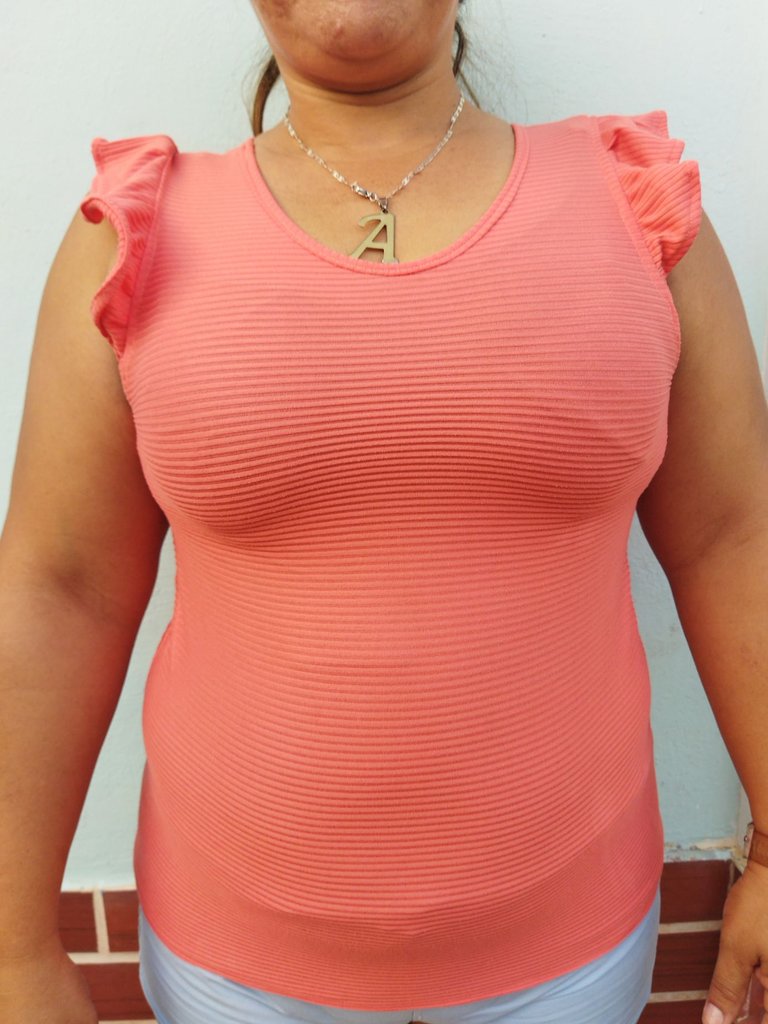

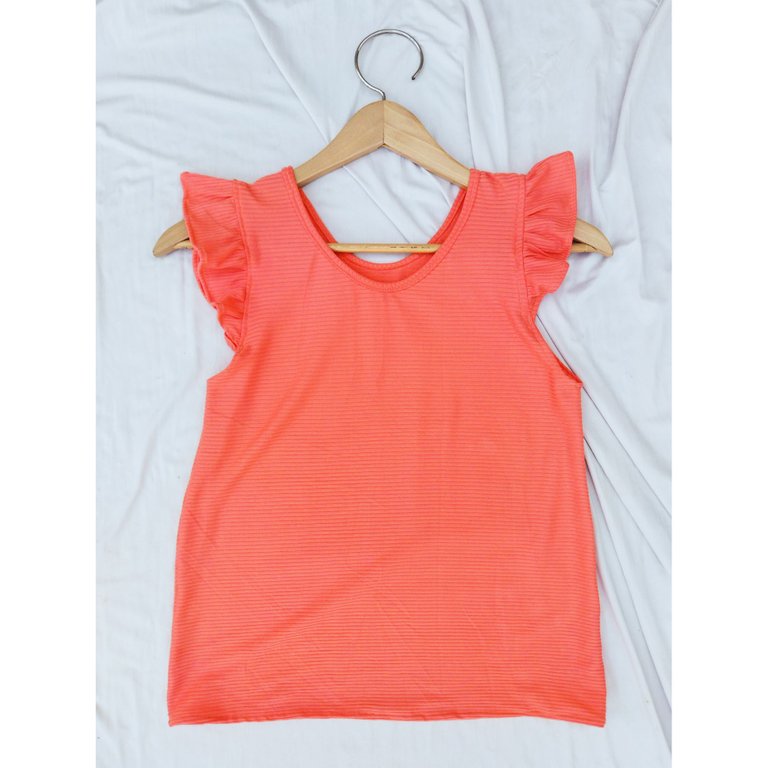
Éste fué el resultado final de esta blusa con volado en las mangas, mi tía estaba muy feliz por como quedó su nueva blusa pero no quiso tomarse fotos completa, así que el las fotos finales solo les muestro con se ve la blusa puesta, cómo les dije este tipo de manga no les va a todo mundo pero siento que a mi tía Ana le que da muy bien este corte, Espero que les hay gustado y si llegaste hasta aquí mil gracias por leer mi post ❤️🥰 un fuerte abrazo.
This was the final result of this blouse with ruffle on the sleeves, my aunt was very happy with how her new blouse turned out but did not want to take full pictures, so in the final photos I only show you how the blouse looks like, as I said this type of sleeve does not suit everyone but I feel that my aunt Ana is very good with this cut, I hope you liked it and if you got here thank you very much for reading my post ❤️🥰 a big hug.
All images are my property / Todas las imágenes son de mi propiedad
Camera: Xiaomi Redmi 9T.
Translation: Deepl.com
Excelente trabajo amiga! Tomaré tus pasos para hacerle una a mi bebé! Saludos!
Gracias amiga, la primera vez que hice este tipo de mangas fué para una bata pijamera que le hice a mi bebé y quedó realmente bonita. Gracias por tu comentario 😊👍🏻😊
Si se ven muy hermosas! Yo no sabía hacerlas de verdad, por eso lo pondre en práctica próximamente, gracias por compartir este contenido!
Ohh tampoco me gustaban estas mangas pero me amigué con ellas después de que me regalaron un vestido así y ahora pienso que no quedan tan mal jaja. Amiga, esta prenda quedé hermosa, super prolija. Coser esta tela erotizada no es fácil y lo hiciste genial. A tu tía seguro le habrá encantado. Felicitaciones ❤️.
Hola amiga, pues si creo que tengo que probarme estás mangas a ver qué tal, y si este tela es todo un desafío por su elasticidad, creo que me quedo bien, seguimos aprendiendo y mejorando cada día creo que de eso se trata la vida. Gracias por tu comentario 😊😊😊
Beautiful thank for sharing
Ahhh thanks so much!!! 💗💗💗
Hola te ha quedado muy linda, realmente me encantó el resultado, saludos.
Sencillamente encantada con tu blusa, el modelo es sencillo pero hermoso, el color es uno de mis favoritos...
Hola, gracias por tu comentario, el color es fascinante, me encanta.