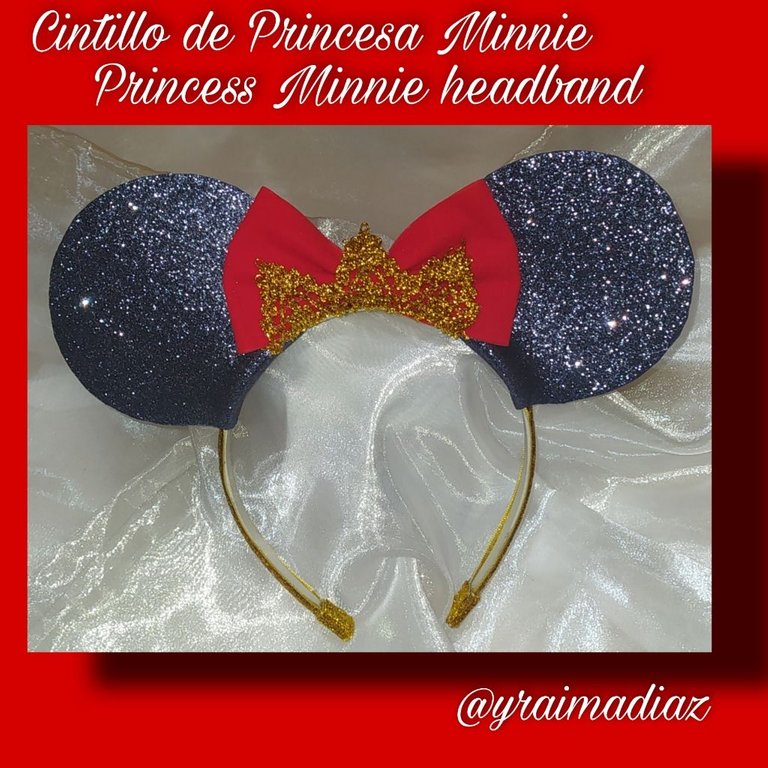
[ESP-ENG] ✨👑 Cintillo de Princesa Minnie ✨👑//Princess Minnie headband ✨👑
🤗Saludos queridos amigos de esta hermosa comunidad, deseándoles se encuentren bien, Dios me los bendiga grandemente🌹.
Greetings dear friends of this beautiful community, wishing you well, God bless me greatly🌹.
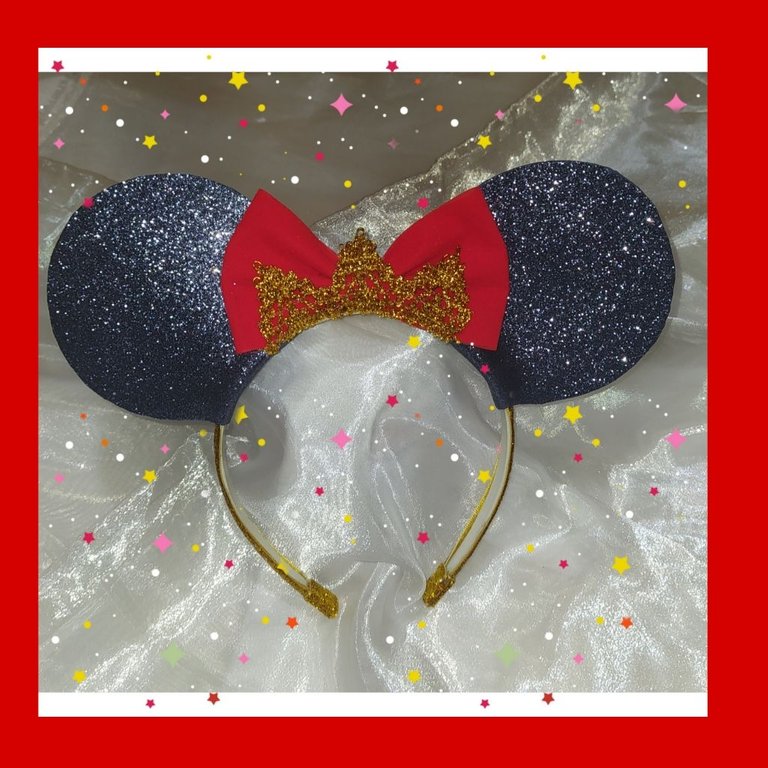
Hoy les traigo un lindo Cintillo de Princesa Minnie para las consentidas de la casa,para que siempre luzcan muy bellas y coquetas 👑😍.
Today I bring you a cute Princess Minnie Headband for the spoiled of the house,so they always look very beautiful and flirty 👑😍.
Ahora les diré los materiales que utilice para hacer este bello cintillo y el paso a paso.
Now I will tell you the materials I used to make this beautiful headband and the step-by-step instructions.

Materiales.
- Cintillo.
- Foami azul escarchado.
- Pistola de silicón.
- Barra de silicón.
- Silicón al frío.
- Cinta roja de razó.
- Cinta dorada.
- Pasamanería dorada.
- Página.
- Tapa redonda.
- Lápiz.
- Tijera.
Materials.
- Headband.
- Blue frosted Foami.
- Silicone gun.
- Silicone stick.
- Cold silicone.
- Red ribbon.
- Gold ribbon.
- Gold trimmings.
- Page.
- Round cover.
- Pencil.
- Scissors.
Ahora les indicaré la forma como lo realicé.
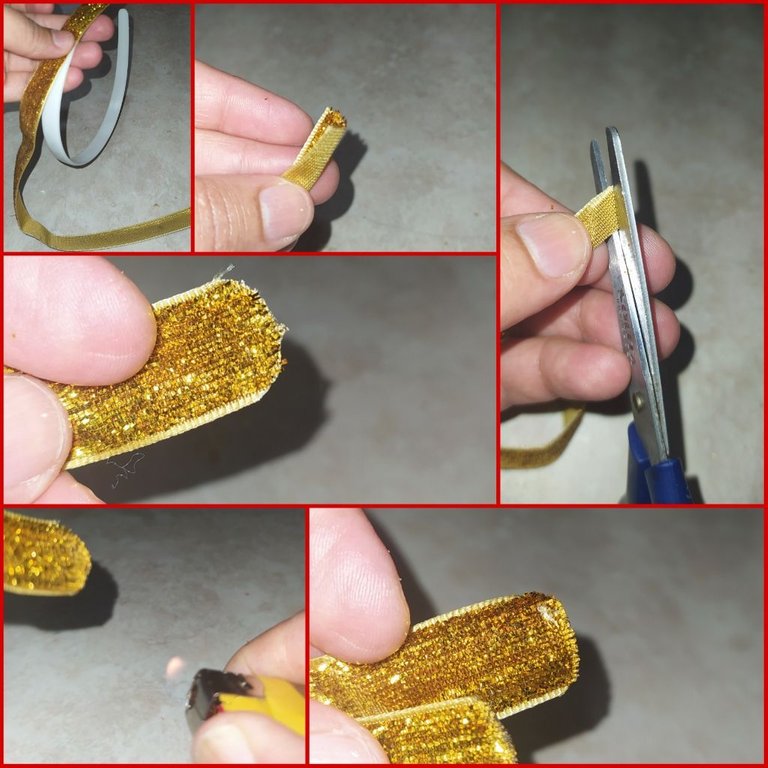
Paso número uno.
- Medimos la cinta dorada alrededor de todo el cintillo y recortamos.
- Paso número dos.
Doblamos las puntas de las cintas y la recortamos en forma redondeadas. - Paso número tres.
Luego con un encendedor quemamos las puntas para que no se deshilachen
Now I will show you how I did it.
Step number one.
- We measure the gold ribbon all the way around the headband and cut it out.
- Step number two.
Fold the ends of the ribbons and cut them into rounded shapes.- Step number three.
Then we burn the ends with a lighter so that they do not fray.
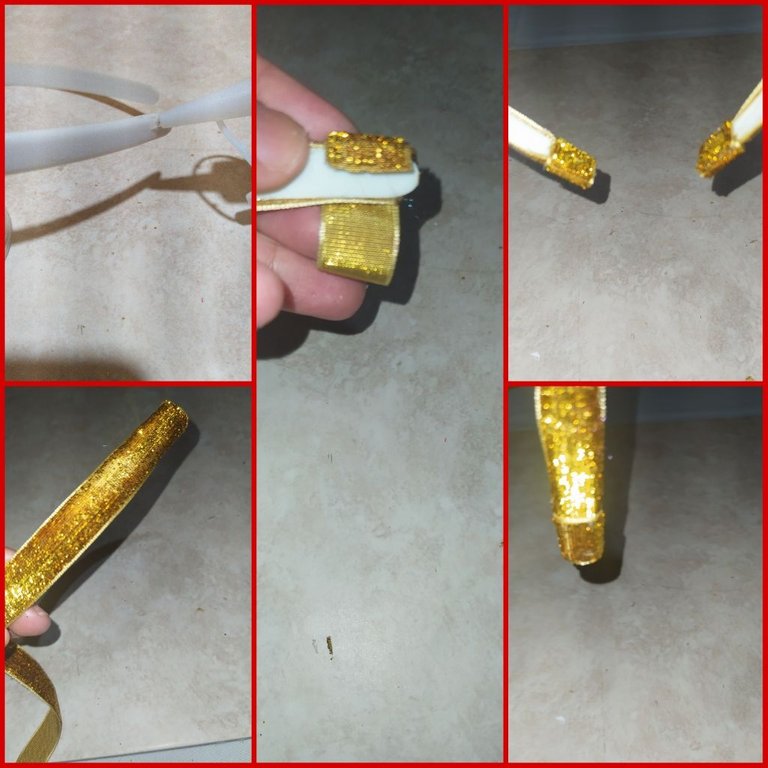
- Paso número cuatro.
Colocamos silicón al frío a todo el cintillo y pegamos la cinta dorada. - Paso número cinco.
Con la cinta en la parte de las puntas del cintillo la medimos y recortamos. - Paso número seis.
Le colocamos silicón al frío y procedemos a pegar para reforzar las puntas del cintillo y darle un mejor acabado.
- Step number four.
Apply cold silicone to the entire headband and glue the gold ribbon.- Step number five.
With the ribbon at the ends of the headband we measure and cut it.- Step number six.
We put cold silicone and proceed to glue to reinforce the ends of the headband and give it a better finish.
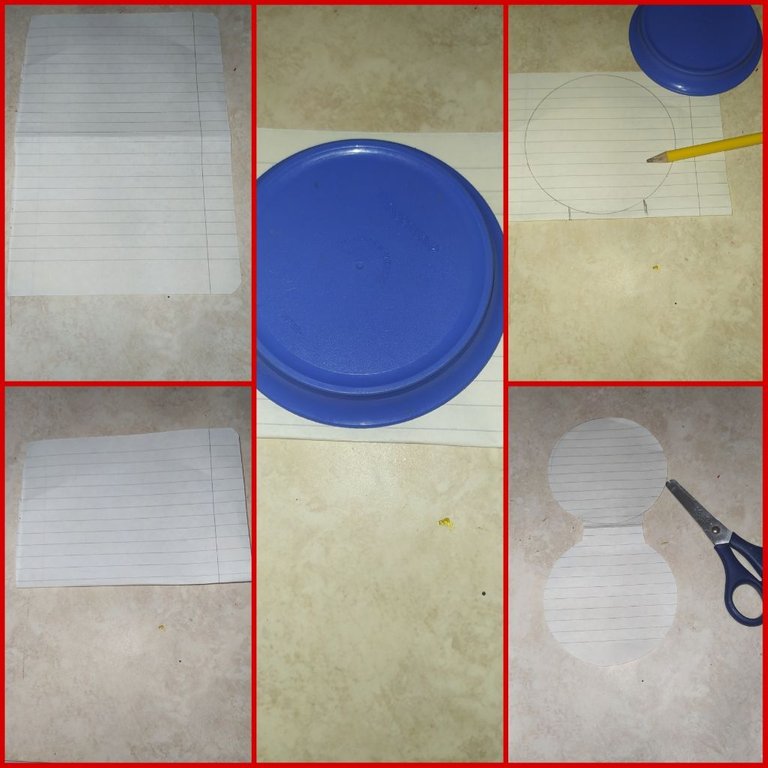
- Paso número ocho.
Tomamos la página y la doblamos a la mitad. - Paso número nueve.
Con la tapa marcamos un círculo en la página. - Paso número diez.
En la parte donde está la página doblada le marcamos un cuadrado de base. - Paso número once.
Recortamos y sacamos el patrón de las lindas orejas.
- Step number eight.
We take the page and fold it in half.- Step number nine.
With the cover we mark a circle on the page.- Step number ten.
In the part where the page is folded we mark a square base.- Step number eleven.
Cut out the pattern of the cute ears.
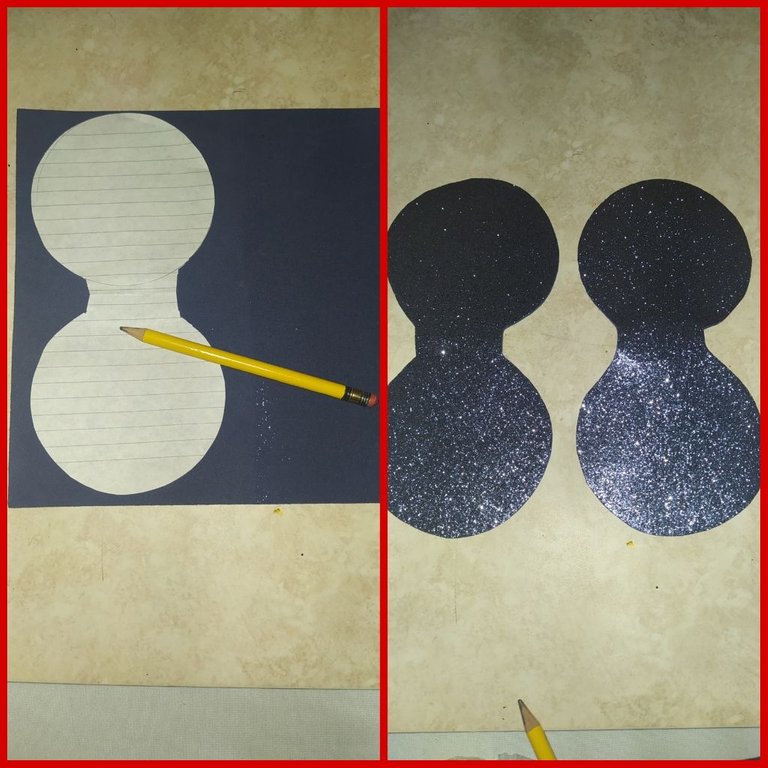
- Paso número doce.
Colocamos el molde que recortamos encima del foami y marcamos las orejas.
*Paso número trece.
Recortamos las orejas.
- Step number twelve.
Place the mold we cut out on top of the foami and mark the ears.
*Step number thirteen.
Cut out the ears.
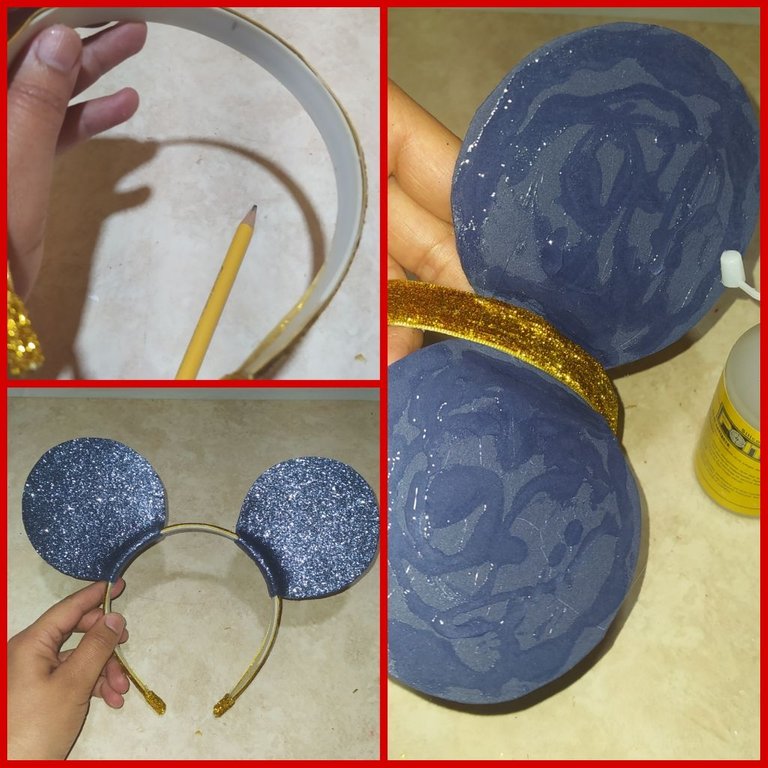
- Paso número catorce.
Marcamos el centro del cintillo para cuando pegue mis orejas queden bien centradas. - Paso número quince.
Le colocamos silicón al frío a las orejas y procedemos a pegarlas.
- Step number fourteen.
We mark the center of the headband so that when I glue my ears they will be well centered.- Step number fifteen.
We put cold silicone on the ears and proceed to glue them.
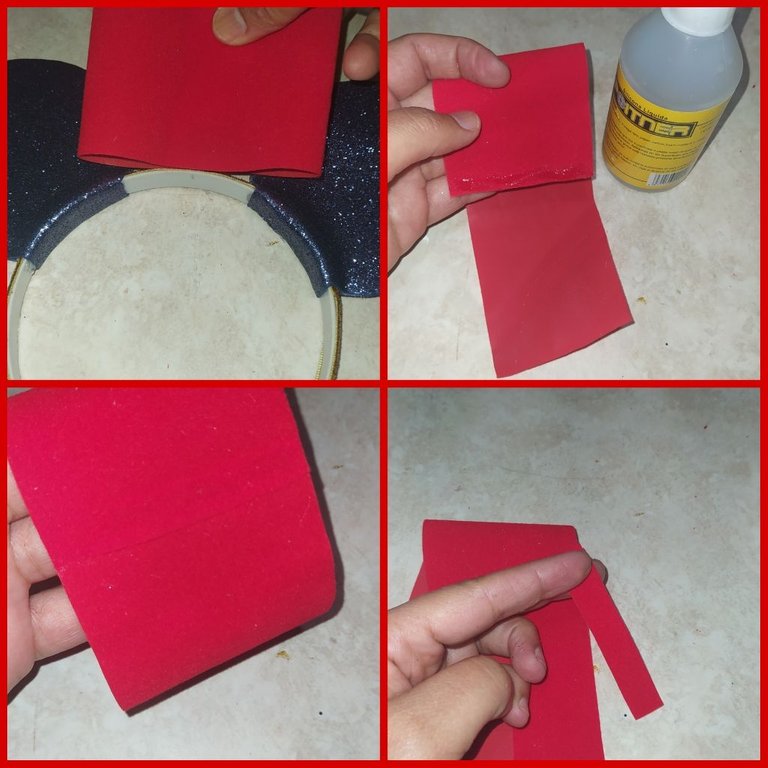
- Paso número dieciseis.
Colocamos la cinta de razó roja encima de las orejas y medimos el tamaño que vamos hacer el lazo recortamos, luego le colocamos pega de silicón al frío en las puntas y pegamos. - Paso número diecisiete
Recortamos un pedacito de cinta roja la cual utilizaremos para colocarla en el centro del lazo.
- Step number sixteen.
Place the red ribbon on top of the ears and measure the size that we are going to make the bow, cut it out, then we put cold silicone glue on the ends and glue it.
- Step number seventeen
Cut out a small piece of red ribbon which we will use to place in the center of the bow.
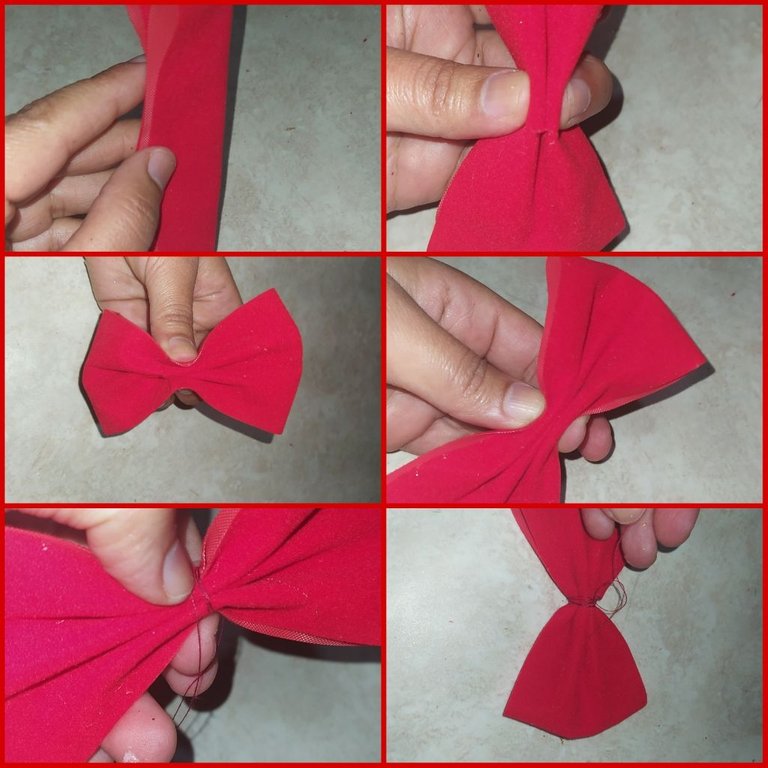
- Paso número dieciocho.
Doblamos la cinta a la mitad y luego la sujetamos por la parte de abajo y doblamos los laterales hacia abajo cada lado. - Paso número diecinueve.Ahora doblamos los laterales de la cinta hacia arriba siempre sujetándola.
- Paso número veinte.
Tomamos hilo y le damos varias vueltas y luego hacemos un nudo para asegurarlo en todo el centro de los dobles que hemos realizado y de esta forma ya tenemos el lazo armado
- Step number sixteen.
Place the red ribbon on top of the ears and measure the size that we are going to make the bow, cut it out, then we put cold silicone glue on the ends and glue it.- Step number seventeen
Cut out a small piece of red ribbon which we will use to place in the center of the bow.
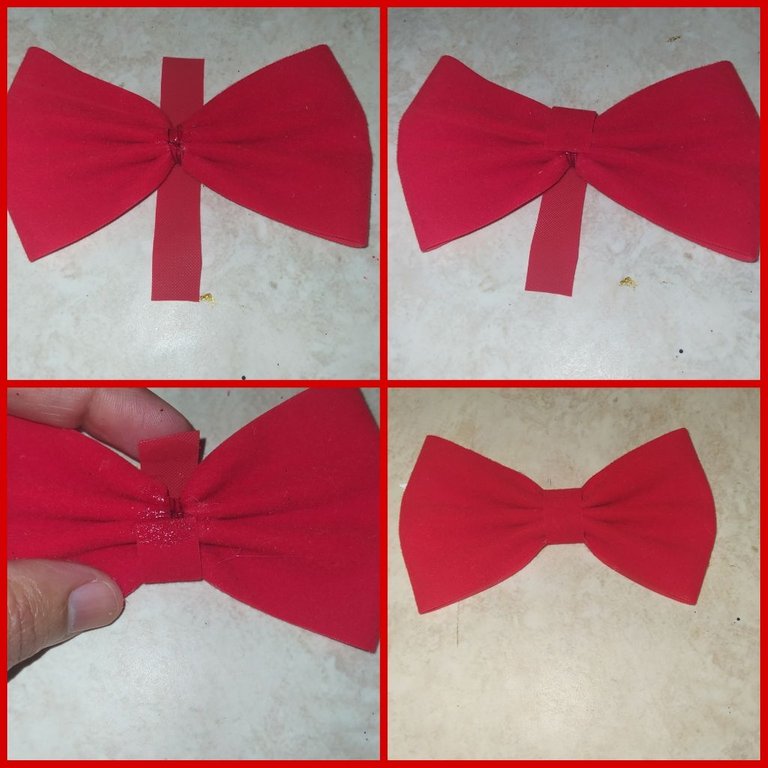
- Paso número veintiuno.
Colocamos el pedacito de cinta de razó delgado que habíamos cortado en la parte de abajo de nuestro lazo. - Paso número veintidós.
Ahora le colocamos silicón al frío y procedemos a pegar primero lo pegamos hacia el lazo y luego pegamos el otro extremo de la cinta encima de éste y de esta forma ya hemos terminado nuestro lazo.
- Step number twenty-one.
We place the little piece of thin ribbon that we had cut on the bottom of our bow.- Step number twenty-two.
Now we put silicone to the cold and we proceed to glue first we glue it to the ribbon and then we glue the other end of the ribbon on top of it and in this way we have finished our ribbon.
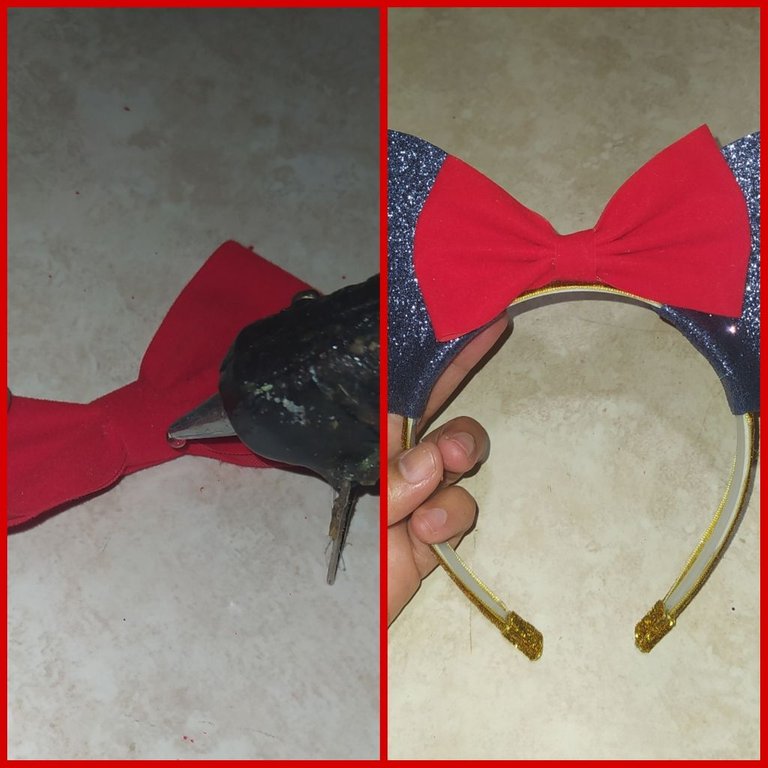
- Paso número veintitrés
Colocamos silicón caliente y procedemos a pegar el lazo en el centro de las dos orejas.
- Step number twenty-three
Place hot silicone on the side and proceed to glue in the center of the two ears.
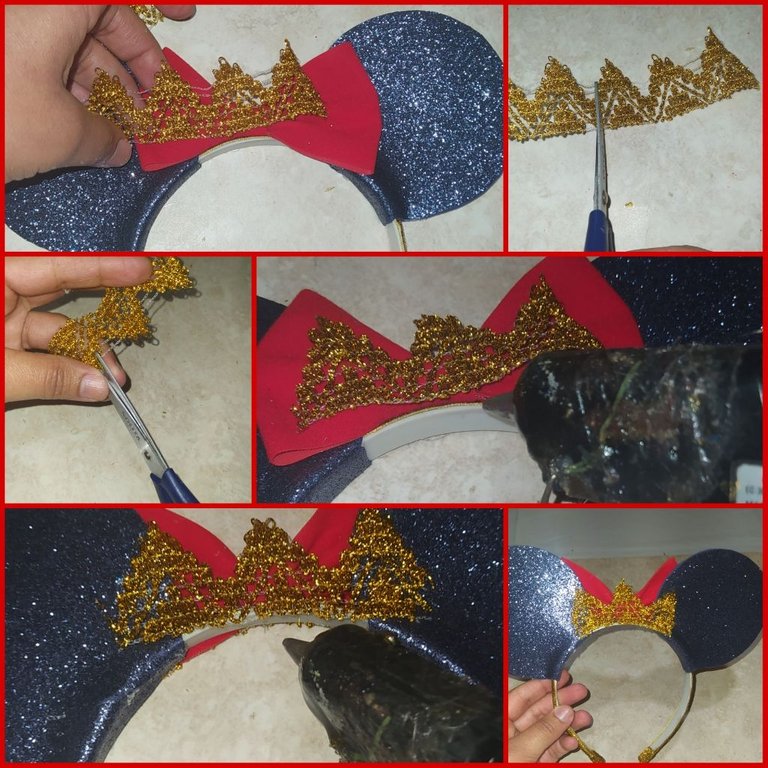
- Paso número veinticuatro.
Colocamos la cinta de pasamanería encima del lazo para medir lo que vamos a cortar para hacerle la corona tanto en la parte delantera como trasera, luego recortamos quitamos los hilos colocamos silicón caliente y pegamos.
- Step number twenty-four.
We place the trimmings tape over the ribbon to measure what we are going to cut to make the crown both in the front and back, then we cut, remove the threads, place hot silicone and glue.
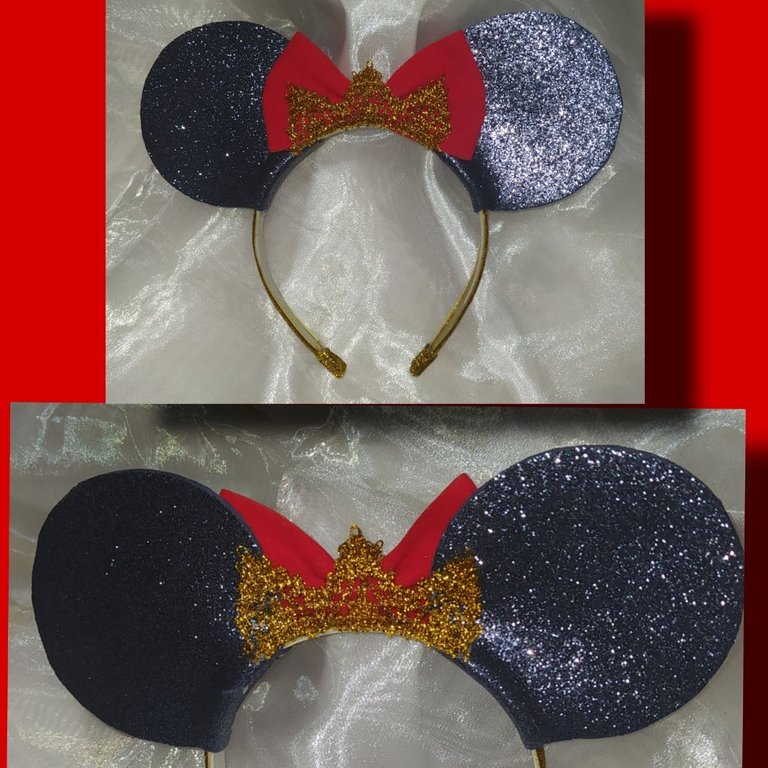
Así queda nuestro lazo terminado por la parte delantera y trasera.
This is how our finished bow looks on the front and the back
Toda una coquetería que las princesas y reinas de la casa, grandes o pequeñas, podrán lucir.
A whole coquetry that the princesses and queens of the house, big or small, will be able to show off.

Espero les haya gustado este hermoso Cintillo de Princesa de Minnie👑
Gracias por haberme acompañado hasta aquí y haber leído mi post🌹.
No se olviden de dejarme sus comentarios ya que son Muy importantes para mí.
Y ya sabes si no te quieres perder nada del contenido que estaré subiendo no dejes de seguirme 🤗.
I hope you liked this beautiful Minnie Princess Headband 👑.
Thank you for joining me here and reading my post🌹
Don't forget to leave me your comments as they are very important to me.
And you know if you do not want to miss any of the content that I will be uploading do not stop following me 🤗
📝 Todo el el contenido es mio
📸 Fotos tomadas con teléfono Xiaomi redmi note 8.
✨Fotos editadas PicsArt.
✨Traductor DeepL.
📝 All the content is my own
📸 Photos taken with Xiaomi redmi note 8 phone.
✨PicsArt edited photos.
✨Translator DeepL
The people doing V2K with remote neural monitoring want me to believe this lady @battleaxe is an operator. She is involved deeply with her group and @fyrstikken . Her discord is Battleaxe#1003. I cant prove she is the one directly doing the V2K and RNM. Doing it requires more than one person at the least. It cant be done alone. She cant prove she is not one of the ones doing it. I was drugged in my home covertly, it ended badly. They have tried to kill me and are still trying to kill me. I bet nobody does anything at all. Ask @battleaxe to prove it. I bet she wont. They want me to believe the V2K and RNM in me is being broadcast from her location. And what the fuck is "HOMELAND SECURITY" doing about this shit? I think stumbling over their own dicks maybe? Just like they did and are doing with the Havana Syndrome https://ecency.com/fyrstikken/@fairandbalanced/i-am-the-only-motherfucker-on-the-internet-pointing-to-a-direct-source-for-voice-to-skull-electronic-terrorism