[ESP-ING] Picture of a bouquet of flowers in paper
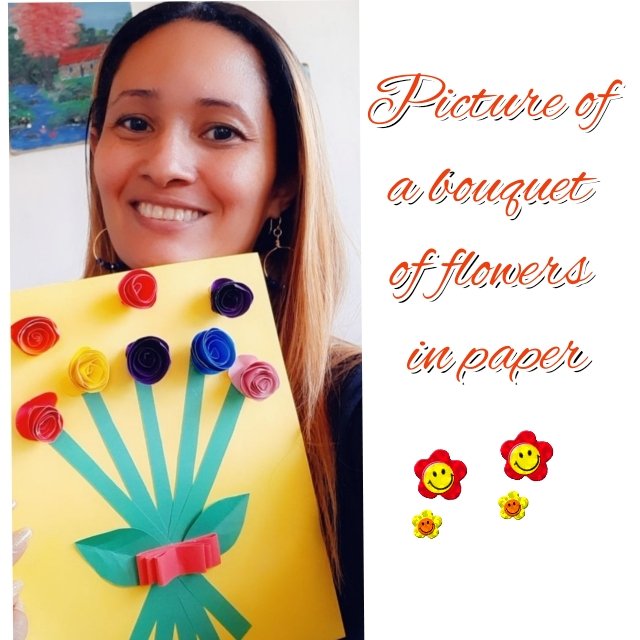


Bienvenidos a mi blog hoy quiero compartir con ustedes un cuadro con un ramo de flores hecho en papel, es un cuadro muy sencillo sólo se necesita imaginación y un poco de creatividad.

Welcome to my blog today I want to share with you a picture with a bouquet of flowers made in paper, it is a very simple picture you just need imagination and a little creativity.
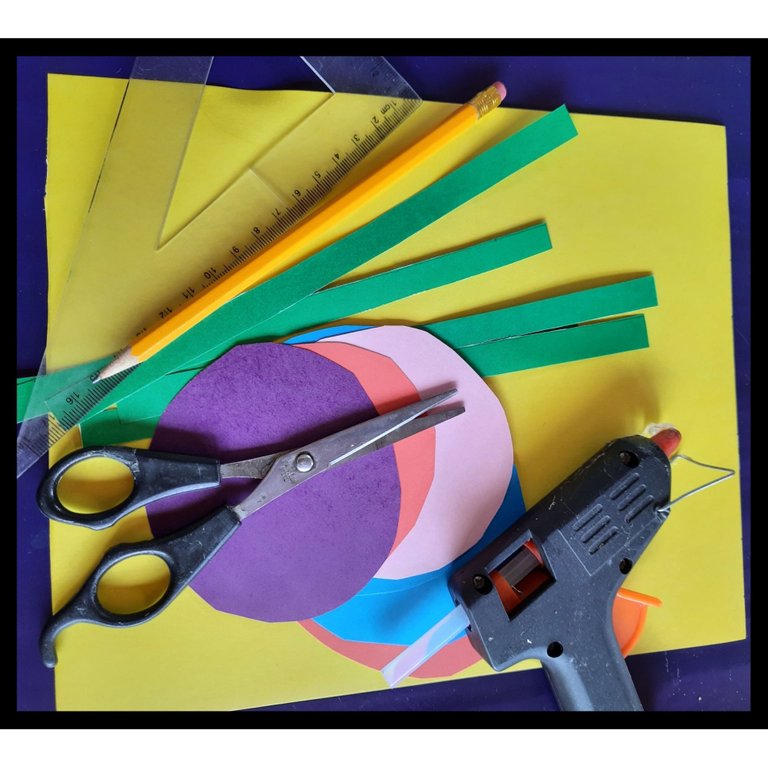
Materiales:
- Cartulina de colores
- Pega escolar
- Silicona
- Lápiz y tijera
Materials:
- Colored construction paper
- School glue
- Silicone
- Pencil and scissors
Paso a Paso / Step by Step
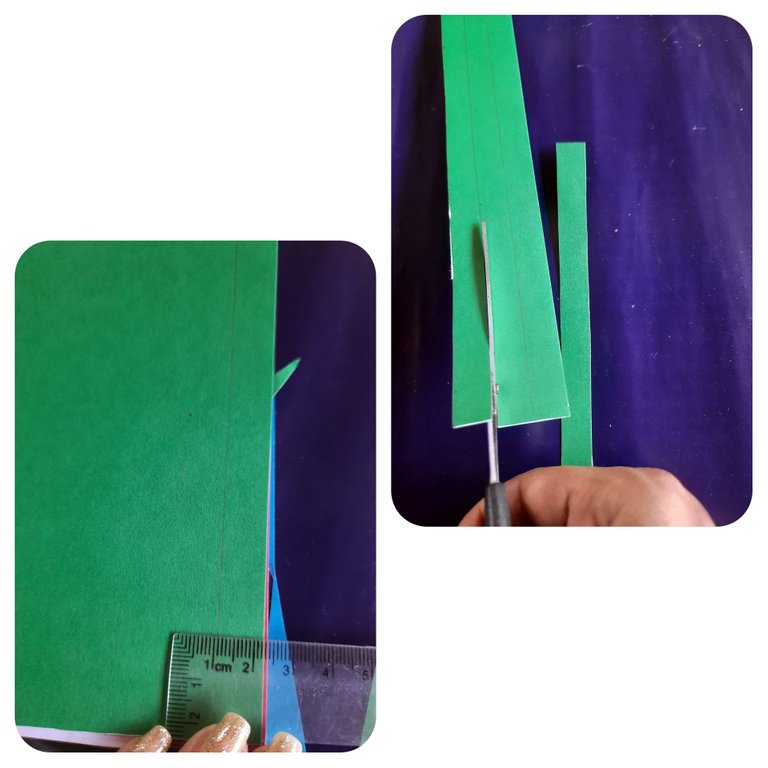
Lo primero que vamos a hacer es cortar 5 tiras en color verde de 1.1 cm de grosor y 15 cm de largo.
The first thing we are going to do is to cut 5 green strips 1.1 cm thick and 15 cm long.
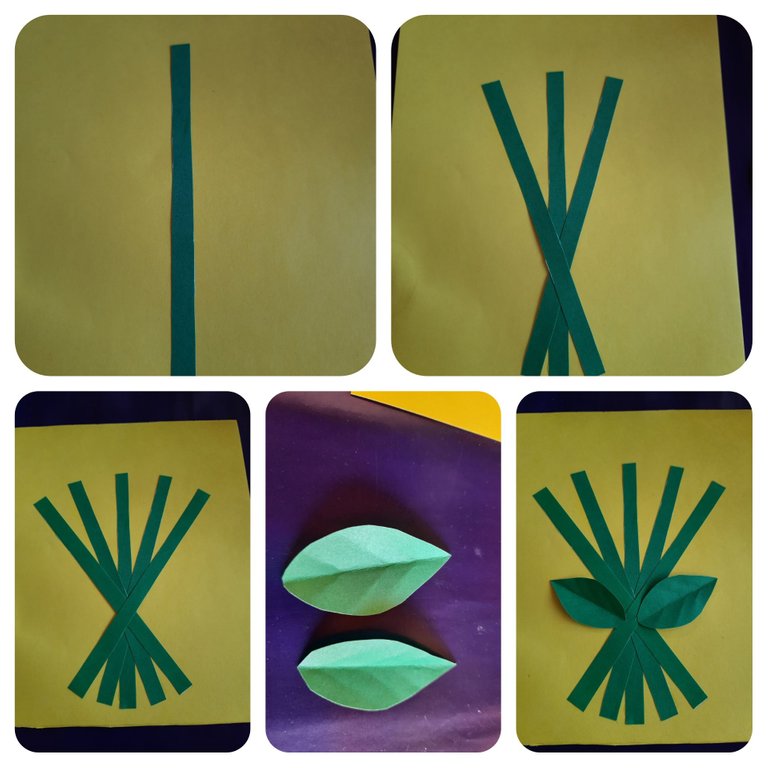
Iremos pegando las tiras en nuestro marco, una por una y también haremos dos hojas y las pegaremos como se muestra en la foto.
We will glue the strips on our frame, one by one and we will also make two leaves and glue them as shown in the picture.
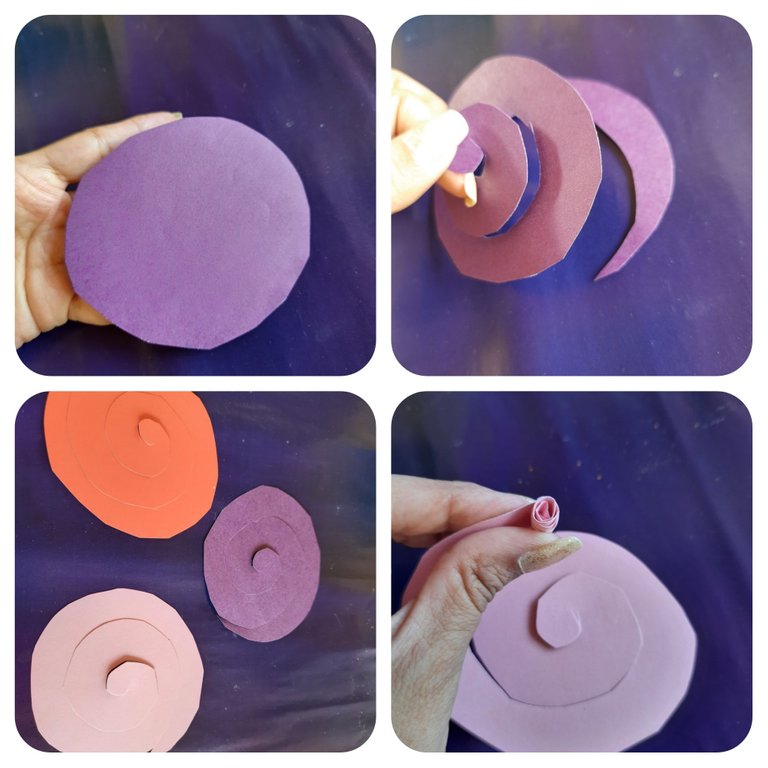
Nuestros círculos serán de 8 a 9cm aproximadamente y vamos a cortarlos en forma de espiral y luego lo vamos enrollando para formar unas flores y pegamos con silicón.
Our circles will be approximately 8 to 9cm and we will cut them in a spiral shape and then we will roll them to form flowers and glue them with silicone.
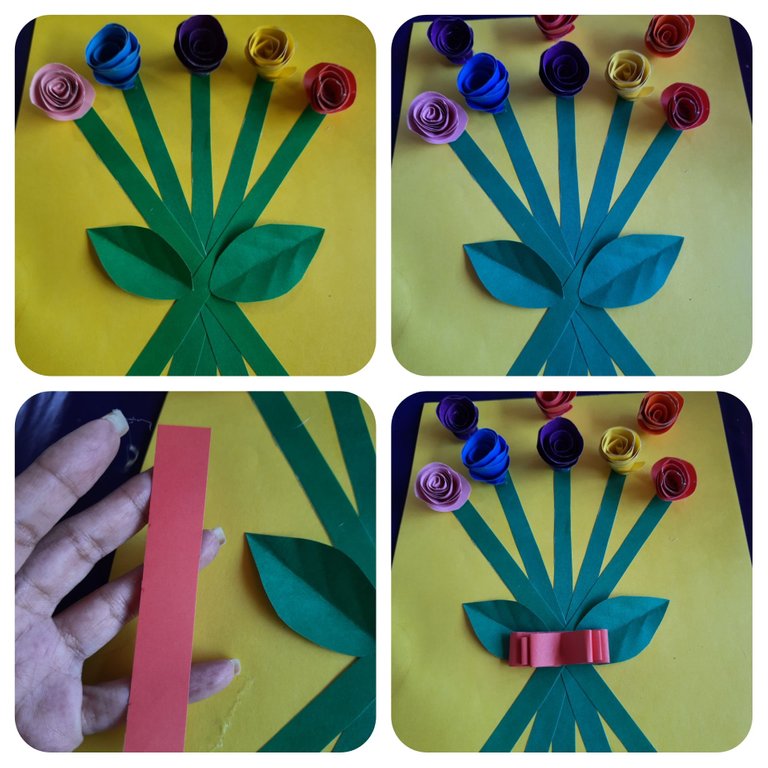
Pegamos las flores como se muestra en la foto, y cortaremos 2 tiras de color rojo una más pequeña que la otra, así formamos nuestro lazo.
Glue the flowers as shown in the photo, and cut 2 red strips, one smaller than the other, to form our ribbon.
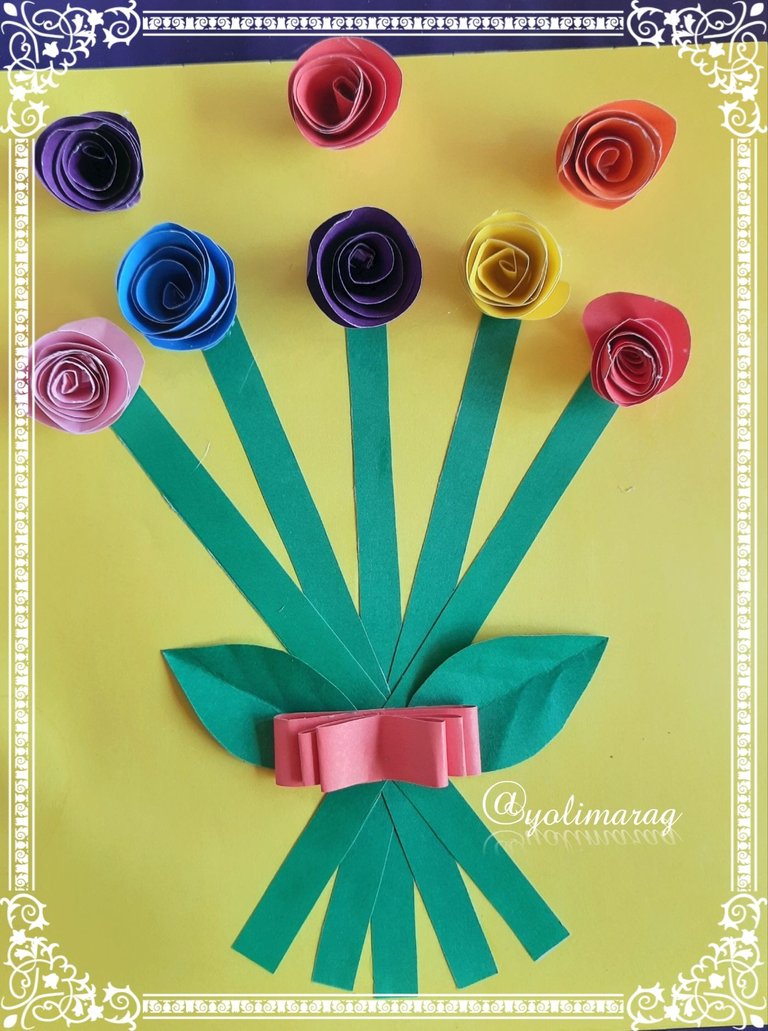
Y así a quedado este pequeño tutorial, espero que les gustará, gracias por ser parte de mi blog, nos vemos en una próxima publicación, bendiciones 😘.
And so has been this little tutorial, I hope you like it, thanks for being part of my blog, see you in a next post, blessings 😘.
Fotos principal editada con Canva.
Fotos de mi Autoría derechos reservados
Cámara: Samsung A20S
Traducido con www.DeepL.com/Translator (versión gratuita)
Photos edited with Canva
Photos by me Author's rights reserved
Quote> Camera: Samsung A20S
Translated with www.DeepL.com/Translator (free version)


0
0
0.000
Nice work done
Thank
Thank you for sharing this amazing post on HIVE!
Your content got selected by our fellow curator @stevenson7 & you just received a little thank you via an upvote from our non-profit curation initiative!
You will be featured in one of our recurring curation compilations and on our pinterest boards! Both are aiming to offer you a stage to widen your audience within and outside of the DIY scene of hive.
Join the official DIYHub community on HIVE and show us more of your amazing work and feel free to connect with us and other DIYers via our discord server: https://discord.gg/mY5uCfQ !
If you want to support our goal to motivate other DIY/art/music/homesteading/... creators just delegate to us and earn 100% of your curation rewards!
Stay creative & hive on!
Gracias por el apoyo
Que belloooooo 🤩🥰 me ha encantado se ve súper delicado esas mini rosas están preciosas, felicidades por tu trabajo de verdad ha quedado muy lindo, un abrazote.
Gracias por el apoyo mi linda