[ESP | ENG] Como realizar un patrón básico parte delantera para realizar tus propias blusas.//How to make a basic front part pattern to make your own blouses.
El mundo de la costura y confección para muchos puede parecer un desafío imposible de entender, sé que puede pasar porque a mí me sucedió y cuando veía un patrón de cualquier pieza para confeccionar, no podía entender de donde salían tantas rayas y porque quedaban de tal manera con forma de la prenda de vestir que se quiera diseñar.
The world of sewing and clothing for many may seem like an impossible challenge to understand, I know it can happen because it happened to me and when I saw a pattern of any piece to be made, I could not understand where so many stripes came from and why they were so way in the shape of the garment you want to design.
Hoy en día ya logro entenderlo gracias al curso que estoy realizando de corte y costura, como les dije en mi post anterior, les enseñare paso a paso como realizar estos patrones.
Today I am able to understand it thanks to the cutting and sewing course I am taking, as I told you in my previous post, I will teach you step by step how to make these patterns.

Hands to work, without fear of success future Hive seamstresses.
Materiales
Materials
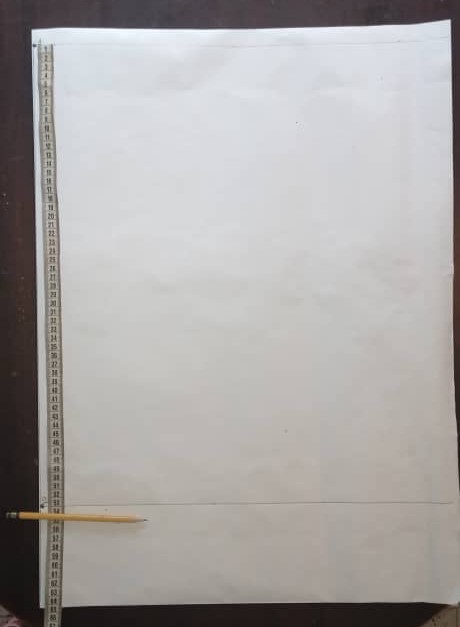
1 Pliego de papel bond.
1 sheet of bond paper.
1 Cinta métrica.
1 tape measure.
1 Lápiz.
1 Regla.
1 Tijera
1 scissors

Las medidas que utilizaremos para realizar este patrón básico delantero son :
The measures that we will use to make this basic front pattern are:
Contorno de cuello.
Neck contour.
Contorno de cintura.
Waistline.
Altura de pinza.
Clamp height.
Talle delantero.
Front waist
Ancho de espalda.
Back width.
Separación de pinzas.
Forceps separation.
En el post anterior les explique detalladamente cada una Dale click aqui.
In the previous post I explained each one in detail.Click here..
Procedimiento.
Procedure .
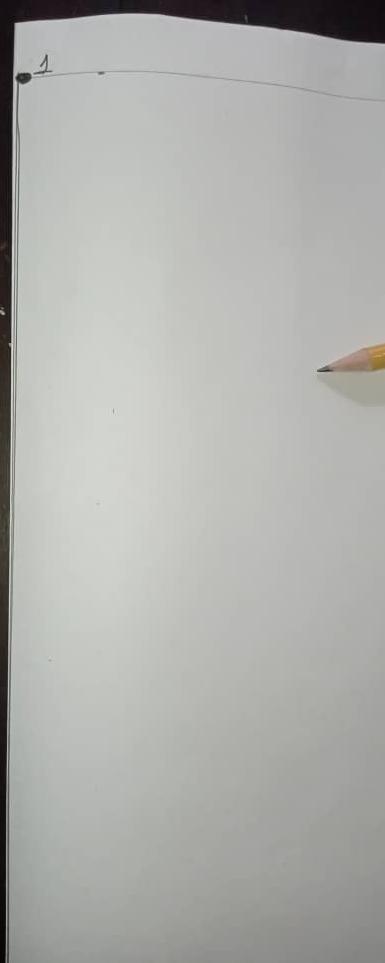
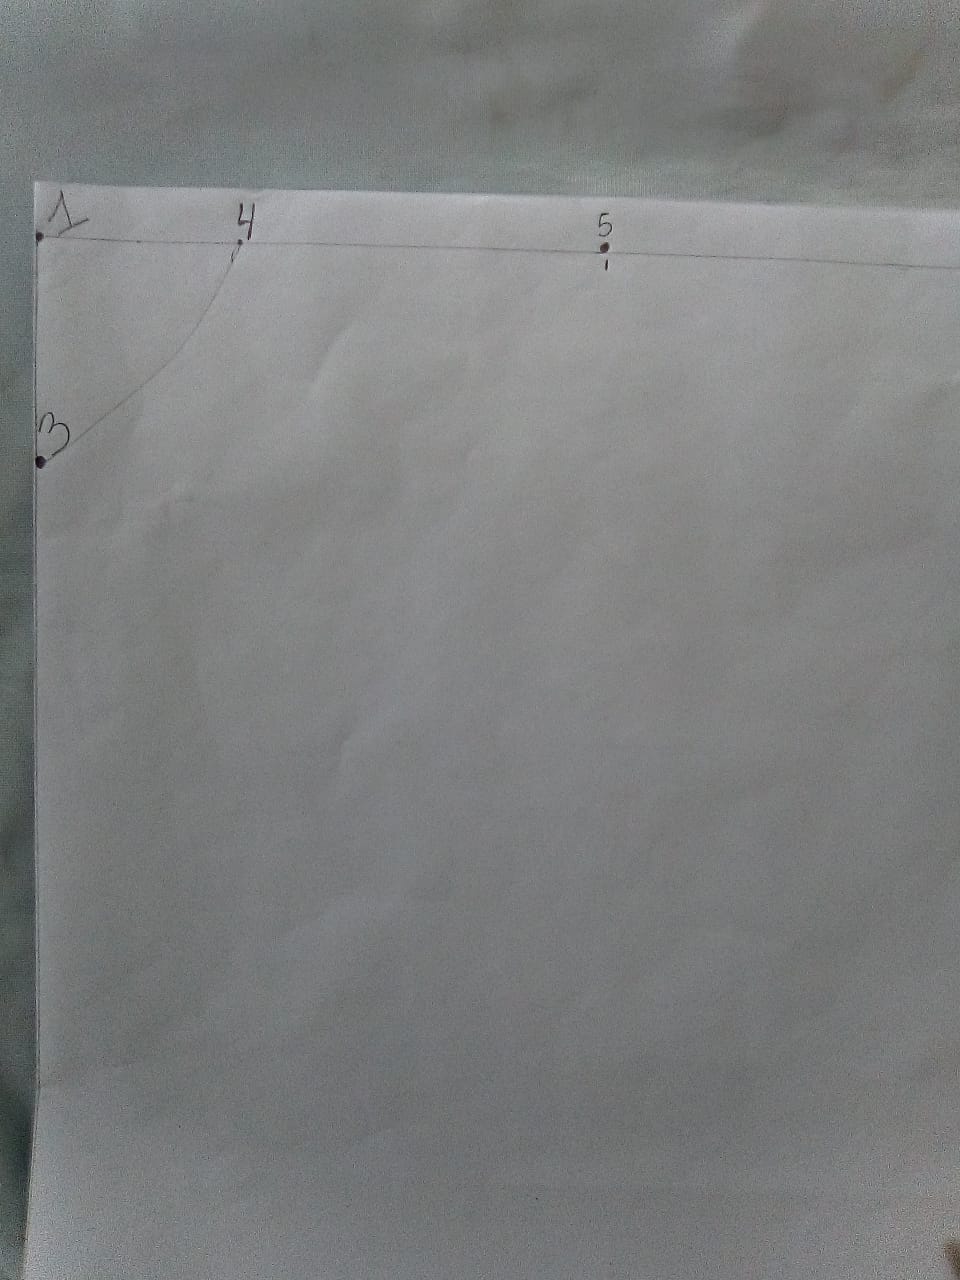
Doblamos el papel a la mitad, tomamos el papel por el dobles dejando un margen superior de 2 cm y trazamos una línea horizontal una línea vertical en el dobles del papel, fijamos el punto 1.
We fold the paper in half, we take the paper by the folds leaving a top margin of 2 cm and we draw a horizontal line a vertical line on the folds of the paper, we set point 1.
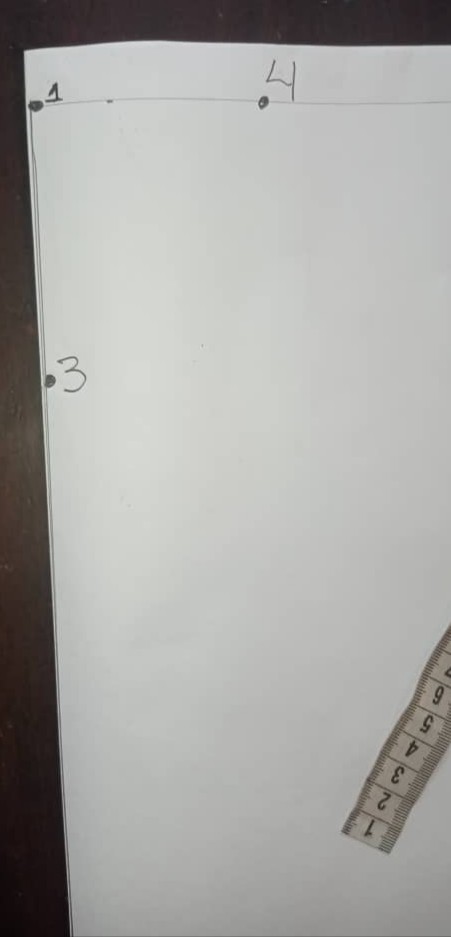
Del punto 1 hacia abajo aplicamos la medida de talle delantero(en este ejemplo use mis medidas, mi talle delantero mide 53 cm) y fijamos el punto 2, trazamos una linea horizontal que sera donde aplicaremos la medida de contorno de cintura.
From point 1 downwards we apply the front waist measurement (in this example I used my measurements, my front waist measures 53 cm) and we fix point 2, we draw a horizontal line that will be where we will apply the waist contour measurement.
Del punto 1 hacia abajo aplicamos la medida de contorno de cuello dividida entre 6 sumamos 2 cm.
From point 1 downwards we apply the measurement of the neck contour divided by 6 we add 2 cm.
Ejemplo: mi contorno de cuello es de 36 cm lo divido entre 6 = 6 +2 cm = 8 cm.
Example: my neck circumference is 36 cm, I divide it by 6 = 6 + 2 cm = 8 cm.
8 cm es la medida que aplicaremos desde el punto 1 hacia abajo fijamos el punto 3.
8 cm is the measure that we will apply from point 1 downwards, we fix point 3.

El punto 4: lo formaremos desde el punto 1 sobre la manga superior donde aplicaremos la medida de ancho de escote, utilizaremos la 6ta parte de contorno de cuello mas 1 cm.
Point 4: we will form it from point 1 on the upper sleeve where we will apply the neckline width measurement, we will use the 6th part of the neck contour plus 1 cm.
Ejemplo: contorno de cuello es de 36 cm lo divido entre 6 = 6 +1 cm = 7 cm.
Example: neck circumference is 36 cm I divide it by 6 = 6 +1 cm = 7 cm.
Fijamos el punto 4.
We set point 4.
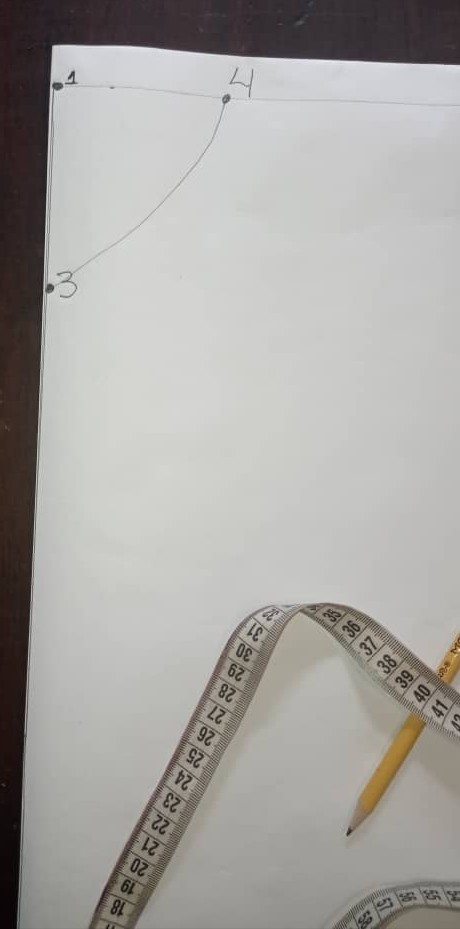
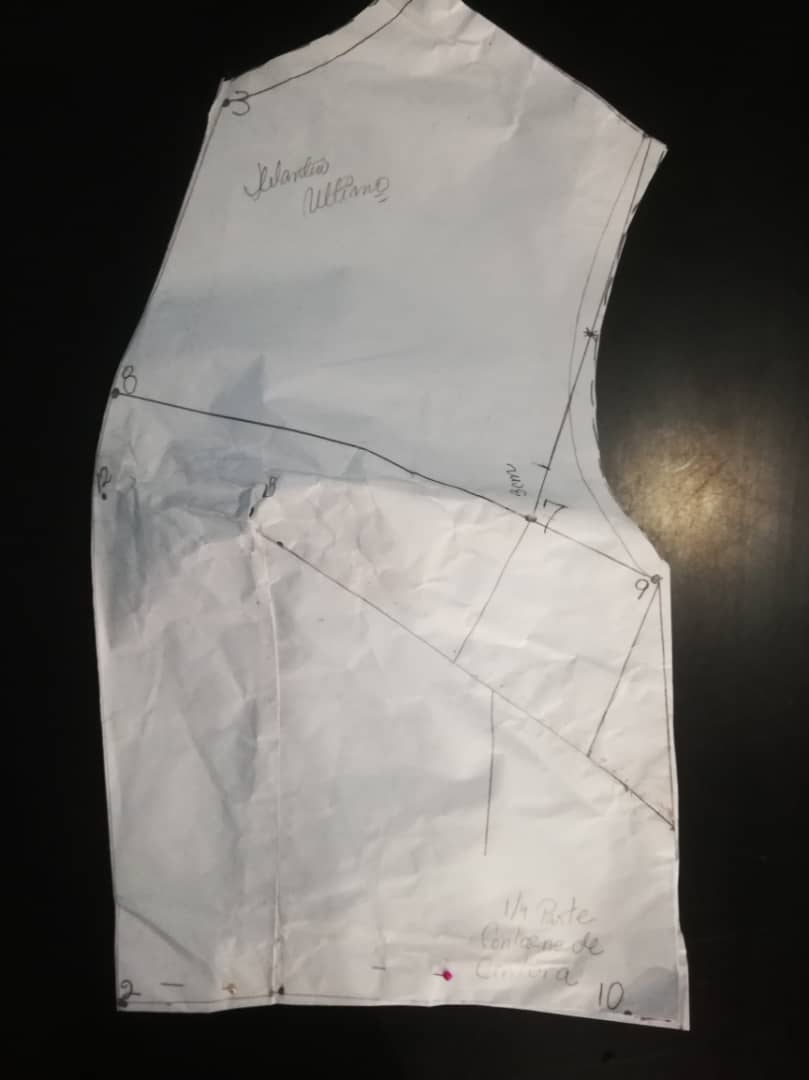
Unimos con una curva suave los puntos 3 y 4.
We join points 3 and 4 with a smooth curve.
Del punto 1 sobre el margen superior aplicamos la mitad de ancho de espalda fijamos el punto 5.
From point 1 on the upper margin we apply half the width of the back and fix point 5.
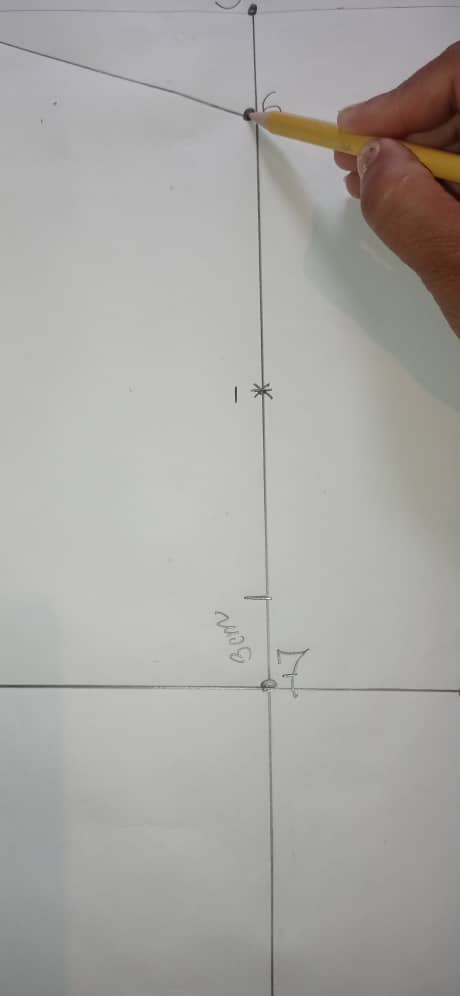
En el puno 5 trazamos una linea vertical, aplicamos la medida de declive de hombro (4 cm, es una medida estándar.) y fijamos el punto 6 que lo unimos con una linea diagonal con el puno 4 formando así el hombro.
At cuff 5 we draw a vertical line, we apply the shoulder slope measurement (4 cm, it is a standard measurement) and we fix point 6 that we join with a diagonal line with cuff 4 thus forming the shoulder.


Del puno 6 sobre la linea vertical aplicamos la medida de sisa que es la mitad de ancho de espalda y colocamos el punto 7, trazamos hacia la izquierda una linea recta , formando así el punto 8.
From pin 6 on the vertical line we apply the armhole measurement that is half the width of the back and place point 7, we draw a straight line to the left, thus forming point 8.
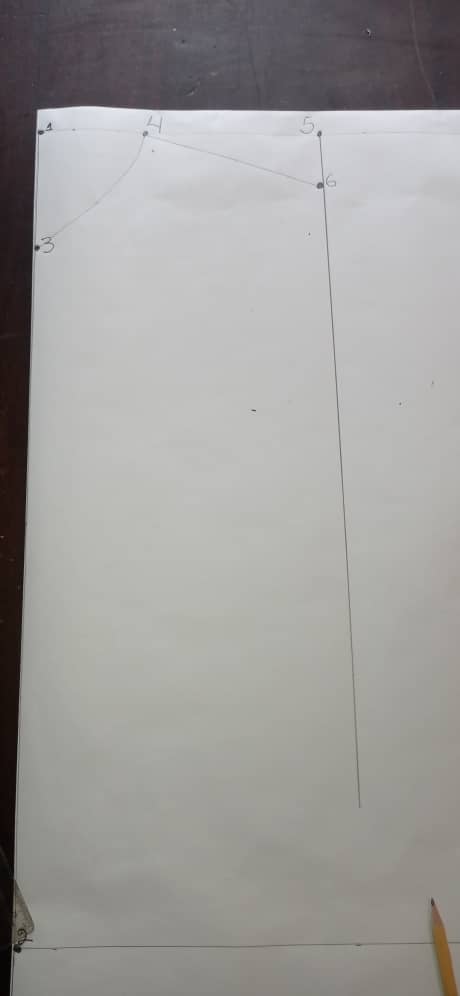
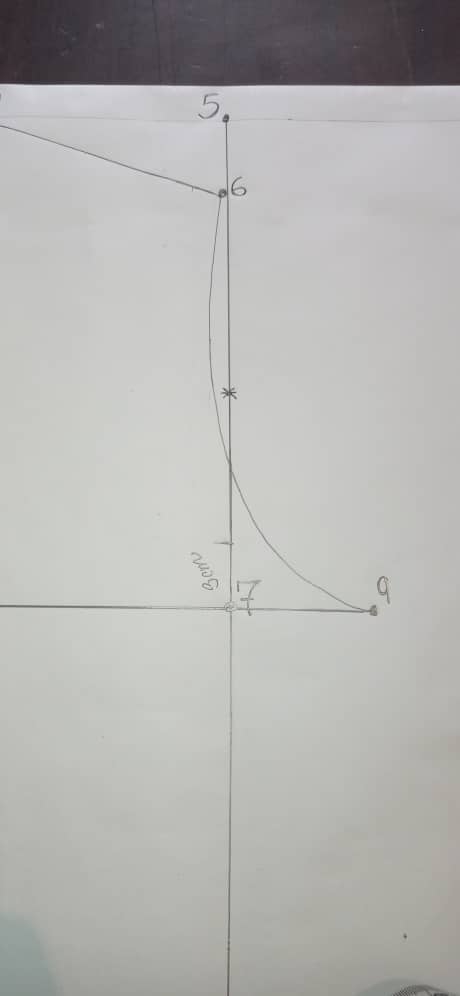
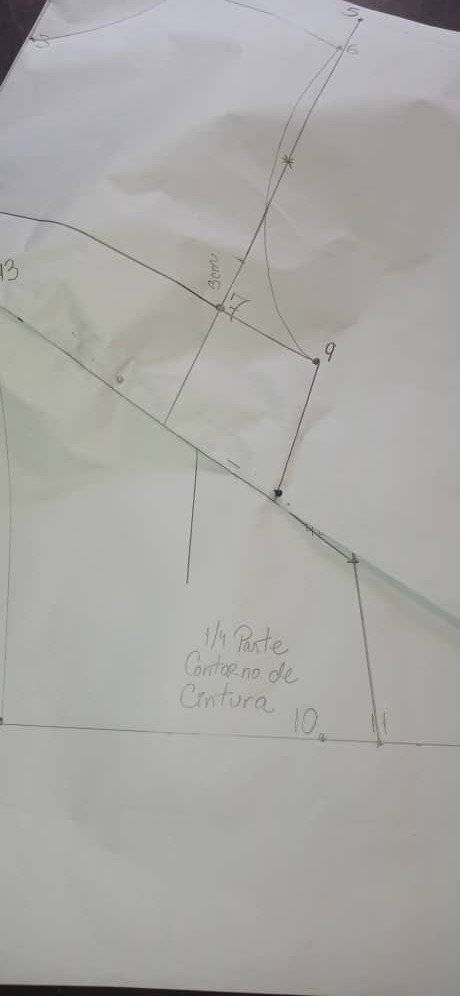
La linea que dibujamos entre los puntos 8 y 7 la llamaremos contorno de busto, aquí aplacaremos la medida de la 1/4 pare de contorno de busto y marcamos el punto 9.
The line that we draw between points 8 and 9 we will call the bust contour, here we will appease the measurement of the 1/4 stop contour of the bust and mark the point 9.
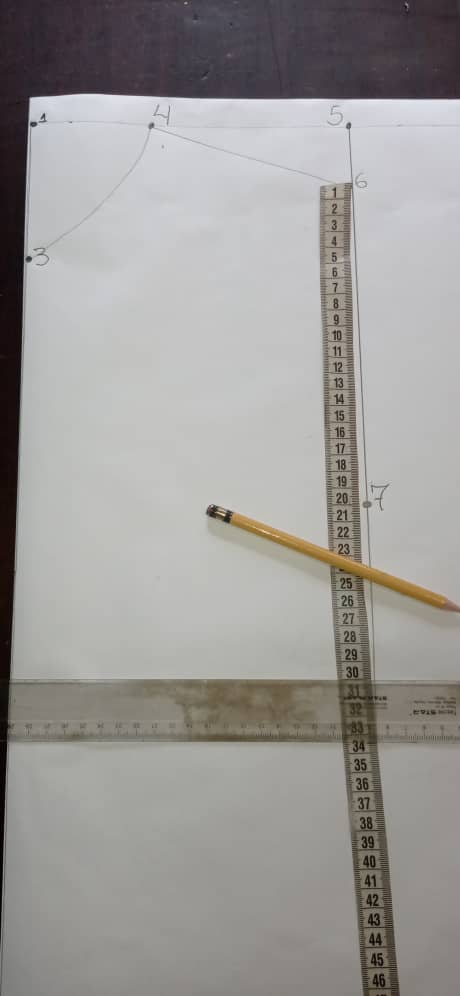
Para hacer la sisa buscamos la mitad entre los puntos 6 y 7, marcamos con un asterisco ( * ) frente a este entramos 1 cm.
To make the armhole we look for the middle between points 6 and 7, we mark with an asterisk (*) in front of this we enter 1 cm.
En el punto 7 subiremos 3 cm, comenzamos a formar la sisa por medio de una curva suave que nace en el punto 6 pasando a su vez por el centímetro que entramos y si dejar de pasar por los 3 cm que subimos hasta llegar al punto 9.
At point 7 we will go up 3 cm, we begin to form the armhole by means of a smooth curve that starts at point 6 passing in turn through the centimeter that we entered and if we stop going through the 3 cm that we went up until we reach point 9 .
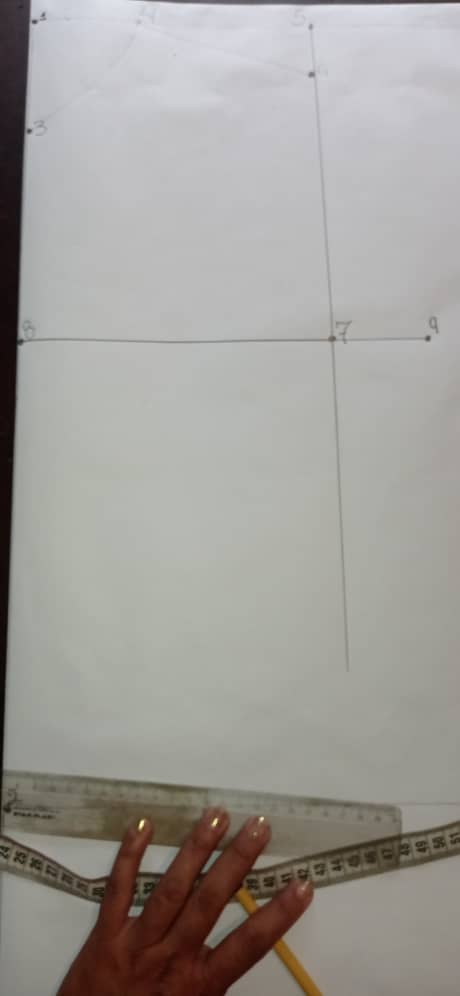
Del punto 2 sobre la linea de contorno de cintura aplicamos la cuarta parte de contorno de cintura marcamos el punto 10 , mas 3 cm que usaremos para la pinza fijamos el punto 11.
From point 2 on the waist contour line we apply the fourth part of the waist contour we mark point 10, plus 3 cm that we will use for the clamp we set point 11.
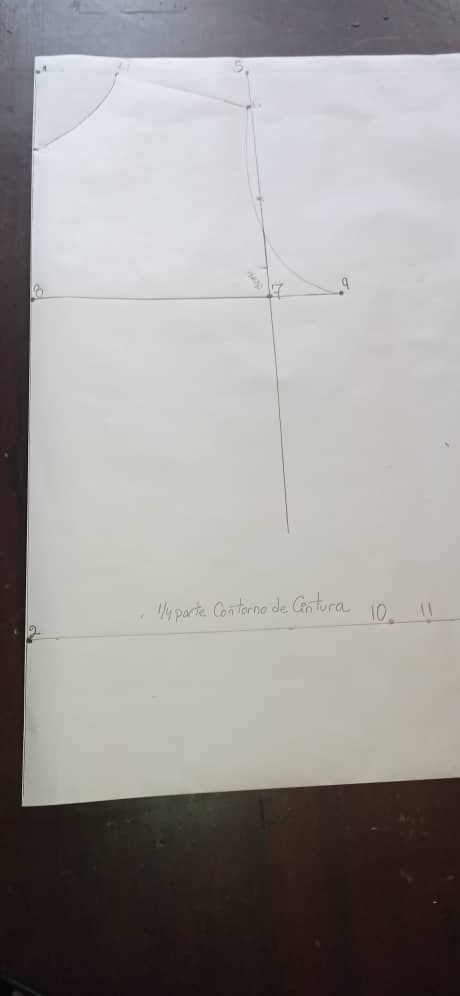
Unimos el punto 11 con el 9 formando así el costado de la blusa.
We join point 11 with 9 thus forming the side of the blouse.

Para fijar los puntos 12 y 13 hacemos la siguiente modificación:
To fix points 12 and 13 we make the following modification:
En el punto 1 hacia abajo aplicamos la medida de altura de pinza con ese paso fijamos el punto 12, frente a este aplicamos la medida mitad separación de pinza dibujamos el punto 13.
At point 1 downwards we apply the measure of the clamp height with that step we set point 12, in front of this we apply the measure half separation of the clamp we draw point 13.


Para hacer la pinza de la cintura buscamos la miad de separación de pinza colocamos un asterisco (*) , a cada lado del asterisco dejamos 1 1/2 cm de separación, proyectamos la pinza desde el asterisco hasta faltar 2 cm para llegar al punto 13 la dibujamos con sus lineas laterales.
To make the waist clip we look for the half of the clip separation we place an asterisk (*), on each side of the asterisk we leave 1 1/2 cm of separation, we project the clip from the asterisk until 2 cm are missing to reach point 13 we draw it with its lateral lines.

Formamos la pinza del costado buscamos la mitad de los puntos 9 y 11 fijamos un asterisco al lado y lado del mismo dejamos 1 cm 1/2 de diferencia de mitad de talle delantero trasero , proyectamos la pinza por medio de una linea recta , que nace desde el asterisco llegara hasta faltar 2 cm para llegar al punto 13 la formamos con sus respectivas lineas.
We form the dart on the side, we look for the middle of points 9 and 11, we fix an asterisk to the side and next to it, we leave 1 1/2 cm of difference in the middle of the front rear waist, we project the dart by means of a straight line, which is born from the asterisk it will reach 2 cm to go to point 13, we form it with their respective lines.


Doblamos las pinzas hacia abajo antes de cortar quedara de esa manera.
We bend the tweezers down before cutting it will be that way.
Al tener la pinzas dobladas debemos dibujar una linea recta desde el punto 11 al 9, de esta manera.
Having the tweezers bent we must draw a straight line from point 11 to 9, in this way.

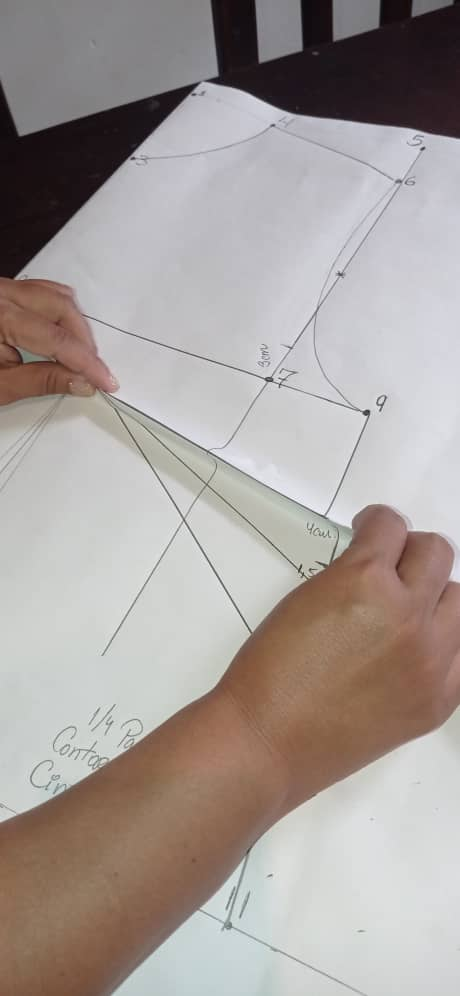
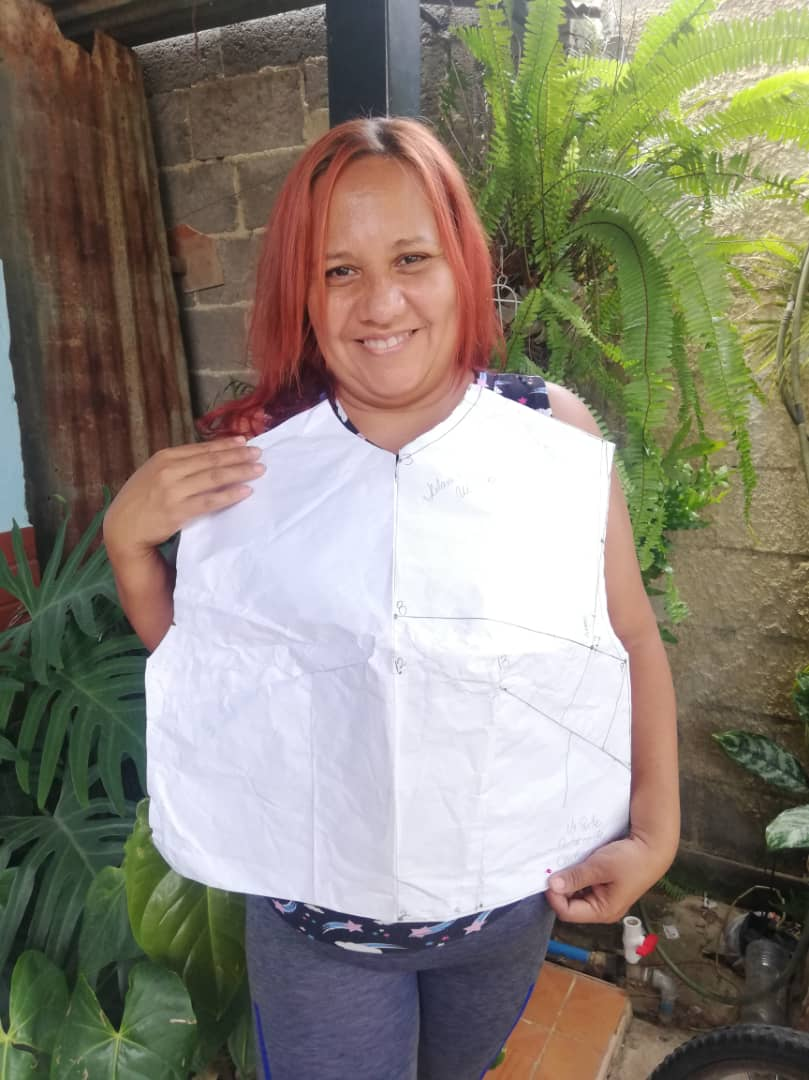
Dibujamos una linea punteada por todas las orillas de 2 cms de separación de cada tramo de la blusa, luego recortamos, es de esta forma cumpliendo todos los pasos logramos el patrón básico delantero para una blusa.
We draw a dotted line on all the edges 2 cm apart from each section of the blouse, then we cut it, it is in this way, fulfilling all the steps, we achieve the basic front pattern for a blouse.
Deben practicarlo las veces que sea necesario hasta dominar muy bien las técnicas y así lograr dominar la parte trasera que les enseñare en mi próximo post.
You should practice it as many times as necessary until you master the techniques very well and thus manage to master the rear part that I will teach you in my next post.
