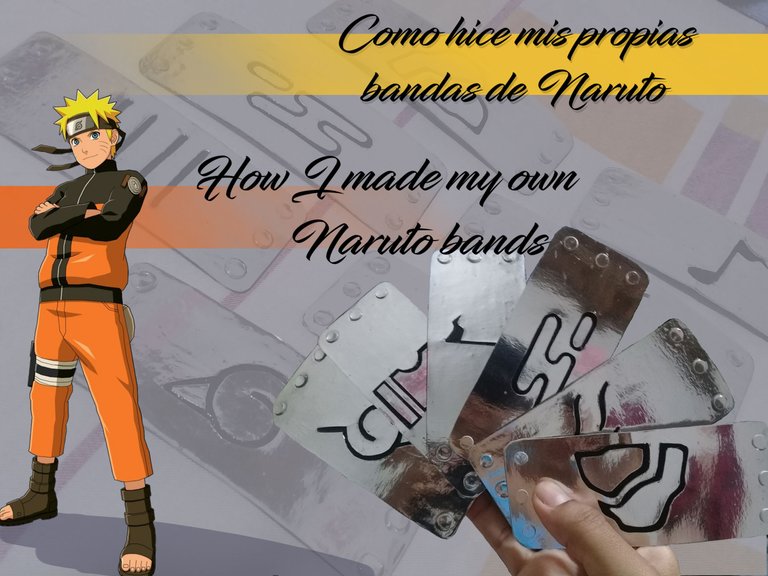
Como hice mis propias bandas de Naruto (Paso a Paso) - How I made my own Naruto bands (Step by Step) - [ENG-ESP]
¡Hola a todos! Hoy quiero mostrarles una manualidad que hice con mucho tiempo dedicación y paciencia, se trata de unas bandas de identificación de la serie de anime Naruto, estas las realice por motivo del cumpleaños del hijo de mi amiga @irenenavarroart que se celebró el mes pasado, el día del cumpleaños todos usamos las bandas hechas por mí y Rafael pudo tener su disfraz completo gracias a esta, sin más que decir les mostrare el proceso.
Hello everyone! Today I want to show you a craft that I made with a lot of time, dedication and patience, these are identification bands of the anime series Naruto, I made them for the birthday of my friend's son @irenenavarroart that was celebrated last month, the day of the birthday we all used the bands made by me and Rafael could have his complete costume thanks to this, without more to say I will show you the process.
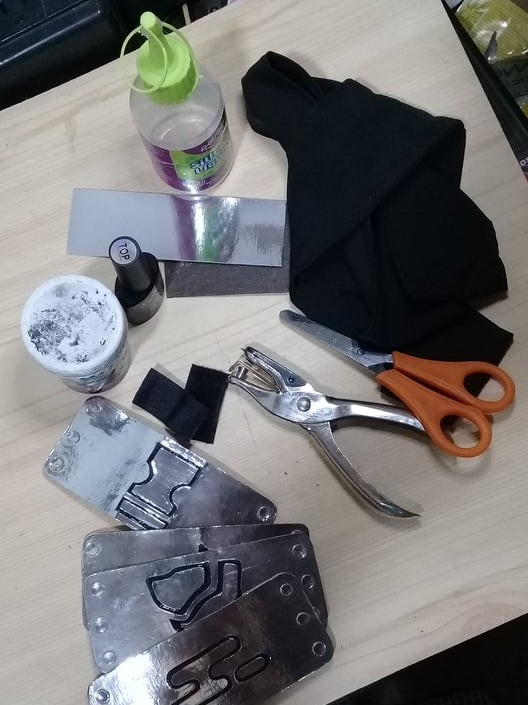
Materials:
Silver cardboard
A piece of formica or other resistant material
Black paint
Hole punch
Silicone
Gel and UV lamp
Black, blue or any color fabric of your choice
Needle and thread
Magic clasp (Velcro)
Materiales:
Cartulina plateada
Un pedazo de formica u material resistente
Pintura negra
Perforadora
Silicón
Gel y lámpara UV
Tela negra, azul o del color de su preferencia
Aguja e hilo
Cierre mágico (velcro)
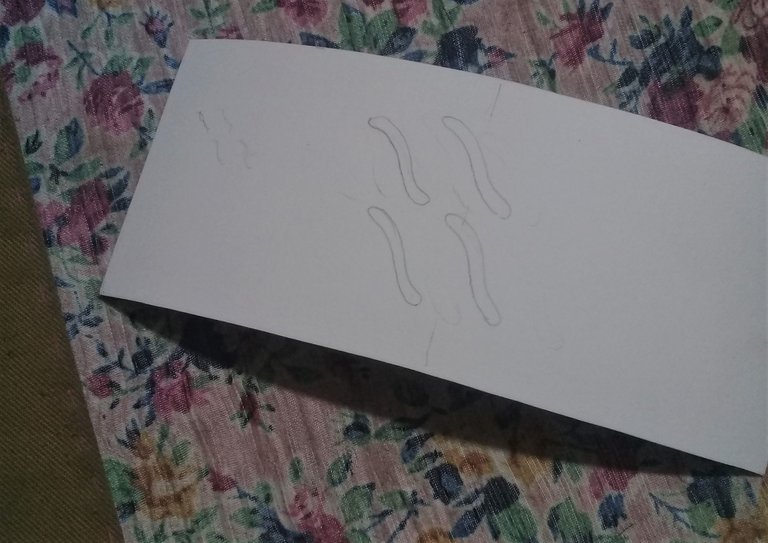
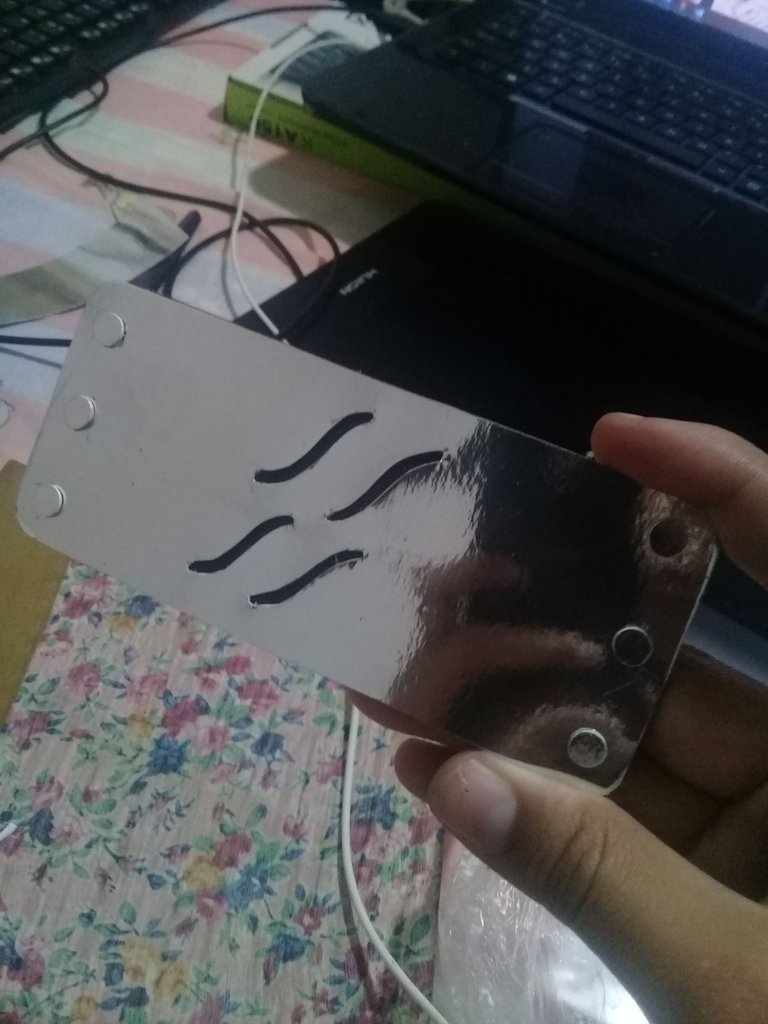
Lo primero que hice fue cortar rectángulos de la cartulina plateada de 12x5cm, luego por el reverso de esta dibuje el símbolo de las diferentes aldeas Hoja, arena, sonido, roca, nubes lluvia niebla (importante el simbolo debe ser dibujado invertido, de esta manera al girarlo se vea de la forma correcta)
The first thing I did was to cut rectangles of the silver cardboard of 12x5cm, then on the back of this I drew the symbol of the different villages Leaf, sand, sound, rock, clouds, rain fog (important the symbol must be drawn inverted, this way when turning it, it will be seen in the correct way).
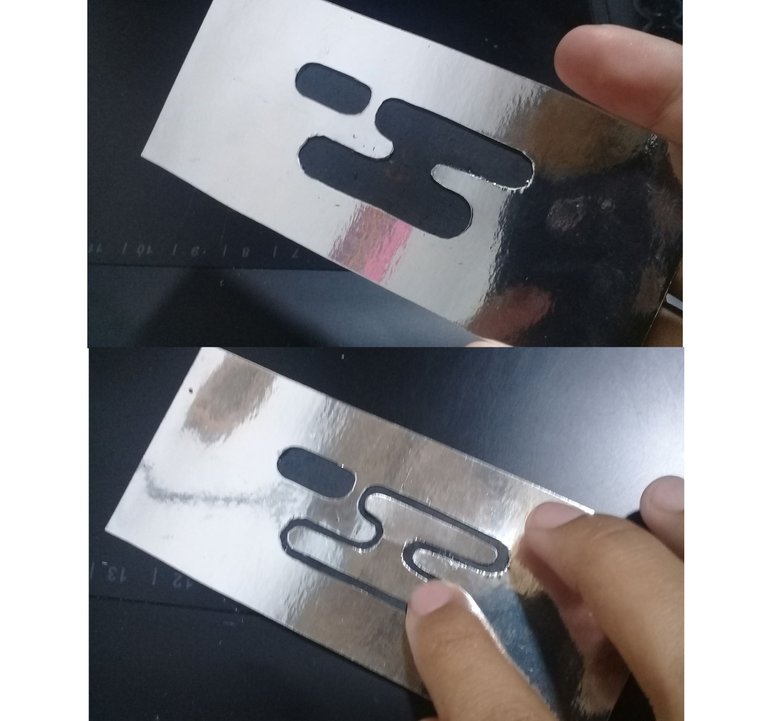
Luego con la ayuda de un bisturí, bien afilado y con mucho cuidado, recortar por todas las lineas dibujadas hasta cortarlo completamente y si es necesario una vez ya este retirado la mayoria con una tijera se pueden mejorar imperfeciones
Then with the help of a scalpel, well sharpened and very carefully, cut along all the drawn lines until it is completely cut and if necessary, once it is already removed most of the imperfections can be improved with a scissors.
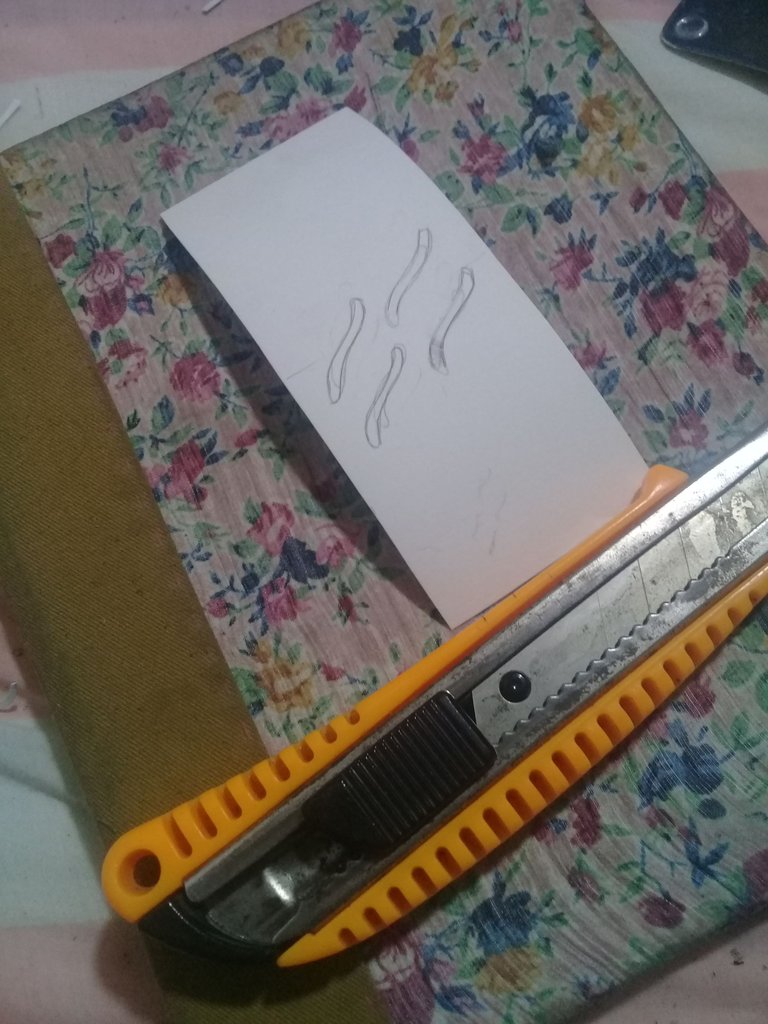
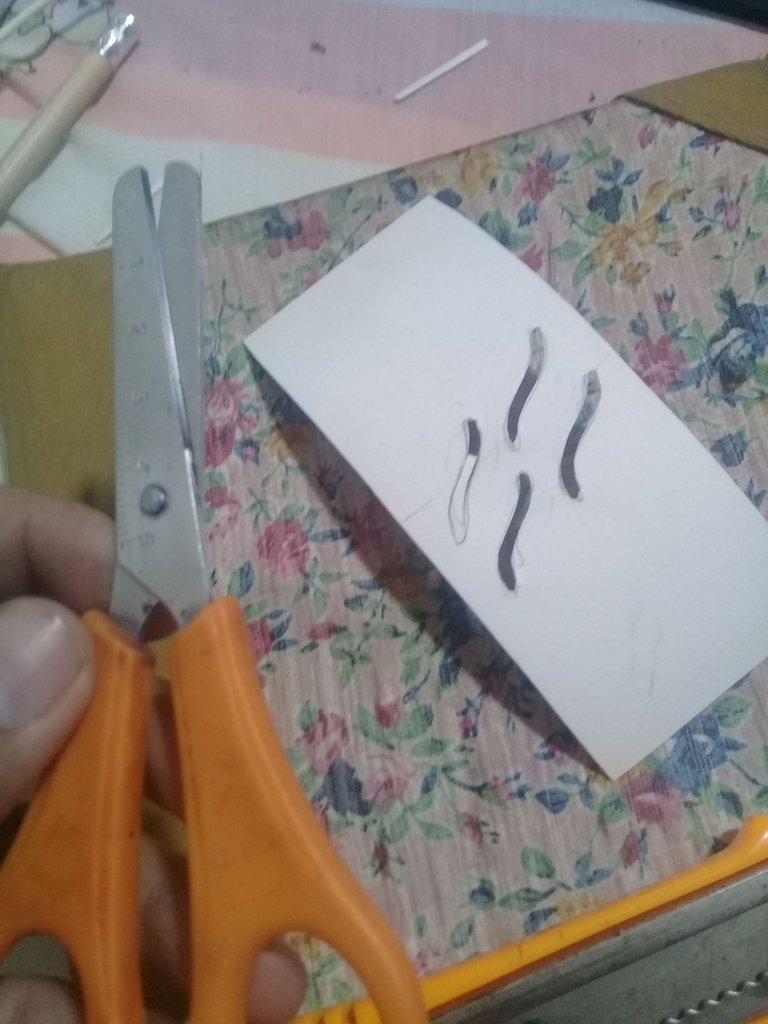
En el caso de ser figuras complejas como es el caso de la hoja, arena, roca y niebla que pose piezas internas deben conservarse para luego pegarlas en el soporte, también con la tijera redondee las esquinas del rectángulo, para hacerlo mas realista a la serie.
In the case of complex figures as is the case of the leaf, sand, rock and fog that have internal parts should be retained and then glued on the support, also with the scissors round the corners of the rectangle, to make it more realistic to the series.
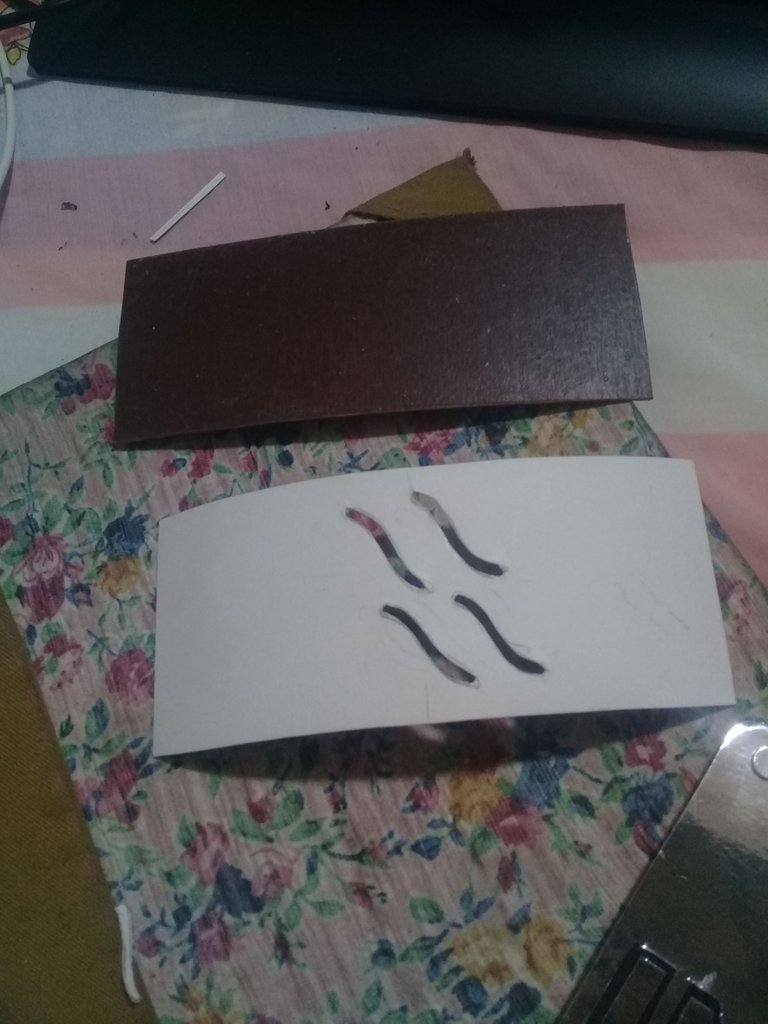
Lo siguiente es cortar un pedazo de formica o del material resistente de su elección con las mismas medidas del rectángulo de cartulina cortado previamente, este debe pintarse de negro, aunque no en su totalidad, solamente el área central donde estará ubicado el símbolo.
The next step is to cut a piece of formica or the resistant material of your choice with the same measurements of the rectangle of cardboard previously cut, this should be painted black, although not in its entirety, only the central area where the symbol will be located.
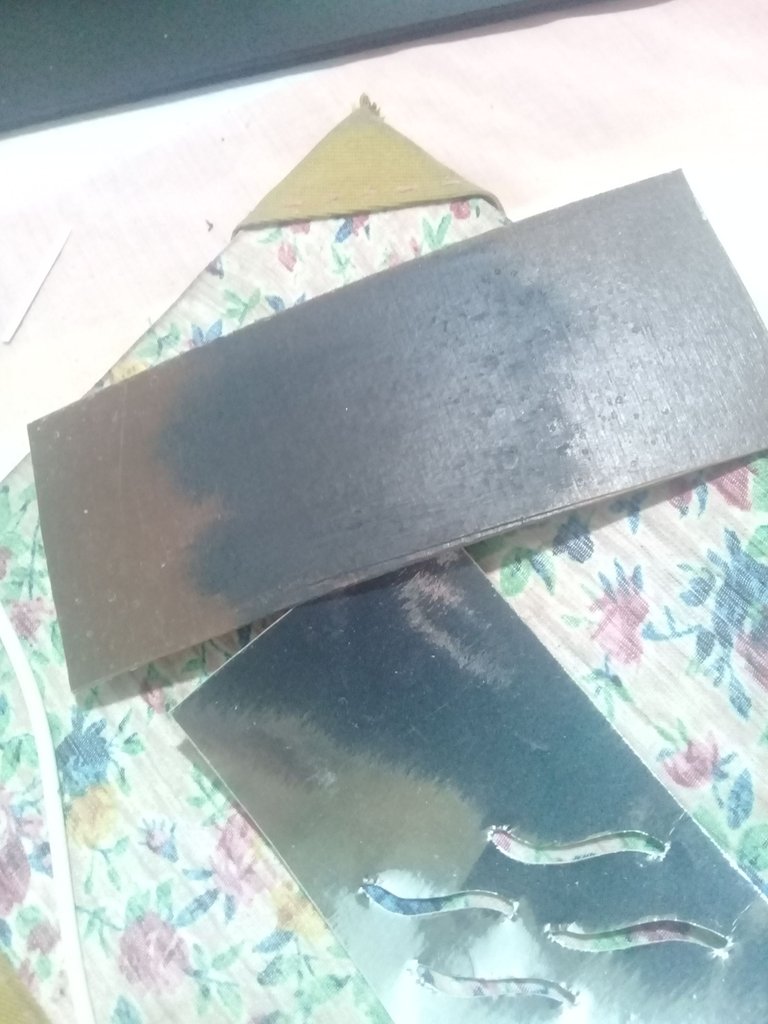
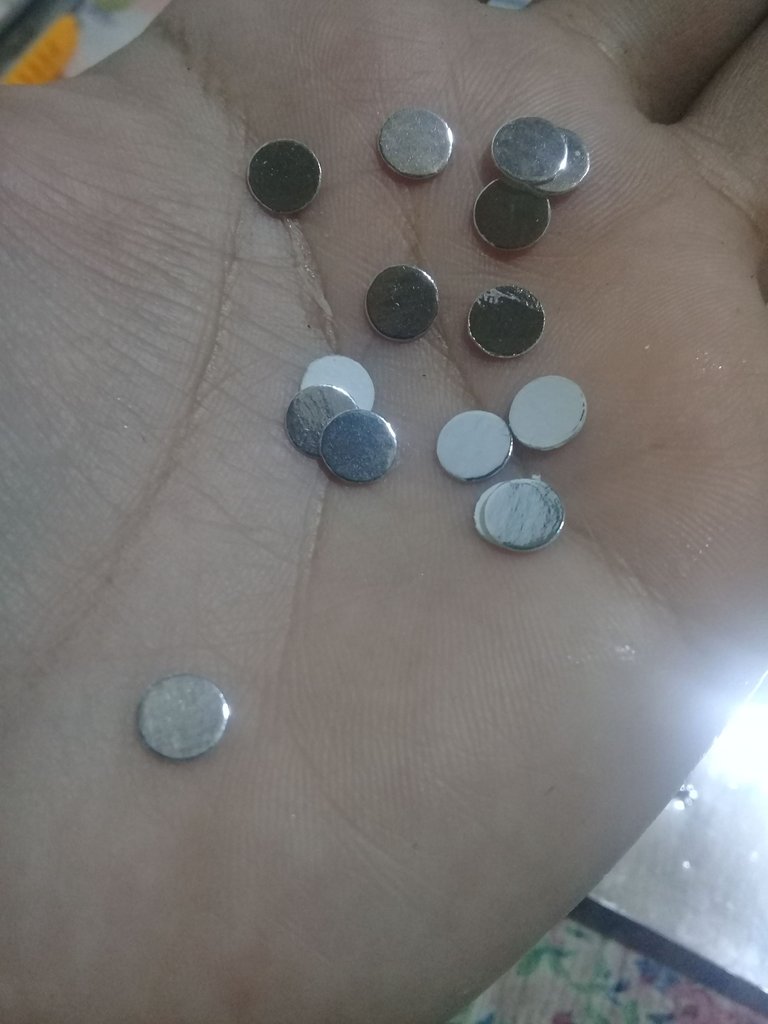
Luego tome silicón líquido y pegue la cartulina cobre el pedazo de formica y los sostuve el tiempo suficiente para que este se pegara muy bien, en este punto también pegue los remaches de las bandas, para ello tome una perforadora y corte muchos círculos de cartulina plateada, pegue dos juntos y luego ubique tres a cada lado de la banda.
Then I took liquid silicone and glued the copper cardboard to the piece of formica and held them long enough for it to stick very well, at this point I also glued the rivets of the bands, for this I took a hole punch and cut many circles of silver cardboard, glue two together and then place three on each side of the band.
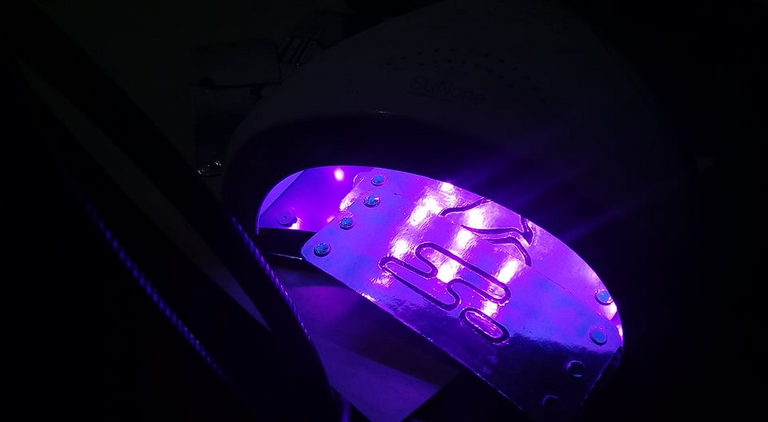
Para darle un poco más de resistencia a la cartulina, no quería que fueran arruinarse fácilmente con un poco de agua decidí colocarle una capa de gel UV que se usa en manicura para aplicar una capa y aportarle resistencia al agua y los rasguños, el resultado de esta prueba fue excelente pues además de aportarle resistencia extra, también contribuyó a consolidar más la unión entre la cartulina y el soporte
To give a little more resistance to the cardboard, I did not want it to be easily ruined with a little water, I decided to apply a layer of UV gel that is used in manicure to apply a layer and provide resistance to water and scratches, the result of this test was excellent because in addition to providing extra resistance, it also helped to further consolidate the bond between the cardboard and the support.

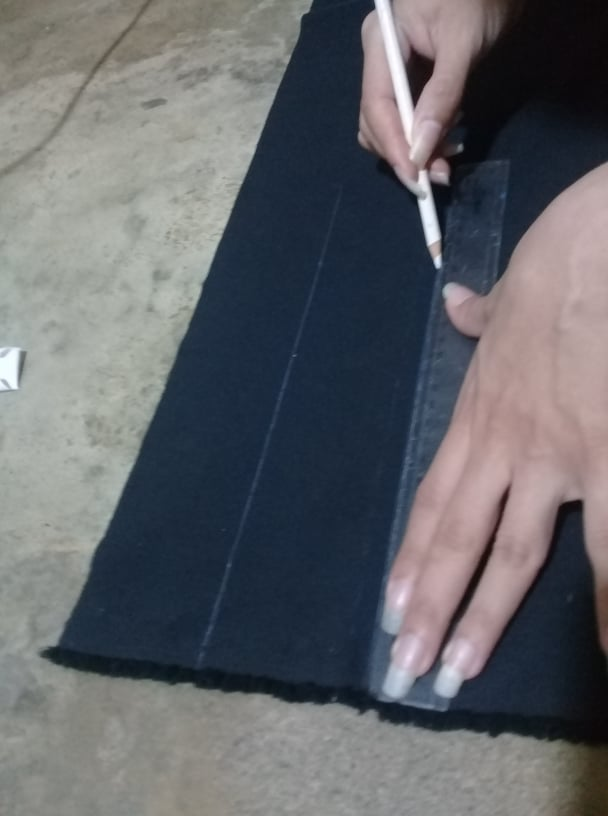
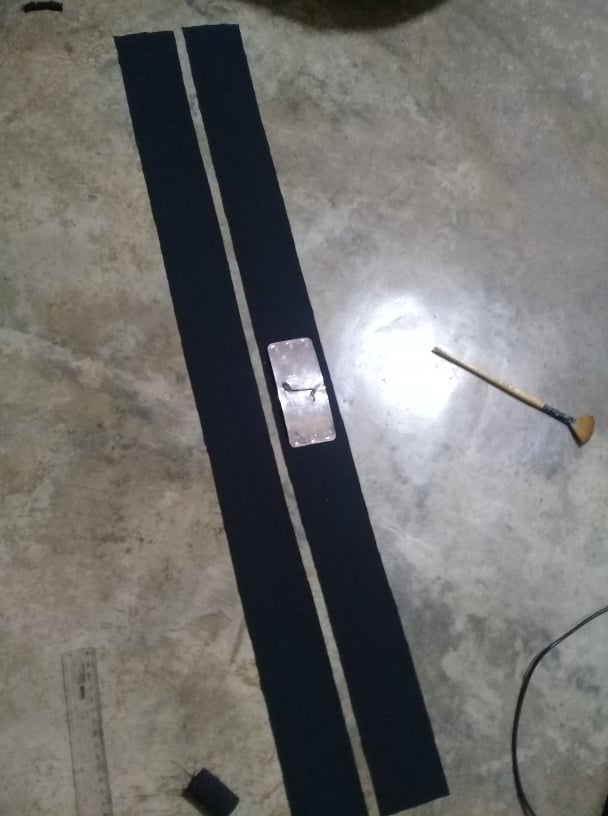
Por ultimo para la bandas he recortado tiras de tela negra de 6x90cm, para hacer la banda se toman dos piezas con las medidas mencionada y de cosen juntas con los bordes de la tela hacia adentro, este paso fue cortesía de @irenenavarroart, tengo cero de paciencia en habilidades lentas de repetición jajaj!
Finally for the bands I have cut strips of black fabric of 6x90cm, to make the band you take two pieces with the mentioned measures and sew them together with the edges of the fabric facing inwards, this step was courtesy of @irenenavarroart, I have zero patience in slow repetition skills hahahah!
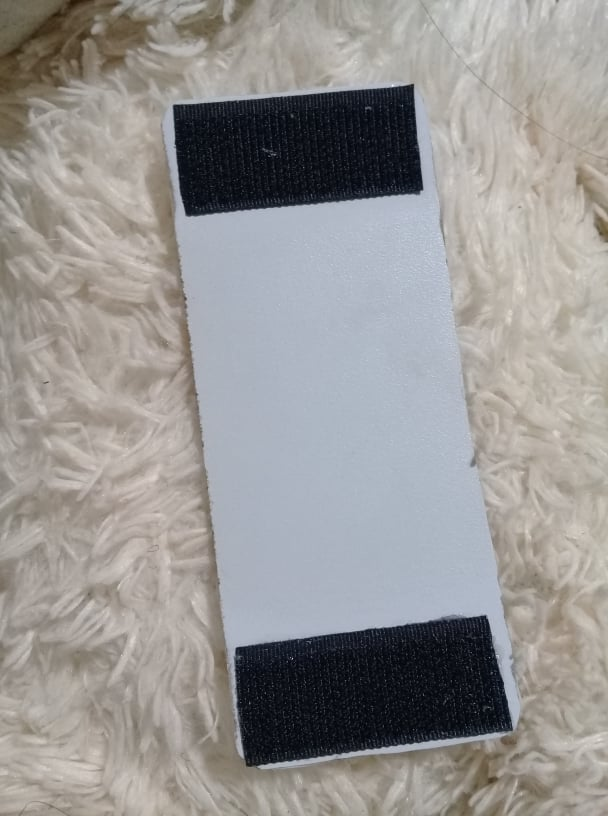
Para asegurar la chapa a la banda he usado unos trozo de velcro estos los he dispuesto de la siguiente manera con la parte plástica a la chapa y la otra más suave a la tela, pensé que esta sería la mejor manera de hacerlo, pues las bandas se ensucian y aunque el gel UV le aporto resistencia al agua no pienso ponerlo a prueba.
To secure the sheet to the band I have used some pieces of velcro these I have arranged them as follows with the plastic part to the sheet and the other softer to the fabric, I thought this would be the best way to do it, because the bands get dirty and although the UV gel provided water resistance I don't plan to test it.

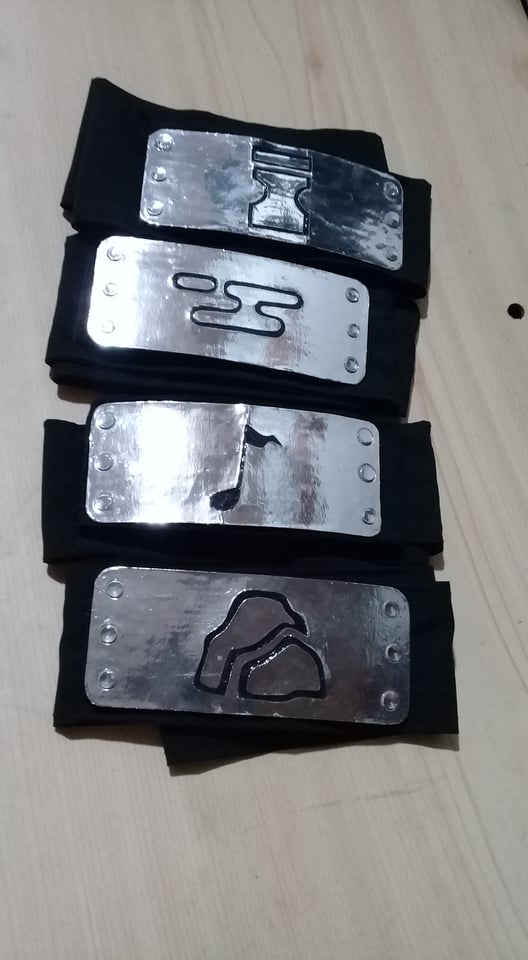
De esta manera logré obtener mis preciadas bandas de Naruto, las cuales no he lucido lo suficiente, pronto me tomo mis merecidas fotos después de tanto trabajo, no diré que es fácil realmente es una manualidad que me llevo más tiempo del que pensaba, y fue un poco estresante ya que suelo ser muy ansiosa para terminar las cosas o pasar al otro extremo y perder el interés fácilmente, esto fue todo si les ha gustado déjenme su comentario.
In this way I managed to get my precious Naruto bands, which I have not worn enough, soon I will take my deserved photos after so much work, I will not say that it is easy really is a craft that took me more time than I thought, and it was a little stressful as I tend to be very anxious to finish things or go to the other extreme and lose interest easily, this was all if you liked leave me your comment.
¡Espero que les haya gustado esta publicación!
¡Muchas gracias por leer, hasta la próxima!
Hoping you liked this post!
Thank you very much for reading, see you next time!
Agradecida infinitamente por este maravilloso detalle, Rafael lo usa practicante todos los días, al igual que los shurikens hechos por @tsunsica <3
Me alegra mucho saber eso, creo que es lo mas importante que el resultado de todo el esfuerzo sea apreciado que es lindo Rafa, mis saludos! 💕
Excelente seguro a mis primitos les van encantar.
Sii😁 es una excelente manualidad! gracias por comentar!