[ESP-ENG] Detalle para obsequiar | Gift to give as a present
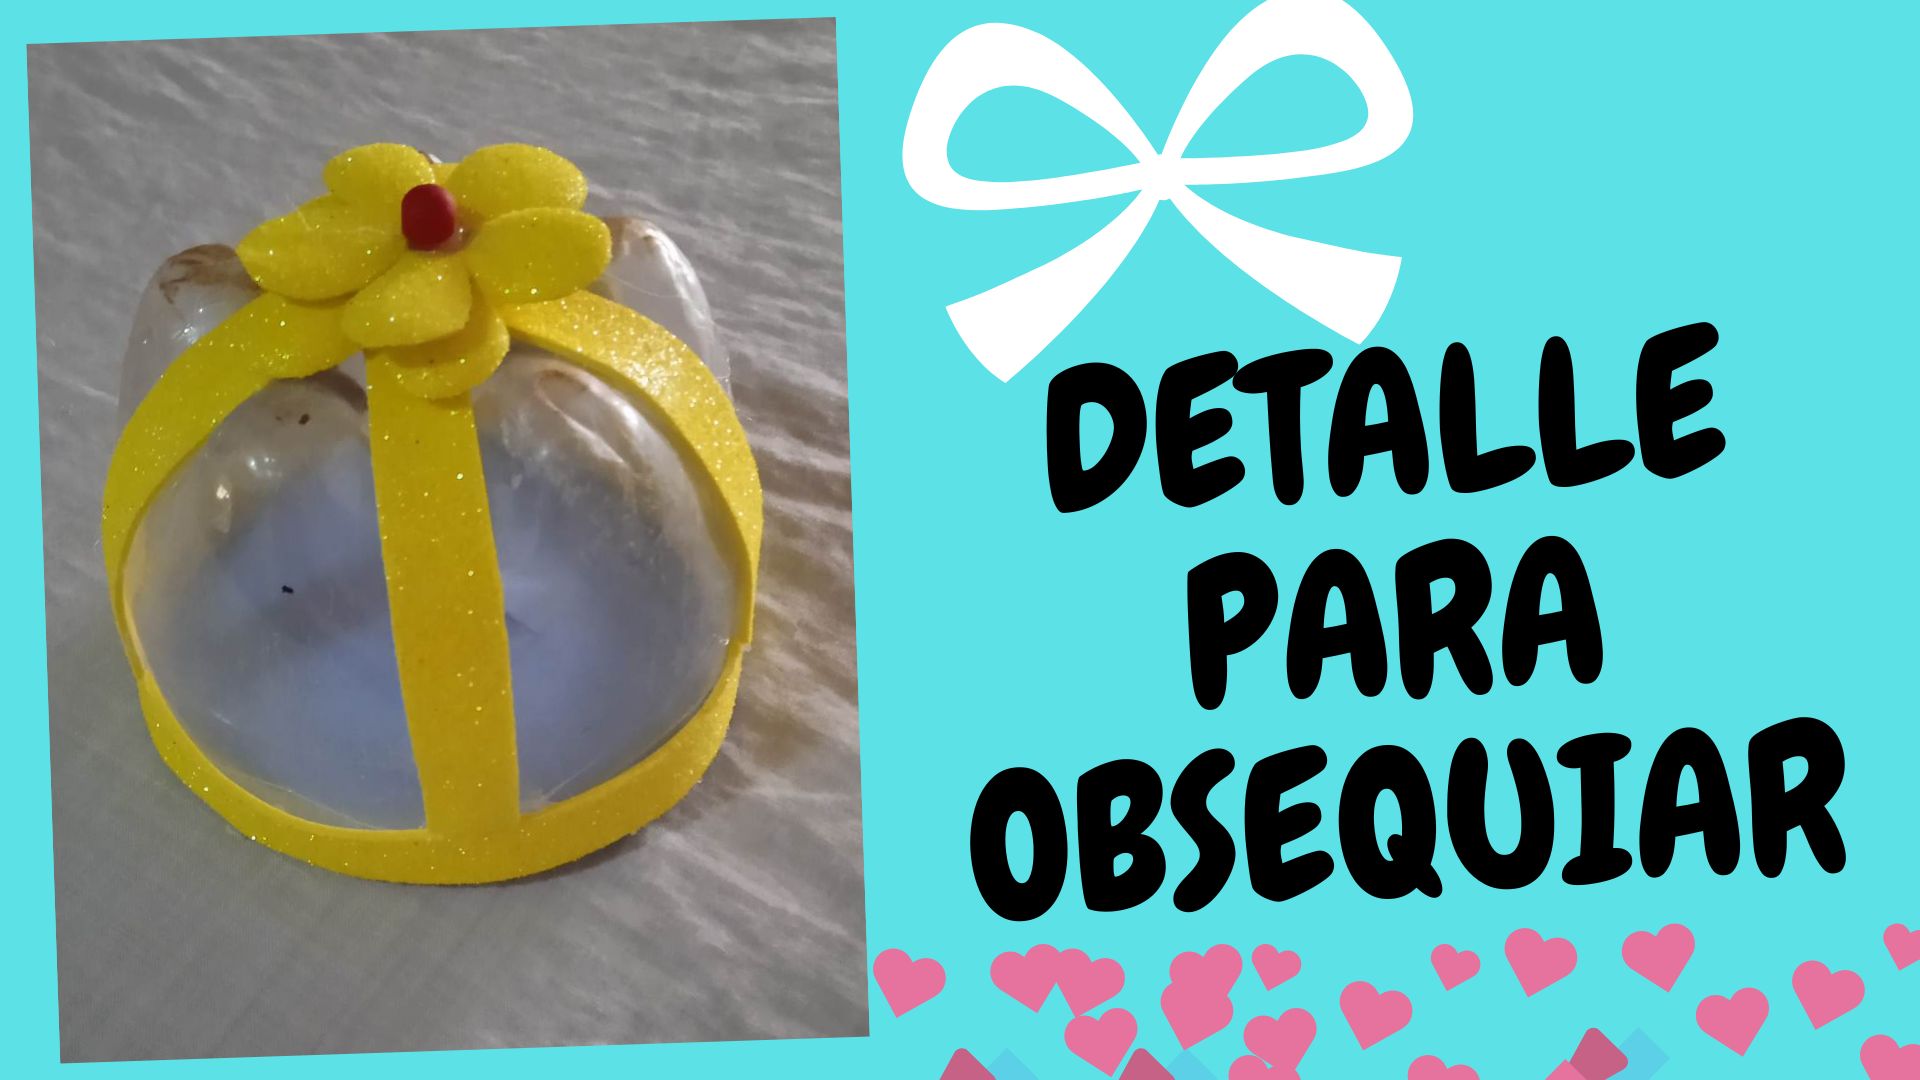
Hello everyone, it is a pleasure for me to be sharing again with all of you after a long time absent due to work commitments, but I'm back and I am very happy to be here with this great family, I want to share with you a nice detail ideal to give to anyone, we can fill it with candy, even also serves to give it to the little ones of the house, a detail is a way to show our appreciation and affection to that person who is very special to us, let's see the steps to follow for this nice detail.
.jpg)
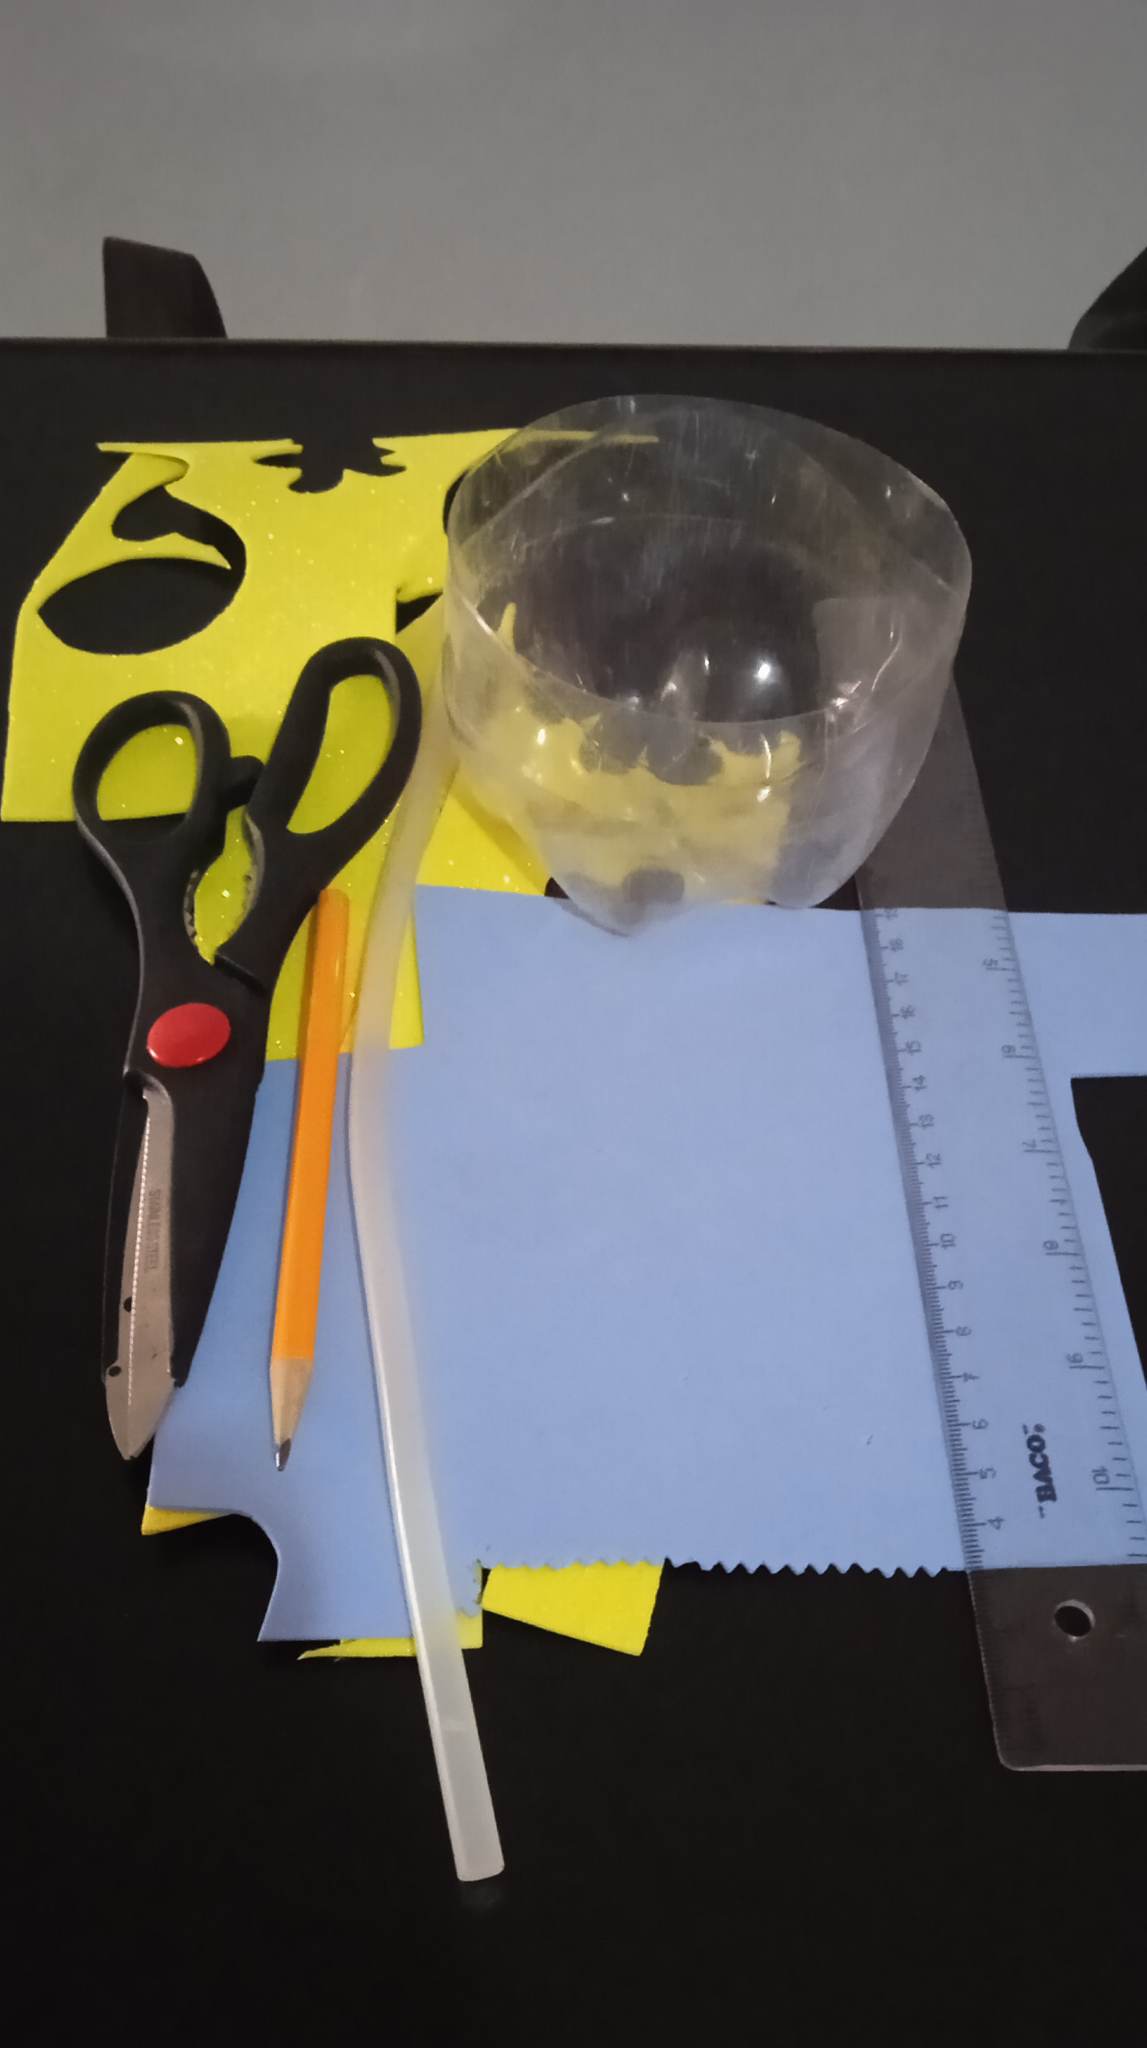
- Los materiales a utilizar son.
- Tijera.
- Lápiz.
- Regla.
- Silicón en barra.
- Foami azul y amarillo.
- Botella plástica ( solo la parte de abajo )
- The materials to be used are.
- Scissors.
- Pencil.
- Ruler.
- Silicone stick.
- Blue and yellow Foami.
- Plastic bottle (only the bottom part).
.jpg)
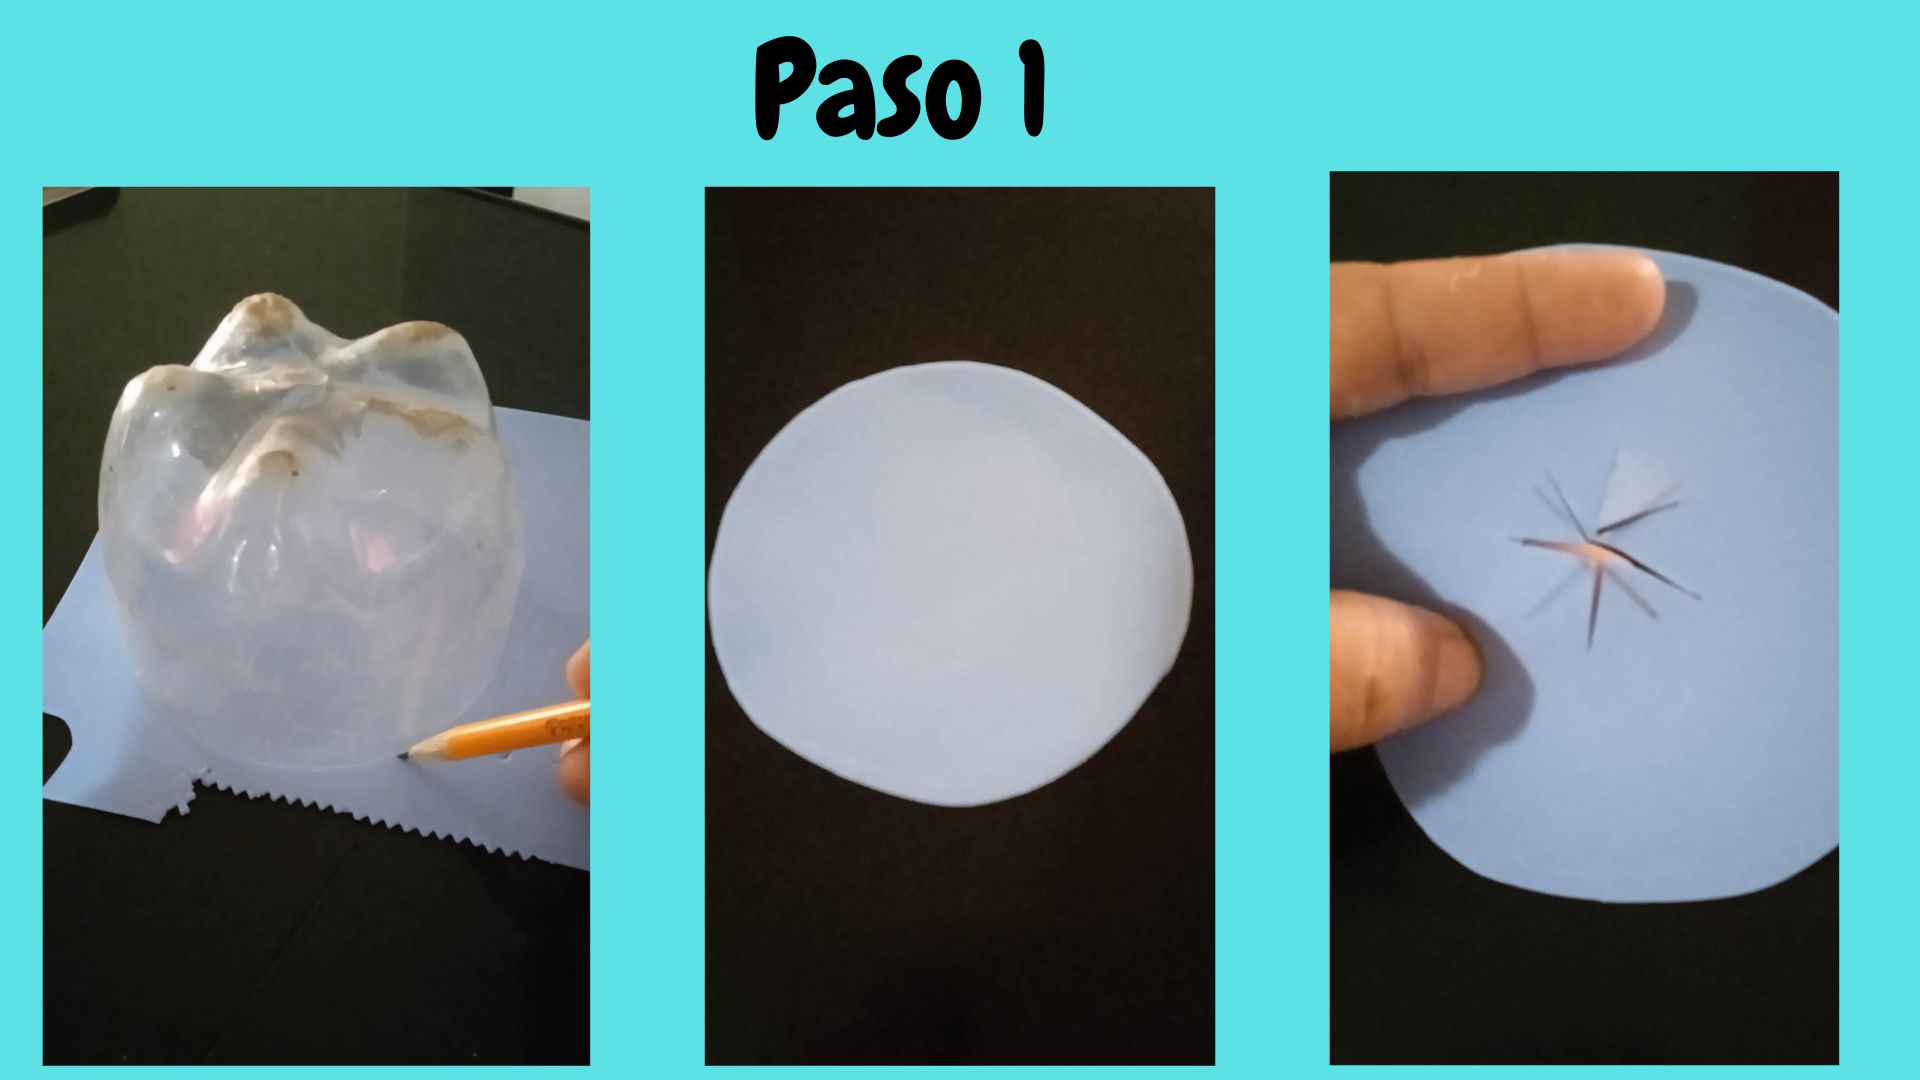
- Paso 1: Lo primero que debemos hacer es marcar en el foami la medida del envase, luego procedemos a recortar seguidamente hacemos una pequeña abertura en el centro del foami, esto con la finalidad de introducir cualquier detalle que queramos colocar dentro del obsequio.
- Step 1: The first thing to do is to mark on the foami the size of the container, then we proceed to cut it, then we make a small opening in the center of the foami, this in order to introduce any detail that we want to place inside the gift.
.jpg)
- Paso 2: Pegamos el foami al envase de plástico tal cual muestra la segunda imágen, luego en el foami amarillo recortamos una pequeña tira de 1 cm de ancho por 30 cm de largo.
- Step 2: Glue the foami to the plastic container as shown in the second picture, then cut a small strip of 1 cm wide by 30 cm long from the yellow foami.
.jpg)
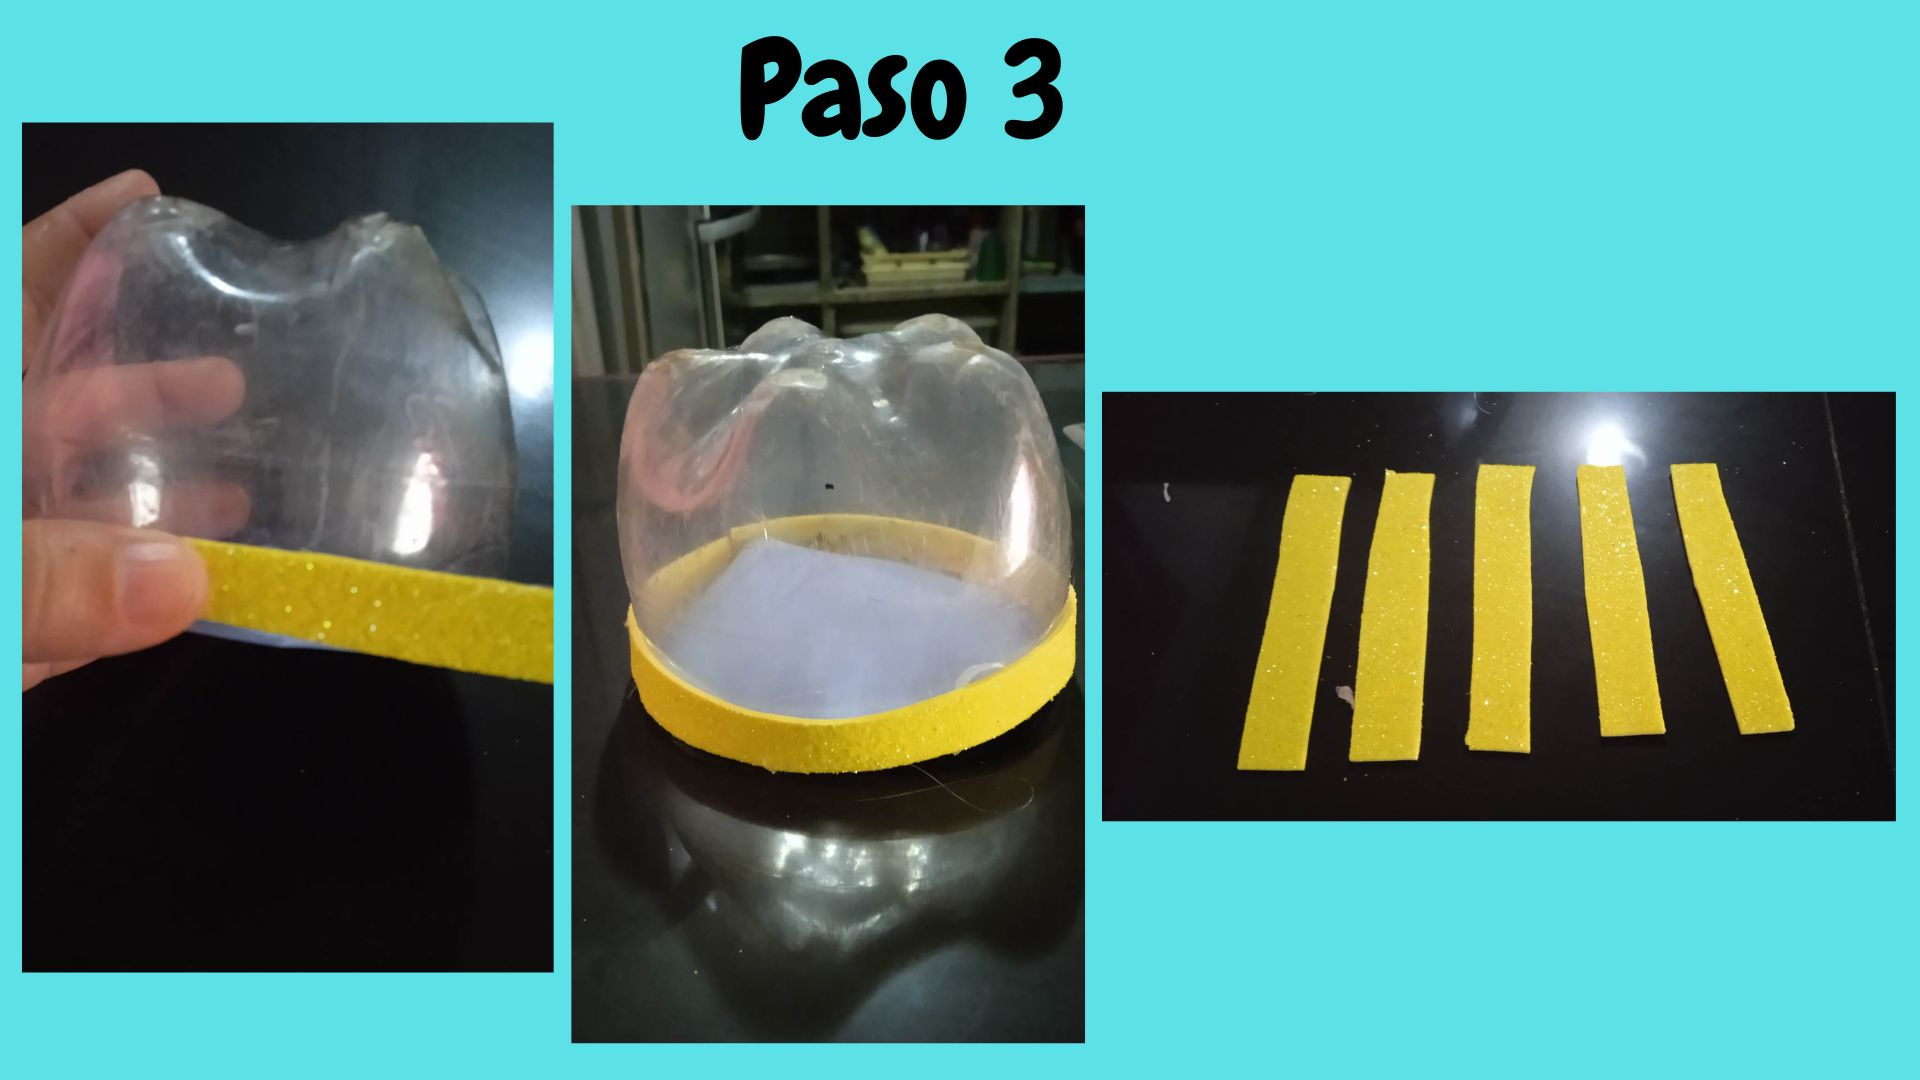
- Paso 3: Pegamos la tira por todo alrededor del envase, justo en la parte de abajo, luego procedemos a recortar 5 tiras de 1 cm de ancho por 9 cm de largo, nos deben quedar todas del mismo tamaño.
- Step 3: Glue the strip all around the container, just at the bottom, then proceed to cut 5 strips of 1 cm wide by 9 cm long, they should all be the same size.
.jpg)
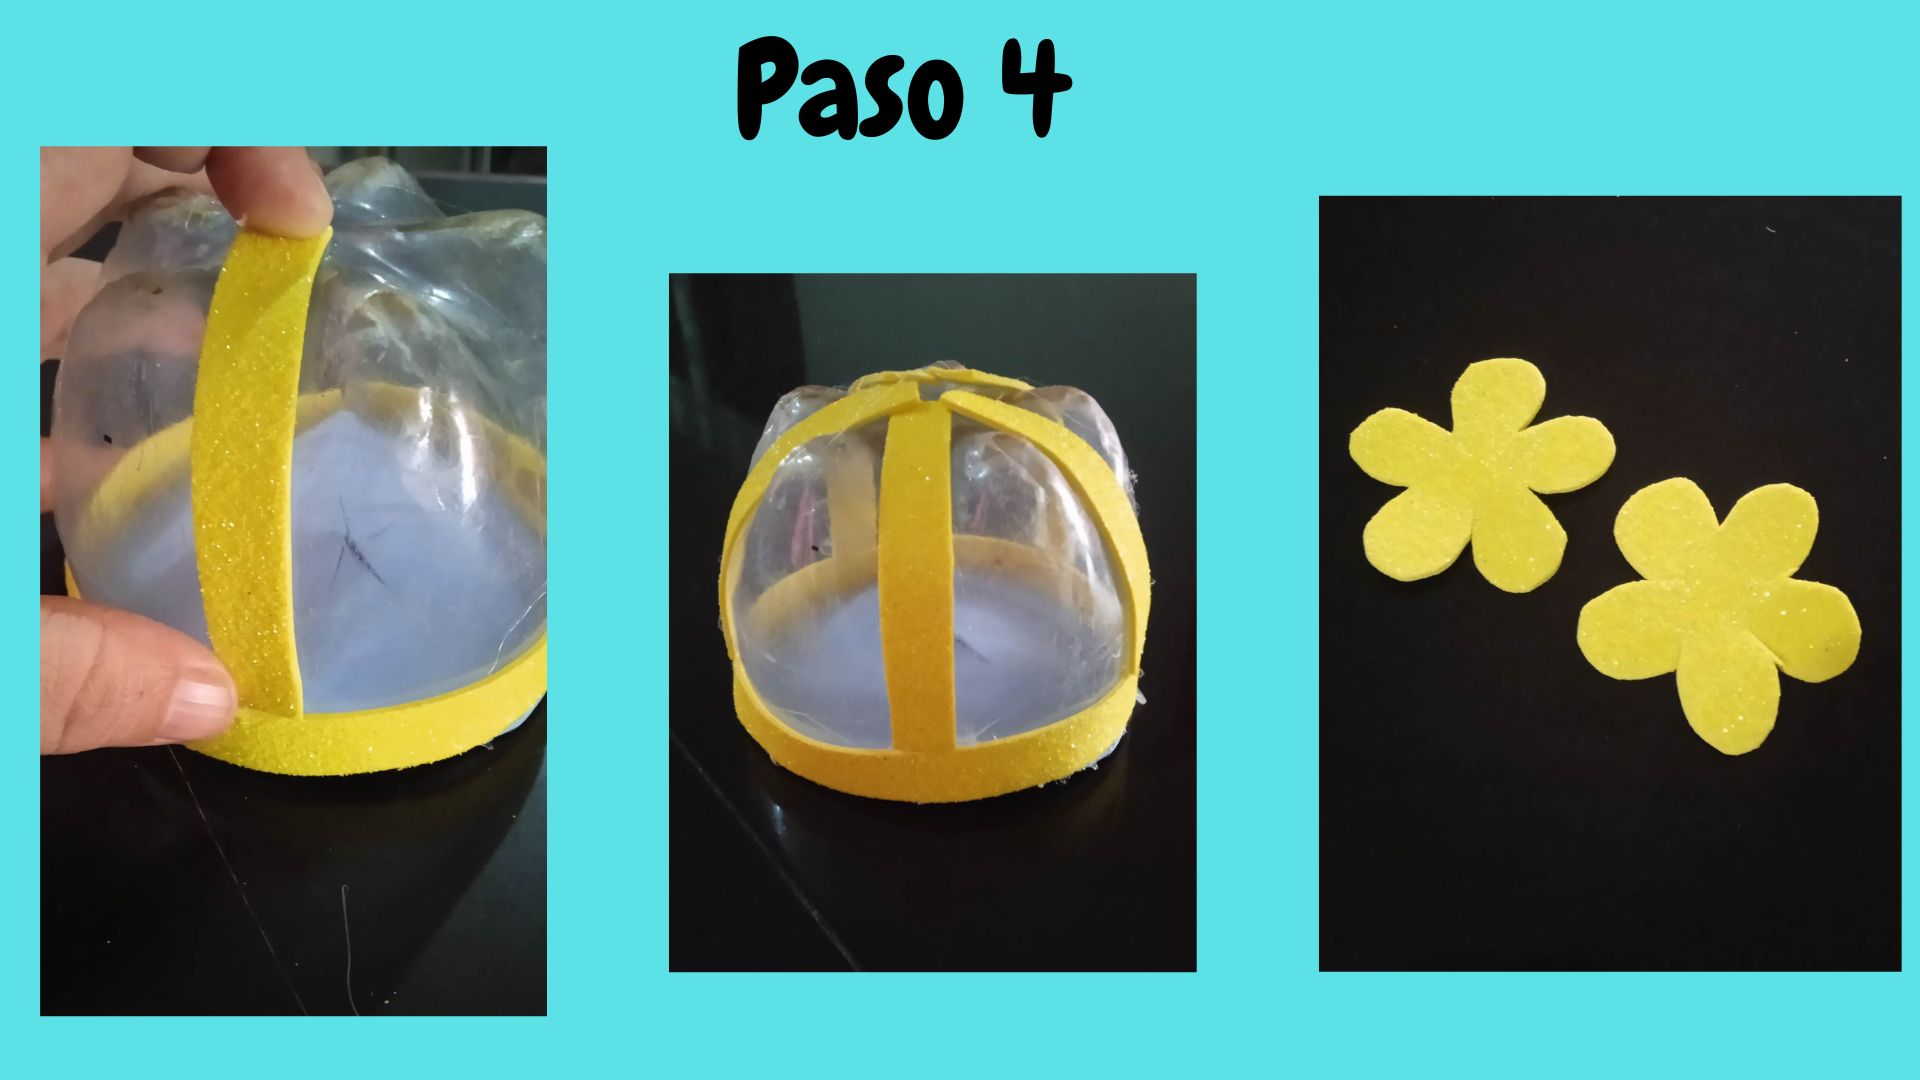
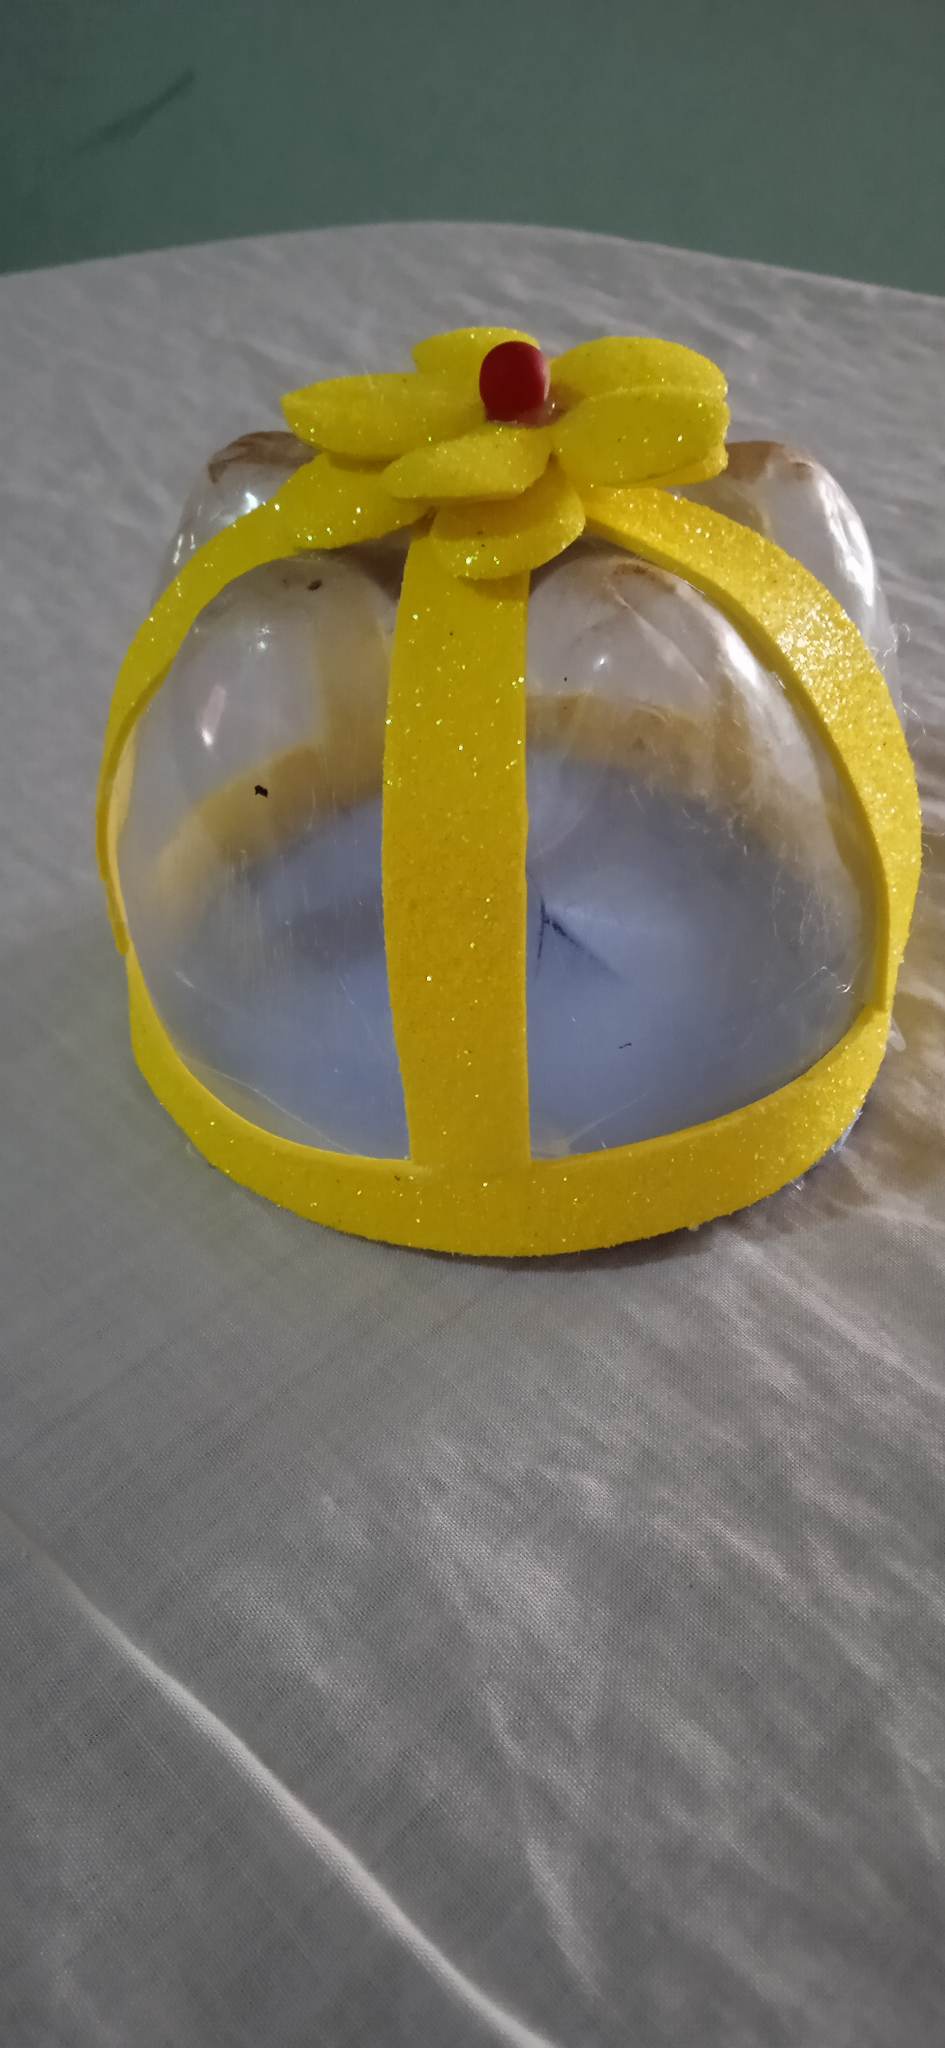
- Paso 4: Procedemos a pegar las tiras en cada uno de los espacios del envase hasta terminar con las 5 tiras que recortamos, luego hacemos 2 flores de foami y las recortamos, las flores quedaran a su gusto si hacerlas pequeñas o hacerlas más grandes, yo las hice de tamaño medianas.
- Step 4: We proceed to glue the strips in each of the spaces of the container until we finish with the 5 strips that we cut, then we make 2 foami flowers and cut them, the flowers will be to your liking whether to make them small or make them bigger, I made them medium size.
.jpg)
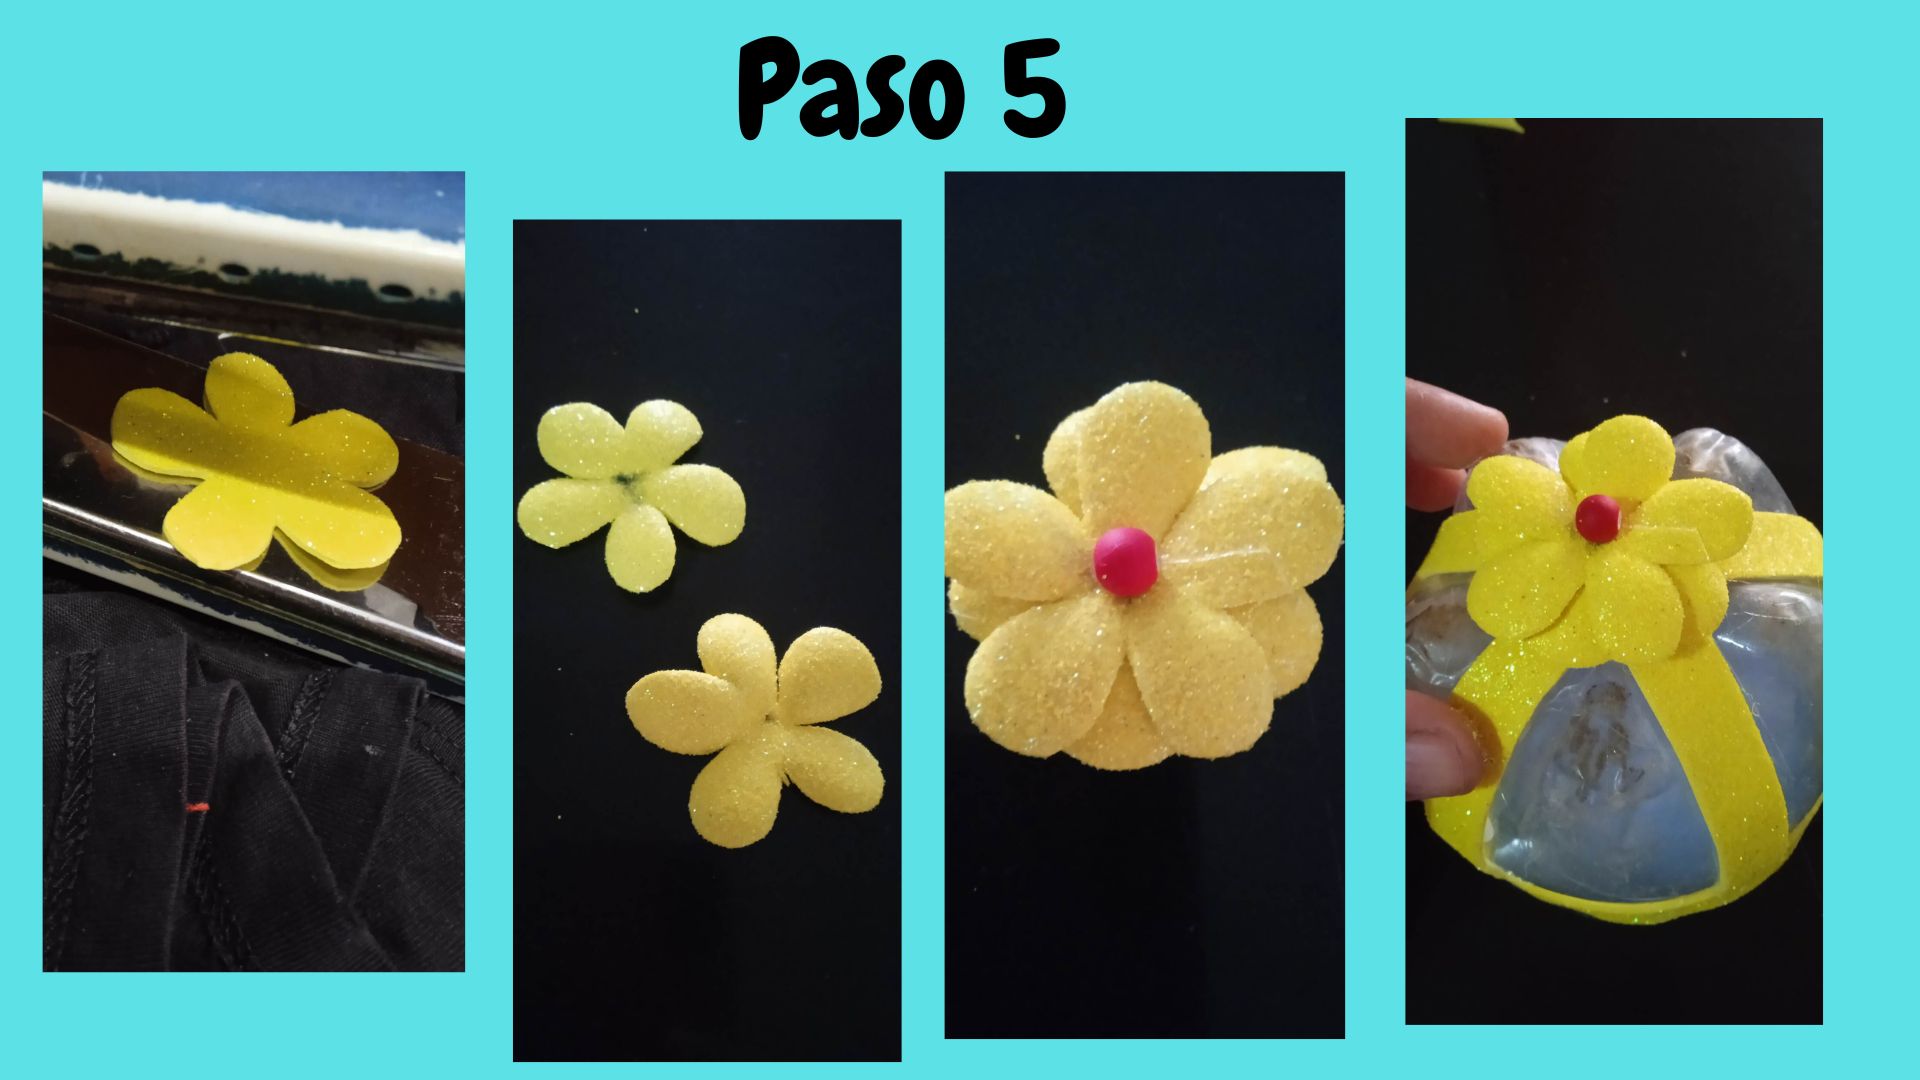
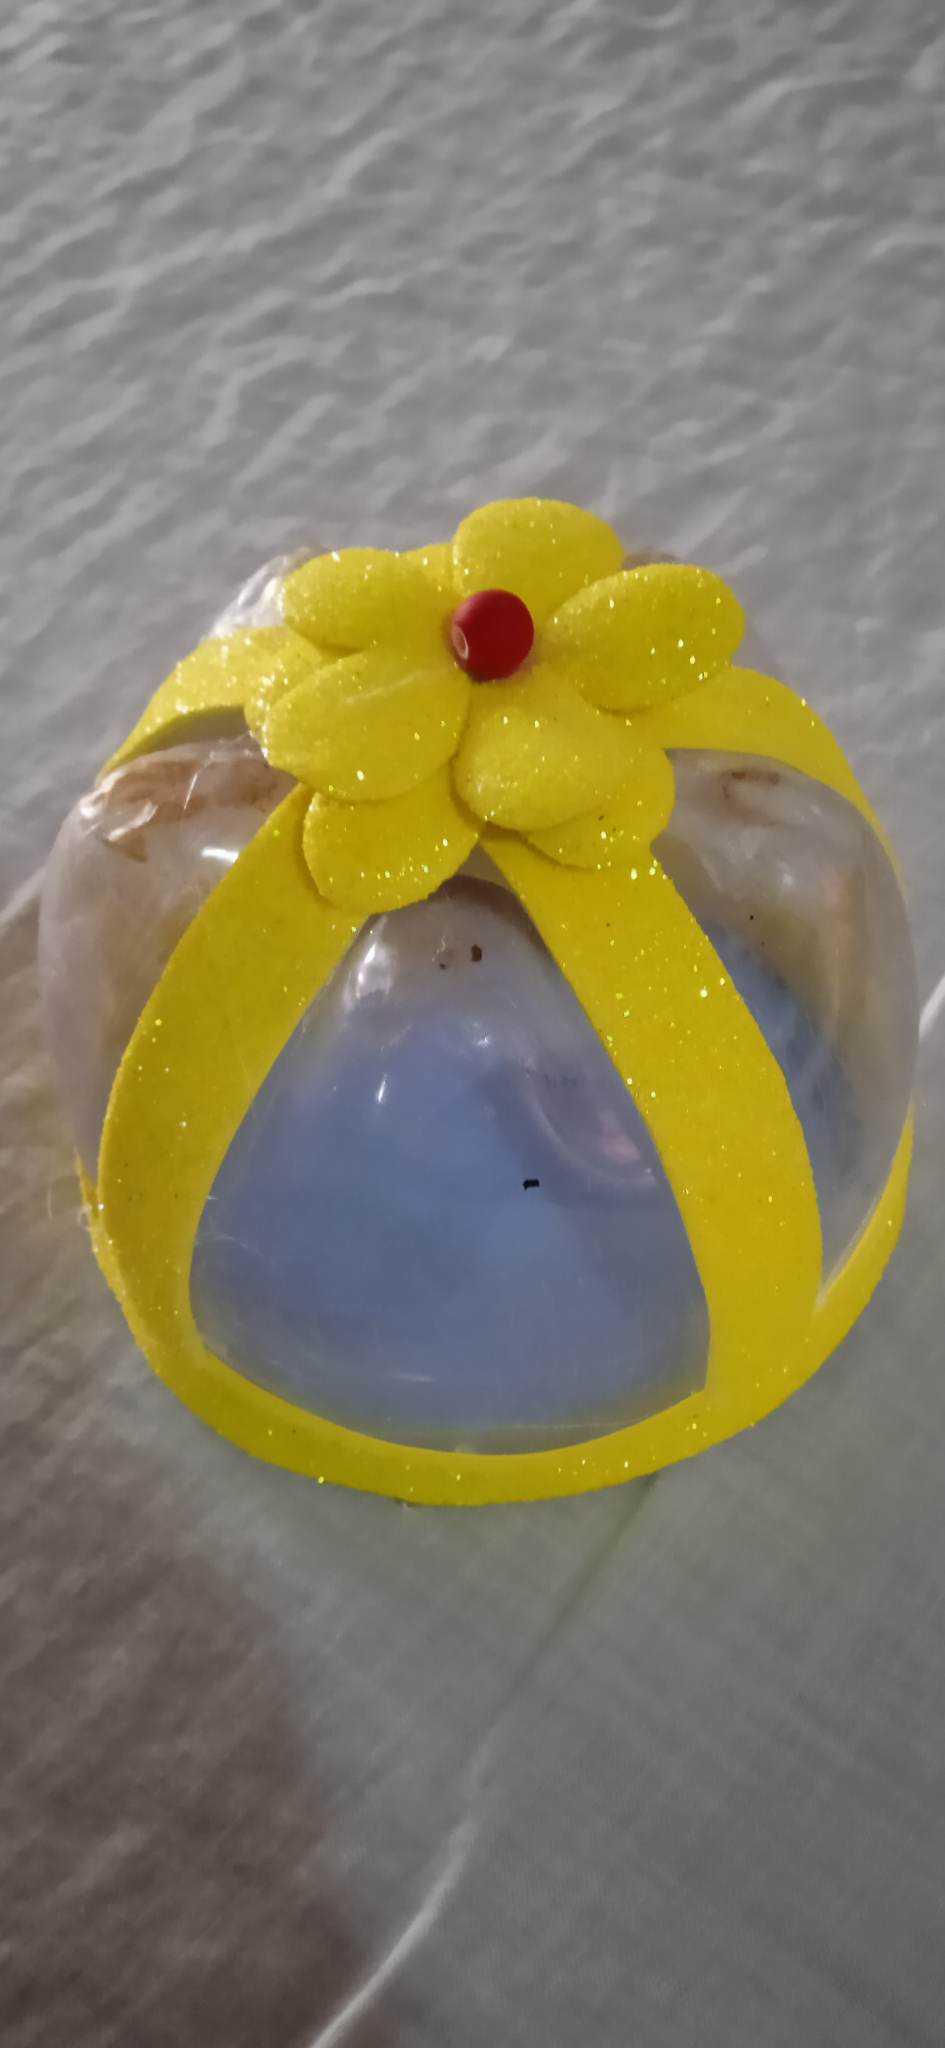
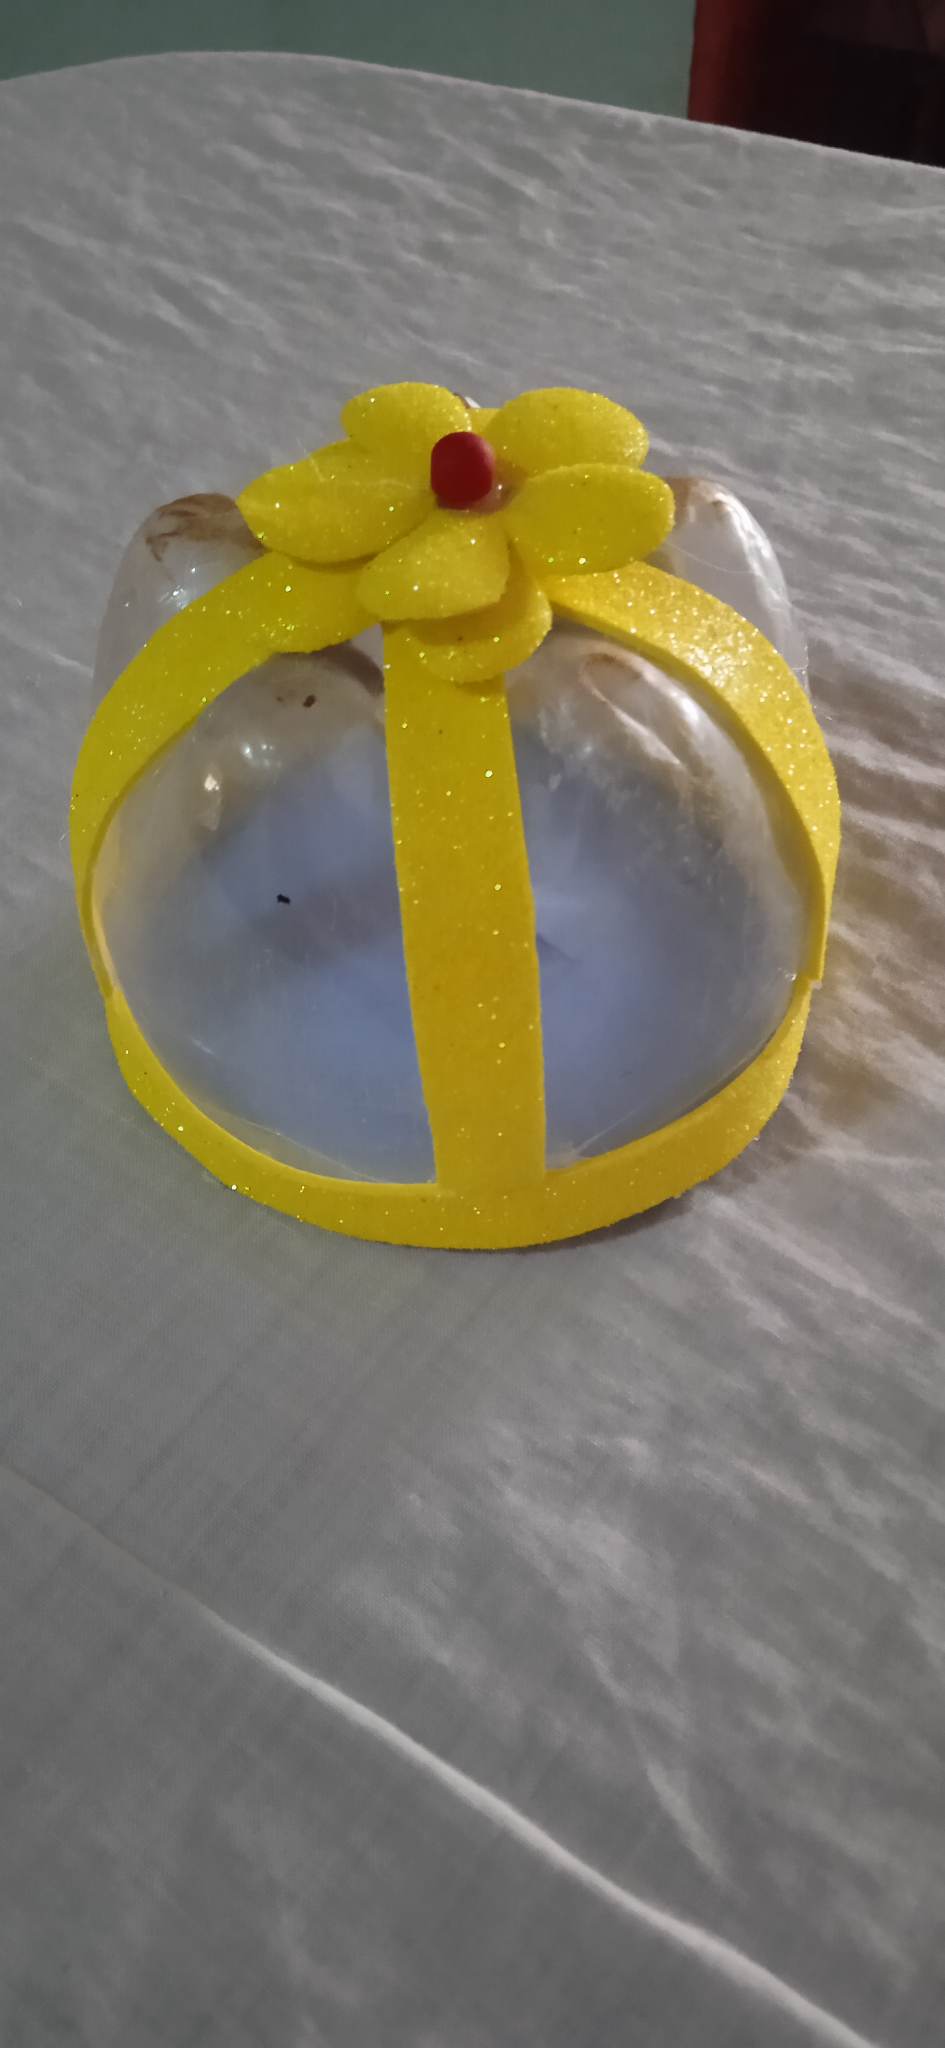
- Paso 5: Luego colocamos las flores en una plancha caliente para darle un poco más de forma, las pegamos con silicón colocándolas una encima de la otra, pegamos una pega pepita de color rojo en el centro de la flor y por último la pegamos en la parte de arriba del obsequio.
- Step 5: Then we place the flowers on a hot plate to give them a little more shape, we glue them with silicone placing them one on top of the other, we glue a red nugget in the center of the flower and finally we glue it on the top of the gift.

.jpg)
0
0
0.000
Congratulations, your post has been upvoted by @dsc-r2cornell, which is the curating account for @R2cornell's Discord Community.
Thank you for your support
¡Felicidades! Esta publicación obtuvo upvote y fue compartido por @la-colmena, un proyecto de Curación Manual para la comunidad hispana de Hive que cuenta con el respaldo de @curie.
Si te gusta el trabajo que hacemos, te invitamos a darle tu voto a este comentario y a votar como testigo por La Colmena.
Si quieres saber más sobre nuestro proyecto, te invitamos a acompañarnos en nuestro servidor de Discord.
Muchas gracias
Muchas gracias