[ESP-ENG] Confeccionando un lindo porta tapabocas | Making a nice mouthpiece holder
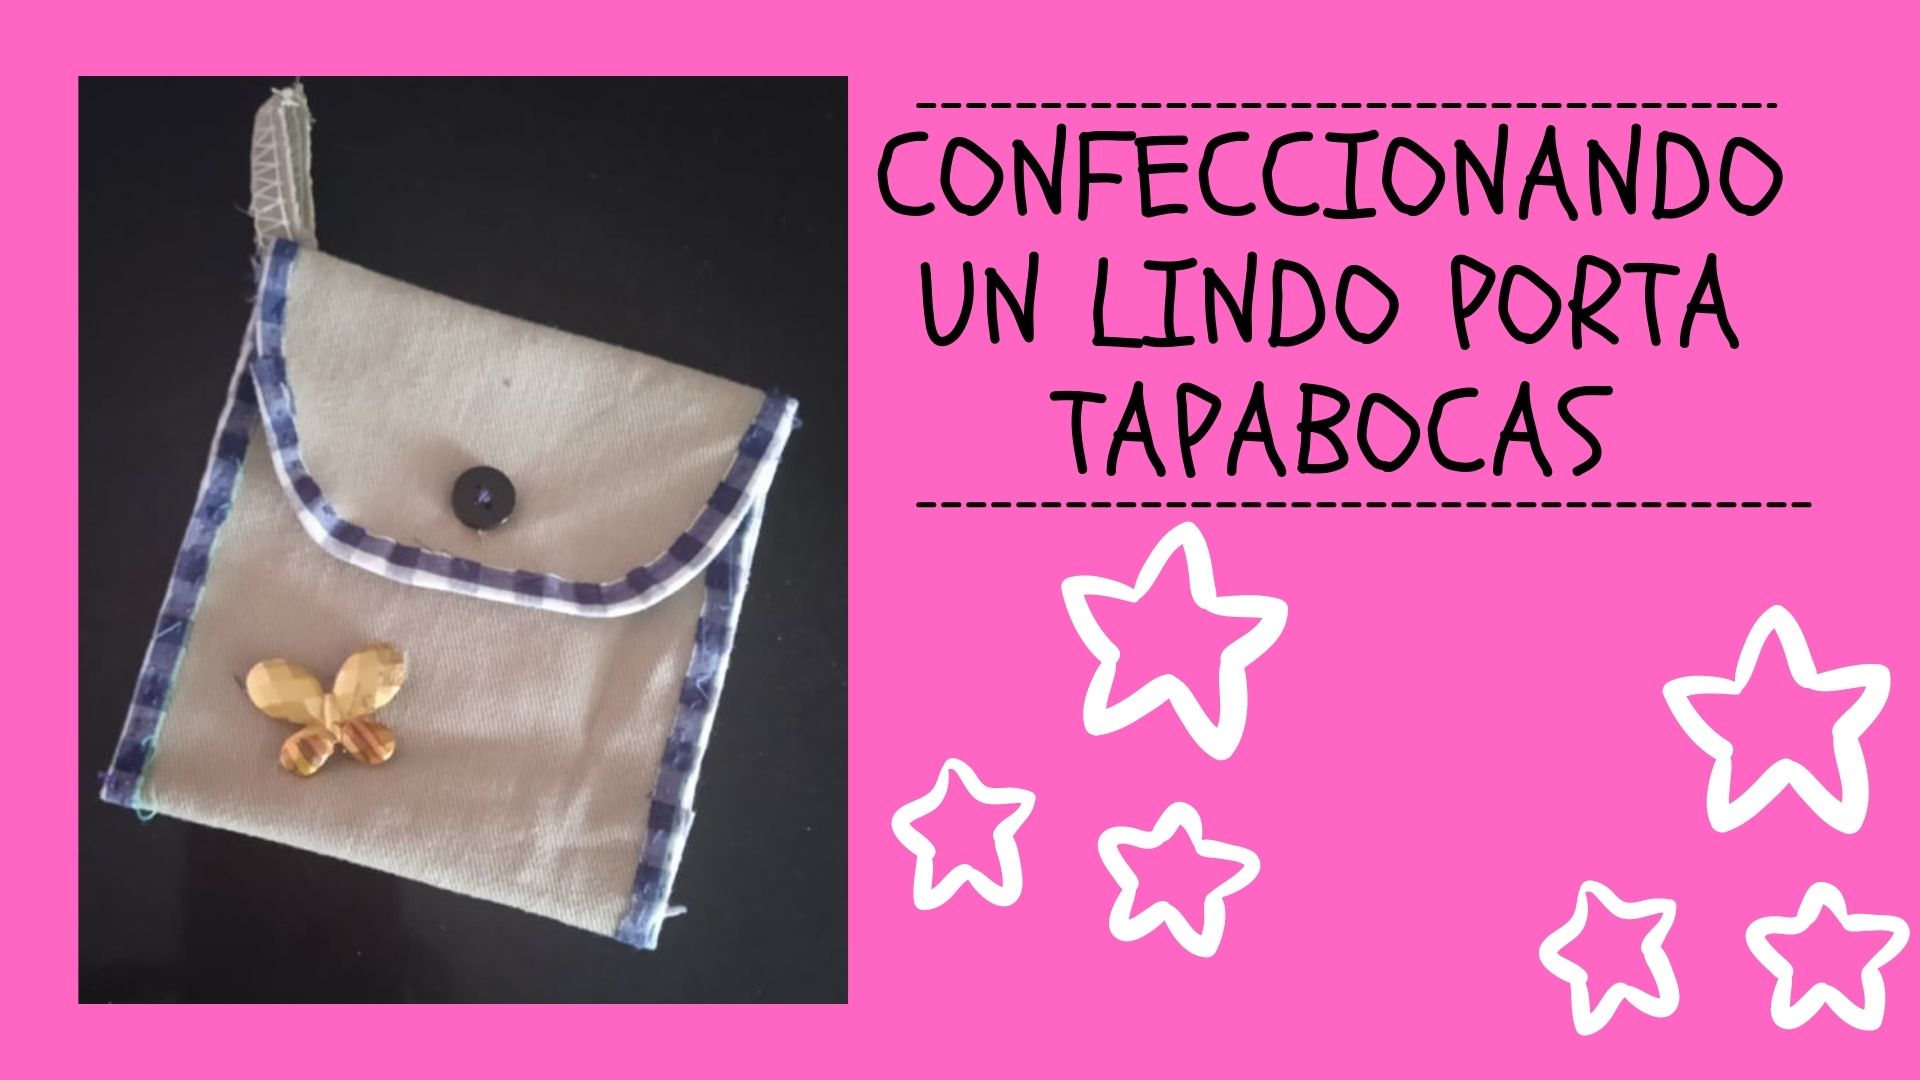
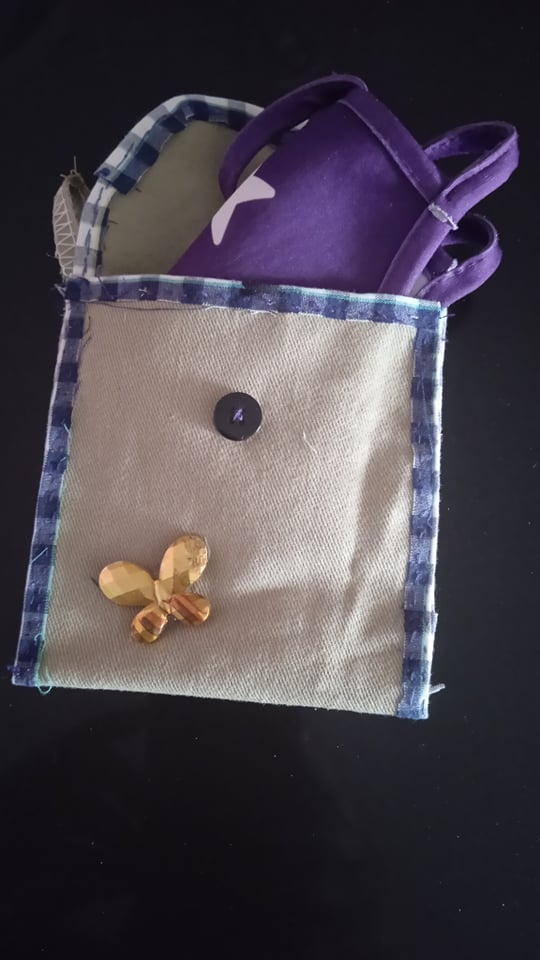
I hope you are well, once again I am pleased to be sharing with you, this time I made a nice mouth guard holder made with scraps of fabric, sometimes we carry our mouth guards inside the bag and somehow or another way they get dirty inside it, for example I usually always take more than 1 mouth guard when I go to work, this because sometimes I lose it, or sometimes I drop it on the floor and it gets dirty, and of course I have to change it, then it is always good to have a reserve and what better way than to carry them inside a mouth guard, as you all know I have a son who plays soccer, and sometimes travels to other places to play, so this mouth guard holder will be of good use for him, as I will place inside, several clean mouth guards apart from the one that my son will wear, here is the step by step.
.jpg)
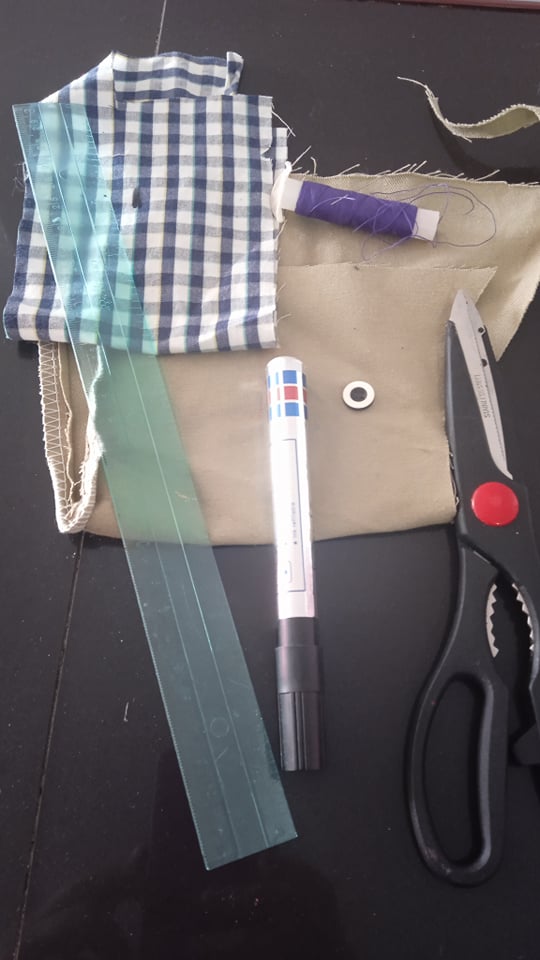
- Los materiales a utilizar son:
- Retazos de tela.
- Regla.
- Marcador.
- Botón.
- Hilo de coser.
- Aguja de coser.
- Regla.
- Tijera.
- The materials to be used are:
- Fabric scraps.
- Ruler.
- Marker.
- Button.
- Sewing thread.
- Sewing needle.
- Ruler.
- Scissors.
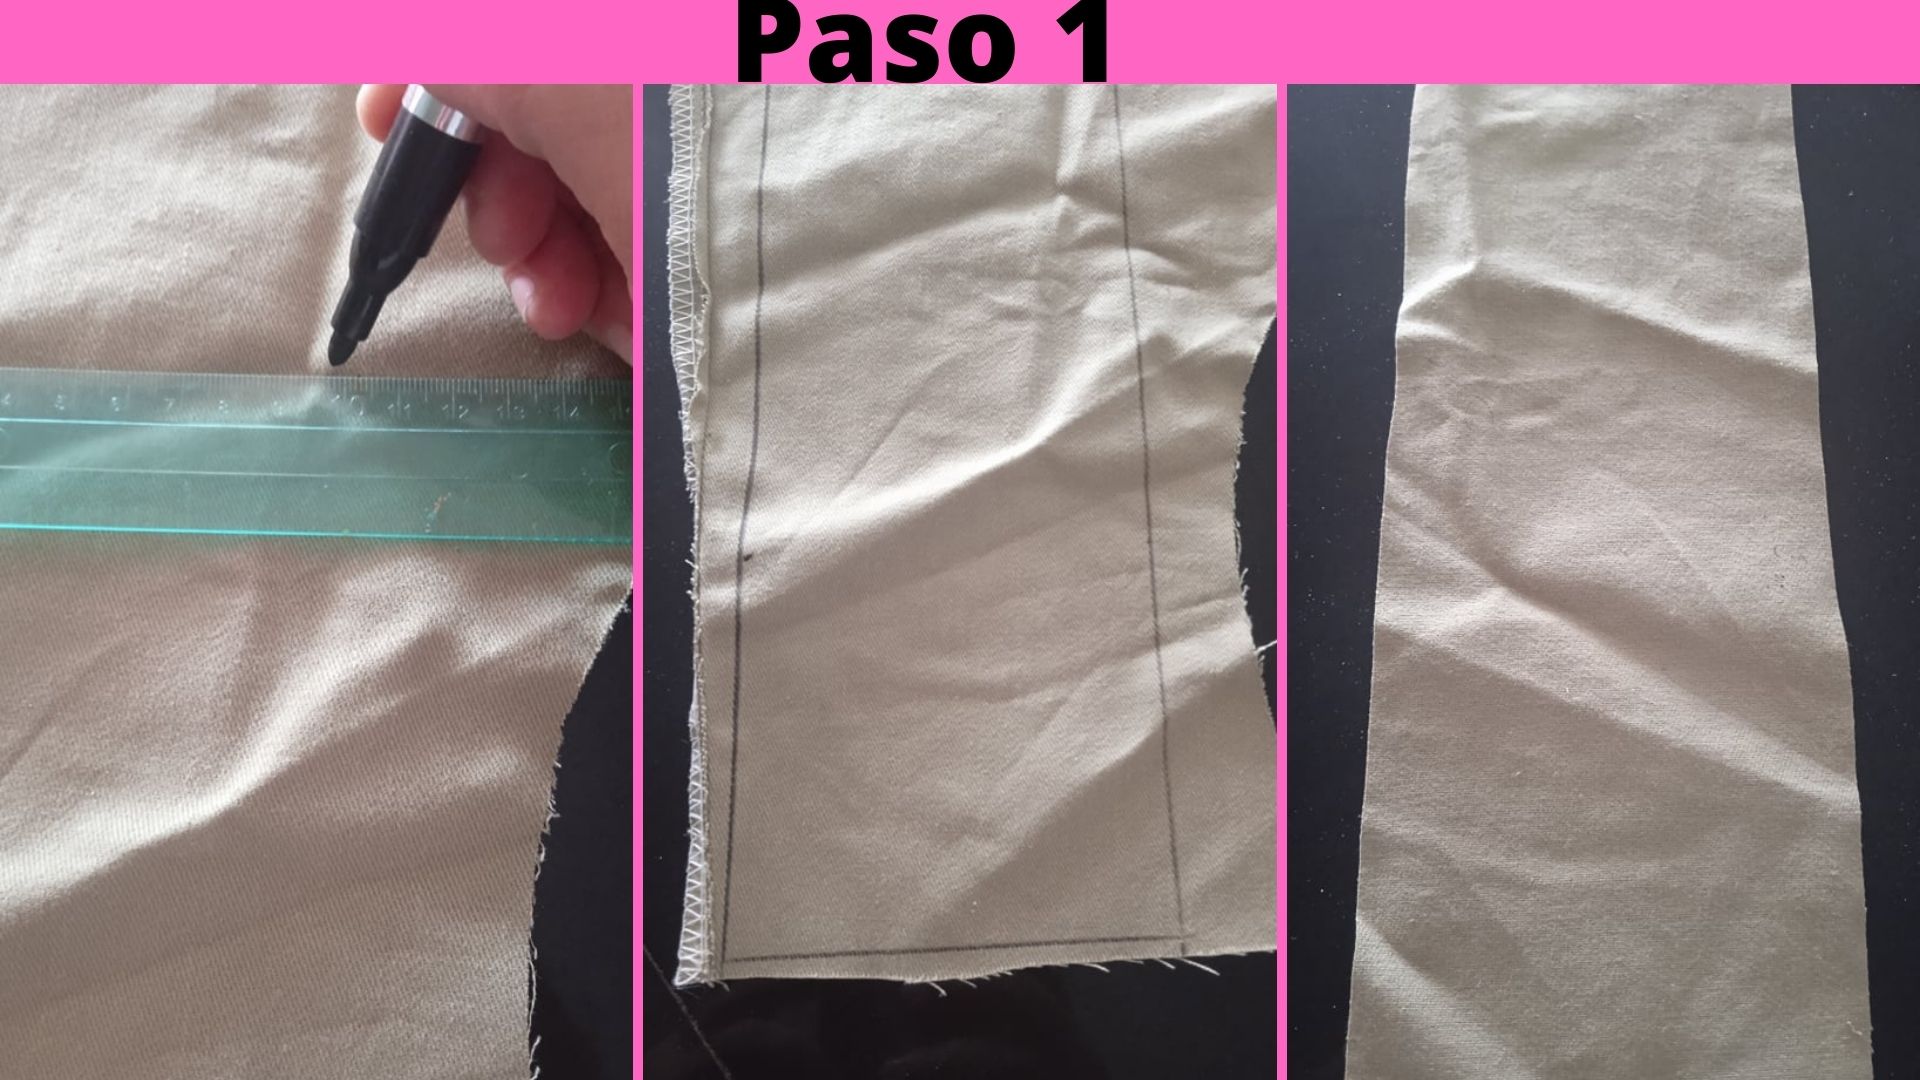
- Paso 1: Primero marcamos las medidas en el retazo de tela, en mí caso fueron 25 cm de largo por 10 cm de ancho, una vez marcadas las medidas, procedemos a recortar.
- Step 1: First we mark the measurements on the piece of fabric, in my case they were 25 cm long by 10 cm wide, once the measurements are marked, we proceed to cut out.
.jpg)
- Paso 2: Recortamos una tira de otro retazo de tela de apróximadamente 1 cm y la cosemos por toda la orilla del porta tapabocas, hasta terminarlo por completo, como muestra la tercera imágen.
- Step 2: Cut a strip of another piece of fabric of approximately 1 cm and sew it all around the edge of the mouthpiece holder, until it is completely finished, as shown in the third image.
.jpg)
- Paso 3: Cosidas las orillas, doblamos un poco más de la mitad, y cosemos por toda la orilla, luego con el marcador marcamos y hacemos un pequeño ojal con la tijera.
- Step 3: Once the edges are sewn, we fold a little more than halfway, and sew along the edge, then with the marker we mark and make a small buttonhole with the scissors.
.jpg)
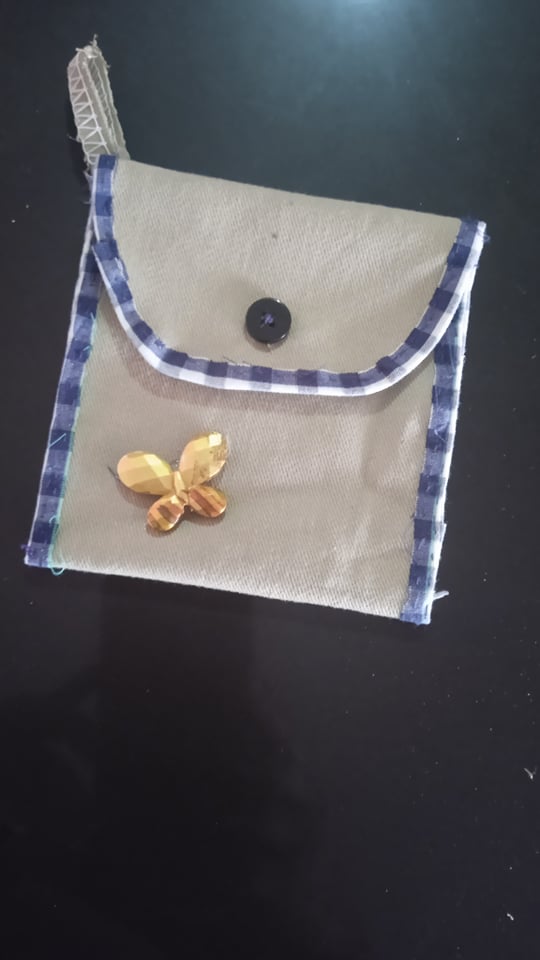
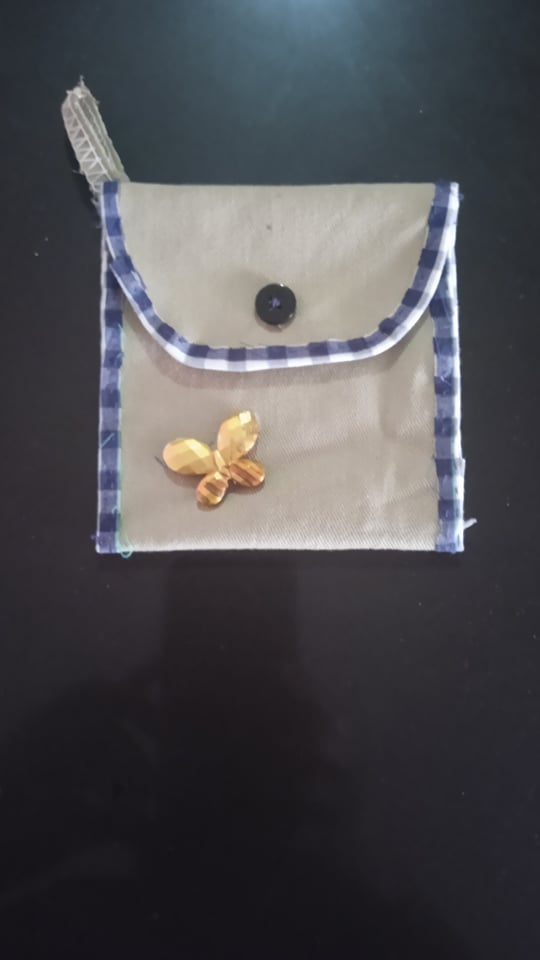
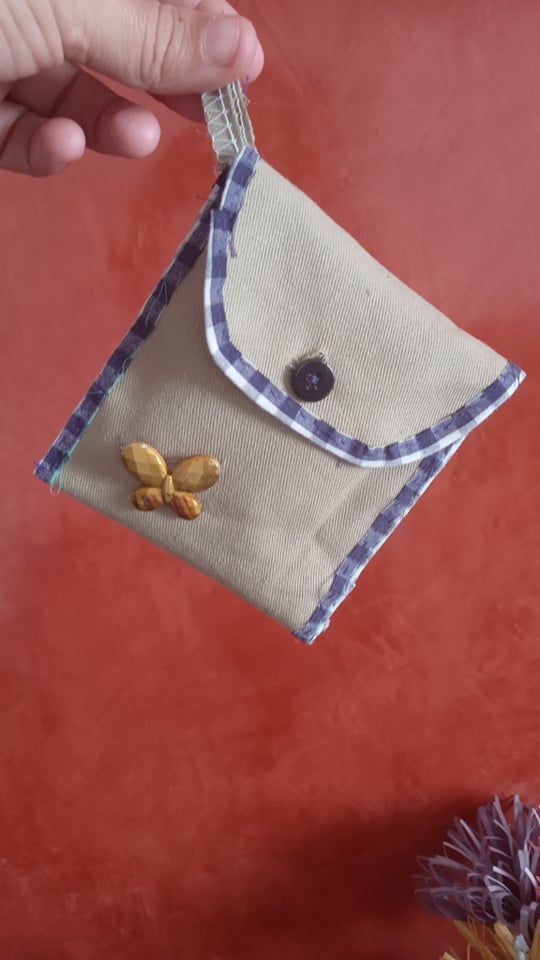
- Paso 4: Luego cosemos el botón, si tienes alguna costura de uno de los retazos, también lo puedes coser en un extremo del porta tapabocas, y luego pegamos cualquier adorno para decorar, yo utilicé una linda mariposa para darle el toque final.
- Step 4: Then we sew on the button, if you have a seam from one of the scraps, you can also sew it on one end of the mouthpiece holder, and then we glue any embellishment to decorate, I used a cute butterfly to give it the final touch.

0
0
0.000
Lovely thanks for sharing 😊
Thanks to you for commenting, best regards.
Thank you for sharing this amazing post on HIVE!
Your content got selected by our fellow curator @rezoanulvibes & you just received a little thank you via an upvote from our non-profit curation initiative!
You will be featured in one of our recurring curation compilations and on our pinterest boards! Both are aiming to offer you a stage to widen your audience within and outside of the DIY scene of hive.
Join the official DIYHub community on HIVE and show us more of your amazing work and feel free to connect with us and other DIYers via our discord server: https://discord.gg/mY5uCfQ !
If you want to support our goal to motivate other DIY/art/music/homesteading/... creators just delegate to us and earn 100% of your curation rewards!
Stay creative & hive on!
Thank you very much
Hey @yannet80 I’ve been trying to reach you in our discord but you haven’t responded. Please leave your post links in the #share-your-post channel and not in the #introduce-yourself channel. It’s a lot of extra work on us to try to keep the channels clean and organized and would be very helpful if you could follow the channel guidelines.
Thank you ~
Hola, muchas gracias por el comentario, para la próxima lo tomaré en cuenta, saludos.
Thank you for your attention to this :)