[ESP-ENG] Confección de una bolsa organizadora | Making of an organizer bag

It is a pleasure for me, to be again sharing with all of you, I want to share with you a nice organizer bag made with jeans fabric, they are very useful, we can store threads, scissors, tape measure, pins, elastic, in short everything is a matter of giving the use we want, let's see the step by step.
.jpg)
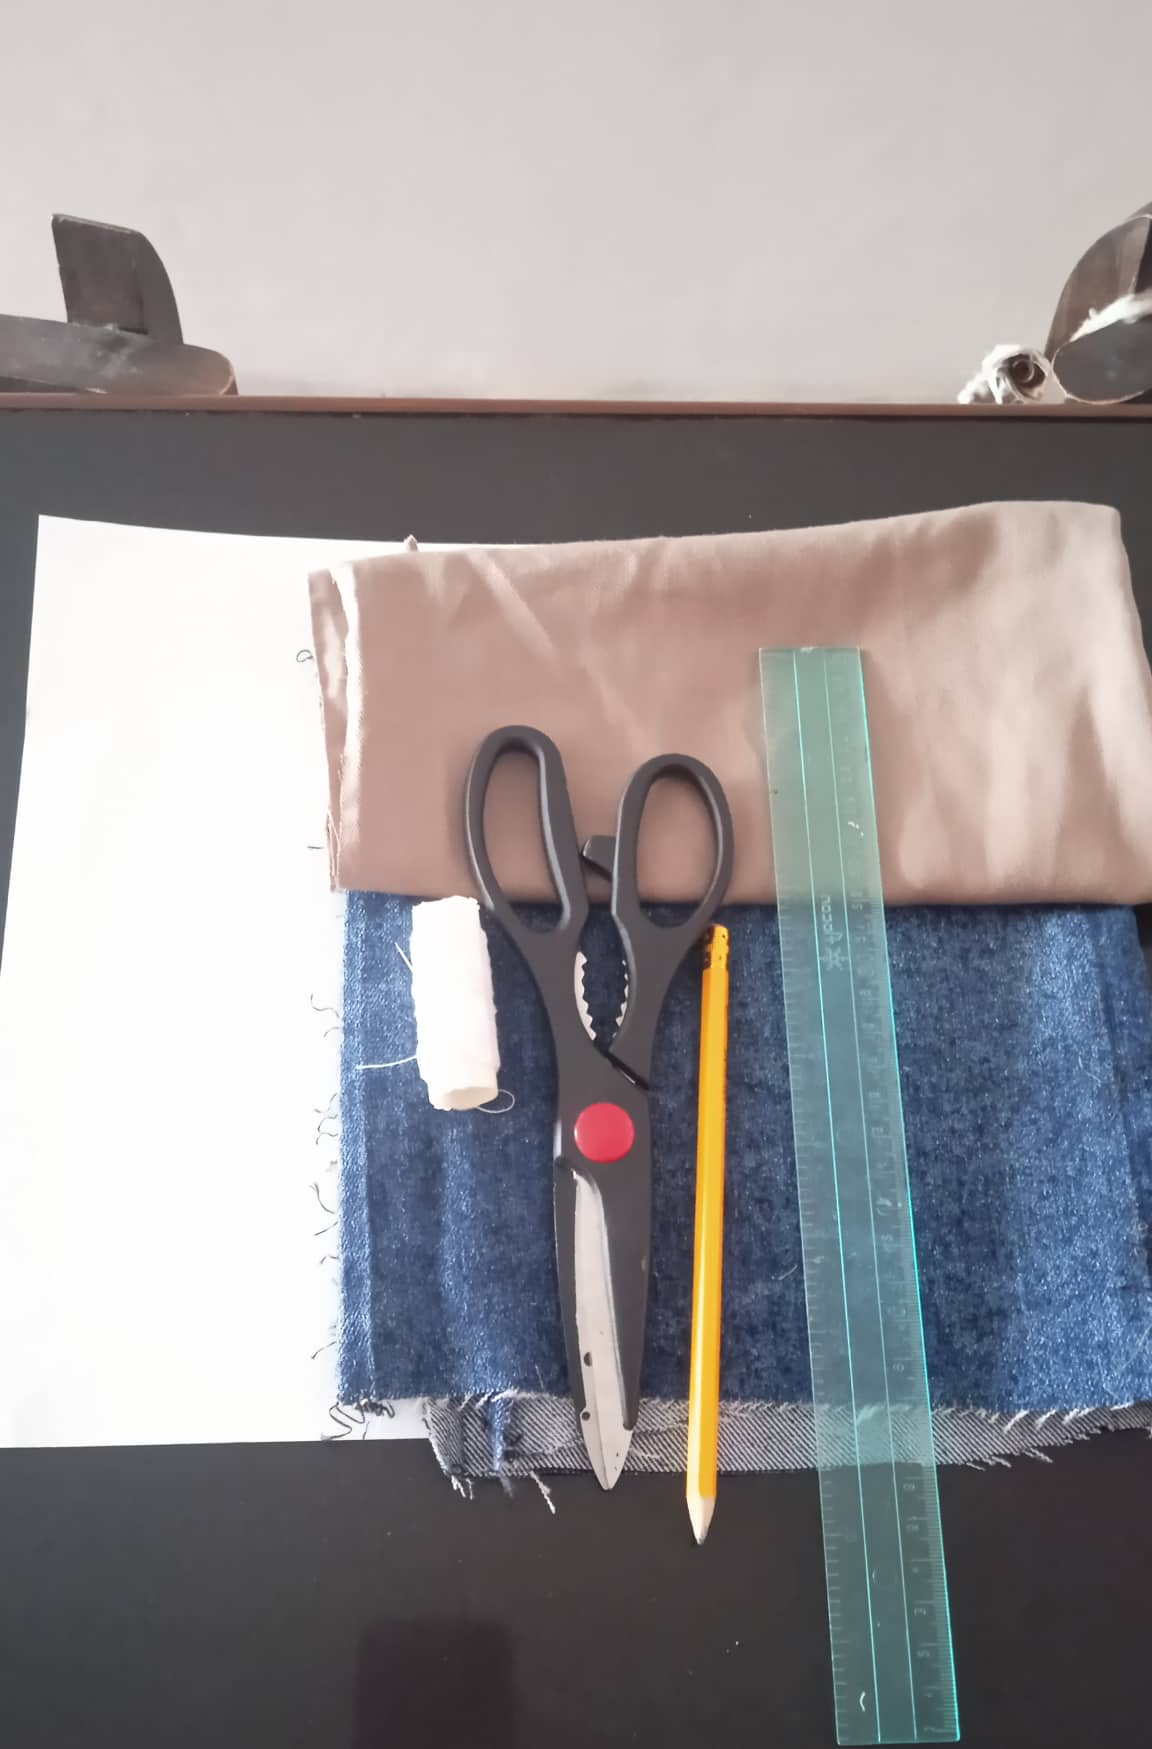
- Los materiales a utilizar son:
- Tela de jeans.
- Tela beige.
- Regla.
- Lápiz.
- Hilo y aguja de coser.
- Hoja de reciclaje.
- Tijera.
- The materials to be used are:
- Denim fabric.
- Beige fabric.
- Ruler.
- Pencil.
- Thread and sewing needle.
- Recycling sheet.
- Scissors.
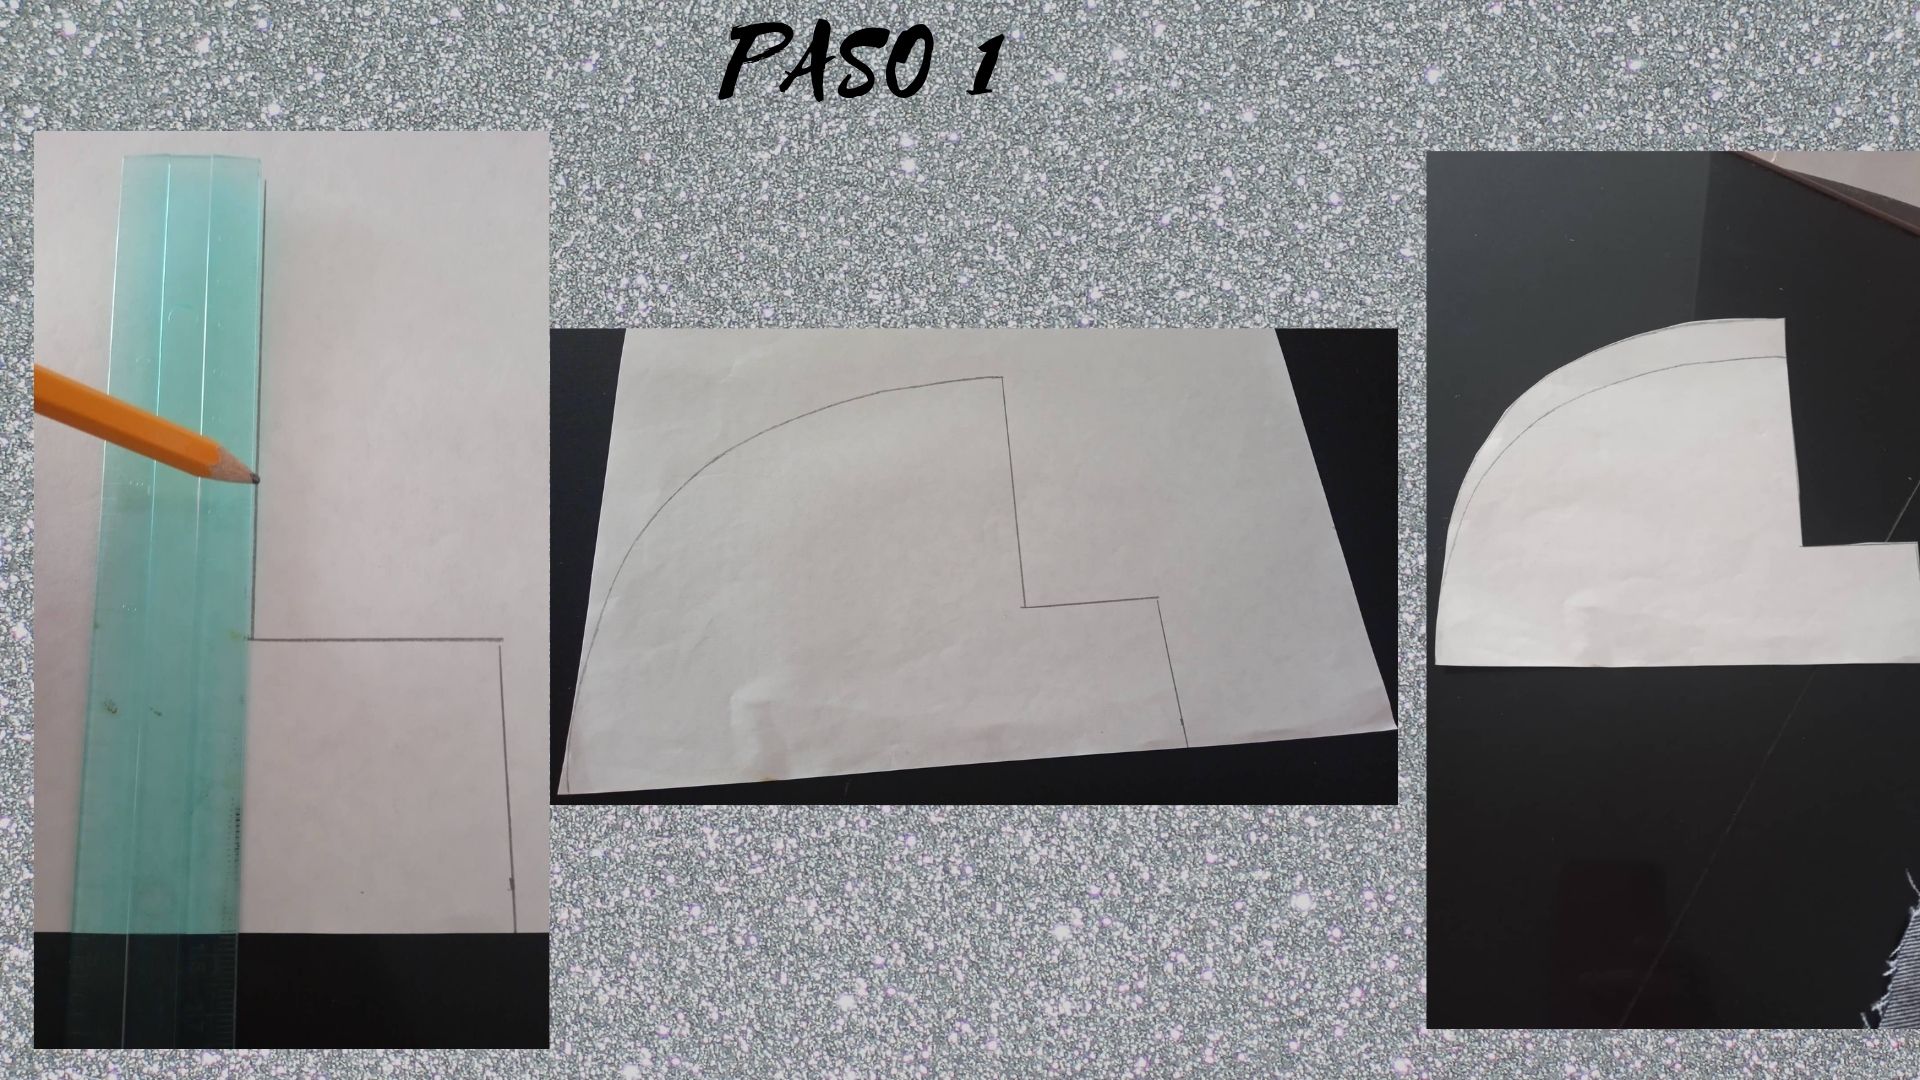
- Paso 1: Primero hacemos el patrón, la línea de abajo debe ser recta y de 20 cm de largo, luego la inclinada de 5 cm de largo, la línea que va hacía la izquierda también deberá ser de 5 cm luego la que va hacía arriba será de 12 cm y por último unimos la línea de abajo y la de arriba haciendo forma de un semicírculo.
- Step 1: First we make the pattern, the bottom line should be straight and 20 cm long, then the inclined line should be 5 cm long, the line that goes to the left should also be 5 cm long, then the one that goes up should be 12 cm long and finally we join the bottom line and the top line making a semicircle shape.
.jpg)
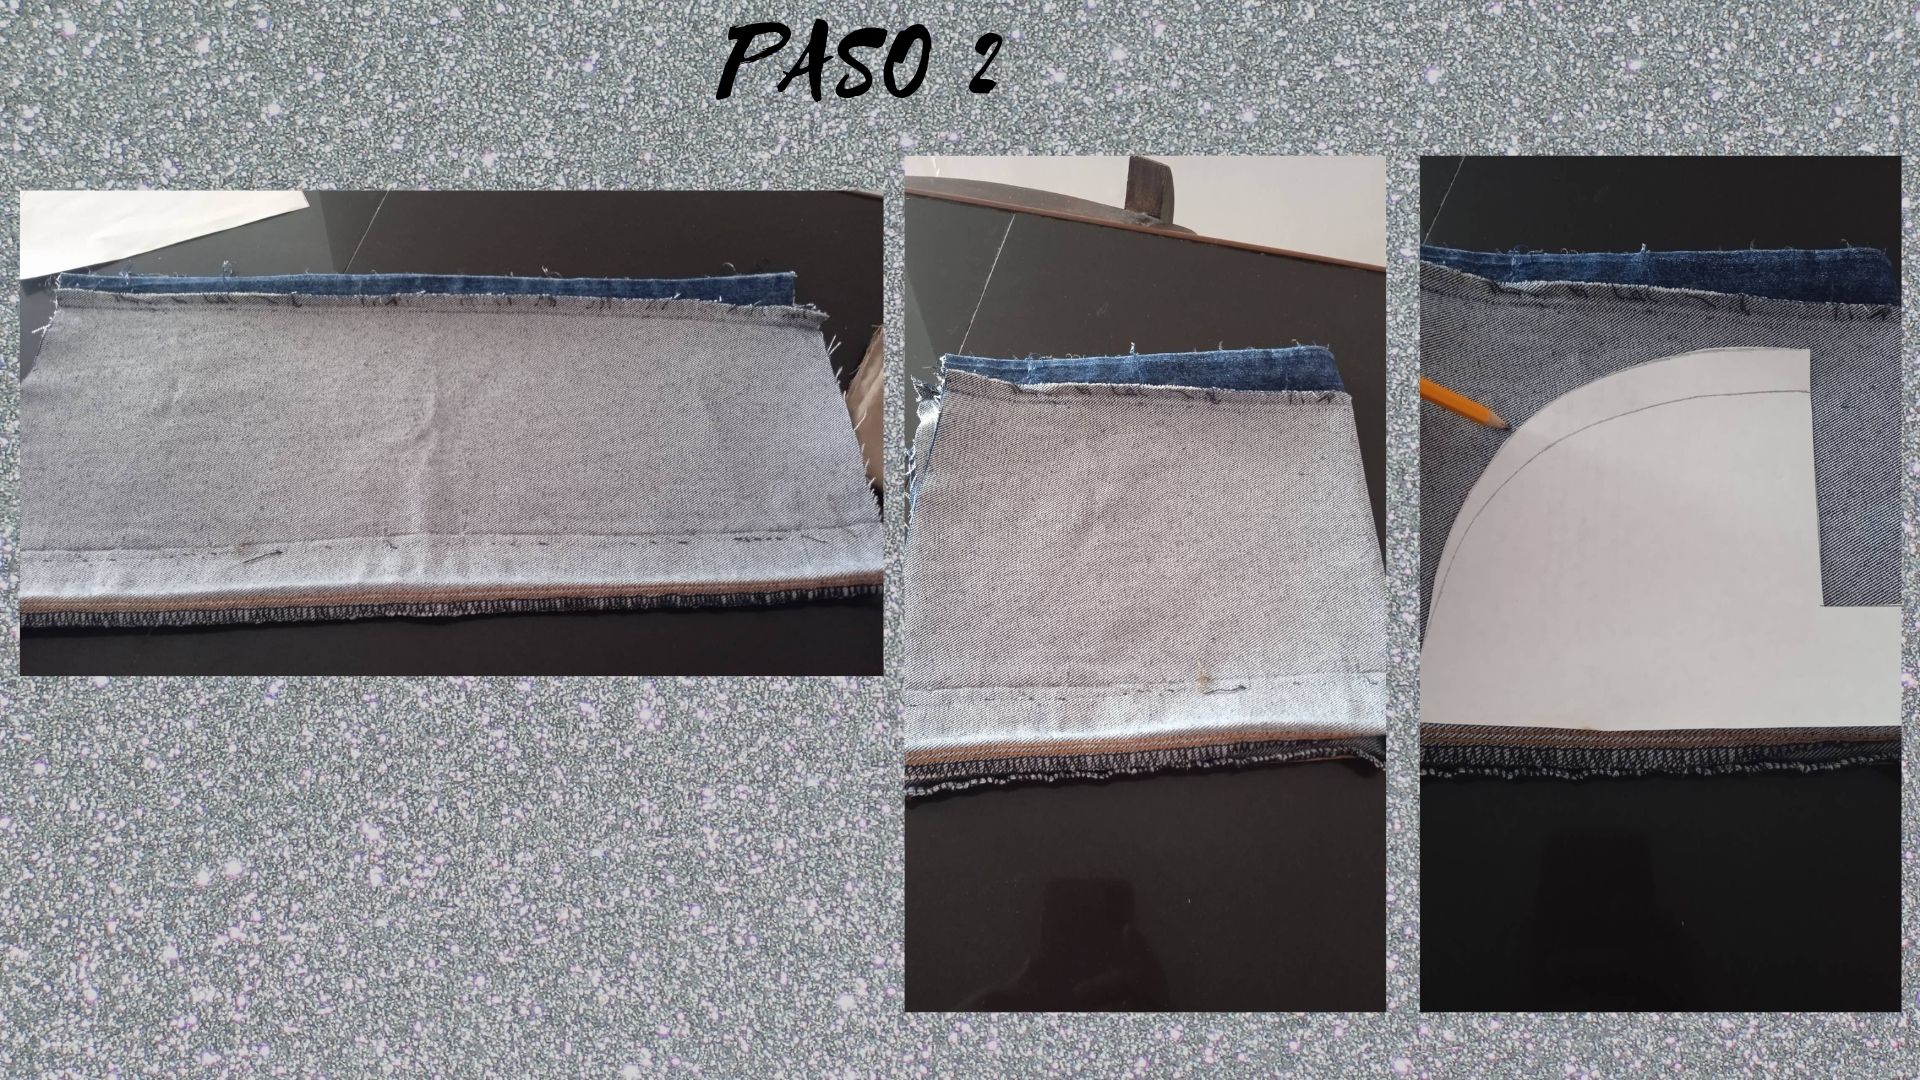
- Paso 2: Doblamos la tela de jean a la mitad, y luego a la mitad otra vez, colocamos el patrón sobre la tela y marcamos con el lápiz.
- Step 2: Fold the jean fabric in half, and then in half again, place the pattern on the fabric and mark with the pencil.
.jpg)
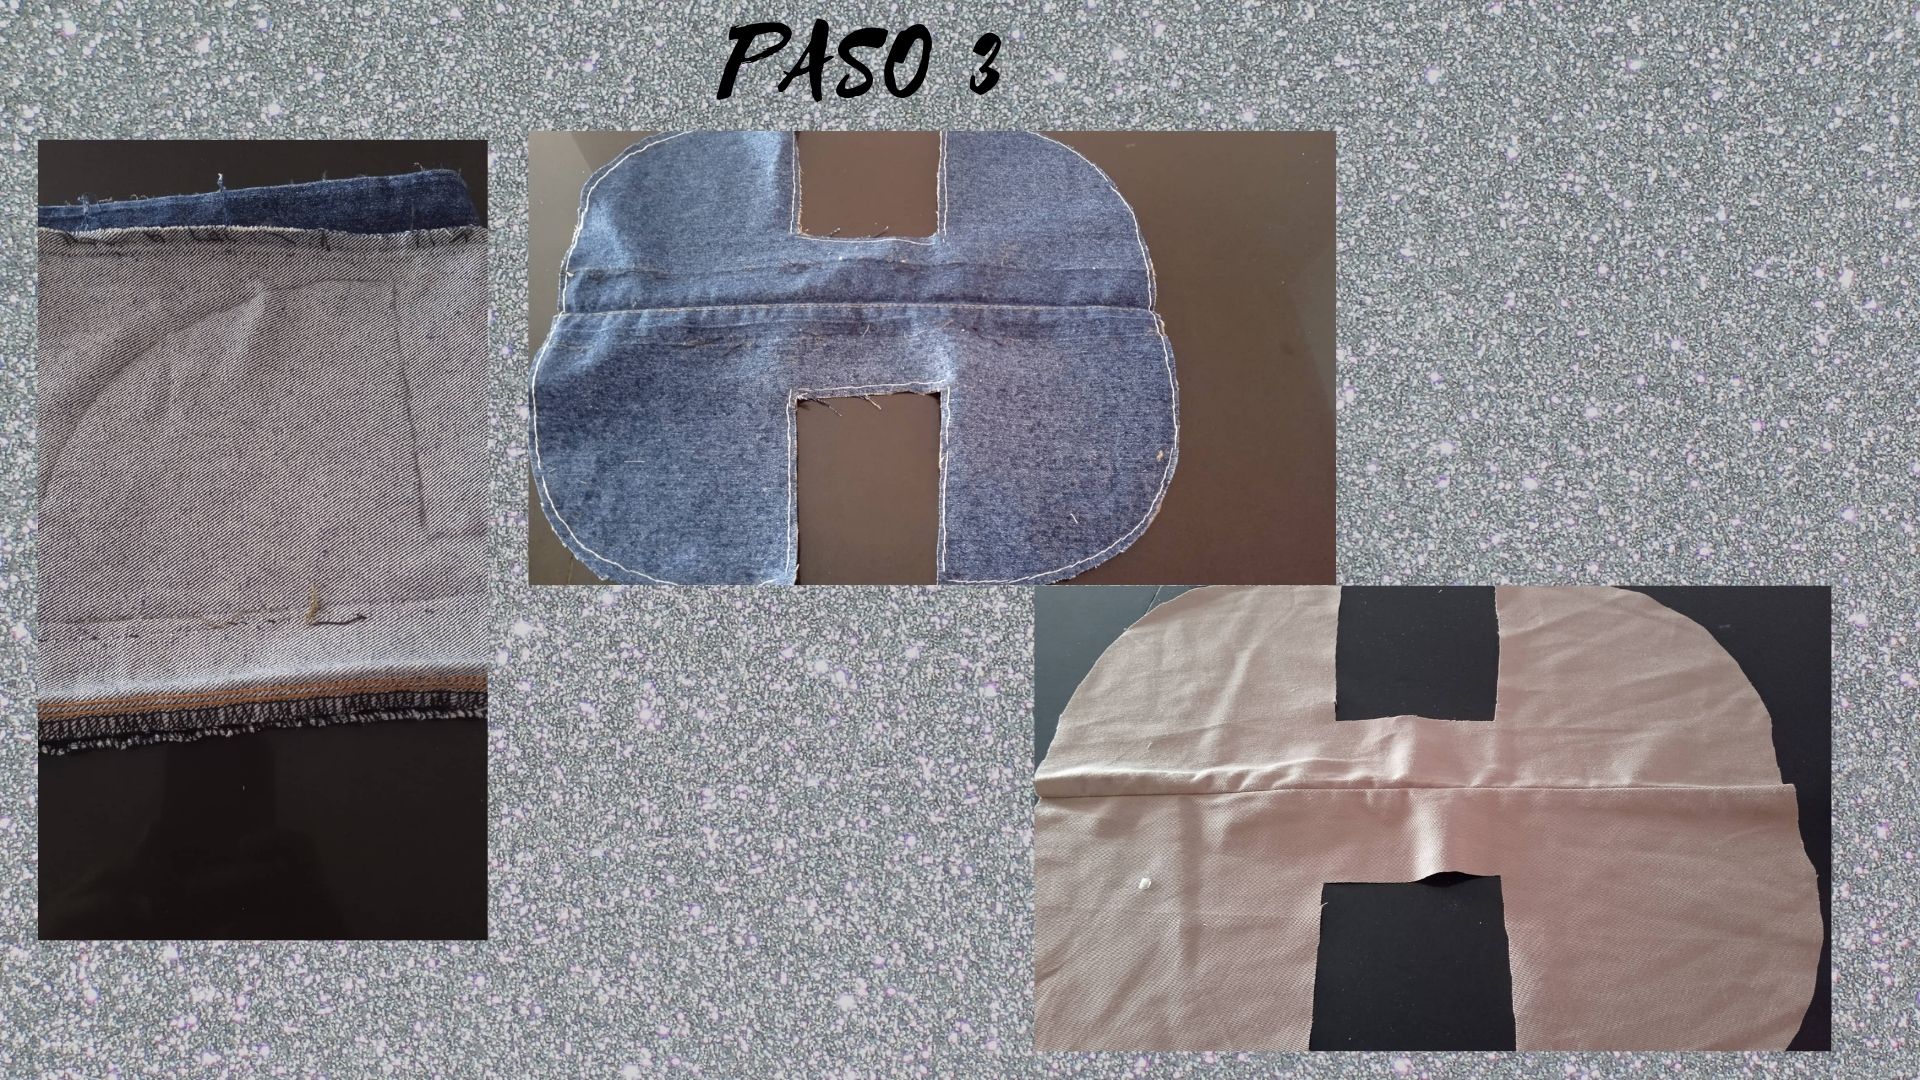
- Paso 3: Una vez marcado procedemos a recortar, cabe destacar que debemos sacar 2 partes iguales, una en la tela de jean y la otra parte en la tela de color, deberá quedar como muestra la segunda y tercera imágen.
- Step 3: Once marked we proceed to cut out, it should be noted that we must take 2 equal parts, one in the jean fabric and the other part in the colored fabric, it should be as shown in the second and third image.
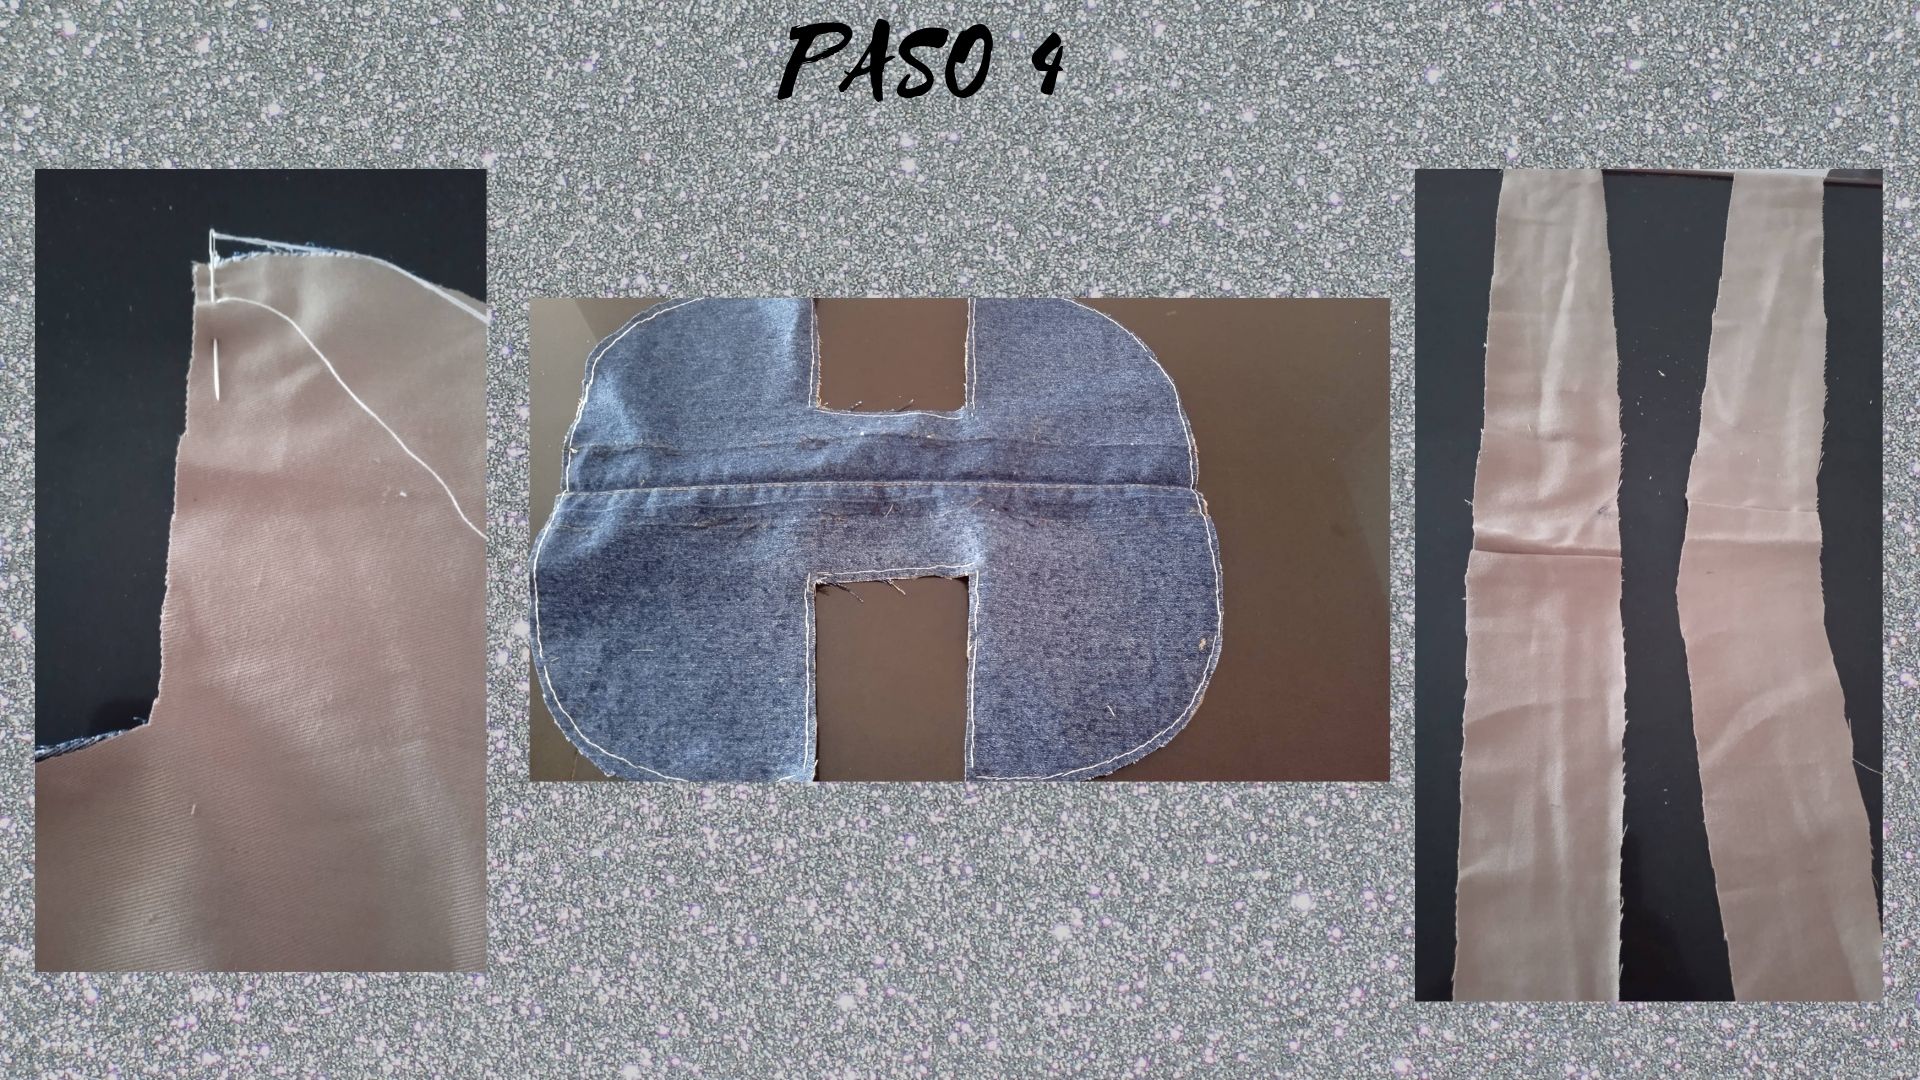
- Paso 4: Colocamos una parte sobre otra y cosemos por toda la orilla, luego recortamos dos tiras de la tela de color.
- Step 4: Place one part on top of the other and sew all around the edge, then cut out two strips of the colored fabric.
.jpg)
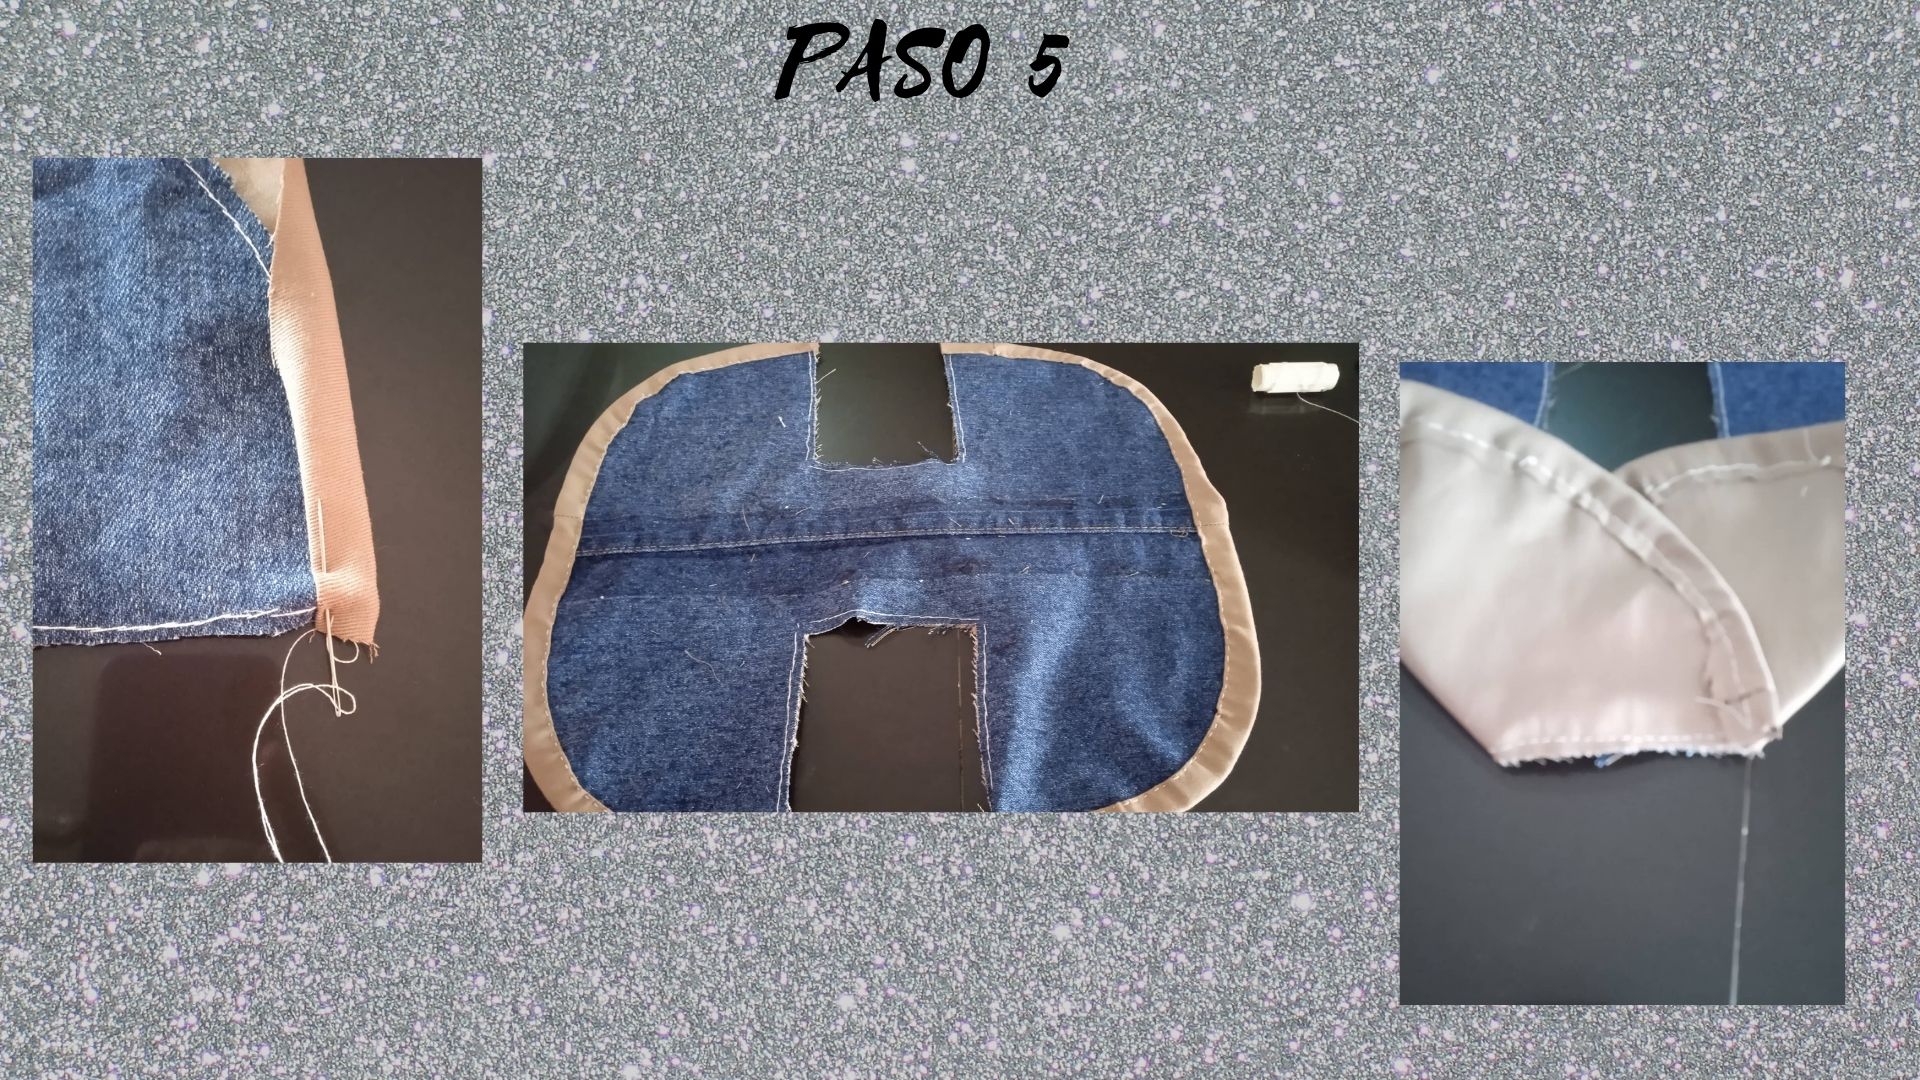
- Paso 5: Cosemos las tiras de la tela de color por toda la orilla( solo de las parte de los lados) como muestra la segunda imágen, luego comenzamos a armar la bolsa, por la parte al revés de la tela que vendría siendo la tela de color, colocamos los lateras a la base de la bolsa luego cosemos por toda la orilla de abajo.
- Step 5: We sew the strips of the colored fabric along the entire edge (only on the sides) as shown in the second image, then we start to assemble the bag, on the reverse side of the fabric that would be the colored fabric, we place the sides to the base of the bag and then sew along the entire bottom edge.
.jpg)
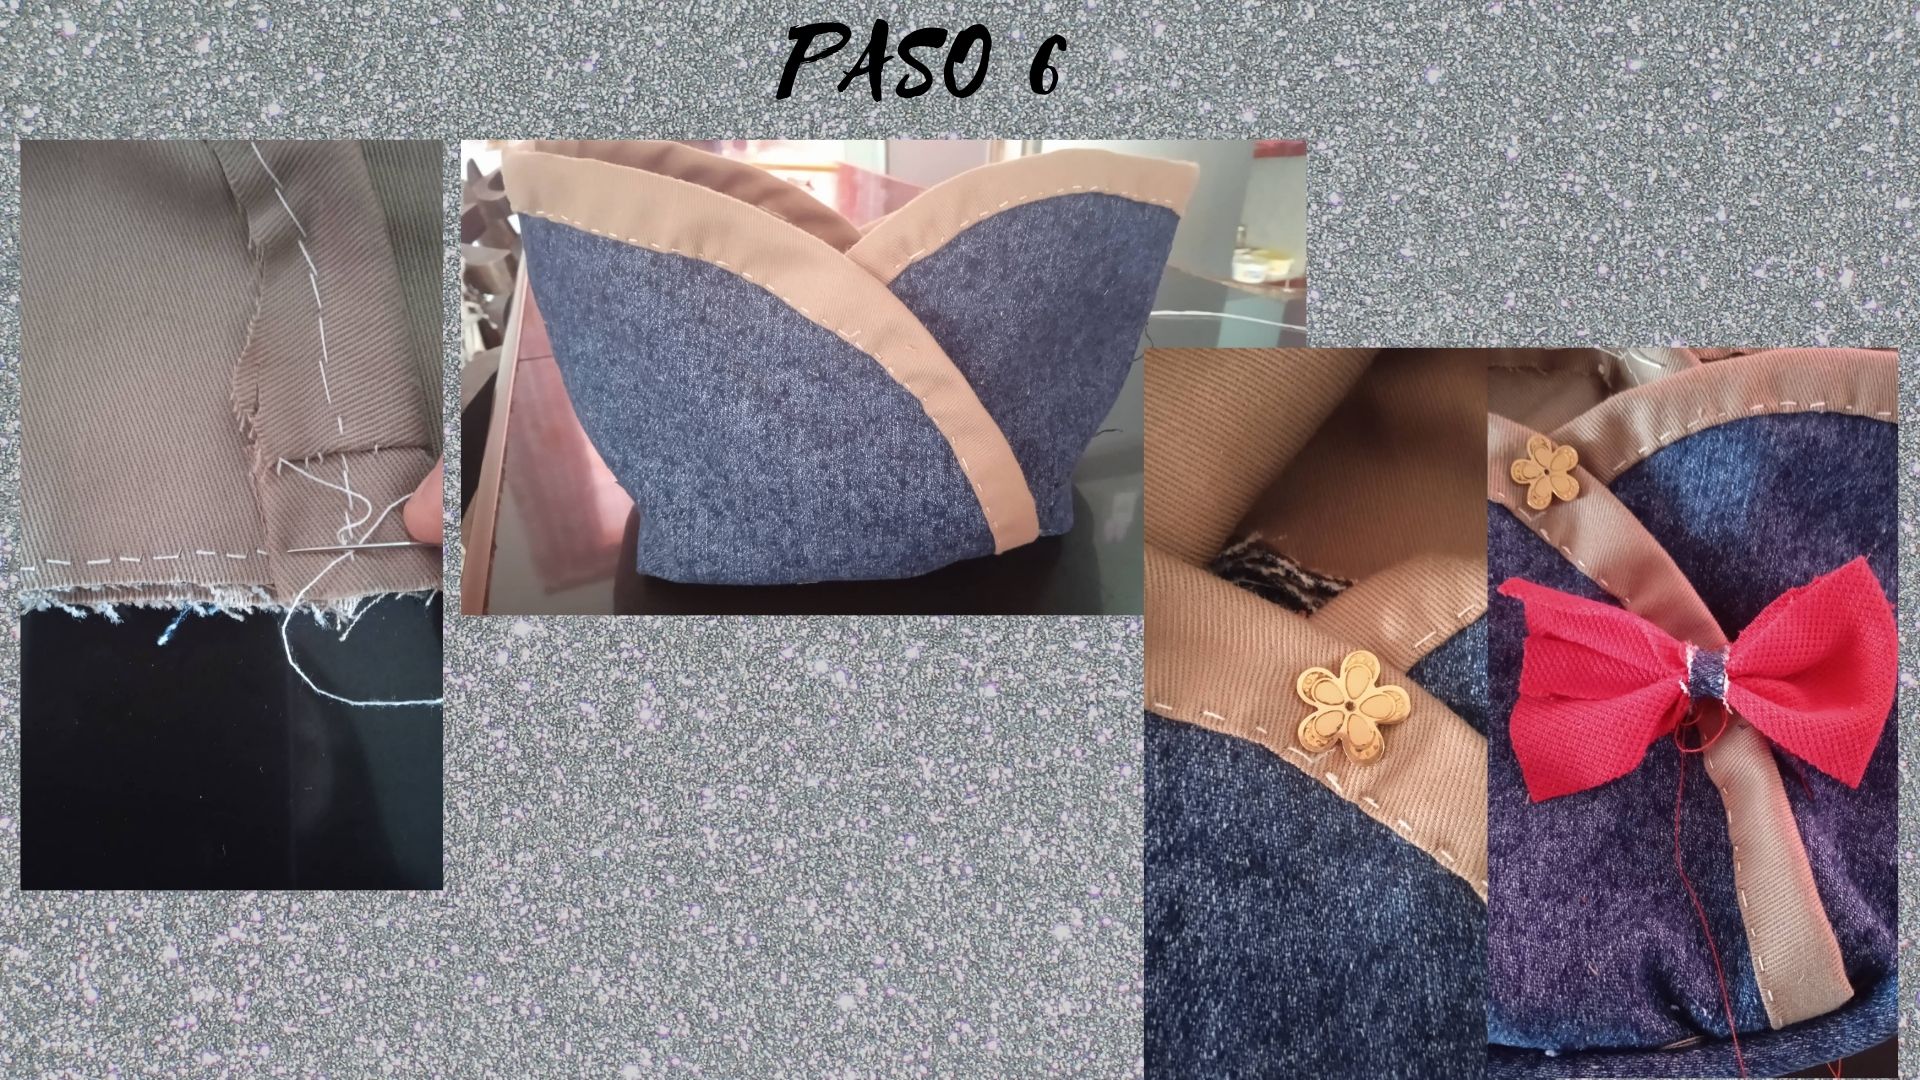
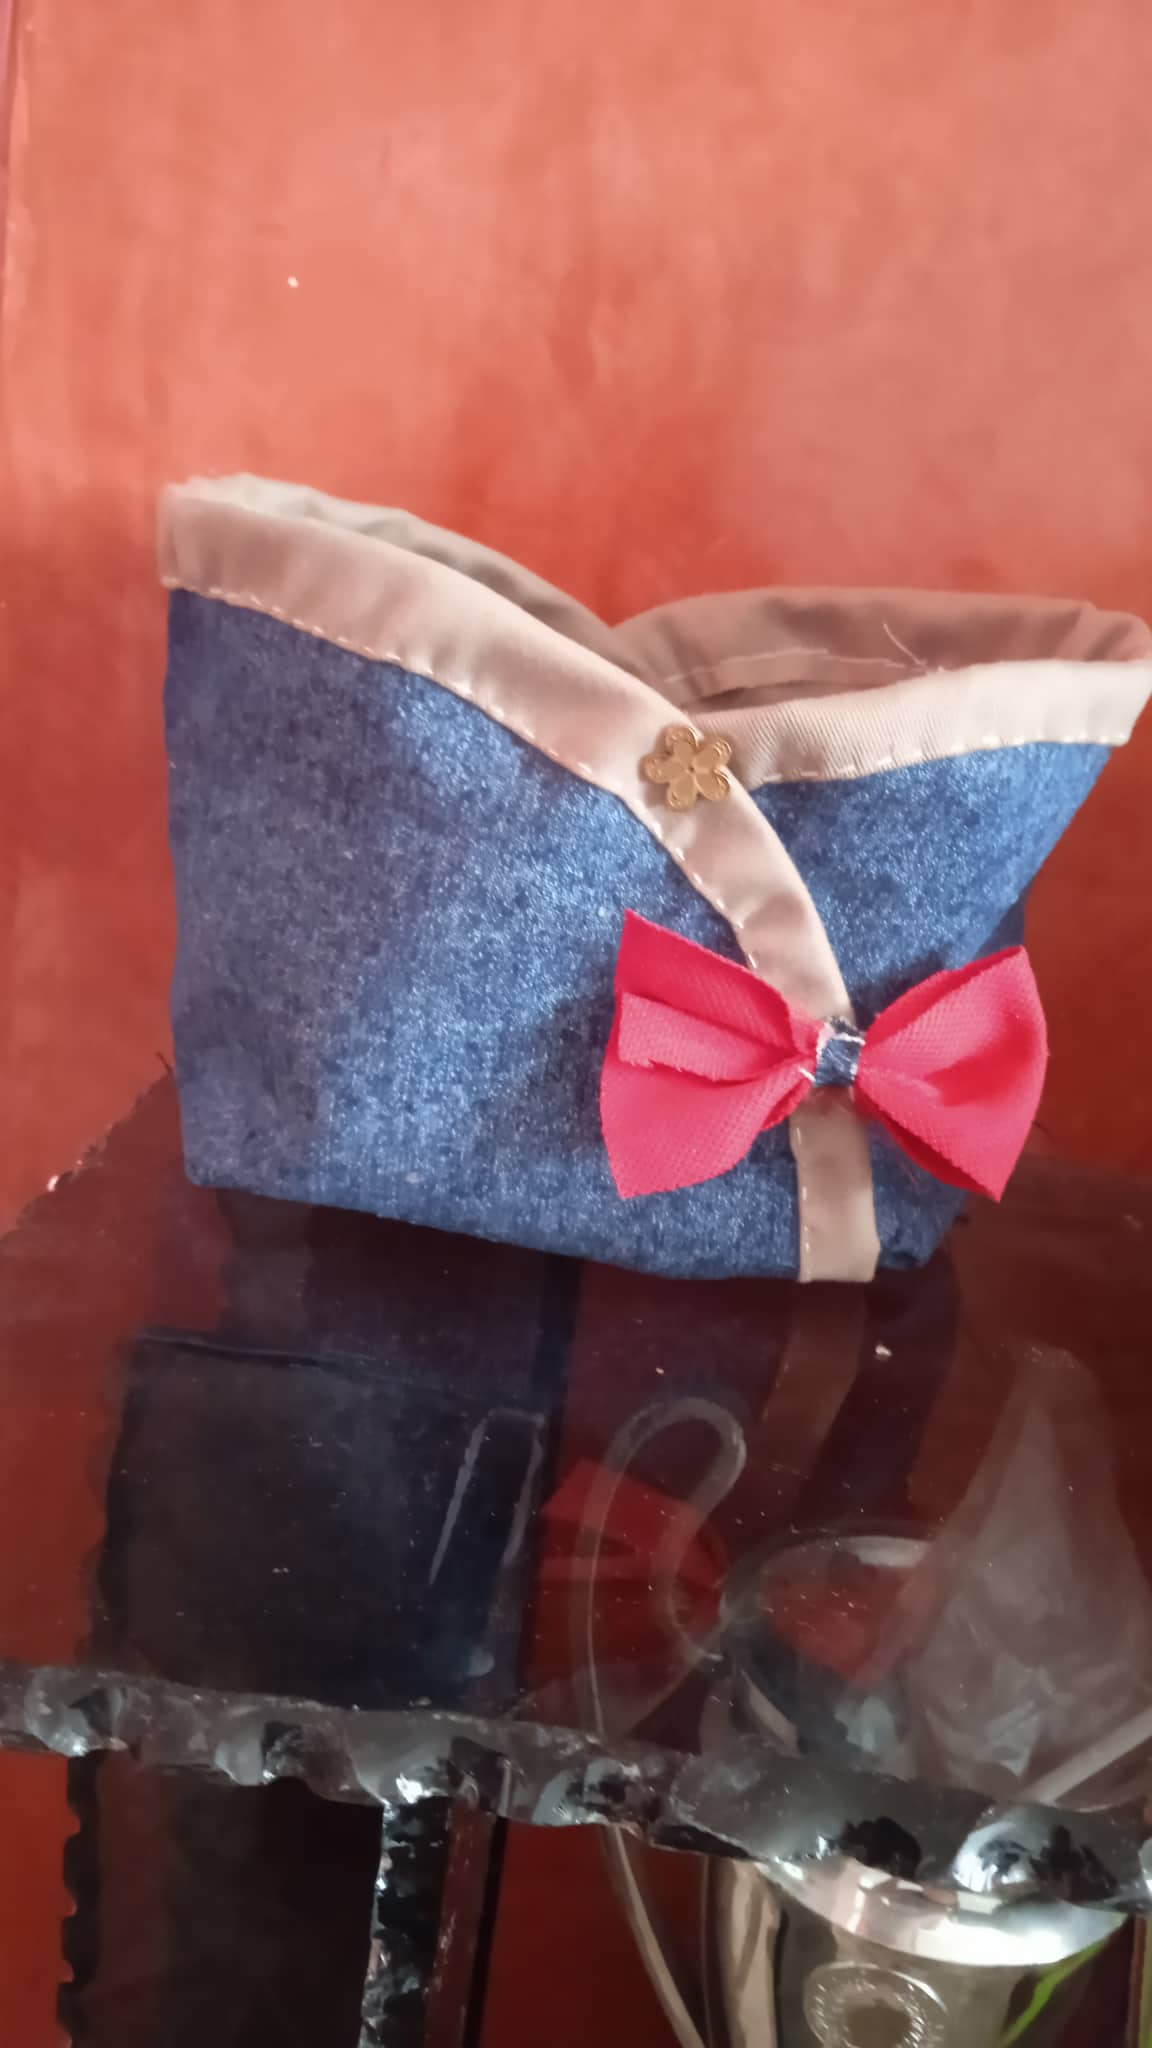
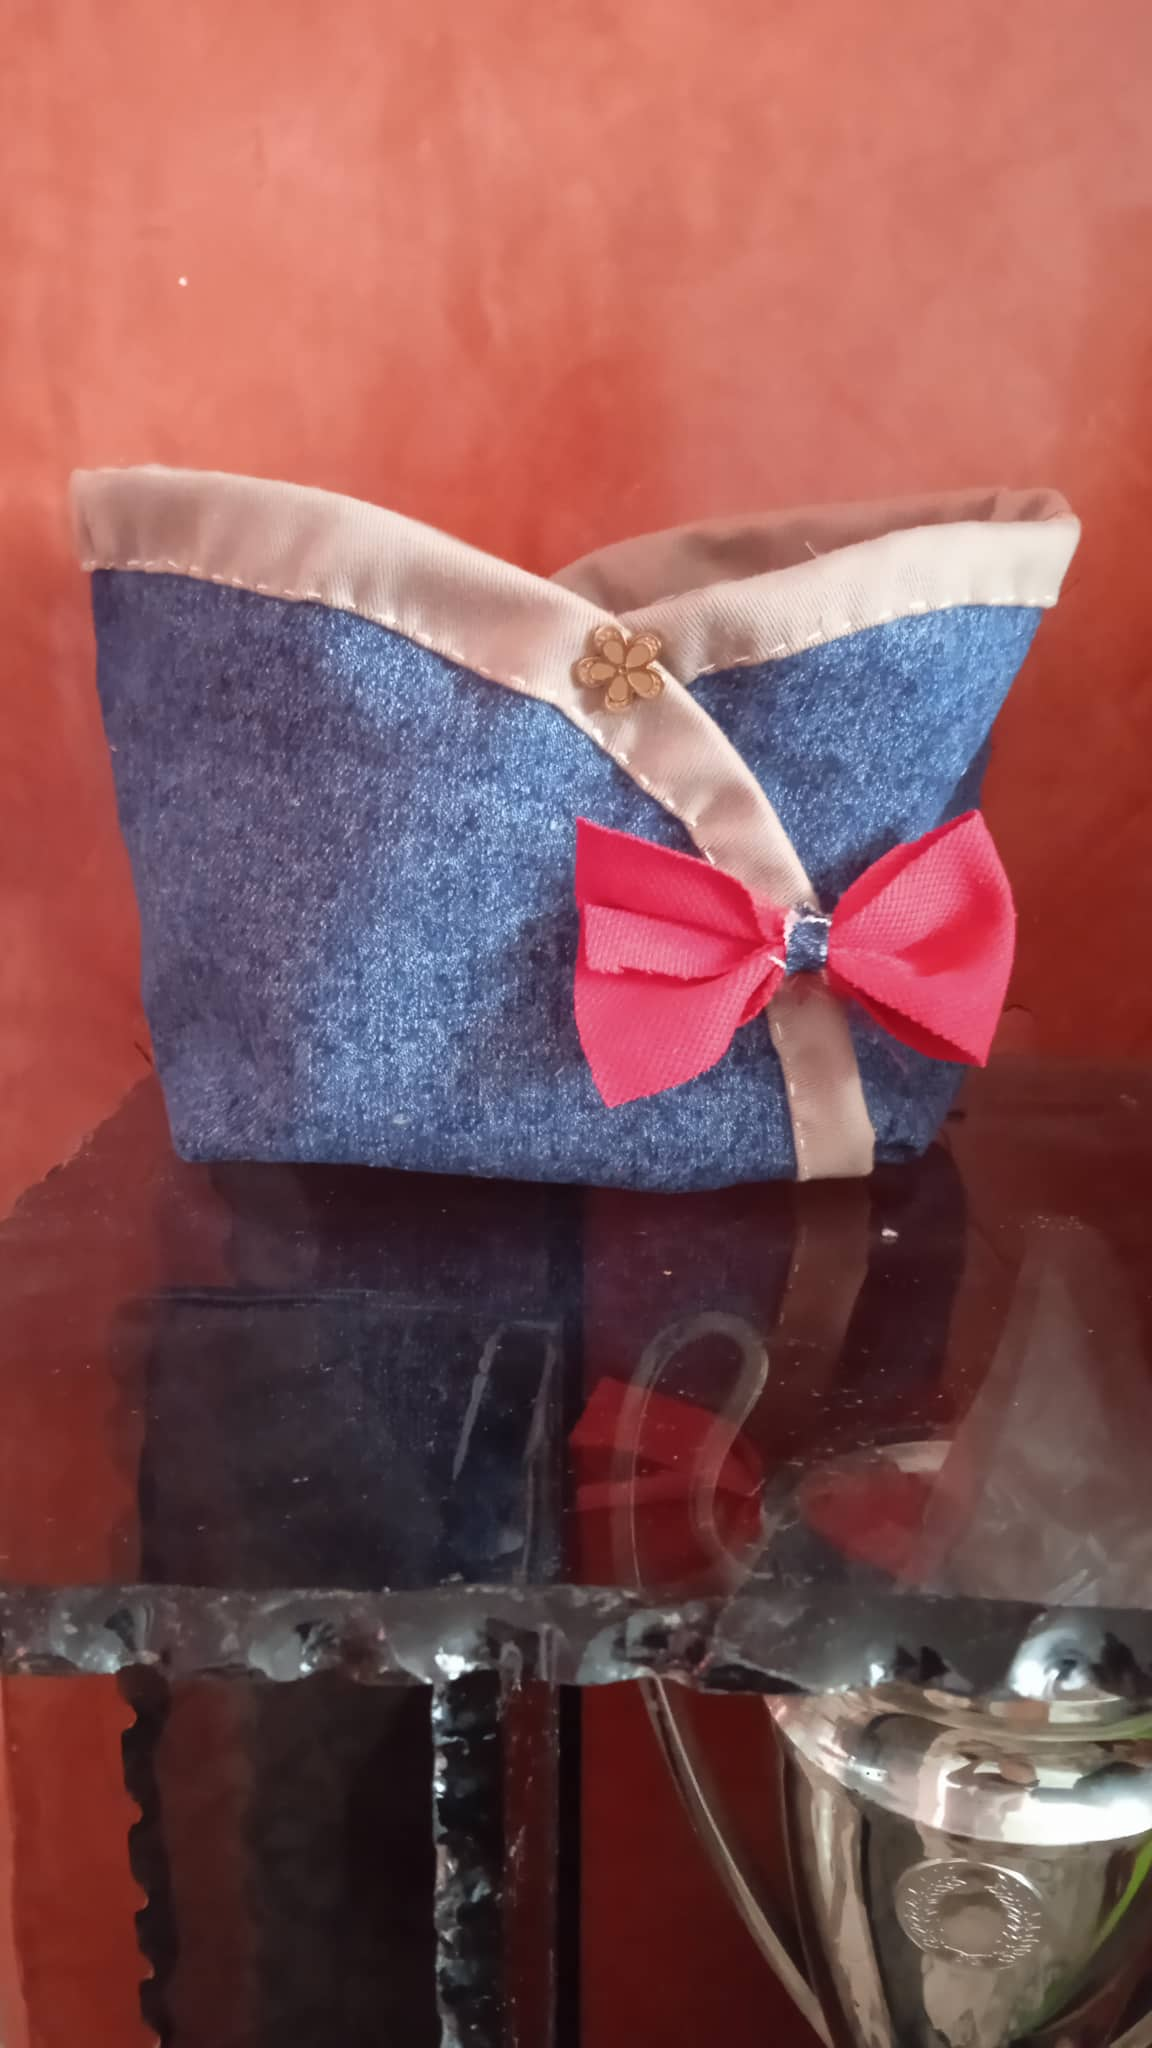
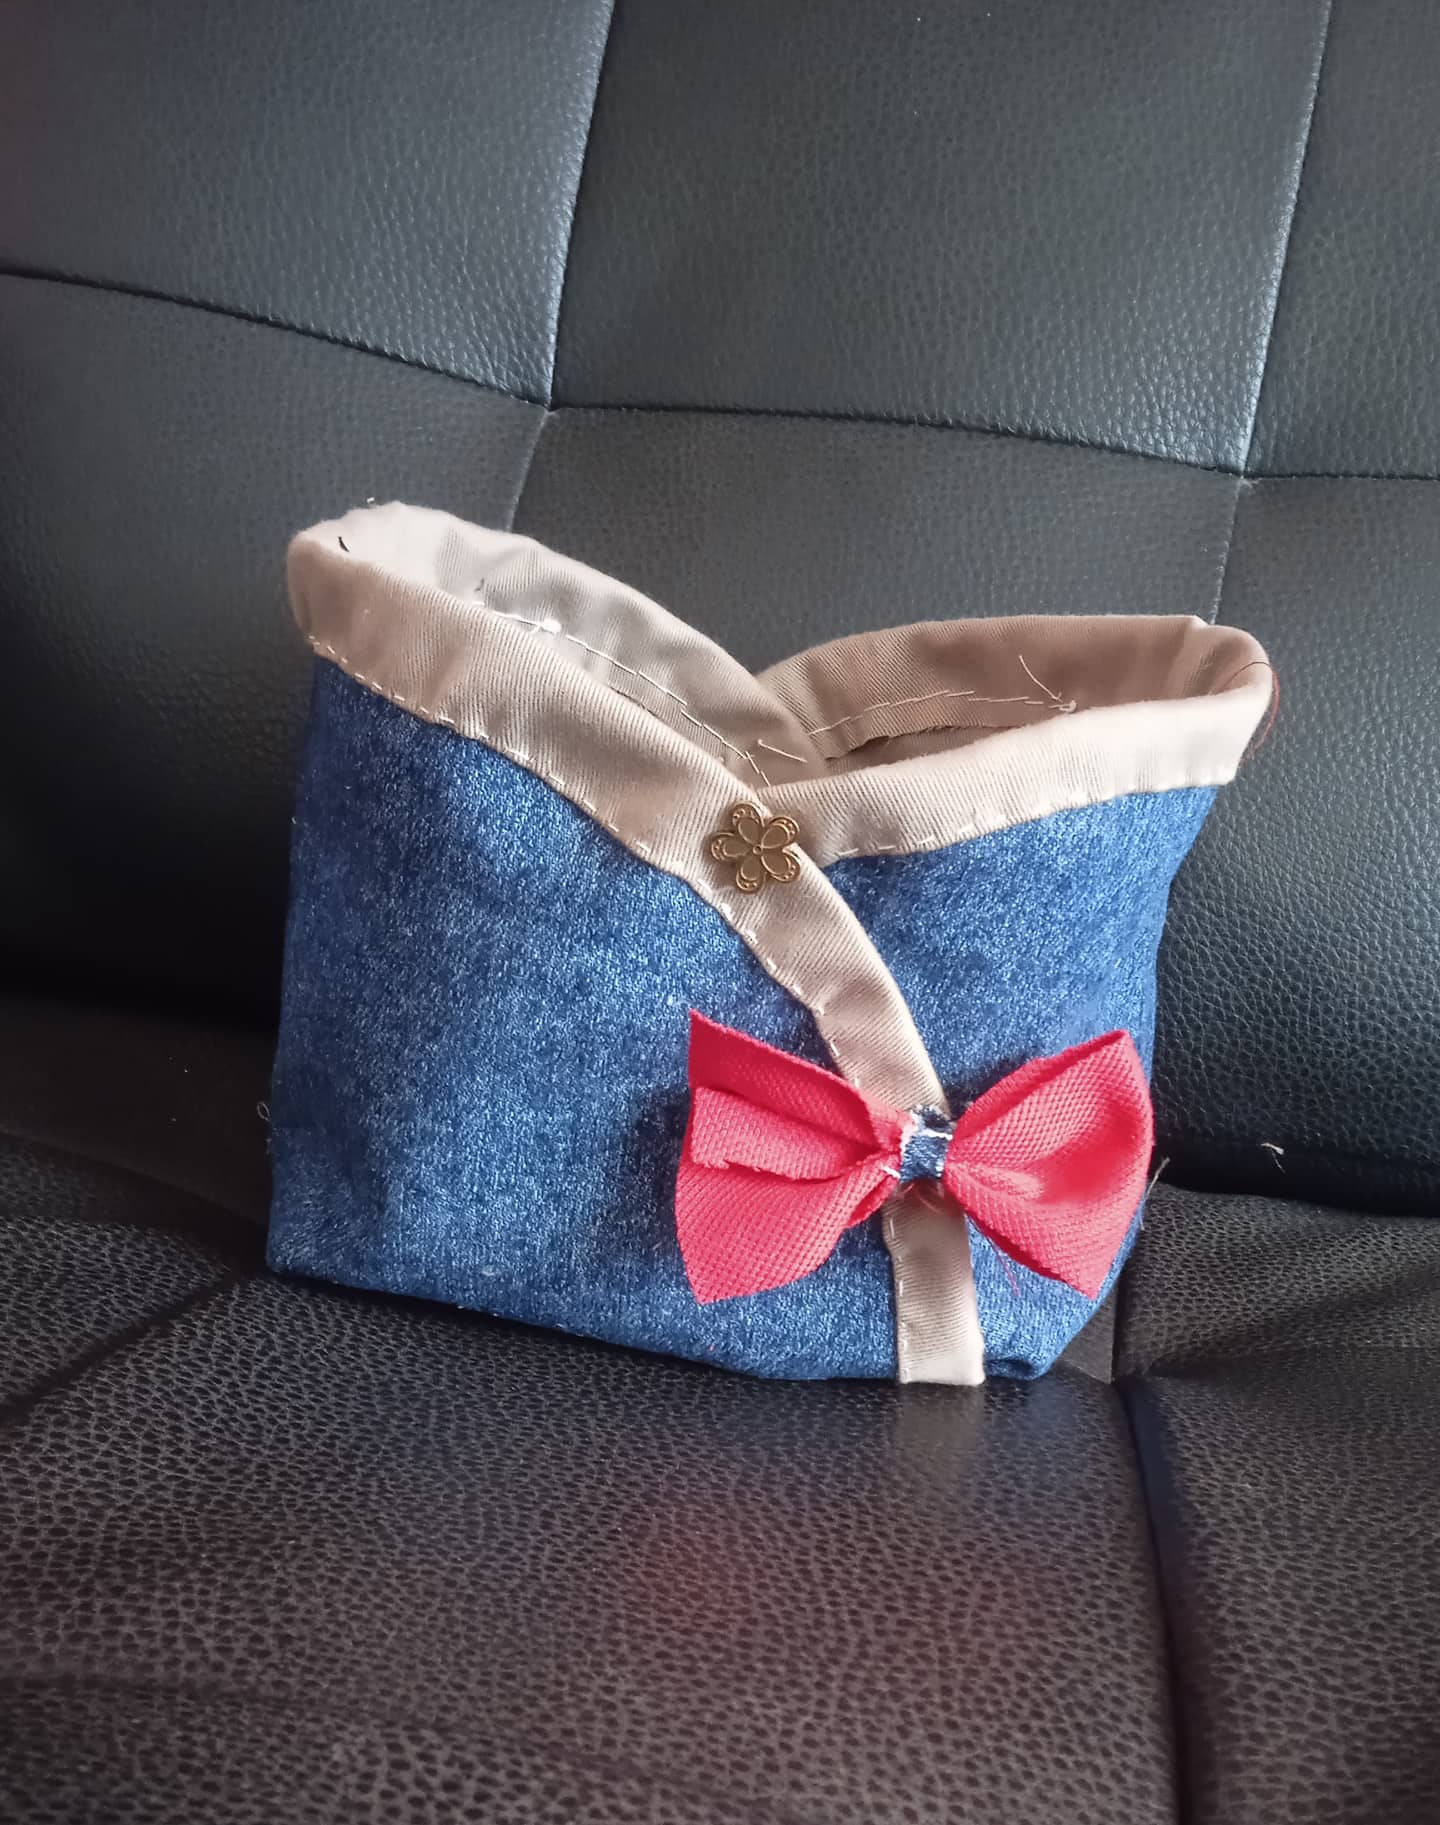
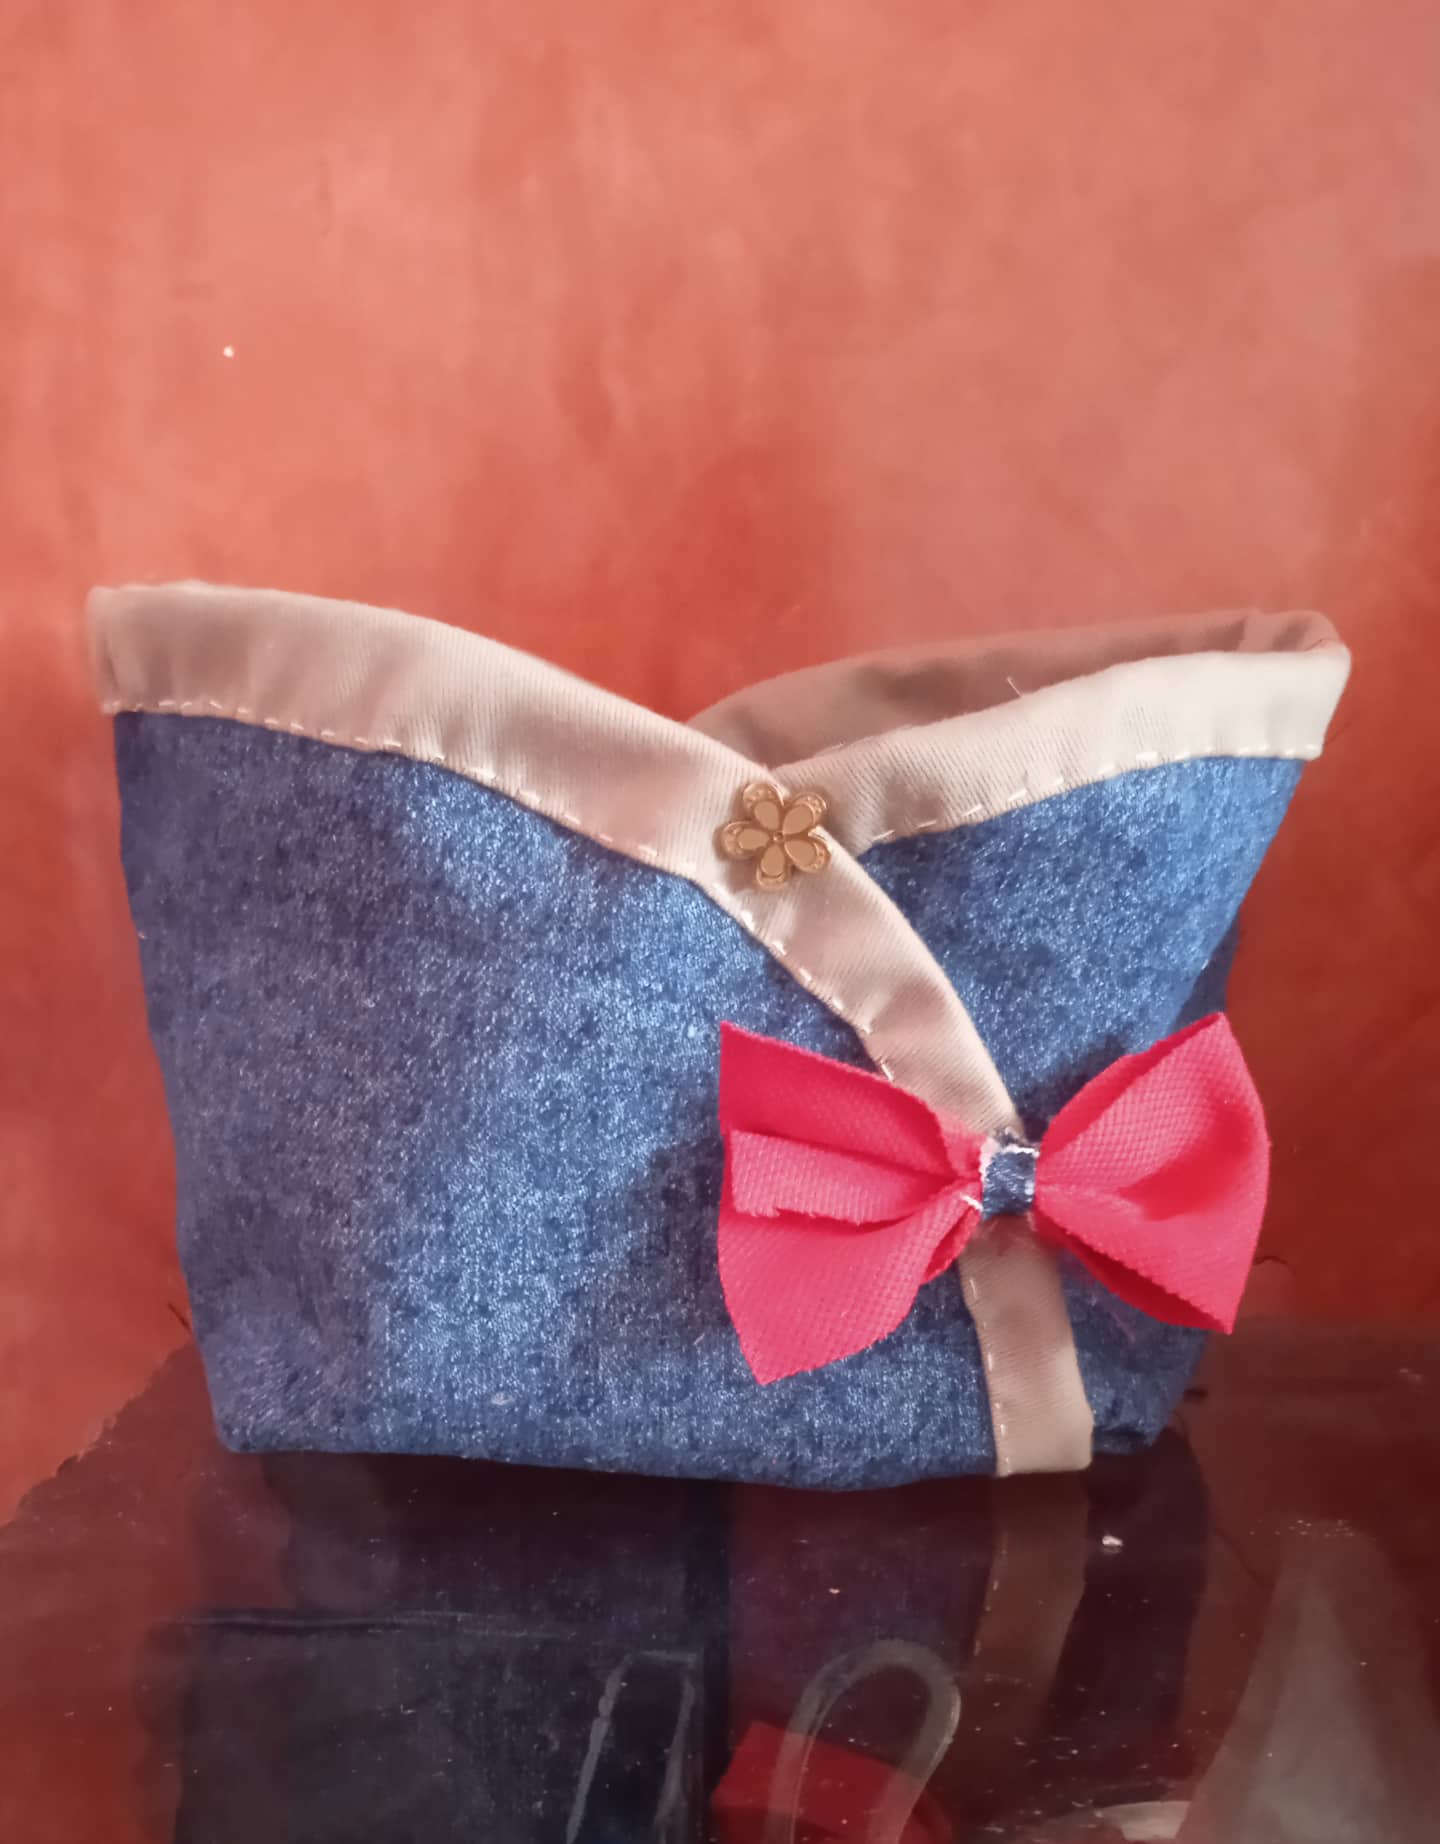
- Paso 6: Una vez cosidos los dos extremos volteamos del lado derecho, adornamos la parte delantera con un lindo broche y de una lado cosemos un lazo de color diferente a la tela de la bolsa, esto para hacerlo un poco más llamativo.
- Step 6: Once the two ends are sewn together, turn right side out, decorate the front with a nice brooch and on one side sew a ribbon of a different color than the fabric of the bag, this to make it a little more eye-catching.
.jpg)

0
0
0.000
Congratulations, your post has been upvoted by @dsc-r2cornell, which is the curating account for @R2cornell's Discord Community.
Thank you for your support
Hola Yannet ❣️. Que lindo que quedó este contenedor reciclado y todo cosido a mano, seguro fue un gran trabajo. Me gusta mucho su forma, es diferente y linda. Gracias por compartir tu proyecto ❣️.
Hola @lauramica, gracias por comentar, lástima que no tengo una máquina de coser, todo lo que hago es a mano, pronto tendré una, saludos.
Muy bonita y practica. Gracias por compartir.
Gracias por comentar amiga @josief27
Uyyy esto está muy bonito!!
Gracias @razielmorales, saludos.
Beautiful thanks for sharing @yannet80
Thanks to you my friend, blessings