😻Lindo Cintillo de Gato😻Cute Cat Headband😻
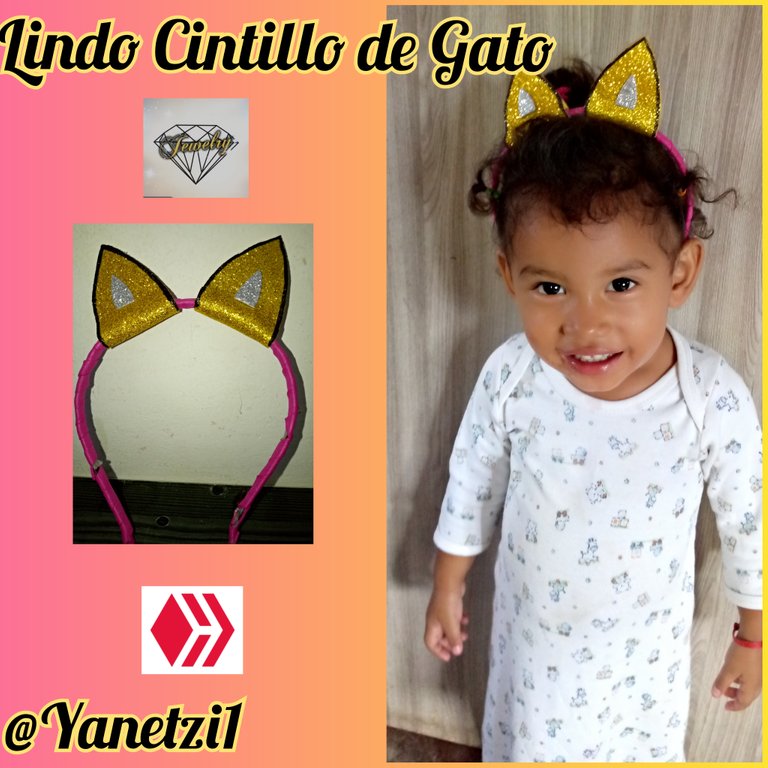
Hola Mis Queridos Amigos de esta increíble comunidad de Hive y jewerly es un gusto Saludarlos a todos espero wue esten muy bien con muchad energías y siempre de corazón deseándoles nuevas ideas y creativas manualidades mi hija no suele usar ganchos dice que jalan mucho el cabello y me anime por primera vez a realizar un cintillo con foamy , pues pense en hacerle unas divertidas orejas de gatitas .
Luego me puse a buscar los materiales utilizados en la elaboración de el Cintillo .Siempre eh pensado que debemos siempre dar lo mejor en todas las cosas esta es una manera de crear y tener cosas de nuestro agrado espero que les guste la presente creación.
Fueron los siguientes Materiales utilizados en el Cintillo de mi Hija :
😽 Tijera
😽 Contillo de Metal no decorado.
😽 Foamy Rosado
😽 Foamy Escarchado Dorado
😽 Silicon
😽 Foamy escarchado Plateado
😽 Marcador
😽 Bolígrafo
Ahora les estare explicando el paso a paso utilizado para realizar nuestro Cintillo
Paso 1
Lo primero que vamos a hacer es recortar el foamy rosado en varias tiras asi como estas .
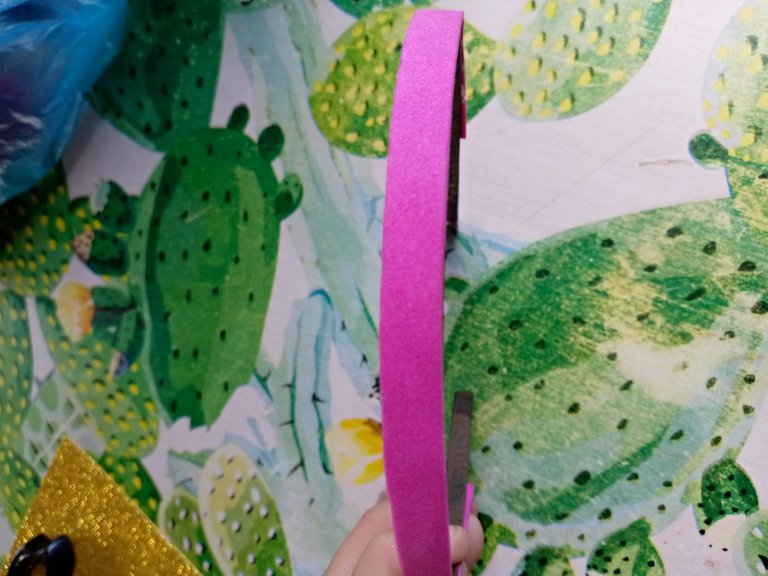
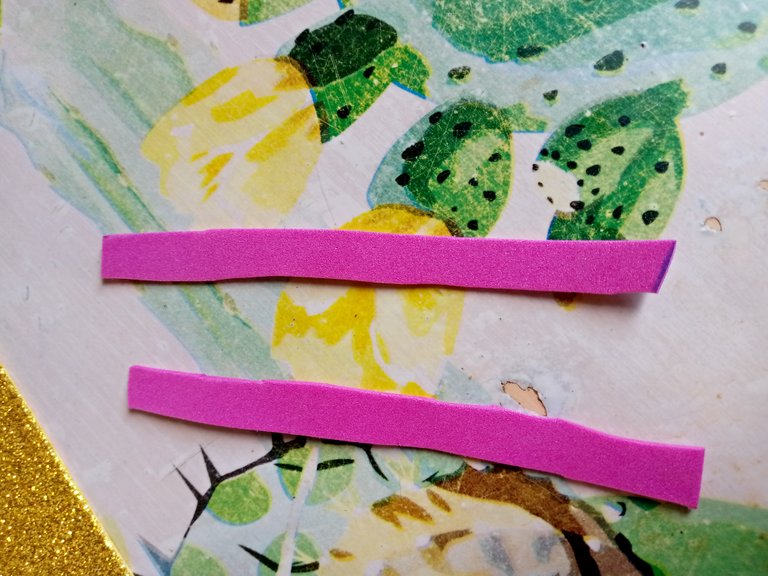
Despues de recortarlas todas manos a la obra .
Paso 2
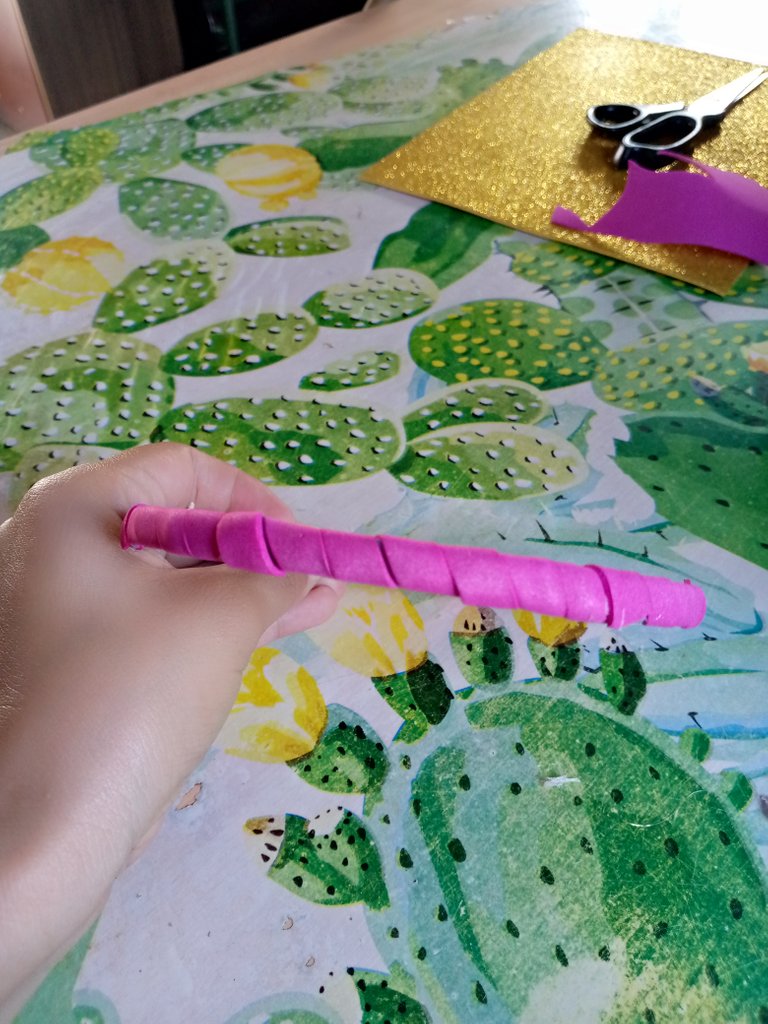
Luego tomamos el cintillo de metal y le vamos agregando silicon y con el foamy rosado vamos a ir forrando desde la parte de bajo del cintillos hasta el otro lado todo comoleto .
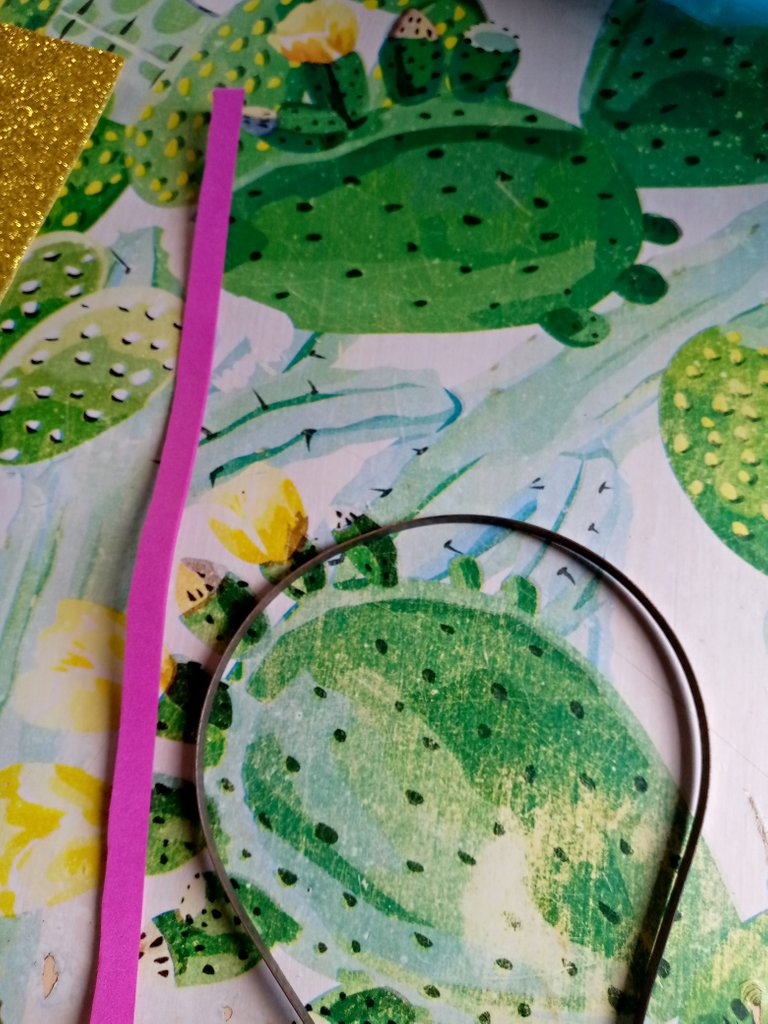


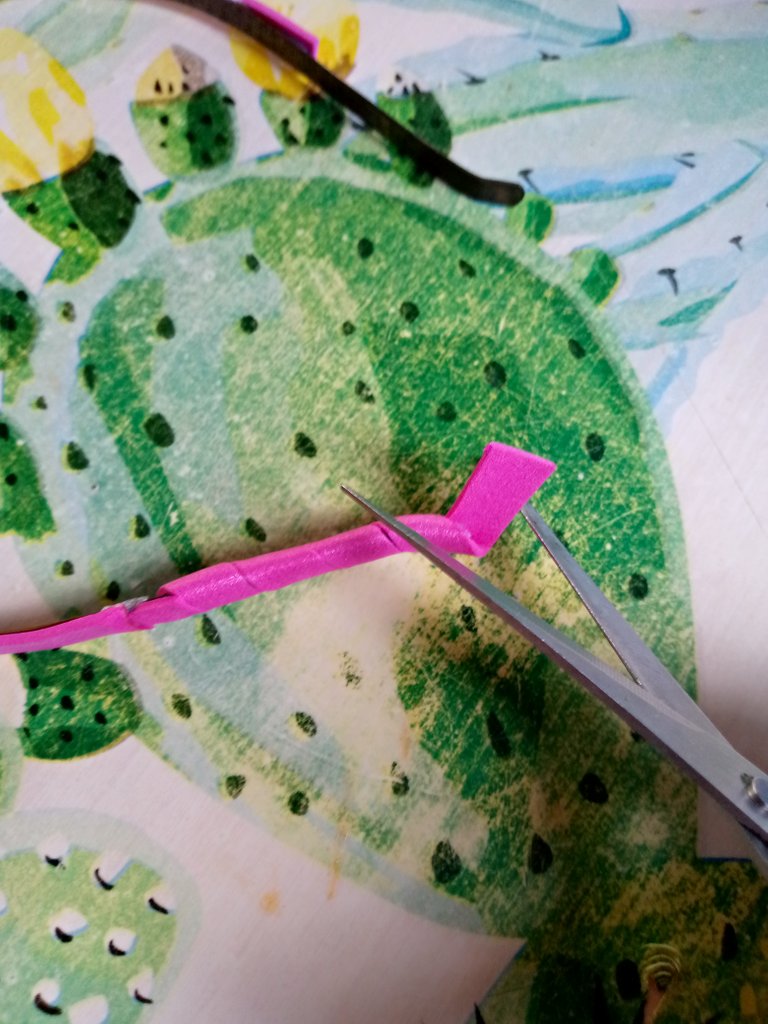
Lo que vamos a hacer es muy facil solo vamos a ir poniendo pega y vamos pegando el foamy rosado y poco a poco vamos a or dandole la vuelta y asi vamos a ir repitiendo hasta que finalmente se logré forrar todo .
De esta manera :
Paso 3
Despues de este tomamos el foamy escarchado y con el bolígrafo en la parte de atrás del foamy vamos a dibujar las orejas de gatitas de esta forma es muy sencillo solo vamos a dibujar la primera parte y luego con esa misma solo al recortar doblamos y terminamos de cortar y asi se van formando las orejas de esta vamos a hacer dos orejas esta forma sera como de hoja de árbol.
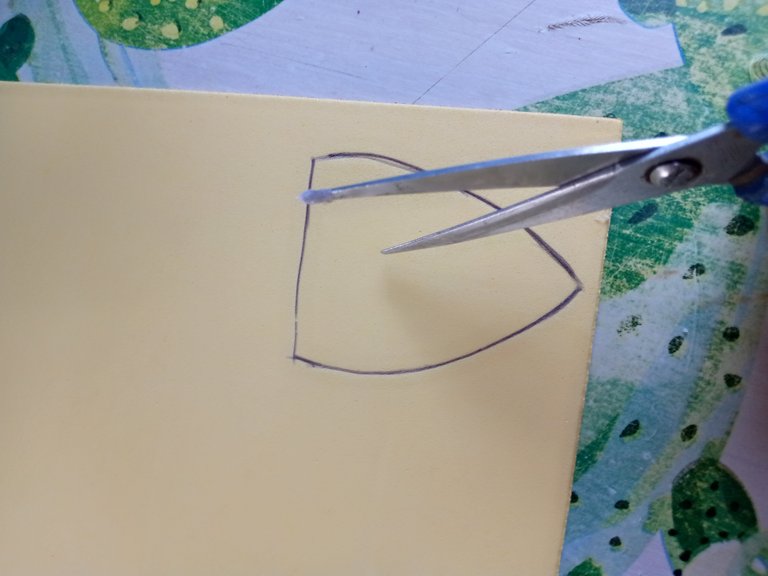
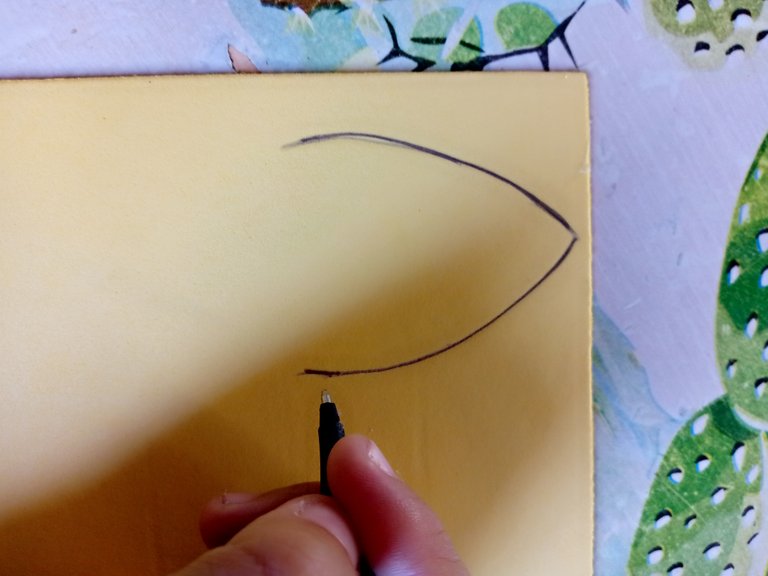
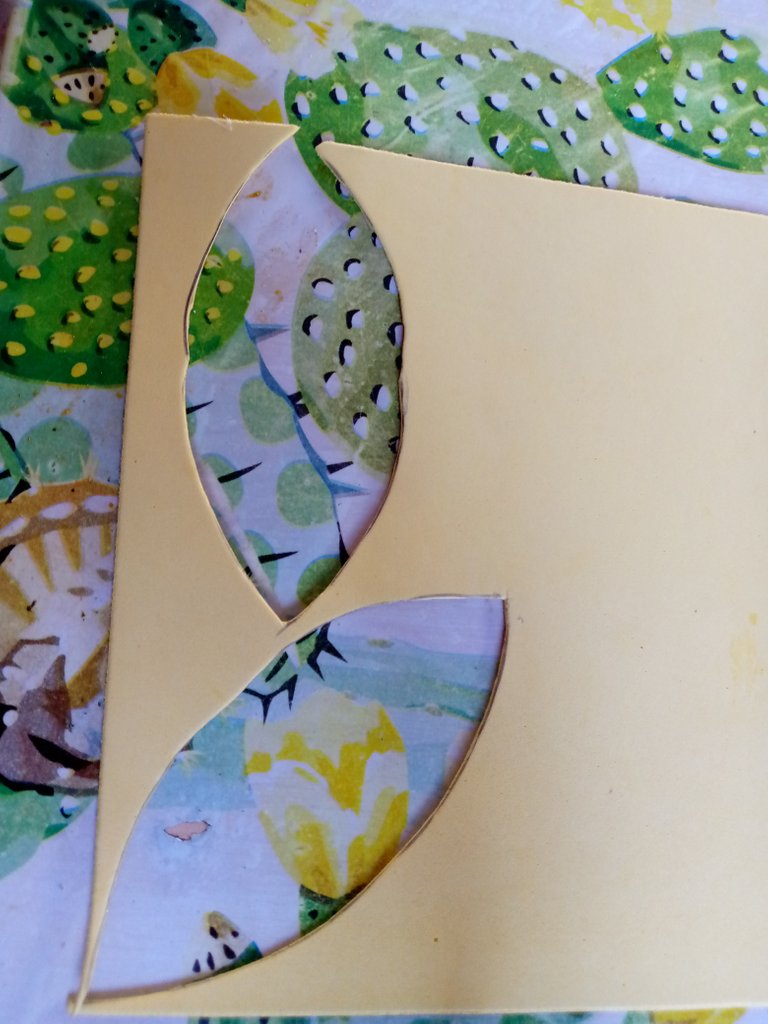
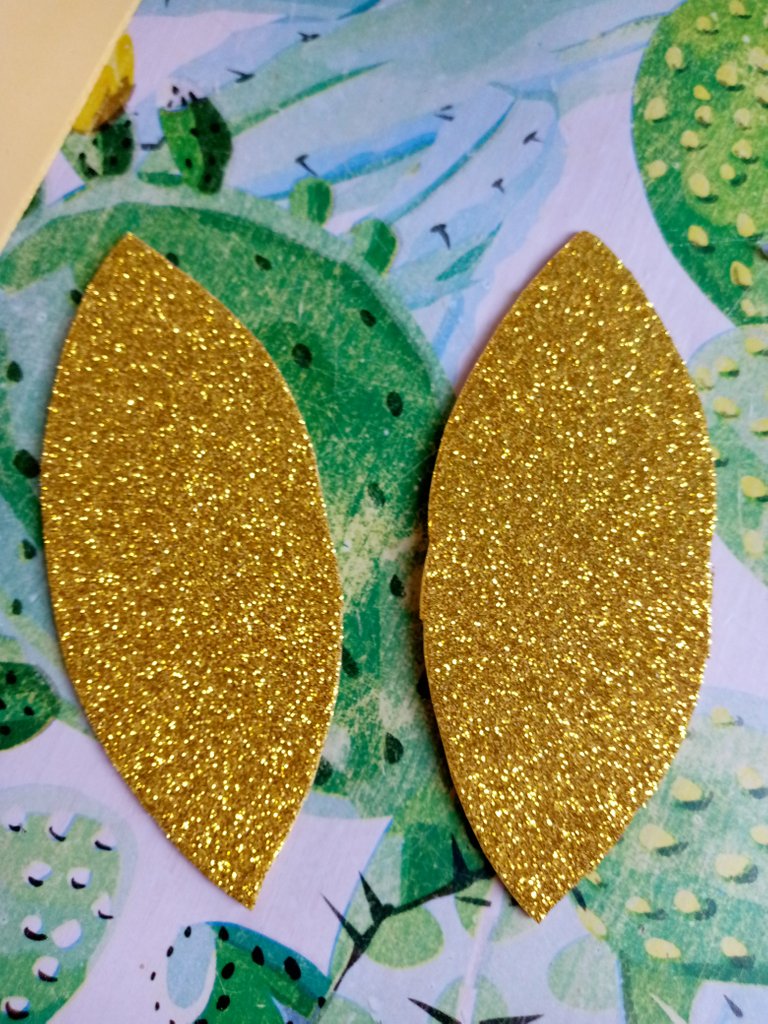
Es muy facil de hacer y recortar .
Paso 4
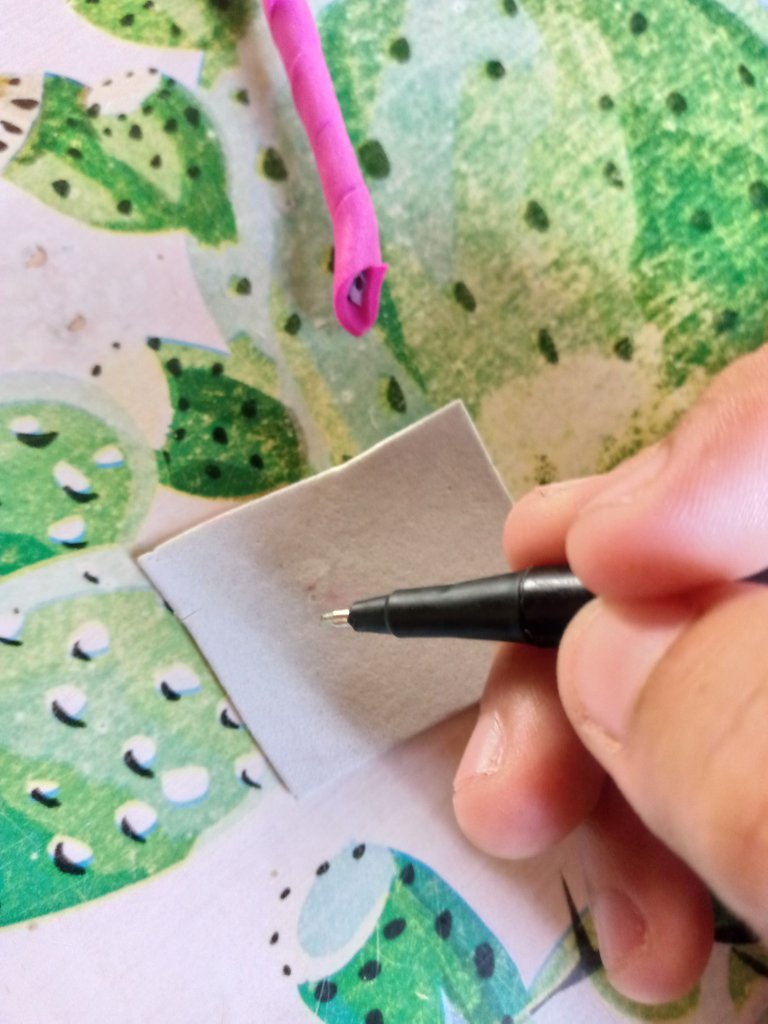
Ahora el foamy escarchado lo utilizaremos para hacer una pequeñas orejas de esta forma solo dibujamos y recortamos después con silicón agregamos en la parte de bajo de las orejas y luego pegamos y asi se veran .
Paso 5
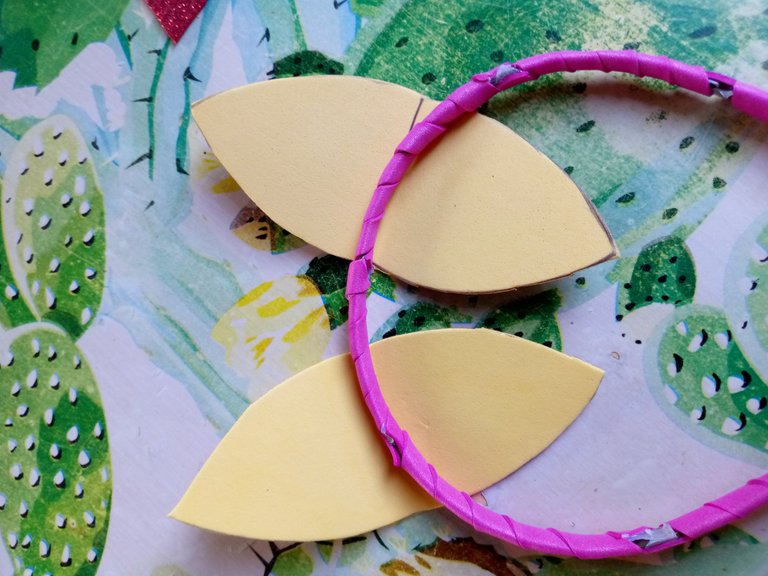
Bueno solo tenemos que armar de una vez las orejas van a ir como en forma de U por debajo del cintillo asi hechamos silicon y con este mismo rápidamente pegamos y asi vamos a hacer con la otra oreja dejando de por medio solo un dedo de distancia .
Este proceso lo repetimos dos veces nada mas y solo debemos de aseguranos que quede bien pegado .

Paso 6
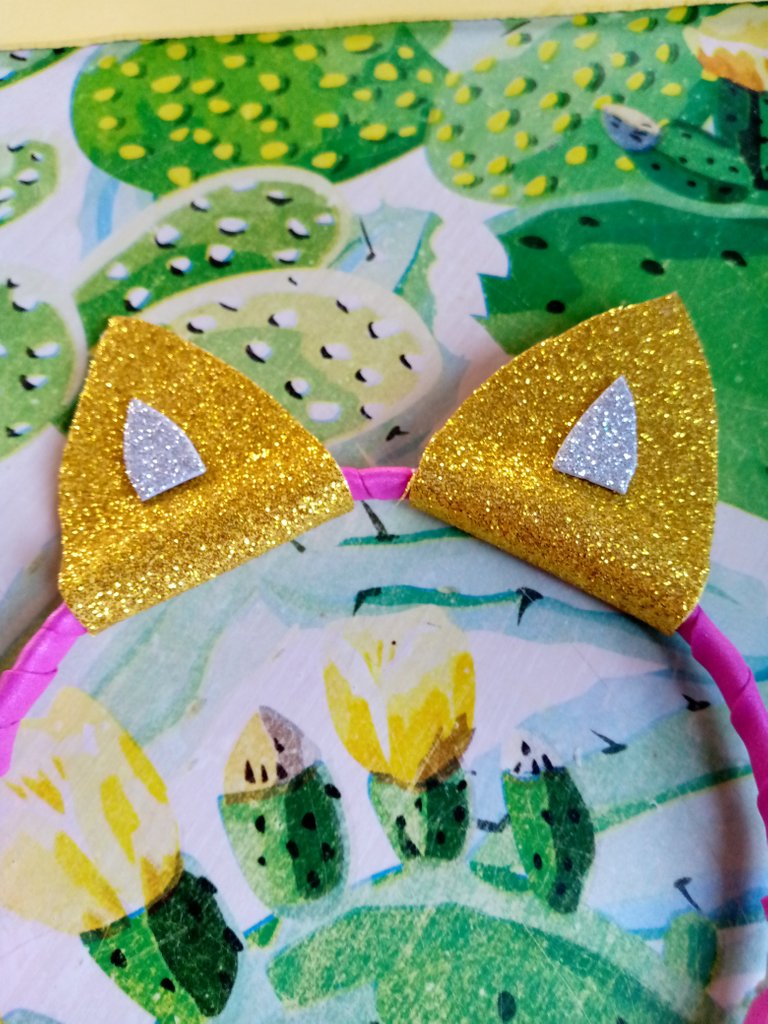
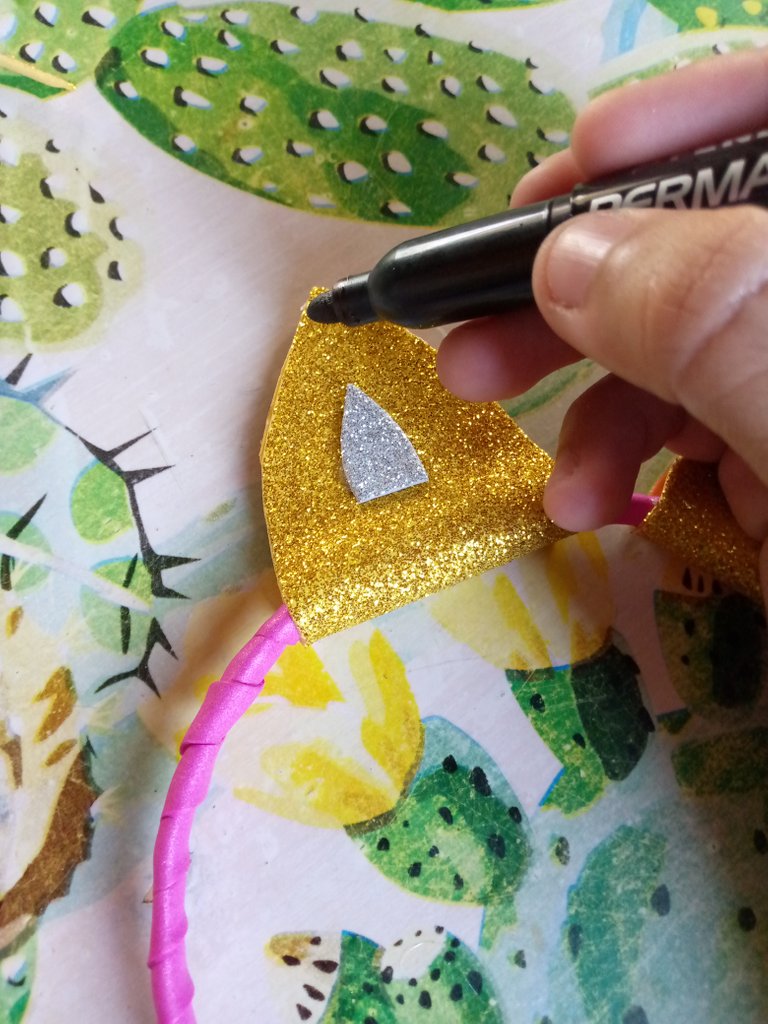
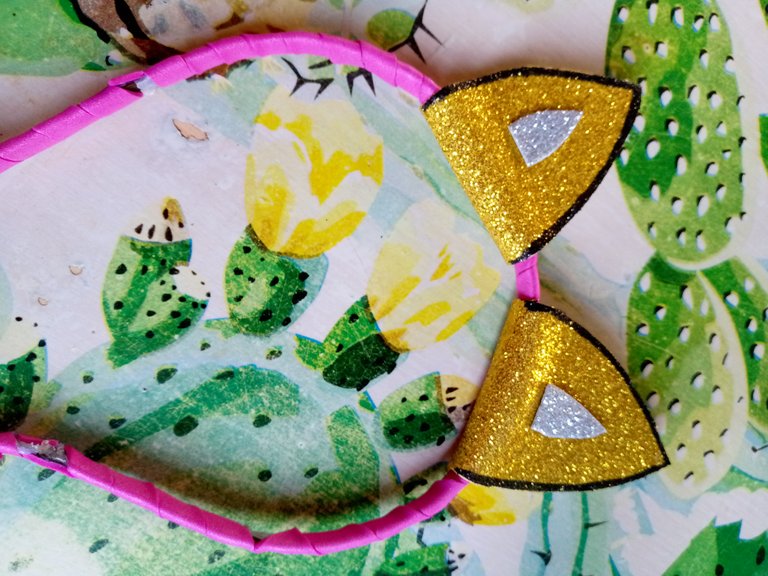
Con el marcador vamos a delinear los bordes del foamy escarchado Dorado y asi se vera siempre me ha gustado delinear porwue este le dan fondo a las manualidades que siempre eh hecho muy pocas veces no lo hago porque aveces no amerita.
Listo amigos aqui tienen por ultimo el lindo cintillo que le he hecho a mi pequeña, siempre consintiendo a la pequeña de la casa y pues ella es la motivación de hacer cosas como estas .
Espero que les guste , quisiera sus comentarios ,que opinan ,y que Dios del Universo Siempre los Bendiga
ÉXITOS A TODOS!
Las fotos son de mi autoría y fueron tomadas por mi teléfono tecno spark Go 2023 .
Traductor Utilizado: Deelp.
Las imagenes son editadas mediante la aplicación editor de fotos polish.
Hello my dear friends of this incredible community of Hive and jewerly is a pleasure to greet you all I hope you are very well with lots of energy and always from my heart wishing you new ideas and creative crafts my daughter does not usually use hooks says that they pull much hair and I was encouraged for the first time to make a headband with foamy, I thought of making some fun kitty ears.
Then I started to look for the materials used in the elaboration of the headband. I always thought that we should always give the best in all things this is a way to create and have things to our liking I hope you like this creation.
The following materials were used in the Headband of my Daughter:
😽 Scissors
😽 Undecorated metal headband.
😽 Pink Foamy
😽 Golden Frosted Foamy
😽 Silicone
😽 Foamy Frosted Silver
😽 Marker
😽 Ballpoint pen
Now I will be explaining the step by step used to make our Cintillo
Step 1
The first thing we are going to do is cut the pink foamy into several strips like this.
After cutting them all out, let's get to work.
Step 2
Then we take the metal headband and we are going to add silicone and with the pink foamy we are going to go lining from the bottom of the headband to the other side all asleto .
What we are going to do is very easy, we are just going to put glue and glue the pink foamy and little by little we are going to turn it around and so we are going to repeat until we finally cover the whole thing.
In this way :
Step 3
After this we take the frosted foamy and with the pen on the back of the foamy we will draw the ears of kittens in this way is very simple we will only draw the first part and then with that same only to cut and finish cutting fold and cut and so are forming the ears of this we will make two ears this form will be like a tree leaf.
It is very easy to make and cut out.
Step 4
Now we will use the frosted foamy to make small ears. We just draw and cut them out, then we add silicone on the lower part of the ears and then we glue them and that's how they will look like.
Step 5
Well we only have to assemble once the ears will go as a U-shaped under the headband so we put silicone and with this same quickly glue and so we will do with the other ear leaving in between only a finger distance.
We repeat this process two more times and we just have to make sure that it is well glued.
Step 6
With the marker we are going to outline the edges of the Gold frosted foamy and this is how it will look like. I have always liked to outline because it gives background to the crafts that I have always made, very few times I do not do it because sometimes it does not deserve it.
Ready friends here you have finally the nice headband that I have done to my little one, always spoiling the little one of the house and she is the motivation to do things like this.
I hope you like it and that you like it, I would like your comments, what do you think, and may God of the Universe always bless you
SUCCESS TO ALL OF YOU!
The photos are of my authorship and were taken by my phone tecno spark Go 2023 .
Translator Used: Deelp.
The images are edited using polish photo editor application.
Hola @yanetzi1 bonito detalle para tu nena y fácil de hacer así como lo muestras. Ese modelo puede adaptarse a un lazo que también se vería muy hermoso. Además me parece excelente creatividad en la cual pueden involucrar a las niñas y a ellas les encantará. Saludos 🤗
Hola amiga muchas gracias 😊 me alegro que te guste , bueno si es buena idea , a mi niña le encanta cuando le hago cositas lindas como este cintillo .
Muchas gracias 🙂
This post has been manually curated by @steemflow from Indiaunited community. Join us on our Discord Server.
Do you know that you can earn a passive income by delegating to @indiaunited. We share more than 100 % of the curation rewards with the delegators in the form of IUC tokens. HP delegators and IUC token holders also get upto 20% additional vote weight.
Here are some handy links for delegations: 100HP, 250HP, 500HP, 1000HP.
100% of the rewards from this comment goes to the curator for their manual curation efforts. Please encourage the curator @steemflow by upvoting this comment and support the community by voting the posts made by @indiaunited.
Lindo cintillo con temática de gato, le queda muy bonito a la beba. Suerte en este concurso maravilloso.
!diy
You can query your personal balance by
!DIYSTATSCongratulations @yanetzi1! You have completed the following achievement on the Hive blockchain And have been rewarded with New badge(s)
Your next target is to reach 300 comments.
You can view your badges on your board and compare yourself to others in the Ranking
If you no longer want to receive notifications, reply to this comment with the word
STOPTo support your work, I also upvoted your post!
Check out our last posts:
Que hermosa princesa. el cintillo le ha quedado genial!
Muchas gracias mana si le quedó muy lindo a mi pequeña ☺️
Very creative, loved the headband, baby doesn't seem to like it though seeing the look on her face
The headband look good on her and she is looking cute 🥰
Bellísimo se le ve ese cintillo a la princesa.. quedó muy lindo y fácil.. 😘
This is a real cute headband and it looks fantastic on the kid. Good luck woth the contest.
Pero que lindo te ha quedado amiga, además de sencillo y con pocos materiales. Hace un tiempo realice varios cintillos con ese modelito, estaban muy de moda. También hay que reconocer que la modelo se veía súper feliz, jejeje. Te deseo éxitos en el concurso.