👾Linda y Fácil Pulsera de Perlas Para Lucir🌟Cute and Easy Pearl Bracelet to Wear👾

Hoy quiero mostrarle cómo hacer una pulsera con perlas y Swarovski de color morado linda y hermosa pulsera con un centro de perlas blancas y piedra redonda de cristales plateados increíble para lucir con un atuendo de color negro o blanco espero que sea de su agrado y que se anime a realizar accesorios que tengan vida brillo para nuestras vidas .
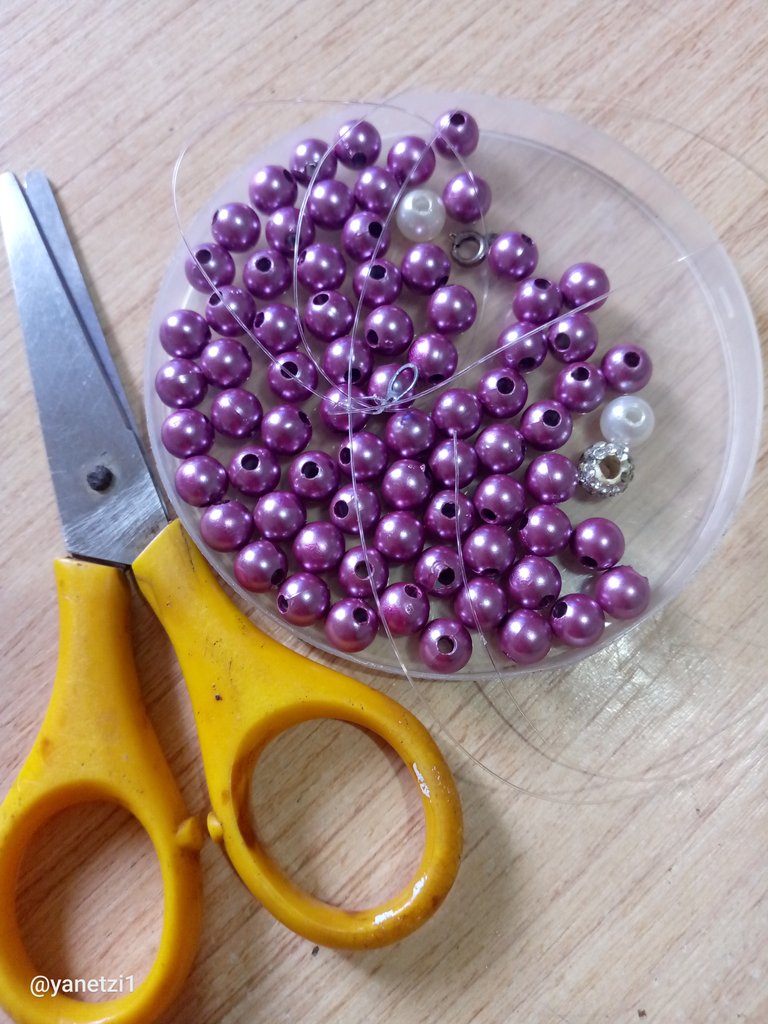
Los materiales utilizados en la elaboración de nuestra pulsera fueron los siguientes:
- tijera
- nylon número 02
- trancadero
- aro de metal
- perlas medianas color morado y blanco
- Swarovski morados
- piedra redonda de cristales plateados
A continuación les estaré presentando la realización del paso a paso de nuestra pulsera de perlas:
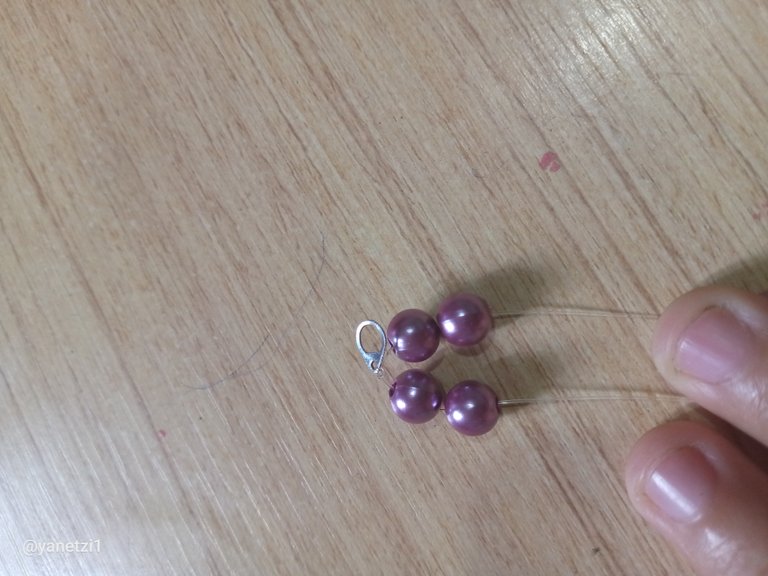
Paso 1
Lo primero que vamos a hacer es poner el nylon 2 que quede punta con poca y luego de esto vamos a introducir el aro de metal en el medio una vez ya listo solamente nos vamos a encargar de hacerle dos novios y de esta manera va a quedar.

Paso 2
Después solamente tomaremos dos perlas y la vamos a ir introduciendo en cada nylon en total serían dos y dos que formarían cuatro perlas dobles así de esta forma para tener una secuencia y una estabilidad en la pulsera.
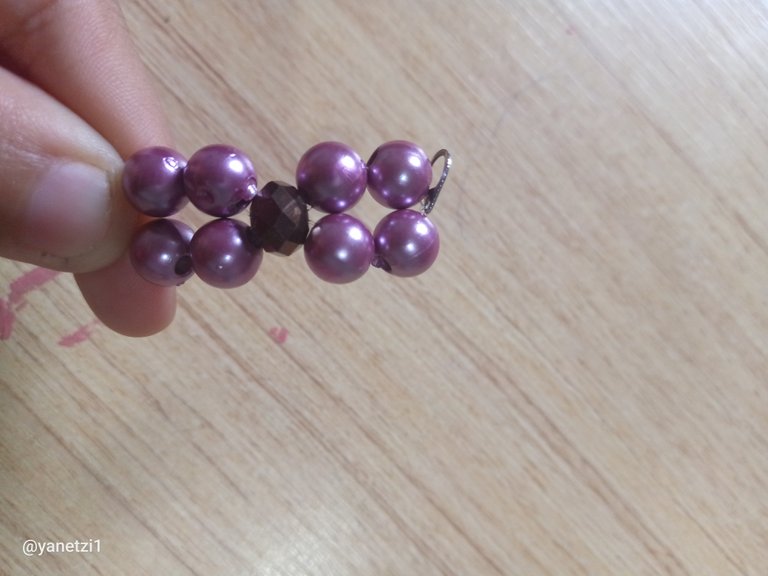
Paso 3
Luego de las perlas solamente vamos a ir colocando en la parte del medio que es como una forma de separar las perlas y para que tenga un toque más de elegancia, vamos a poner un swarovsky.

Siempre tenemos que tener en cuenta que cuando vamos a tomar piedra deben de lucir ambas ya que yo en este caso estoy utilizando el mismo color en el cuerpo de la pulsera pero en la parte del medio cambio a la diferencia de piedra para que así tenga un tono más clásico y único.
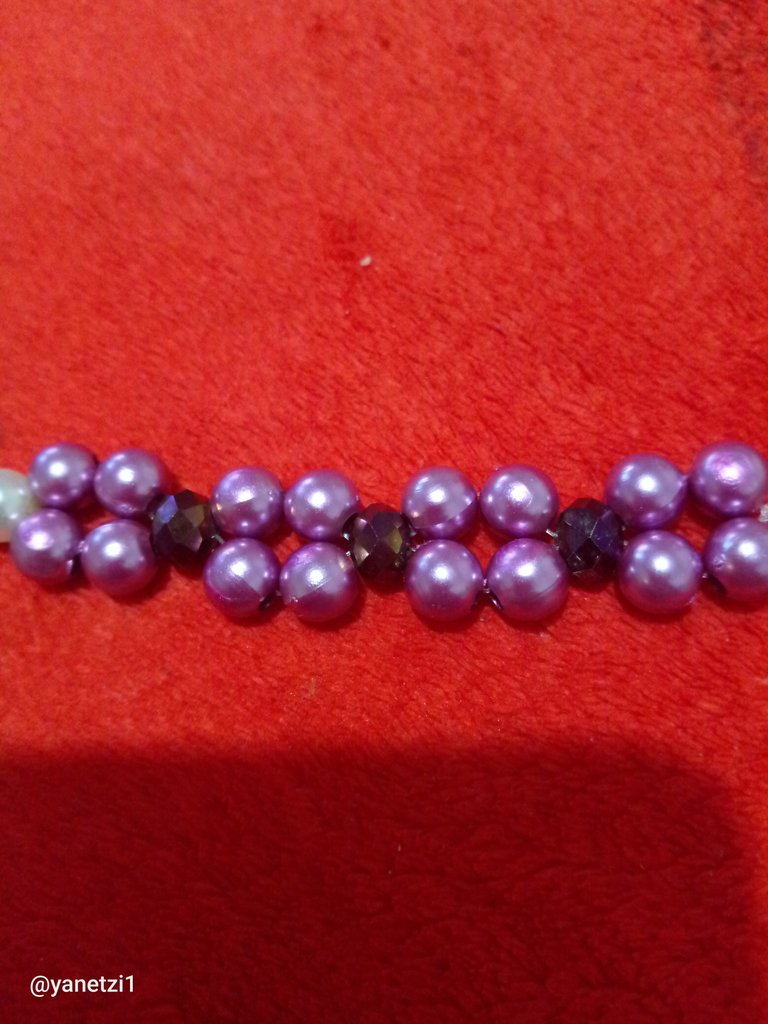
Paso 4
Este paso lo vamos a hacer tres veces las cuatro piernas y El cherokee en el medio esto es parte de la medida de mi muñeca de ambas partes de esta forma.
Paso 5
Una vez ya el cuerpo hecho de la pulsera con las perlas y los charowskies solamente vamos a introducir los dos hilos por una de las perlas blancas que Irán en el medio

Paso 6
Después de la perla blanca solamente vamos a poner la piedra redonda de cristales plateado seguidamente con otra perla blanca que estas serán las que formarán parte del centro de la pulsera.


Paso 7
Ahora solamente vamos a repetir el mismo procedimiento de las cuatro perlas más el charowski y lo haremos por tres veces y así irá quedando.
Paso 8
Después que terminemos por último el cuerpo de la pulsera solamente nos quedará colocarle el trancadero lo vamos a introducir por el aro pequeñito y a este le vamos a dar dos amarres normal .

Y de este modo terminaremos nuestra pulsera linda fácil y con perla y piedras muy elegantes.
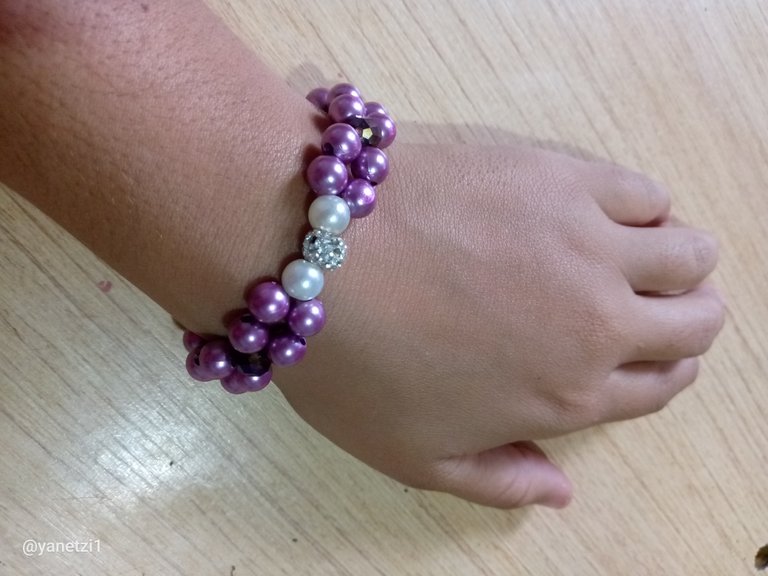
Resultado final!
Bueno amigos espero que les haya gustado, les mando muchas bendiciones abrazos prosperidad salud y abundancia para todos Feliz día éxitos.

Hasta la próxima!

Las imágenes son de mi autoría y fueron tomadas por mi teléfono tecno spark go 2023.
Traductor utilizado: Deepl
Las imágenes las edité mediante la aplicación editor canva.
Today I want to show you how to make a bracelet with pearls and purple Swarovski pretty and beautiful bracelet with a center of white pearls and silver crystals round stone amazing to wear with a black or white outfit I hope you like it and that you are encouraged to make accessories that have brightness life for our lives .
The materials used in the elaboration of our bracelet were the following:
- scissors
- nylon number 02
- locking ring
- metal ring
- medium purple and white pearls
- purple Swarovski
- round stone of silver crystals
I will be presenting you the step by step realization of our pearl bracelet:
Step 1
The first thing we are going to do is to put the nylon 2 that is tip with little and after this we are going to introduce the metal ring in the middle once ready we are only going to take care of making two boyfriends and this way it is going to be.
Step 2
Then we will only take two beads and we are going to introduce them in each nylon in total there would be two and two that would form four double beads in this way to have a sequence and stability in the bracelet.
Step 3
After the pearls we are only going to place in the middle part which is like a way to separate the pearls and to give it a touch more elegance, we are going to put a swarovsky.
We always have to keep in mind that when we are going to take stone must look both as I in this case I am using the same color in the body of the bracelet but in the middle part I change to the difference of stone so that it has a more classic and unique tone.
Step 4
This step we are going to do three times the four legs and the cherokee in the middle this is part of my wrist measurement of both parts this way.
Step 5
Once the body of the bracelet is ready with the beads and the charowskies, we are only going to introduce the two threads through one of the white beads that will be in the middle of the bracelet.
Step 6
After the white pearl only we are going to put the round stone of silver crystals followed by another white pearl that will be the ones that will be part of the center of the bracelet.
Step 7
Now we are only going to repeat the same procedure of the four beads plus the charowski and we will do it three times and this is how it will look like.
Step 8
After we finally finish the body of the bracelet, we will only have to place the locking clasp and we will introduce it through the small ring and we will give it two normal ties.
And in this way we will finish our beautiful and easy bracelet with pearl and very elegant stones.
Final result!
Well friends I hope you liked it, I send you many blessings hugs prosperity health and abundance for all Happy day successes.
Until next time!
The images are authored by me and were taken by my tecno spark go 2023 phone.
Translator used: Deepl
I edited the images using the canva editor application.
Que Linda pulsera amiga 🏵️
Que pulsera tan bonita y elegante 💖 éxitos y saludos 😊
Muchas gracias amiga amén
This is really nice, I love the color, so cool and adorable
Muy linda amiga me encanta ese color.
Muchas gracias amiga 😘
Es un hermoso brazalete. Me gusta la combinación de materiales y colores.
Bendiciones
Muchas gracias amiga si está súper linda la combinación me alegro que te halla gustado
Buen trabajo amiga, muchas bendiciones