Hermoso y colorido maquillaje con delineado y corte de cuenca/Beautiful and colorful make-up with eyeliner and eye socket cut 🎨🖌️

”ESPAÑOL”
Hola Comunidad de Makeup Power🖌️🎨
Un gran saludo a todas las personas que cada día se esfuerzan por salir adelante gracias a esta plataforma, les deseo un día increíble, y de todo corazón espero que se encuentren muy bien.
El día de hoy me siento contenta de nunca rendirme y seguir adelante sin importar las adversidades que hayan, aquí estoy.
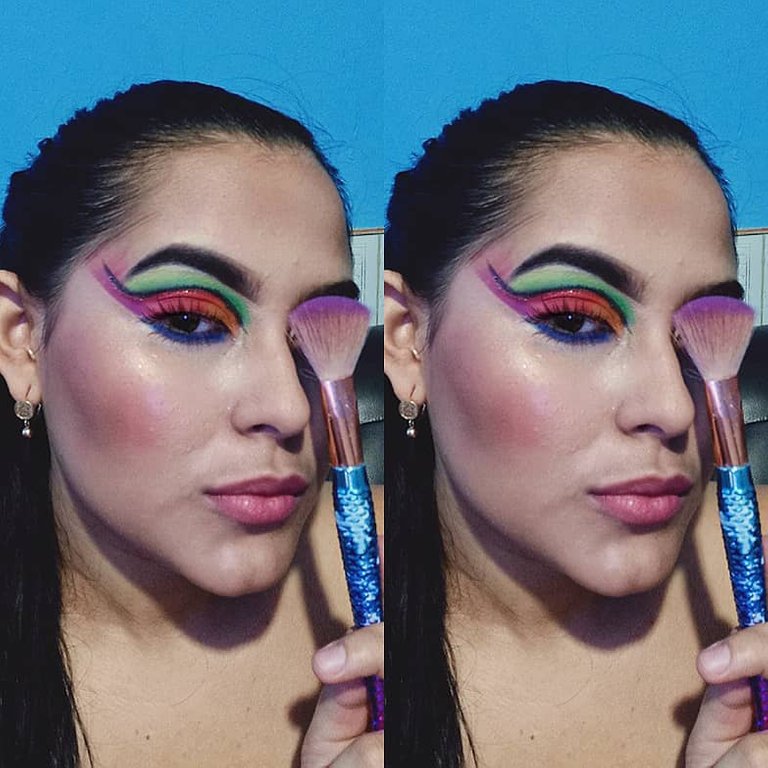
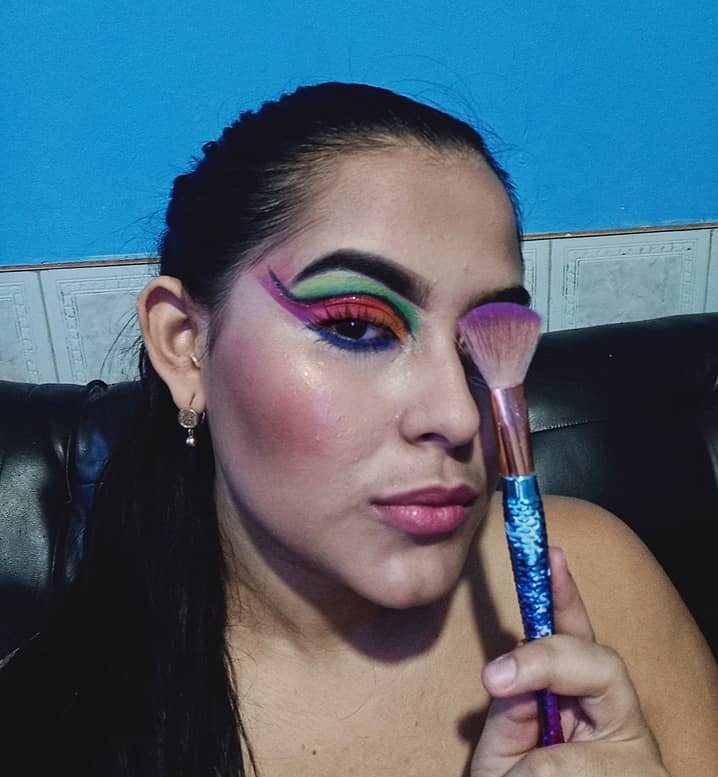
Esta vez quiero mostrarles este hermoso maquillaje en tonos coloridos con diferente corte de cuenca y con un delineado gráfico en tono negro. Para más información, los invito a leer los siguientes pasos a seguir.
Espero Disfrutes este Tutorial de Maquillaje 🖌️🎨
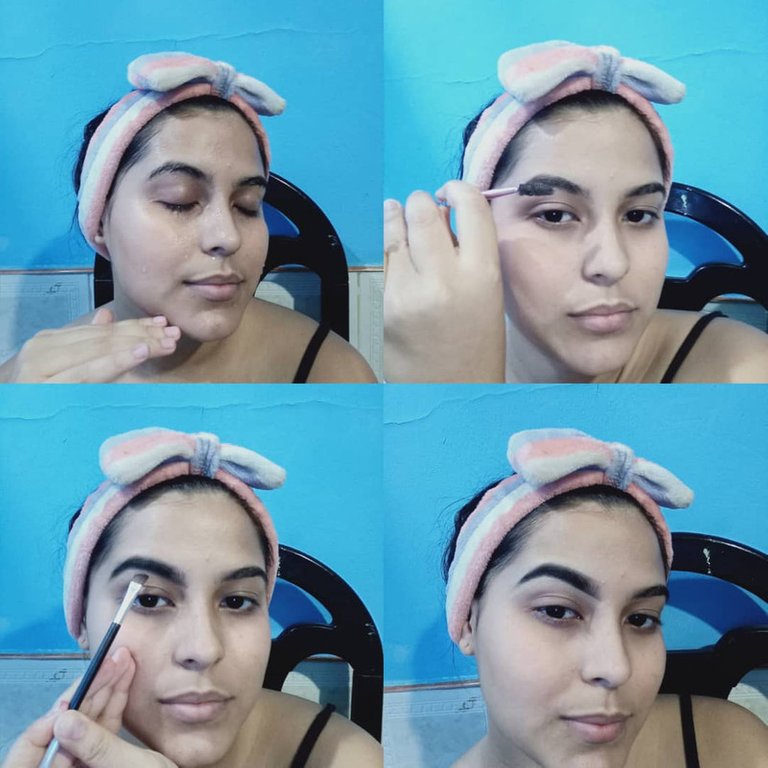
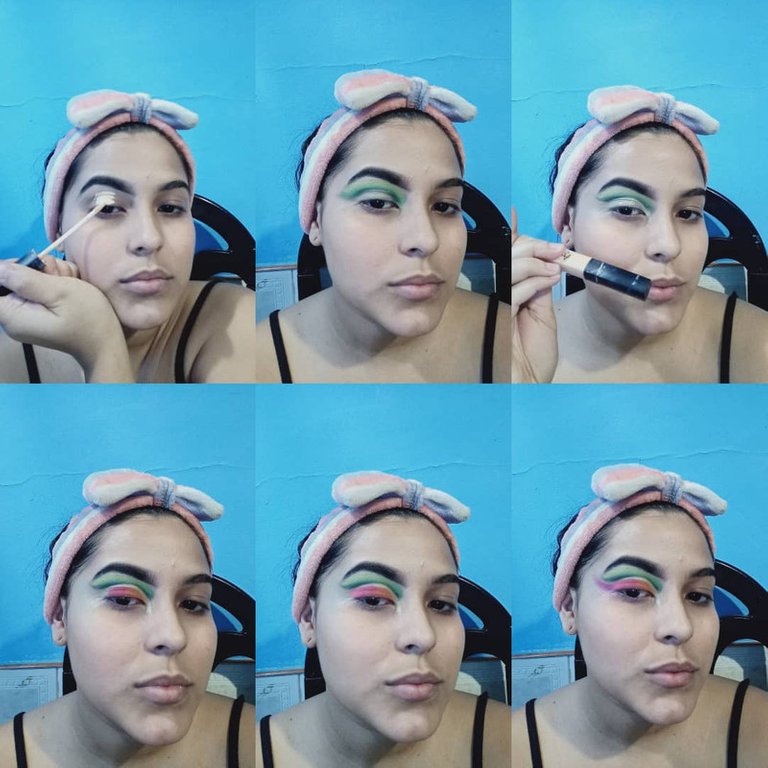
Como siempre les digo, es muy importante tener un rostro limpio antes de comenzar cualquier paso, por eso yo me lavo mi cara con agua y jabón especial, espero que se seque y listo. Arranco a realizar mi rostro.
Para empezar, realizo mis cejas como de costumbre, utilizando sombra especial para cejas, suelo colocarla de un tono oscuro con ayuda de un pincel, relleno poco a poco hasta que no se vea ningún vacío, siempre siguiendo la línea o forma de mis cejas, luego con ayuda del corrector limpio el borde para que se vea más marcada.
Para la parte de mis ojos, coloco un poco de corrector como pueden ver, para que las sombras que vaya a utilizar tenga un buen pigmento, en eso comienzo agregando un tono verde un poco oscuro por encima de mi cuenca, luego agrego un verde más claro para ir difuminado hacia arriba y tenga ese contraste entre los dos colores.
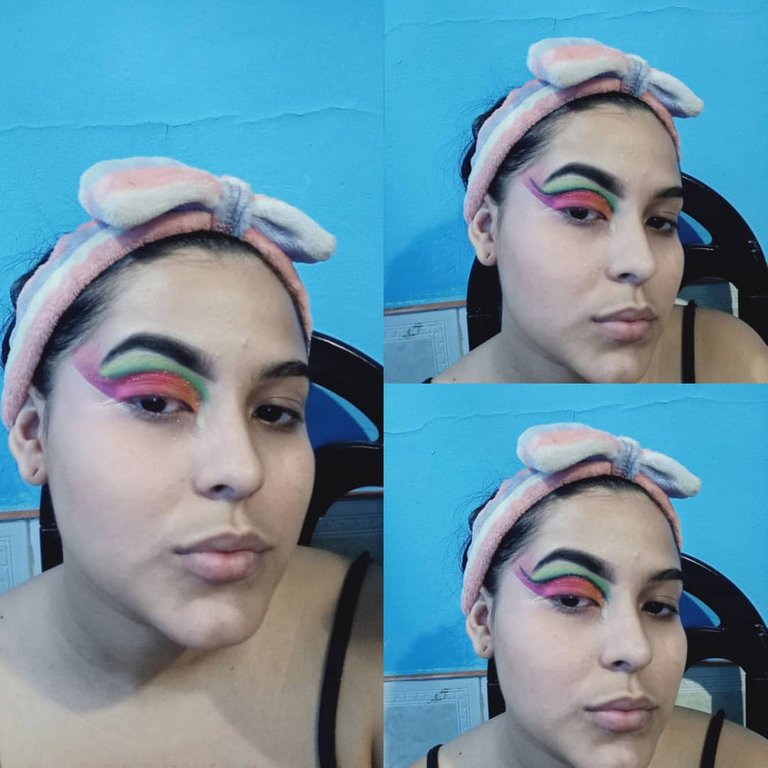
Luego de eso realizo un corte de cuenca con ayuda del corrector y una brocha, coloco el tono naranja al comienzo del lagrimal, luego el tono rojo, luego el fucsia y termino con el morado dándole forma de cola de gato, siempre haciendo una disfunción en los colores.
Para darle un toque diferente realicé este delineado gráfico como se conoce por encima de todo el corte de cuenca. Y en la parte inferior agregue un tono azul para variar.
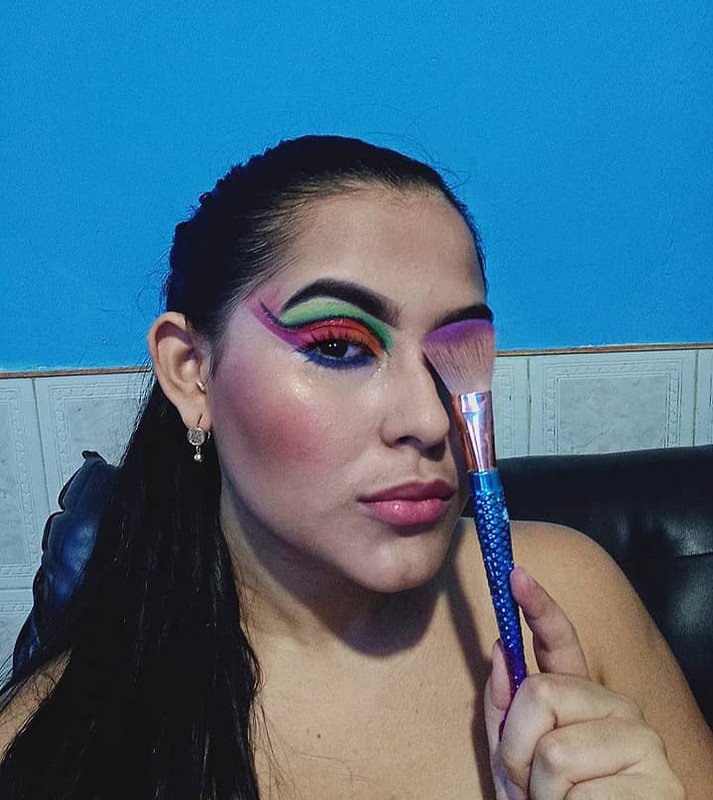
Luego coloco crema Humectante en mi rostro, lo deje actuar unos minutos o mejor dicho espero que se seque, luego aplico mi base con una esponja húmeda y la difumino por toda mi cara, hago contorno y sello con mi polvo compacto.
Espero que les haya gustado.
.

”ENGLISH”

Hello Makeup Power Comunity 🖌️🎨

A big greeting to all the people who every day strive to get ahead thanks to this platform, I wish you an incredible day, and from the bottom of my heart I hope you are doing very well.
Today I feel happy to never give up and keep going no matter what adversities there are, here I am.
This time I want to show you this beautiful make-up in colorful tones with a different eye socket cut and with a graphic black eyeliner. For more information, I invite you to read the following steps to follow.
I hope you enjoy this Makeup Tutorial🖌️🎨

As I always tell you, it is very important to have a clean face before starting any step, so I wash my face with water and special soap, wait for it to dry and that's it. I start to do my face.
To start, I do my eyebrows as usual, using special eyebrow shadow, I usually place it in a dark tone with the help of a brush, I fill in little by little until no gaps are visible, always following the line or shape of my eyebrows, then with the help of concealer I clean the edge to make it look more marked.
For the part of my eyes, I put some concealer as you can see, so that the shadows I am going to use have a good pigment, in that I start adding a green tone a little dark above my socket, then I add a lighter green to go blurring up and have that contrast between the two colors.
After that I make a cut of the socket with the help of the concealer and a brush, I place the orange tone at the beginning of the eyelid, then the red tone, then the fuchsia and finish with the purple giving it a cat tail shape, always making a dysfunction in the colors.
To give it a different touch I made this graphic eyeliner as it is known above all the basin cut. And at the bottom I added a blue tone for a change.
Then I put moisturizer on my face, leave it on for a few minutes or rather wait for it to dry, then I apply my foundation with a damp sponge and blend it all over my face, contour and seal with my pressed powder.
I hope you liked it.


Les doy las gracias por visitar mi blog, sus comentarios son muy valiosos para mi.
I thank you for visiting my blog, your comments are very valuable to me.
Me despido, hasta una próxima oportunidad.
I bid you farewell, until a future opportunity.
The translator used in my publication is :Translated with www.DeepL.com/Translator (free version)

Todo lo escrito es de mi autoría @virgi2001
Everything written is of my authorship @virgi2001
Las fotografías son de mi propiedad, capturando el momento con la cámara de mi teléfono Realme 6.
The photographs are my own, capturing the moment with my Realme 6 phone camera.
Hermosa combinación y hermoso el resultado final.
https://twitter.com/virgiesteves113/status/1539971290169151489
The rewards earned on this comment will go directly to the people sharing the post on Twitter as long as they are registered with @poshtoken. Sign up at https://hiveposh.com.
Muy bonito maquillaje 😍😍
Gracias amiga 😊