CHUPETERA DE SPIDERMAN / SPIDERMAN PACIFIER BAG
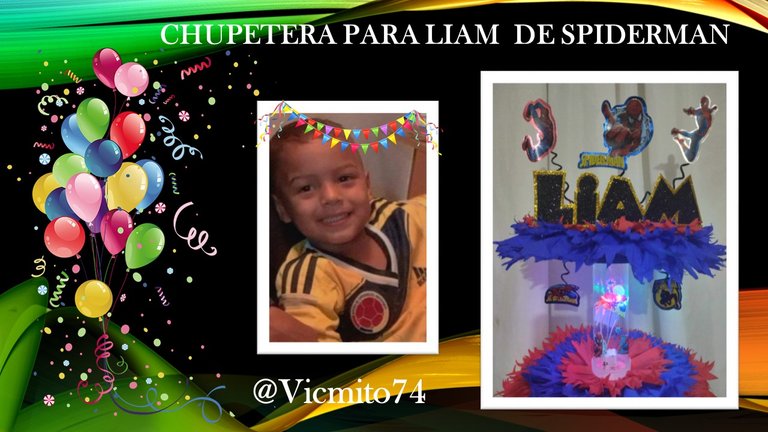
Hola mis queridos amigos de #DIYHub, hoy quiero compartirles mi alegría, mi sobrino-nieto, está de cumpleaños y vamos a celebrarlo, Liam Alejandro se llama, en días pasados estaba trabajando con mi proyecto y llego de visita y cuando vio que estaba trabajando con los gatitos, me dijo: abuela hazme una piñatica del hombre araña anda abuela, jajajaja! este próximo 26 de agosto, va cumplir sus 4 añitos, mi sobrina le compró la piñata, entonces yo me animé a hacerla una chupetera. A continuación les comparto el paso a paso de mi pequeño proyecto.
Hello my dear friends of #DIYHub, today I want to share my joy, my great-nephew, he has a birthday and we are going to celebrate it, his name is Liam Alejandro, in days gone by he was working with my [project](https://peakd.com /hive-189641/@vicmito74/recetario-de-gatitos-concurso-purr-fect-diyhub-kitten-recipes-purr-fect-diyhub-contest) and he came to visit and when he saw that I was working with the kittens, he told me : grandmother make me a piñatica of the spider man come on grandmother, hahahaha! This coming August 26, he will be 4 years old, my niece bought him the piñata, so I decided to make it a pacifier. Below I share the step by step of my little project.
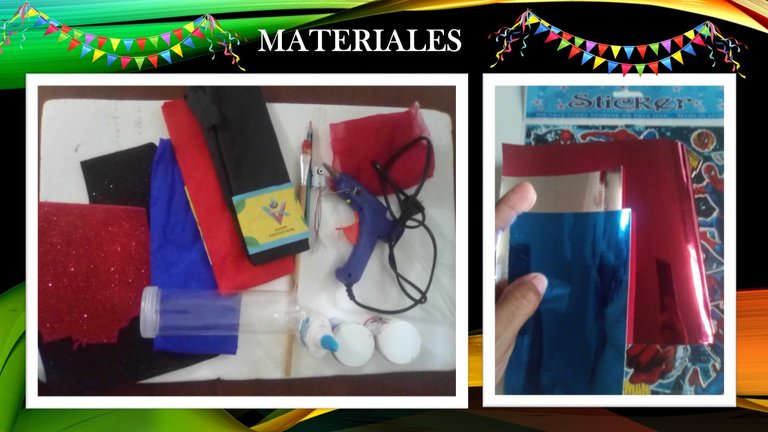
Para la elaboración de esta chupetera, utilice los siguientes materiales: Papel crepe (negro, azul y rojo), Cartulina satinada (roja y plateada), Calcomanías del hombre araña, pintura al frio (roja y azul), Foami escarchado, pincel, silicón en barra, luces de neón, un estuche de colonia, alambre, cola blanca y anime
For the elaboration of this pacifier, use the following materials: Crepe paper (black, blue and red), Satin cardboard (red and silver), Spiderman decals, cold paint (red and blue), Frosted Foami, brush, silicone in a bar, neon lights, a cologne case, wire and anime

PASO A PASO / STEP BY STEP
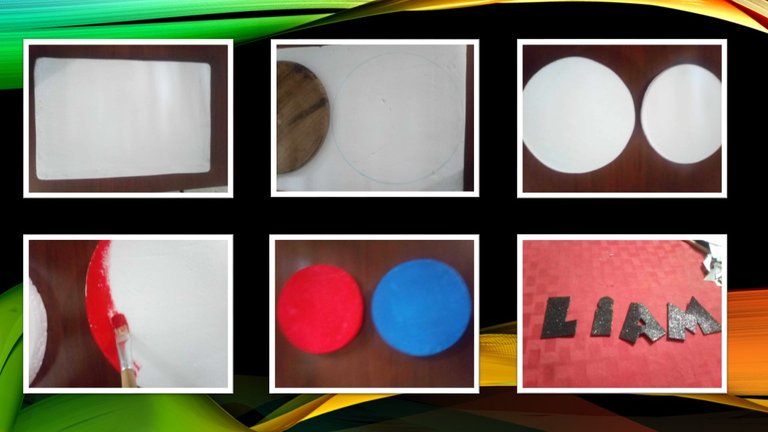
Paso 1. En el anime, trazamos dos círculos, cortamos y pintamos con la pintura al frio azul y roja. Con el foami negro, trazamos las letras del nombre LIAM y cortamos, una vez listas, las montanos sobre otro foami dorado escarchado y cortamos cada letra, dejando un centímetro para hacerle un relieve al nombre.
Step 1. In the anime, we draw two circles, cut and paint with blue and red cold paint. With the black foam, we trace the letters of the name LIAM and cut, once ready, mount them on another frosted gold foam and cut each letter, leaving one centimeter to emboss the name.
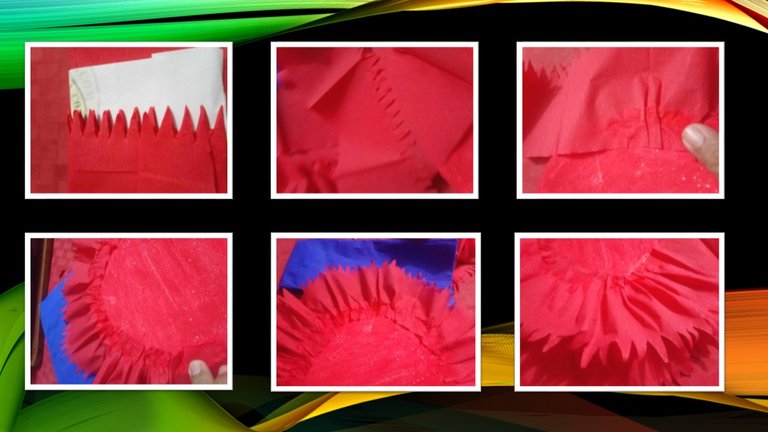
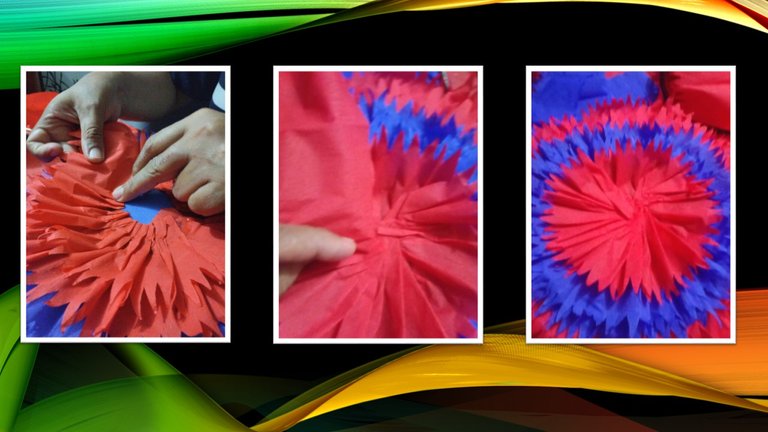
Paso 2. Con el papel crepé rojo y azul, cortamos tiras de 8cm de ancho, a las cuales le hice unos piquetes puntiagudos como se muestran en las imágenes, luego con la cola blanca fui colocando las tiras de colores de manera alternada hasta llegar al centro del circulo de anime.
Step 2. With the red and blue crepe paper, we cut 8cm wide strips, to which I made some pointed notches as shown in the images, then with the white glue I placed the colored strips alternately until reaching the end. center of the anime circle.
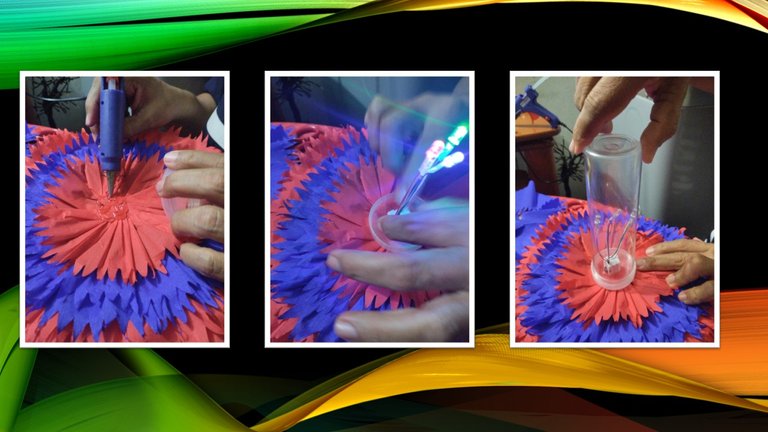
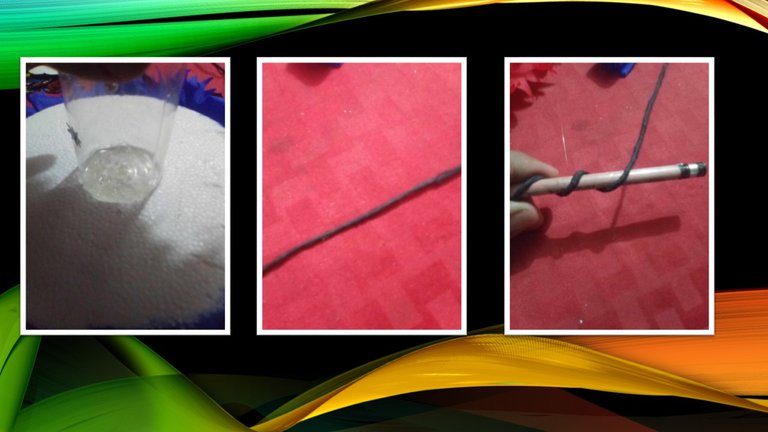
Paso 3. Una vez listos los aros, tomamos el cilindro o estuche de la colonia y lo separamos de la tapa, la tapa, la fijamos con silicón caliente al centro del aro y pegamos la luces de neón a la tapa, una vez fijadas las luces, el cilindro lo fijamos al otro circulo por la parte de abajo como se muestra en las imágenes. El alambre, lo forramos con papel de seda negro y con un lápiz hacemos formas de espiral.
Step 3. Once the rings are ready, we take the cylinder or case of the colony and we separate it from the lid, the lid, we fix it with hot silicone to the center of the ring and we glue the neon lights to the lid, once the lights, the cylinder is fixed to the other circle from the bottom as shown in the images. We cover the wire with black tissue paper and with a pencil we make spiral shapes.
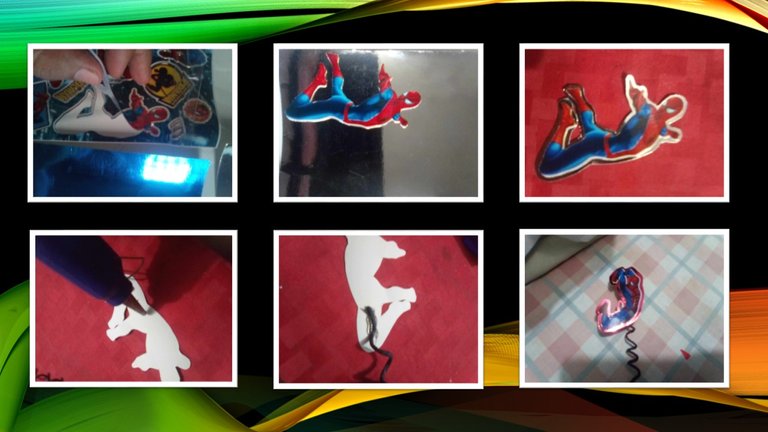
Paso 4. Tomamos las calcomanías, y las pegamos a la cartulina para darle fuerza, cortamos y dejamos un borde a cada figura del hombre araña, luego fijamos el alambre en espiral a dada figura para luego ser colocada de la base y tapa de la chupetera, también pegamos al cilindro varias calcomanías como se aprecia en la imagen final del proyecto ya terminado.
Step 4. We take the stickers, and glue them to the cardboard to give it strength, we cut and leave an edge for each spider-man figure, then we fix the spiral wire to each figure to later be placed on the base and lid of the pacifier holder , we also glue several decals to the cylinder as can be seen in the final image of the finished project.
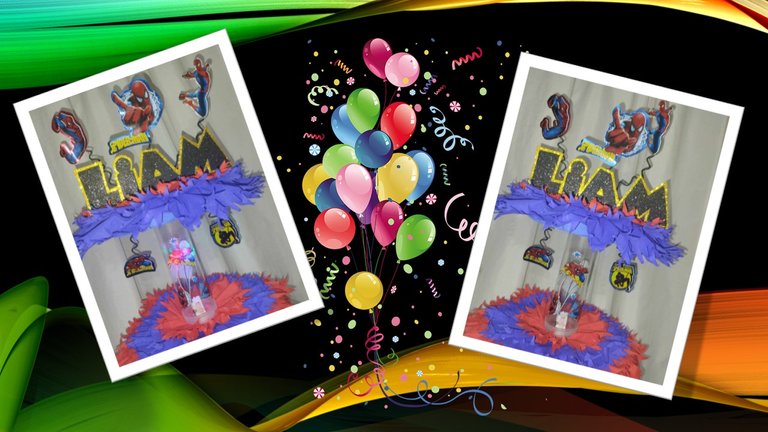
Aca la hermosa chupetera para mi nieto Liam Alejandro, luego se las muestro repleta de ricas chupetas, gracias por visitar mi blog, las imágenes son de mi autoría editadas con power point, utilice deepl para la traducción, los separadores son de mi autoría. Nos vemos pronto.
Here is the beautiful pacifier holder for my grandson Liam Alejandro, later I will show it to you full of delicious pacifiers, thanks for visiting my blog, the images are my own, edited with power point, use deepl for the translation, the separators are my own. See you soon.
This is beautiful. He shares the same birth month with me.
My birthday is on 20th.
I am glad that you have made him something so beautiful in his name.
Happy birthday to him in advance.
Hello, thank you very much for stopping by, this month many important people have their birthdays, my daughter turns 19 on the 18th of this month, my mother turned 22 and my father turns 21. I hope you enjoy your next birthday very much.
Well done working on this, looks cute. I wish advance happy birthday to the prince.
Thanks a lot hugs!