CHOKER 🍀 GARGANTILLA
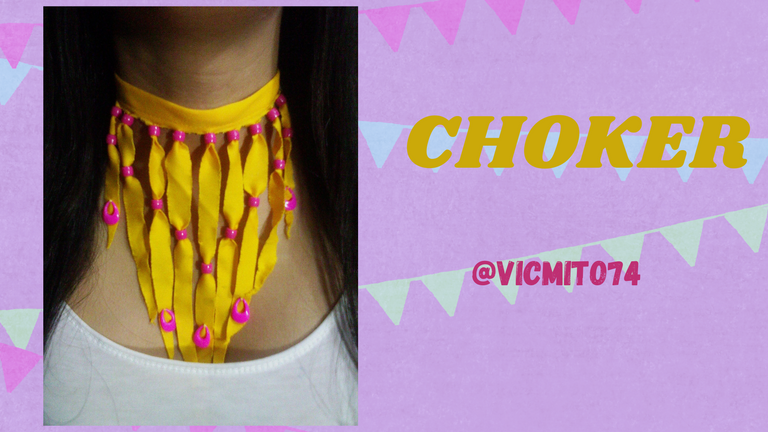
Hello friends of Hive Diy, I hope you had a nice Christmas, I hope that this new year will be one of many successes and entrepreneurship for everyone. Today I bring you a beautiful project, a nice necklace made with fabric (recycled from a skirt that my daughter doesn't use anymore) and beads, ideal to wear with casual clothes, I made it for my daughter, in fact she was my model. I hope you like it.
Hola amigos de Hive Diy, espero que hayan tenido un linda navidad, espero que este nuevo año, sea de muchos éxitos y emprendimiento para todos. Hoy traigo para ustedes un hermoso proyecto, una linda gargantilla hecha con tela (reciclada de una falda que ya mi hija no usa) y cuentas, ideal para usar con ropa casual, lo realice para mi hija, de hecho fue mi modelo. Espero les guste.

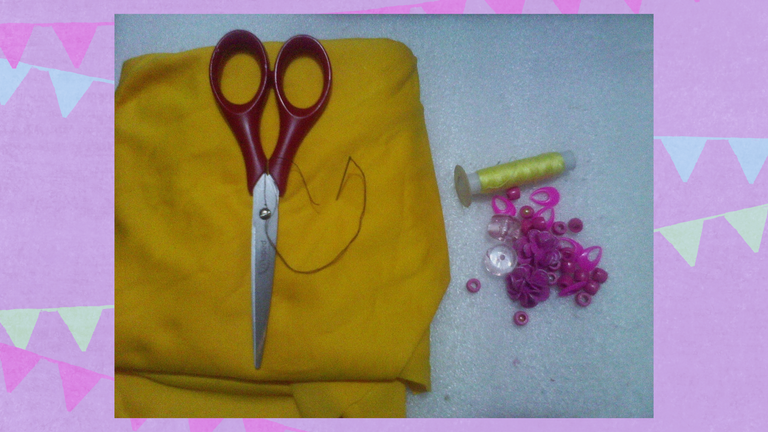
Fuchsia fabric, needle, thread, scissors and beads.
Tela, aguja, hilo, tijeras y cuentas color fucsia.
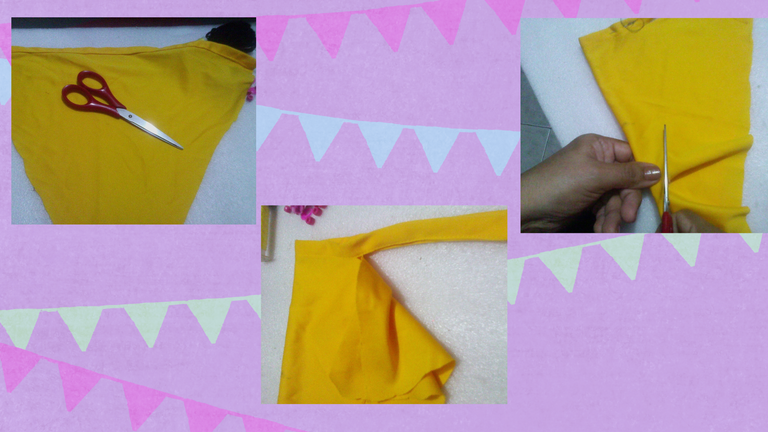
-From our piece of fabric we cut a triangle, trying to take the hem that the skirt already had, which is what we are going to use as the base of the choker.
-Then we chop about 5 cm from each side to reduce the triangle.
De nuestro pedazo de tela picamos un triángulo, procurando tomar el ruedo que ya tenia la falda, que es lo que vamos a utilizar como base de la gargantilla. Luego picamos unos 5 cm de cada lado para reducir el triángulo.
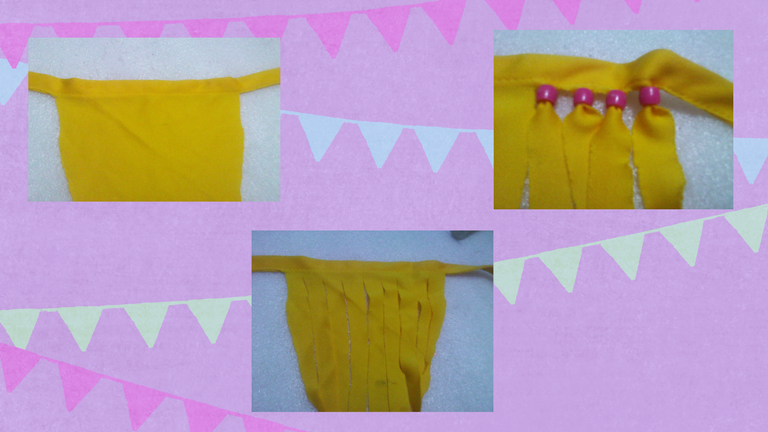
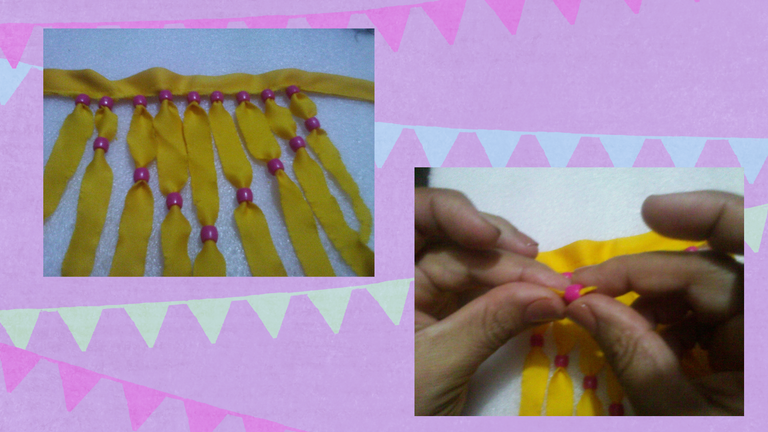
-After having cut the triangle, we cut into fringes, trying to leave the longest strip in the center.
-Then we begin to insert the beads into each strip, helping us with a needle.
Después de haber cortado el triángulo, picamos en flecos, tratando de dejar la tira mas larga en el centro. Luego comenzamos a introducir en cada tira las cuentas, ayudándonos con una aguja.
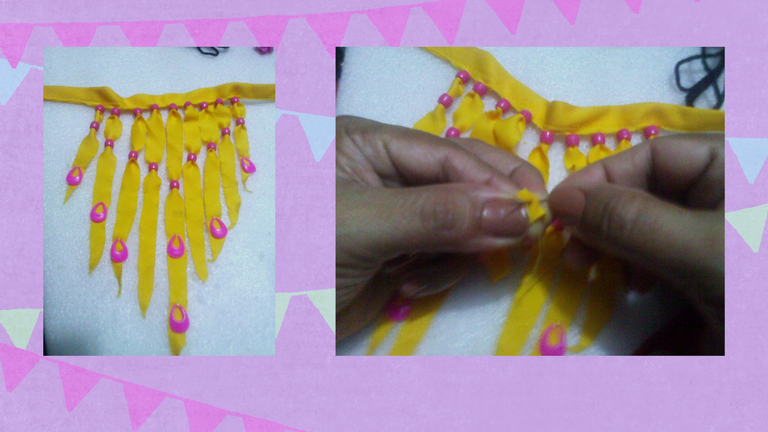
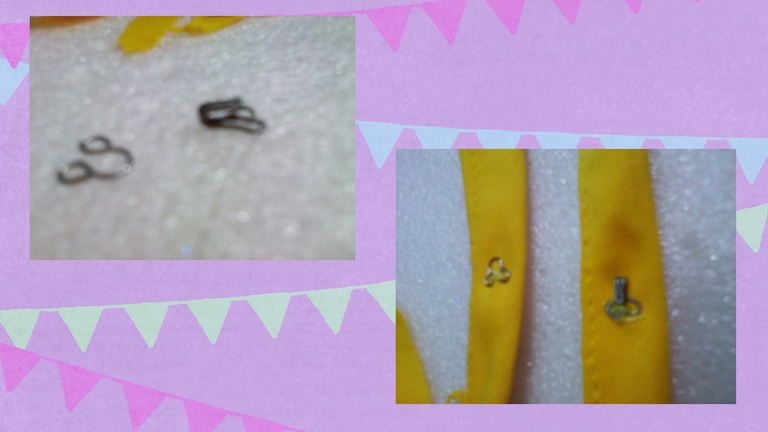
After having placed the first and second lines of beads, with the help of the needle and thread, we fix the tears to the fabric in a sauteed way as shown in the images. Finally, we glue the badges to the necklace.
Después de haber colocado la primera y segunda línea de cuentas, con la ayuda de la aguja e hilo fijamos las lagrimitas a la tela de manera salteada como se muestra en las imágenes. Por ultimo, pegamos los gafetes a la gargantilla.

And this is the final result; we see that it looks really beautiful with two types of clothing. For the realization of this post, use the google translator, separator from @ eve66, the images are my own, edited with canva. See you in the next installment.
Y este es el resultado final; vemos que se ve realmente hermoso con dos tipos de prendas de vestir. Para la realización de este post, use el traductor de google, separador de @eve66, las imágenes son de mi autoría, editadas con canva. Nos vemos en la próxima entrega.

0
0
0.000
0 comments