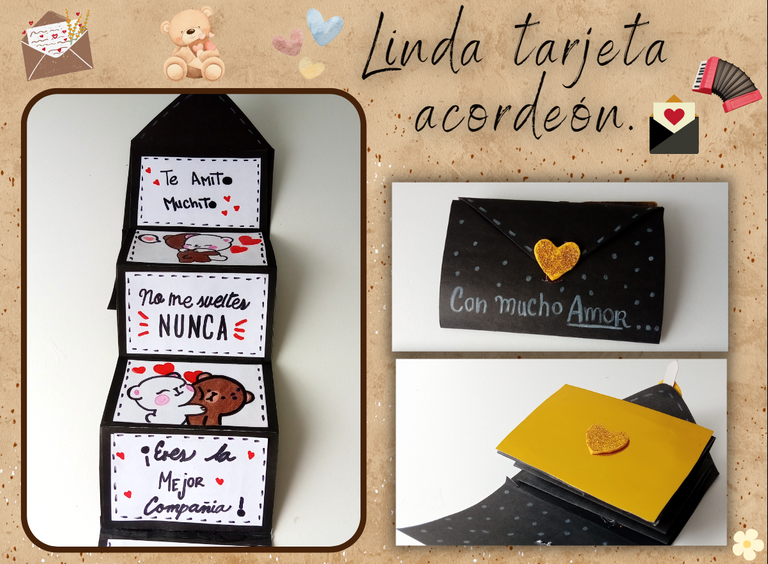
[Esp/Eng] ✨ Linda tarjeta acordeón. // Cute accordion card.✨
✨💌¡Hola amigos amantes de la creatividad! Espero que hayan pasado un muy buen comienzo de semana.💌✨
🔸Sin más que añadir, a continuación los dejo con el paso a paso:
✨💌¡Hello friends who love creativity! I hope you had a very good start to the week.💌✨
This time I share the step by step to make a beautiful accordion card. I remember that before I did a lot of this type of detail to give to my boyfriend, because I thought they were very cute, easy to do and without a doubt, they are a nice detail in which you not only have to write, but you can also make beautiful drawings. I am sharing this step by step, because I know that it is something quick to prepare and that most of us are looking for this type of detail to give to our partner or a loved one. In addition, it is an excellent option as a companion to a more elaborate gift. Be that as it may, or the idea you have to give it away, here I leave you this beautiful idea.
🔸Without more to add, then I leave you with the step by step:
♥️ESPERO QUE TE GUSTE,
¡Empecemos!
♥️I HOPE YOU LIKE IT,
Let's start!

✂️ MATERIALES | ✂️ MATERIALS
- Cartulina escolar negra.
- Cartulina metalizada dorada.
- Foami escarchado dorado.
- Hojas o cartulina blanca.
- Marcadores o crayones de colores.
- Marcador negro.
- Pegamento.
- Regla.
- Tijera.
- Lápiz.
- Black school cardboard.
- Gold metallic cardboard.
- Gold ice cream foami.
- Sheets or white card.
- Markers or colored crayons.
- Black marker.
- Glue.
- Ruler.
- Scissors.
- Pencil.
💌 PROCEDIMIENTO | 💌 PROCESS
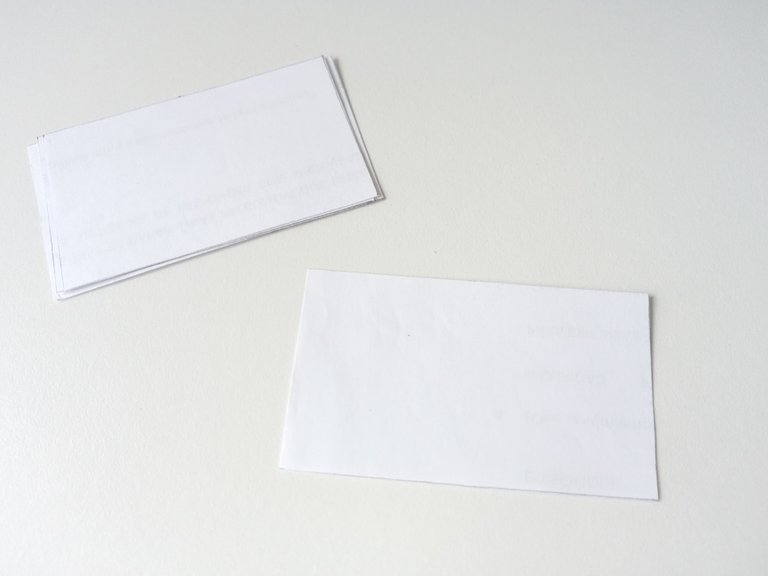
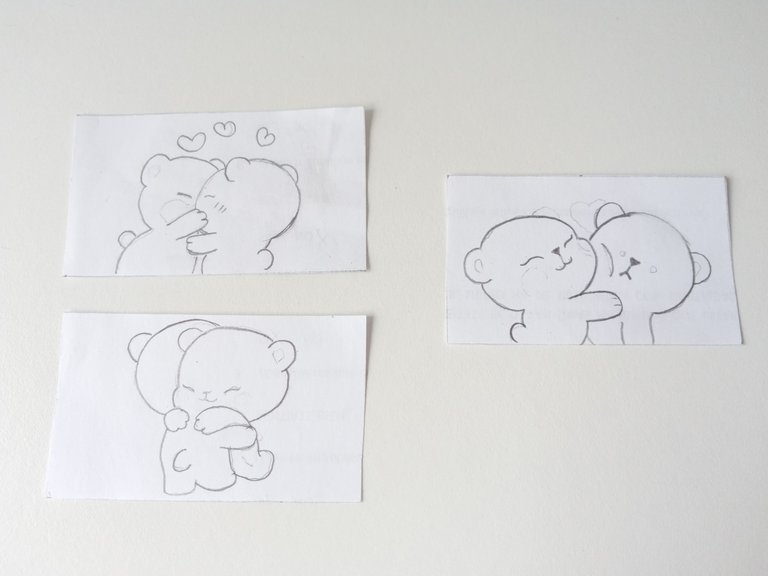
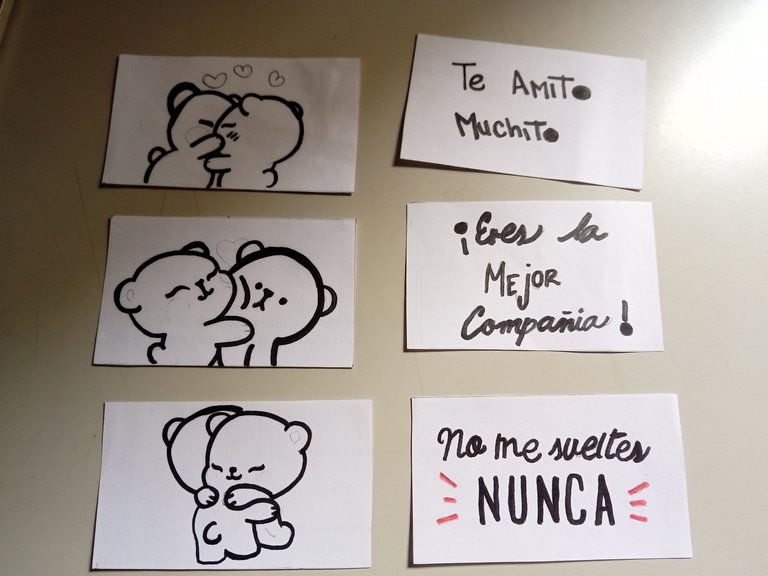
- PASO 1:
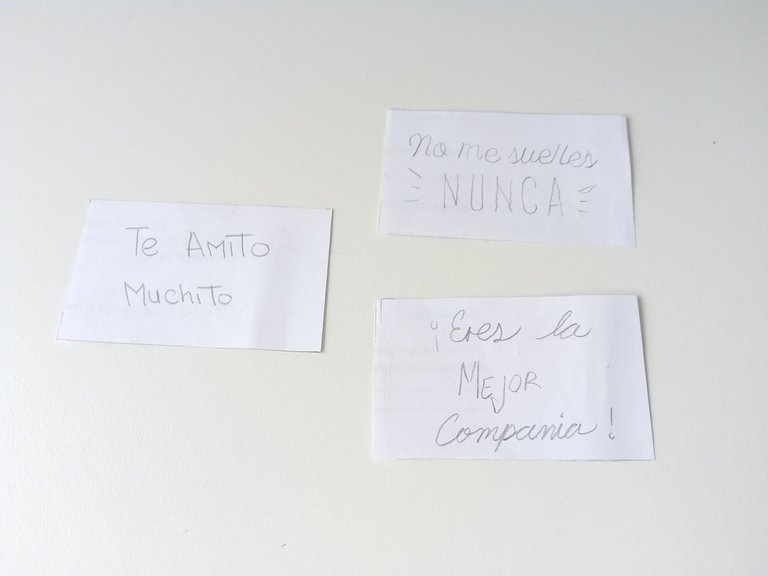
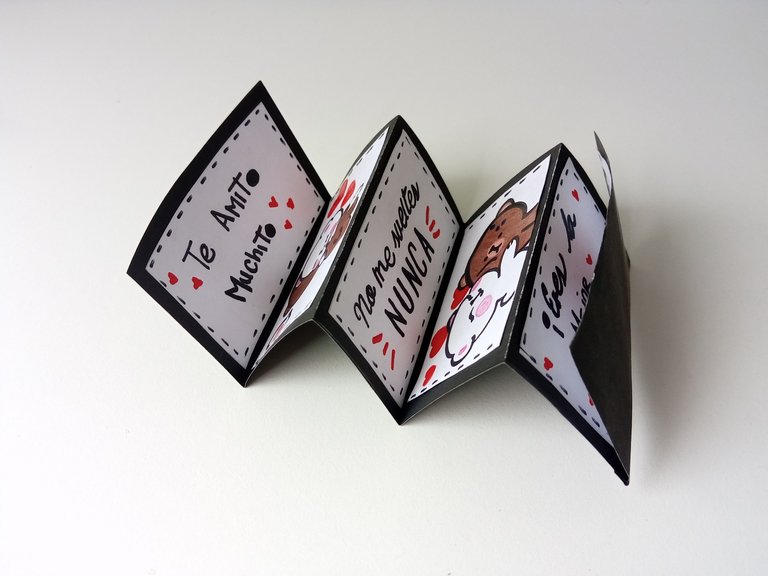
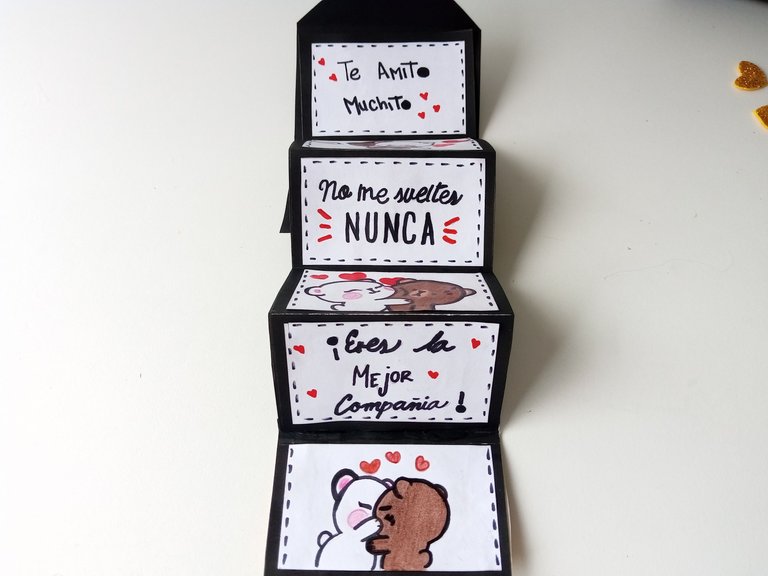
Lo primero que hice fue recortar los rectángulos donde va a ir lo escrito de la carta y los dibujos. Así que recorté 6 rectángulos de 7.5 cm x 4.5 cm. Luego de tener todas las hojas, busque dibujos tiernos y me encontré con algunas imagines de ositos bastante tiernos y románticos. Seleccioné 3 imagines y las dibujé en 3 de las hojas. Para las 3 hojas restantes escribí mensajes bonitos.
- STEP 1:
The first thing I did was cut out the rectangles where the writing of the letter and the drawings will go. So I cut 6 7.5cm x 4.5cm rectangles. After I had all the pictures, I searched for cute drawings and found some pretty cute and romantic bear images. Select 3 pictures and draw them on 3 of the sheets. For the remaining 3 sheets I wrote beautiful messages.
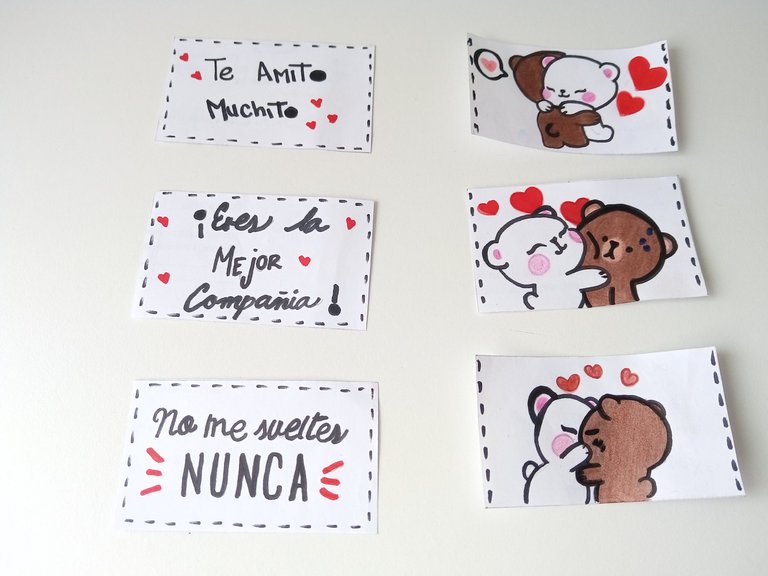
- PASO 2:
Una vez hecho esto, tracé todo el borde de los dibujos con marcador negro y resalté el mensaje con el mismo marcador. Después, coloreé todos los dibujos, agregué corazones y detalles con marcador rojo. Además, dibujé pequeñas líneas por todo el borde de la hoja.
- STEP 2:
Once this was done, I traced around the edge of the drawings with a black marker and highlighted the message with the same marker. Then I colored all the drawings, added hearts and details with a red marker. And additionally, I drew little lines around the edge of the page.
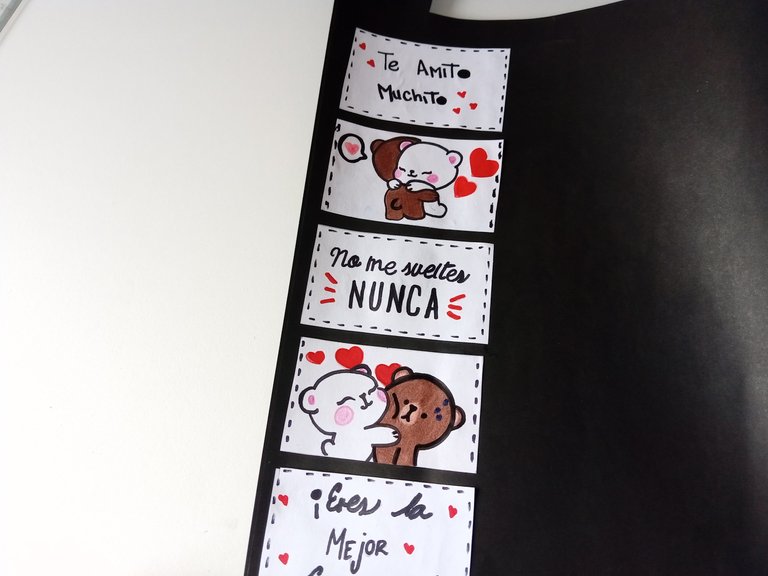
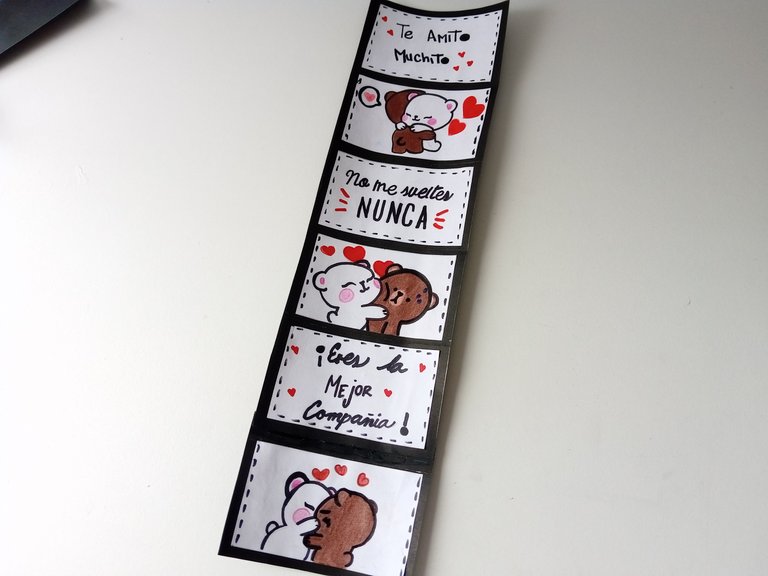
- PASO 3:
Luego, pegué todas las hojas en cartulina escolar negra, dejando 0.5 cm de distancia entre cada hoja y recorté, igualmente, dejando 0.5 cm de espacio en los laterales. Por último, doblar en forma de acordeón.
- STEP 3:
Then, I glued all the sheets on black school cardboard, leaving 0.5 cm of distance between each sheet and I also cut, leaving 0.5 cm of space on the sides. Finally, fold accordion-shaped.
- PASO 4:
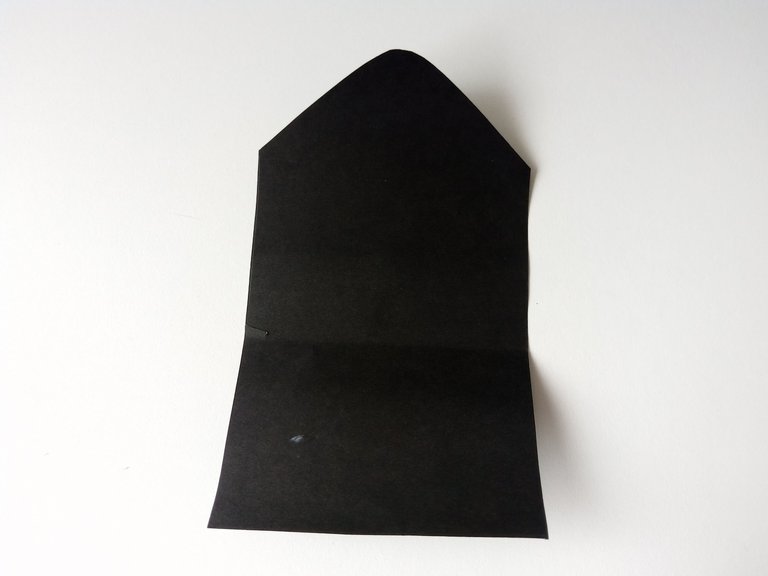
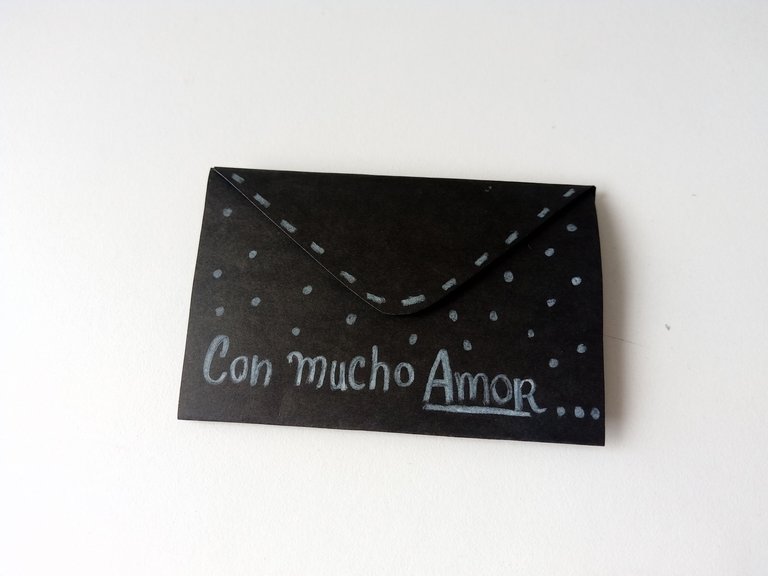
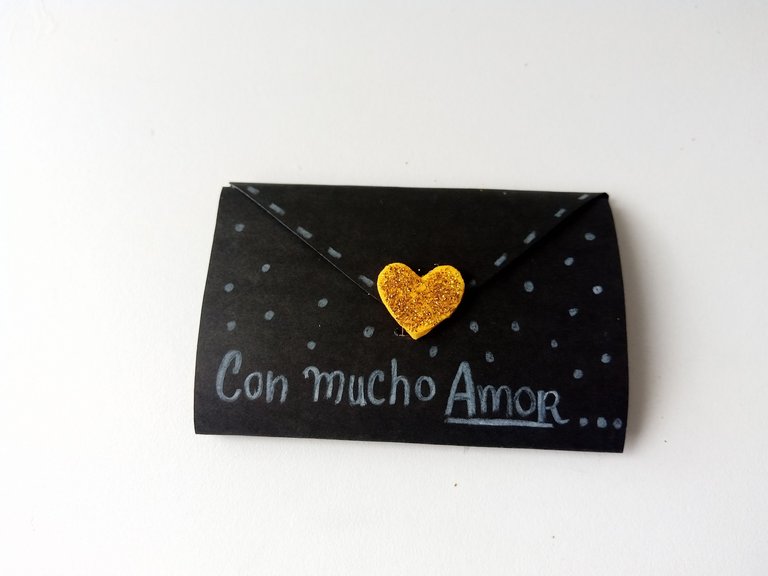
Para el sobre, Tracé y recorté en cartulina negra, una pieza de 15.5 cm x 9 cm, es decir; 0.5 cm más ancho que el tamaño del acordeón. Luego doblé en 3 partes y a la parte superior, lo corté un poco más y le di forma de sobre, haciendo un triángulo con la punta ovalada. Lo cerré y le escribí con creyón blanco, en lo que sería el frente del sobre ‘’Con mucho amor’’ y dibujé algunos puntos y líneas por el borde.
- STEP 4:
For the envelope, I traced and cut out a 15.5 cm x 9 cm piece of black cardboard, that is; 0.5 cm wider than the accordion size. Then I folded it into 3 parts and at the top I cut it a little more and shaped it into an envelope, making a triangle with an oval tip. I closed it and wrote in white crayon, on what would be the front of the envelope, "Lots of love" and drew some dots and lines around the edge.
- PASO 5:
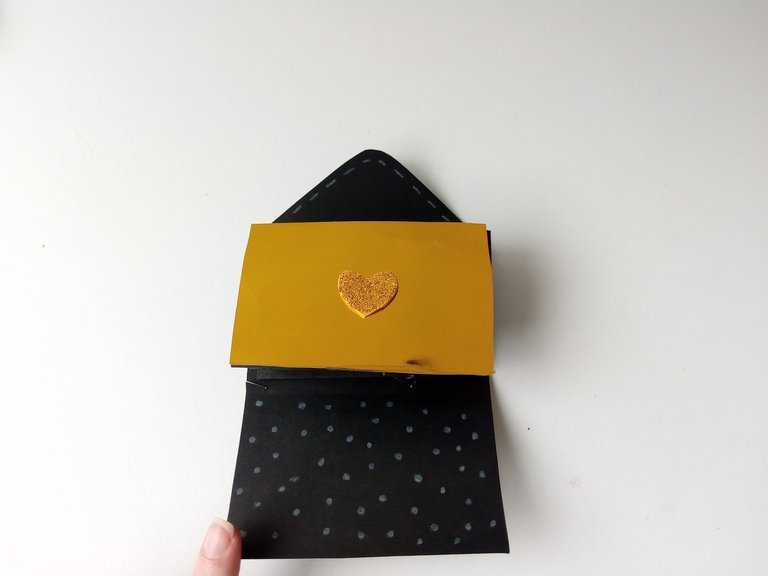
Pegué el acordeón en la parte interna del sobre, justo en medio y en la última pared del acordeón, como detalle extra, pegué un rectángulo en cartulina dorada y en medio un corazón con foam escarchado dorado. Cerré y pegué en la punta del sobre una pequeña flecha de 2 cm, hice una abertura para poder insertarla y sobre la flecha, pegué otro corazón con foami escarchado.
- STEP 5:
I glued the accordion on the inside of the envelope, right in the middle and on the last wall of the accordion, as an extra detail, I glued a rectangle in gold cardboard and in the middle a heart with gold frosted foam. I closed and glued a small 2 cm arrow to the tip of the envelope, I made an opening to insert it and on the arrow, I glued another heart with frosted foam.

✨💌¡Y listo!💌✨ De esta forma muy fácil y rápida, podrás regalar un lindo detalle a tu pareja o ser querido. Recuerda que solo te doy ideas para que te inspires a crear este ejemplo que te doy y dejes volar tu imaginación. Como decía, puedes darlo como extra en un regalo más elaborado o regalarlo tal cual sin necesidad de que sea una fecha especial.
❤️Hasta la próxima publicación.
✨💌¡And ready!💌✨ In this very easy and fast way, you can give a nice detail to your partner or loved one. Remember that I only give you ideas so that you are inspired to create this example that I give you and let your imagination run wild. As I said, you can give it as an extra in a more elaborate gift or give it as is without the need for it to be a special date.
❤️Until the next post.
✨RESULTADO: | ✨RESULT:


Todas las fotografías son de mi propiedad.
Separador y Fotos editadas en Canva
All photographs are my property.
Photos edited in Canva
Dice Olivia, Olivia no yo jajaja, que ella quiere algo así hecho por su hermosa tía Valen ❤️❤️
Jaja si supiera Olivia 🤭 Ay ! dile que su tia con gusto le hace esas cositas. 💕🥺
Ay ñomiooo QUE BELLEZA y delicadeza 😍😍 la amé, los ositos te quedaron demasiado tiernos
Muchas gracias Mili! 💕 La verdad soy mala dibujando, pero estos me quedaron tiernos 🤭
Gracias por pasarte 💕
Congratulations @valenpba! You have completed the following achievement on the Hive blockchain And have been rewarded with New badge(s)
Your next target is to reach 4000 comments.
You can view your badges on your board and compare yourself to others in the Ranking
If you no longer want to receive notifications, reply to this comment with the word
STOPTo support your work, I also upvoted your post!
Check out our last posts:
Amiguita, te quedó bellísima, los ositos le dieron un aspecto super tierno!
Mi Kris, muchas gracias ❤️ me alegra que te haya gustado.
Yay! 🤗
Your content has been boosted with Ecency Points, by @valenpba.
Use Ecency daily to boost your growth on platform!
Support Ecency
Vote for new Proposal
Delegate HP and earn more
Wow, realmente se ve muy bien esta tarjeta y tiene un estilo muy personal. Amo la manera en que presentas las fotografías a través del post. Son de gran calidad y están bien tomadas. Esta idea es sencilla, personal y llamativa a la vez, felicitaciones...
Muchas gracias! ✨ Agradezco mucho tu comentario, a veces siento que las fotos no quedan tan bien, pues trabajo con luz del sol, así que a veces juega en contra, jaja.
Me alegra mucho que te haya gustado, saludos.✨
¡Felicidades! Esta publicación obtuvo upvote y fue compartido por @la-colmena, un proyecto de Curación Manual para la comunidad hispana de Hive que cuenta con el respaldo de @curie.
Si te gusta el trabajo que hacemos, te invitamos a darle tu voto a este comentario y a votar como testigo por La Colmena.
Si quieres saber más sobre nuestro proyecto, te invitamos a acompañarnos en nuestro servidor de Discord.
Muchas gracias por el apoyo 💓
Qué detalle tan hermoso! Quedo estupendo, todos los dibujitos hechos a mano, me encantó. Si le hago uno a mi esposo se flipa! guardaré tu publicación, gracias por compartir con nosotros.
Muchas gracias amiga! 🤭 Me alegra mucho que sea de tu agrado y que te hayan gustado mis dibujos.
Espero te animes a elaborar una tarjetita así para tu esposo, seguro te queda mucho más bello, pues eres una experta dibujando.💕
Muy bonita y tierna esta tarjeta acordeón. Estas figuras me gustan mucho. Lindo trabajo.
Muchas gracias amiga 💕
Me alegra que te haya gustado. La verdad son bastante sencillos los dibujitos, no llevan mucho trabajo.
Muchas gracias por tu comentario, saludos. 😊✨
Que hermosa tarjeta mi querida Valen, saludos.
Muchas gracias bella! Me alegra mucho que te haya gustado.
Saludos 💕
AHAHAHAHAHAAAAAH Esta muy cuchiiisssss 😍😍😍 me encanta!
Ainsss 🥰 muchas gracias amiga bella, me alegra que te haya gustado.
Congratulations, your post has been upvoted by @dsc-r2cornell, which is the curating account for @R2cornell's Discord Community.
Enhorabuena, su "post" ha sido "up-voted" por @dsc-r2cornell, que es la "cuenta curating" de la Comunidad de la Discordia de @R2cornell.
Muchas gracias por el apoyo amigos @dsc-r2cornell 💕
Pero esta es la cosita más bella y tierna😍
Me encanta y más aún como explicas el paso a paso y que se ve súper fácil..
Sabes que amo este tipo de detalles verdad? Me encanta amiga, gracias por compartir tu excelente tutorial💖
Ay 🤭 muchas gracias amiga bella. Bueno, una hace lo que puede 😁 intentando que salga lo más bonito posible, ya sabes cómo soy.
Si amiga, lo sé y te doy las gracias por siempre dejarme comentarios bonitos que me animan a continuar haciéndolo lo que me gusta💖
Ayyyy no puede ser tanta dulzura!
Amiga te quedaron bellisimos los ositos, tal cual se ven en el chat
Te felicito, un trabajo lindo
Que ternuraaaa🥺🥺❤️😍😍
Me encantó esta targeta, amiga 🥺
Los ositos quedaron preciosos.
Muchas gracias amiga 🥺🥰
Una es mala dibujando pero estos estaban fáciles 🤭
Muchas gracias por pasarte mi Albi.
Te quedo linda amiga, muy creativa, saludos.
Muchas gracias, que linda!
Saludos.✨
Yo amo estás tarjetitas, se ven tan tiernas y llenas de amor. Me encantó como te quedó muy vale🥰💕
Muchas gracias amiga! Es verdad, a ti te gusta hacer tarjetitas y eres super buena en eso.
Me alegra que te haya gustado mi Yage.💕✨
Vale pero que relinda te ha quedado 🥹 me gustó mucho es fácil de elaborar me habría imaginado algo peor 🤭 tu siempre elaborando preciosidades. 🌸
Ay mi Dani! 💕 Tu siempre tan linda conmigo, te mando un fuerte abrazo.
Tu también eres super creativa decorando tus cupcakes y en eso sí que soy fatal , a ver si sube una receta con las cremas que preparas para decorar.
Dale vale si va, estoy por activarme con mis recetas y vengo con todoooo! ❤️
Ayyyy pero que bella tarjeta amiga, yo siempre he querido hacer una así tipo acordeón pero no sabía muy bien como hacerlo, tu tutorial me ayudará mucho, me encantaron los ositos, te quedaron muy lindos y tiernos, la tarjeta completa de quedó bellísima 🥰
que creativa , muy tierna idea😃