A nice bracelet to wear for Christmas!! 💫🎄
Hola a todos en esta grandiosa comunidad, bienvenidos a mi blog 💝 para todos ustedes es mi primera vez por acá y quiero hacerlo mostrándoles como elaborar una sencilla pero hermosa pulsera de color navideño; muy acordé a nuestra temporada, la cual es muy fácil de hacer.
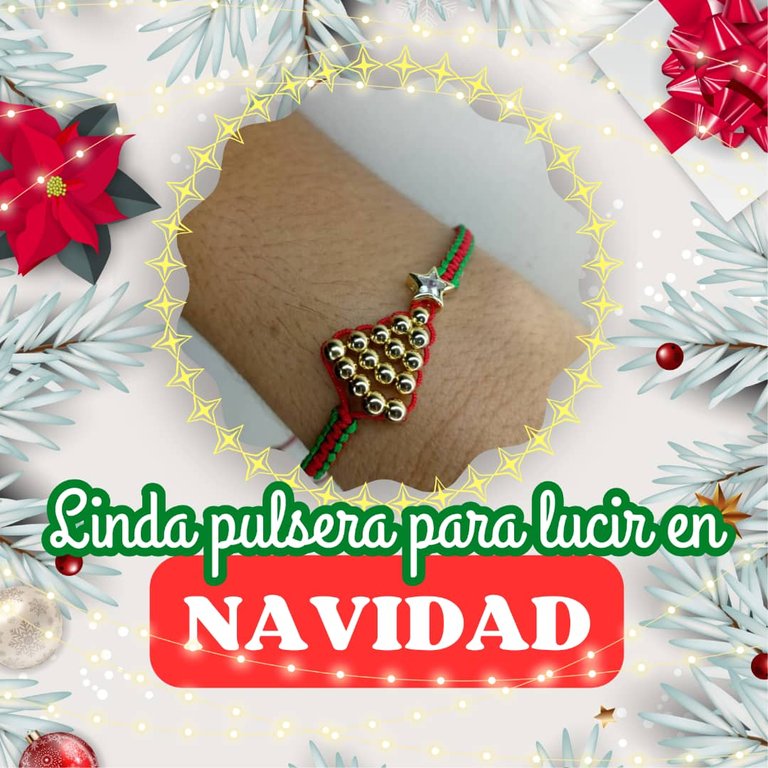
Hello everyone in this great community, welcome to my blog 💝 for all of you is my first time here and I want to do it by showing you how to make a simple but beautiful bracelet of Christmas color; very according to our season, which is very easy to do.
Pueden usar la combinación de hilos que ustedes prefieran; yo en este caso tomé los colores de la navidad, para llevar junto a mi mejor atuendo.
You can use the combination of yarns that you prefer; in this case I took the Christmas colors, to wear with my best outfit.

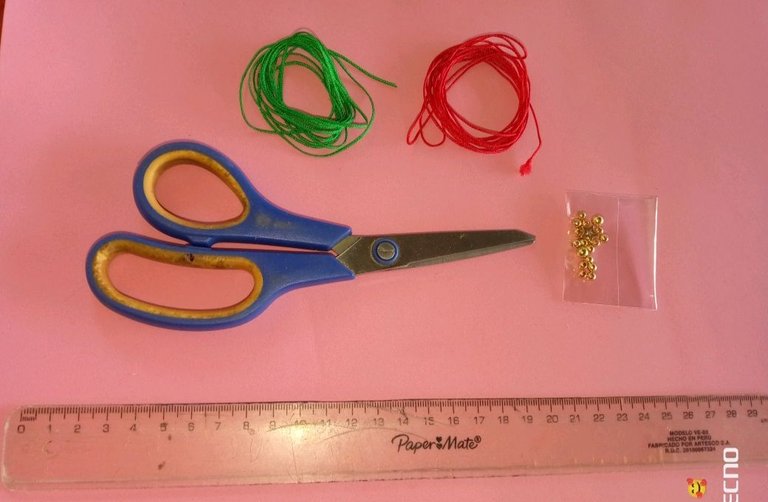
💫 15 balines o cuentas de acero doradas de 3mm
💫 2 balines o cuentas de acero doradas de 4mm
💫 Tijeras
💫 Regla
💫 1 Dije separador de estrella
💫 15 3mm gold-plated steel beads or pellets
💫 2 4mm gold plated steel beads or balls
💫 Scissors
💫 Ruler
💫 1 star spacer

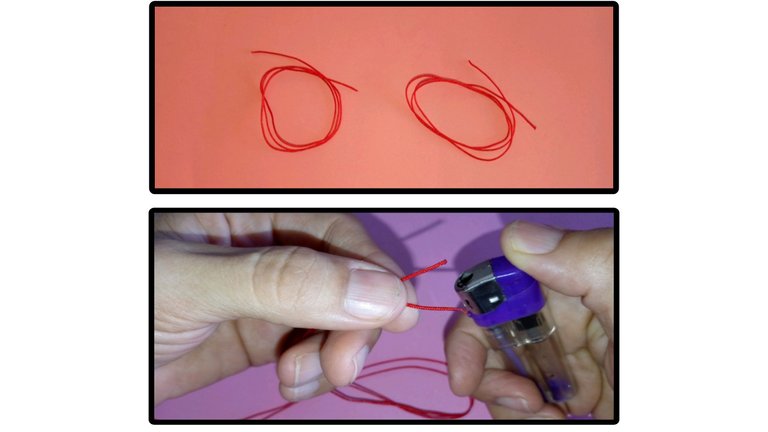
- 1
Tomamos el hilo chino de 0.8 mm de los cuales vamos a utilizar dos hebras de 35 cm cada uno; quemamos y afilamos las cuatro puntas para hacerlas lo más delgado posible que pase por el orificio de nuestros balines.
We take the Chinese thread of 0.8 mm of which we are going to use two strands of 35 cm each; we burn and sharpen the four tips to make them as thin as possible to pass through the hole of our pellets.
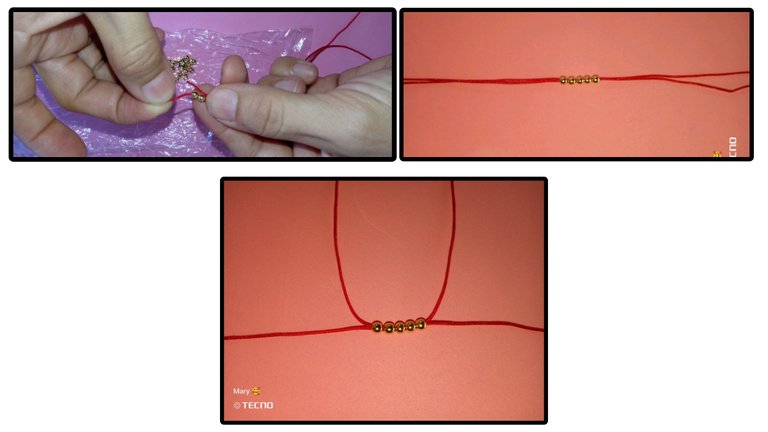
- 2
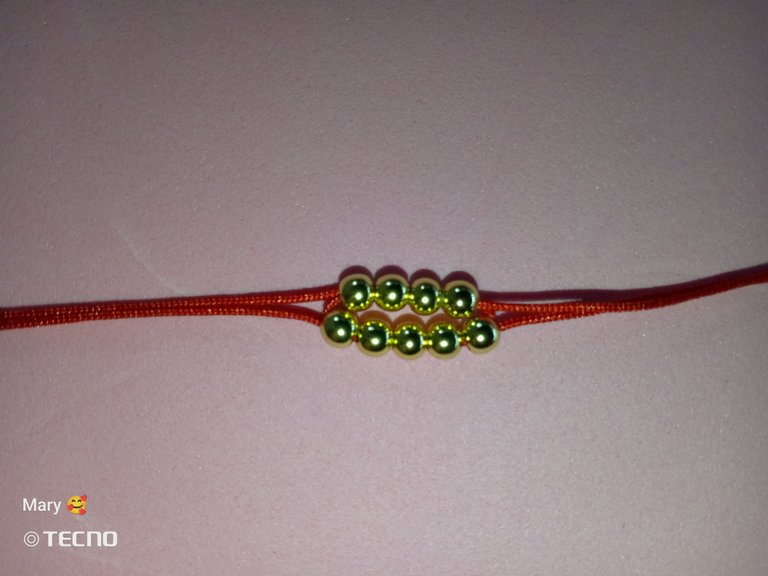
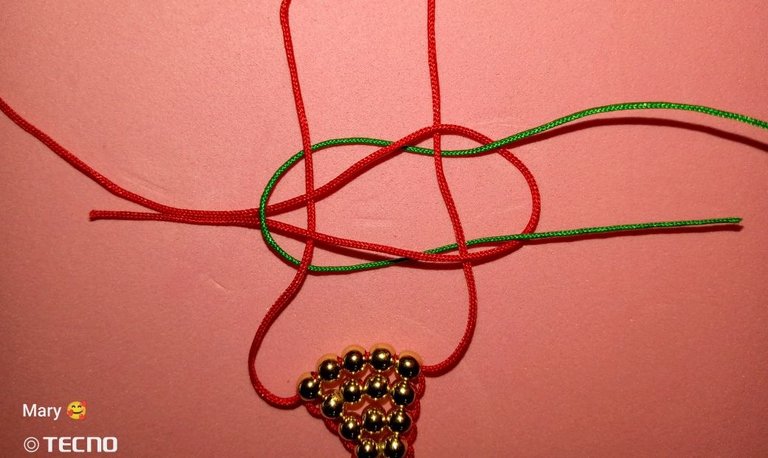
Unimos 2 hilos entre si, introducimos cinco balines dorados y los ubicamos en el centro de ambos hilos luego separamos los hilos que salen hacia abajo y los que salen hacia arriba.
We join 2 threads together, introduce five golden balls and place them in the center of both threads, then separate the threads that go downwards and those that go upwards.
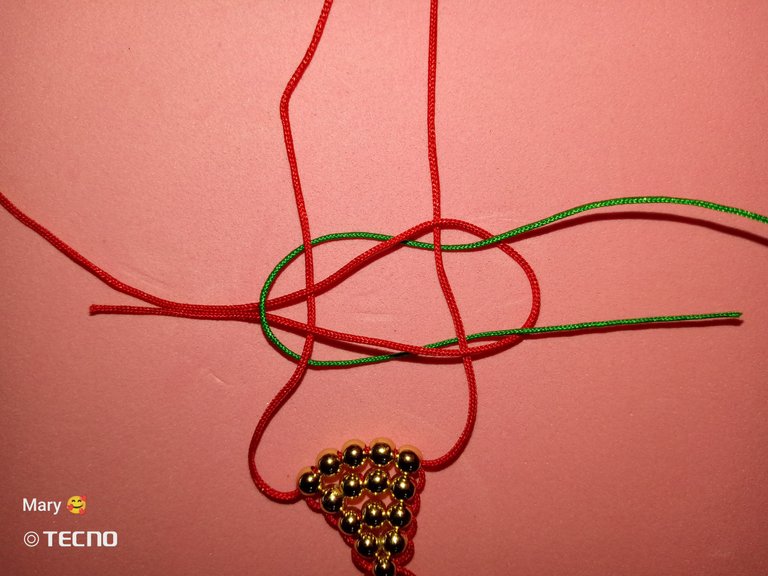
- 3
Introducimos cuatro balines a través de uno de los dos hilos que llevamos hacia arriba y luego en sentido contrario pasamos el otro hilo a través de los cuatro balines La idea es cruzar los hilos.
We introduce four pellets through one of the two threads that we carry upwards and then in the opposite direction we pass the other thread through the four pellets. The idea is to cross the threads.
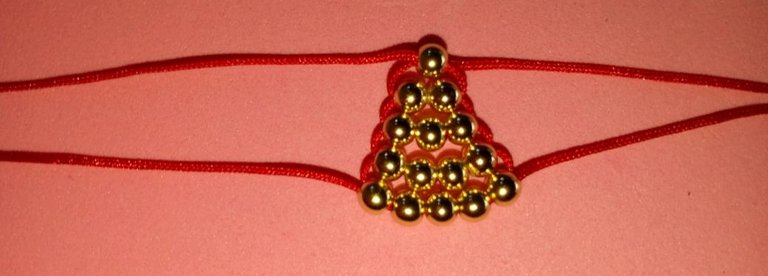
Este proceso lo vamos a ir repitiendo con mucha paciencia con cada escalón de cuentas en forma regresiva hasta llegar al último balín durante este proceso debemos halar los hilos para que vaya tomando la forma de arbolito como pueden notar.
We are going to repeat this process with great patience with each step of beads in a regressive way until we reach the last bead. During this process we must pull the threads so that it takes the shape of a tree as you can see.
- 4
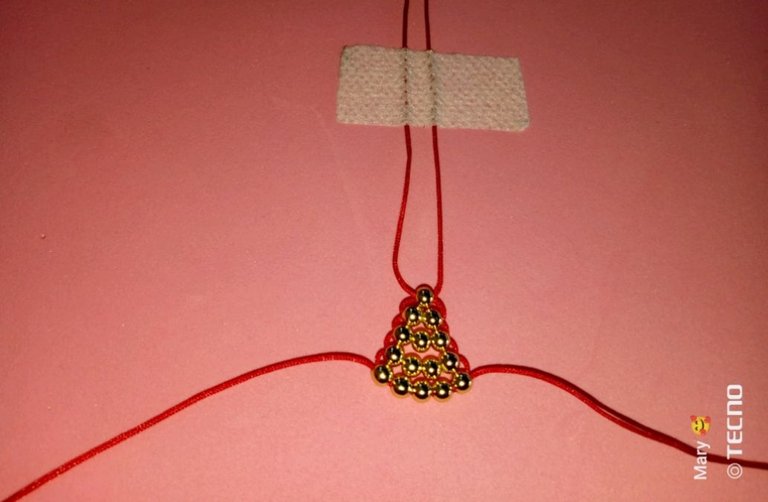
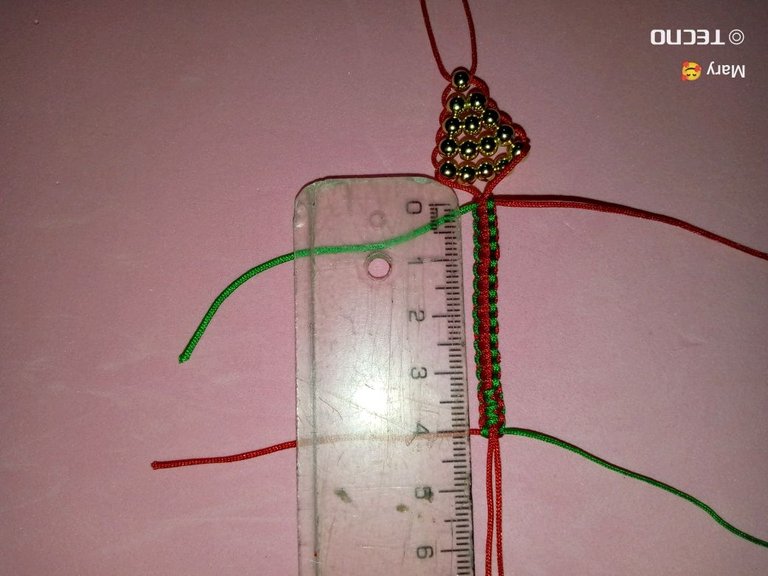
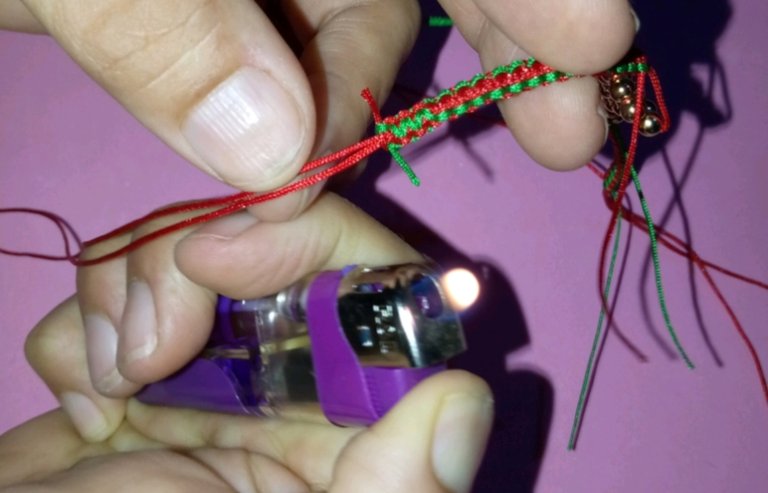
Una vez que tenemos la forma de árbol llegó el momento de fijar los hilos con cinta adhesiva a nuestra mesa (no tengo el tejedor de madera).
Once we had the tree shape it was time to tape the threads to our table (I don't have the wooden weaver).
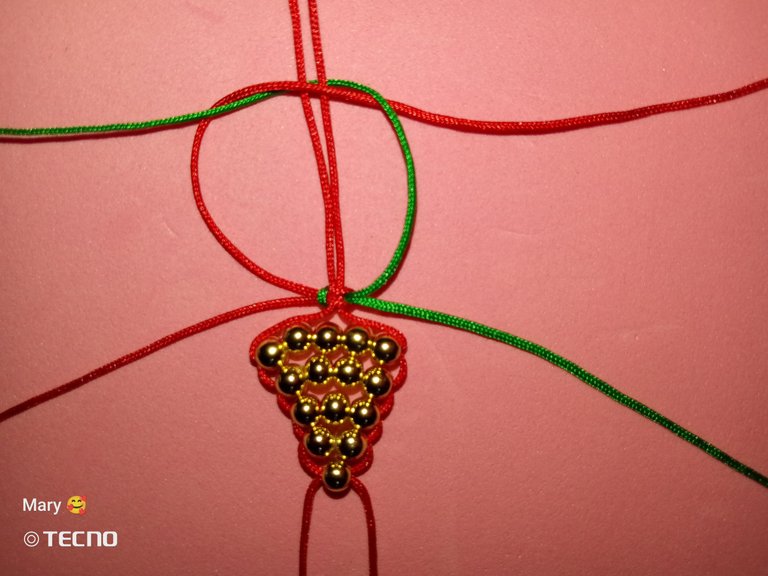
- 5
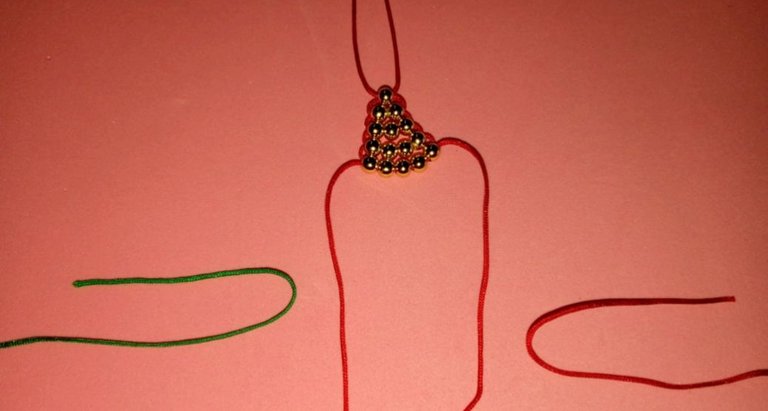
Tomamos dos hebras del mismo hilo chino de 30 cm cada una pero esta vez de ambos colores.
We take two strands of the same Chinese thread of 30 cm each but this time of both colors.
- 6
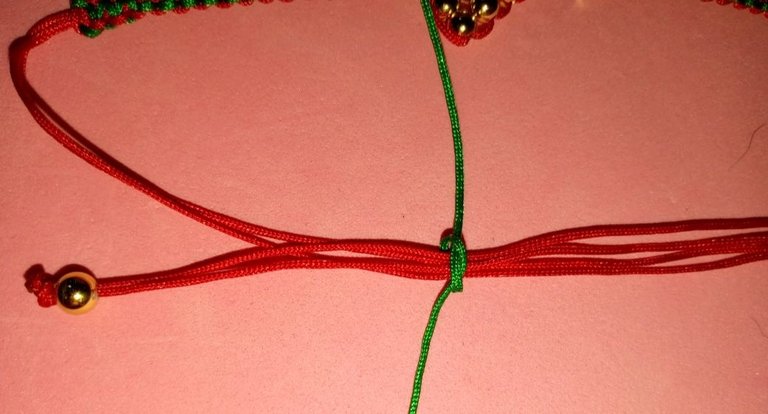
Doblamos la punta de la hebra color verde dejando la parte más corta hacia arriba y hacemos lo mismo con la hebra de hilo rojo.
Fold the end of the green strand leaving the shortest part upwards and do the same with the red strand.
- 7
Luego pasamos la hebra verde por debajo de los hilos centrales y la hebra roja a través de la argolla que se forma en el hilo verde y en la argolla que se forma en el hilo rojo pasamos los hilos de color verde.
Then we pass the green strand under the central threads and the red strand through the ring that is formed in the green thread and in the ring that is formed in the red thread we pass the green threads.
- 8
Halamos muy bien ambos hilos para ajustarlo a la base de nuestro arbolito y que quede lo más pegada posible a los balines.
En este paso tomamos las hebras de arriba que son las más cortas y las separamos de las de abajo que son las que utilizaremos para comenzar a realizar el nudo plano.
We pull both threads very well to adjust it to the base of our tree and make sure it is as close as possible to the balls.
In this step we take the top strands which are the shortest and separate them from the bottom ones which are the ones we will use to start making the flat knot.
- 9
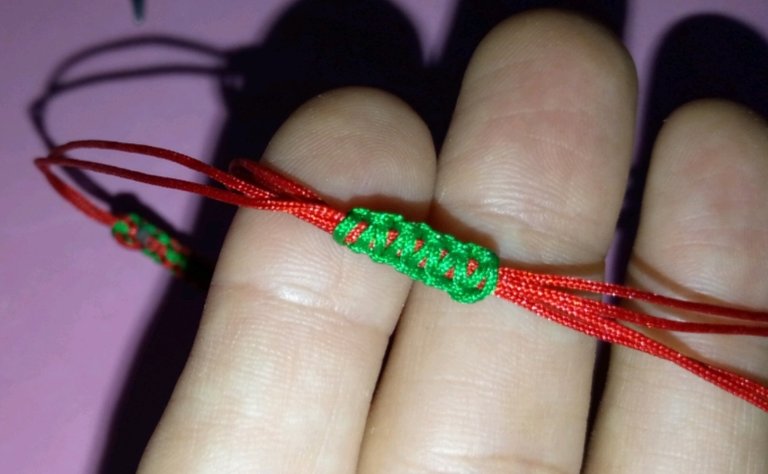
Tomamos el hilo del lado derecho en este caso el hilo rojo; un tips para saber dónde comenzaremos es el primer hilo encima en este caso el verde.
We take the thread on the right side, in this case the red thread; a tip to know where to start is the first thread on top, in this case the green one.
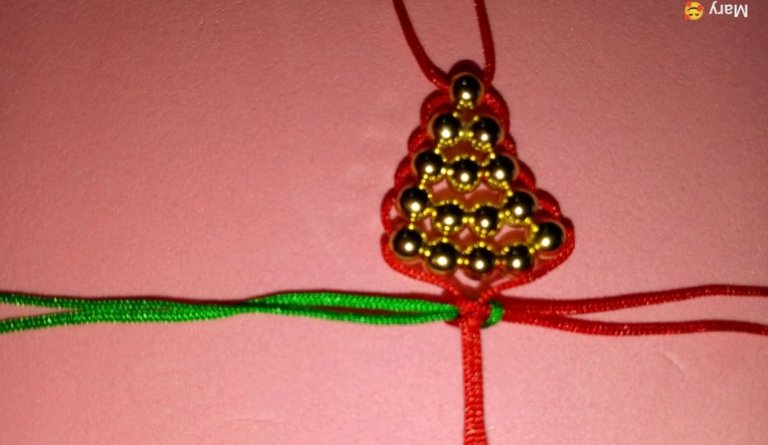
- 10
Pasamos el hilo rojo por encima de los del centro formando una letra P.
We pass the red thread over the ones in the center forming a P letter.
- 11
El hilo verde lo pasamos por encima del rojo que llevamos al lado izquierdo y lo sacamos por debajo de la Unión de los hilos halamos y apretamos.
We pass the green thread over the red thread on the left side and pull it out underneath the union of the threads and tighten it.
Hacemos el mismo procedimiento en el lado izquierdo, hasta aquí tenemos ya formado un nudo plano completo.
We do the same procedure on the left side, up to this point we have already formed a complete flat knot.
- 12
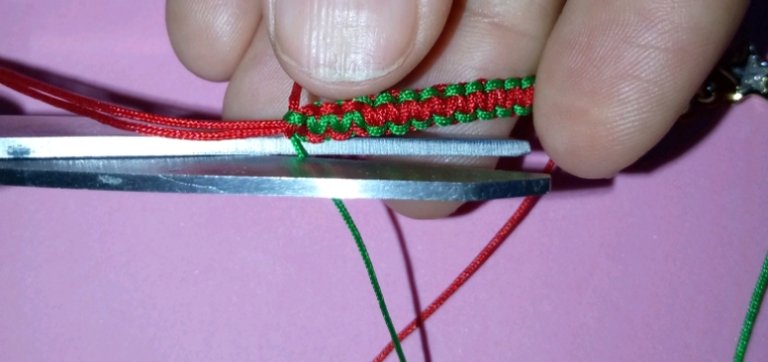
Continuamos realizando este mismo tejido tantas veces de ser hasta lograr el largo para este lado de su pulsera, en este caso lo realizamos de 4 cm.
We continue making this same weave as many times as necessary until we reach the length for this side of your bracelet, in this case we make it 4 cm long.
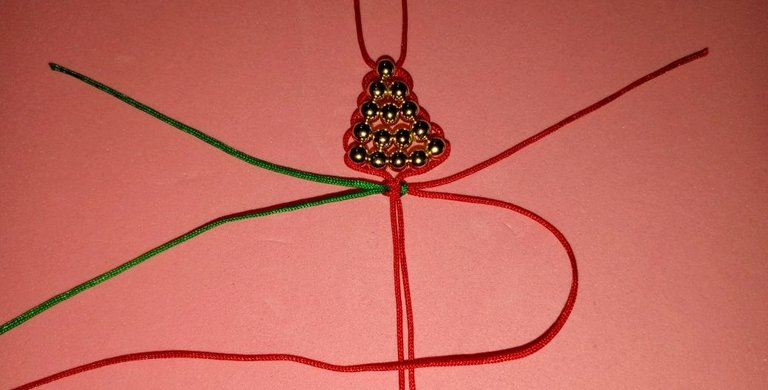
- 13
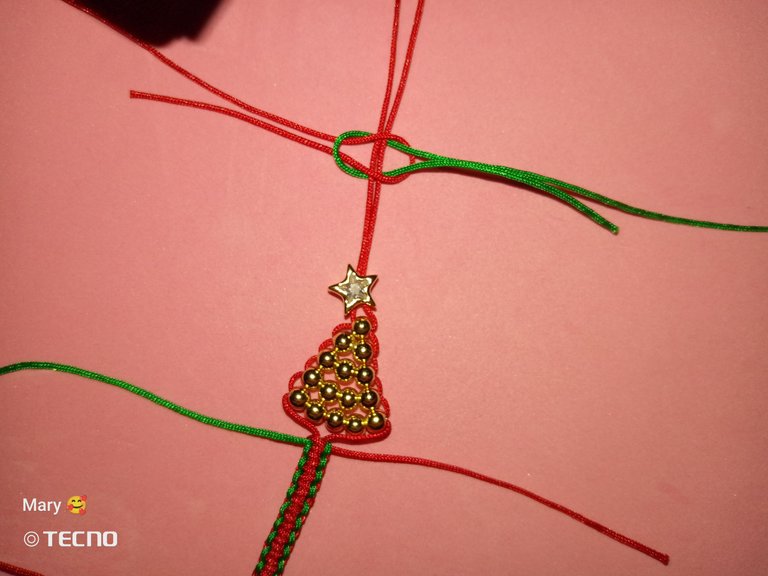
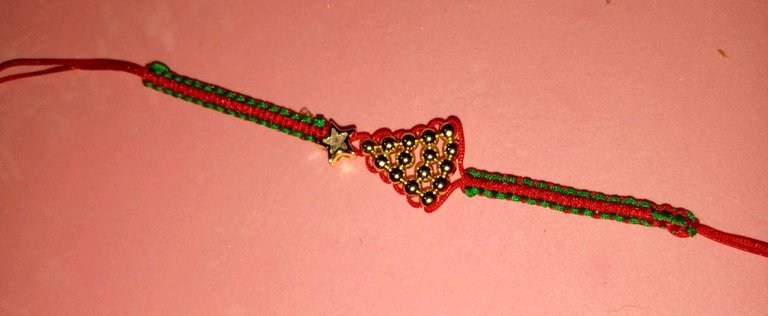
Luego nos vamos al otro lado de la pulsera y lo primero que hacemos será insertar la estrella separadora e iniciamos el tejido de igual manera que en el otro lado de la pulsera; y nos va a quedar de la siguiente manera:
Then we go to the other side of the bracelet and the first thing we do is to insert the star separator and start weaving in the same way as on the other side of the bracelet; and it will be as follows:

- 14
Tomamos de nuevo dos hebras de 30 cm y repetimos el procedimiento desde el paso 9.
We take again two strands of 30 cm and repeat the procedure from step 9.
- 15
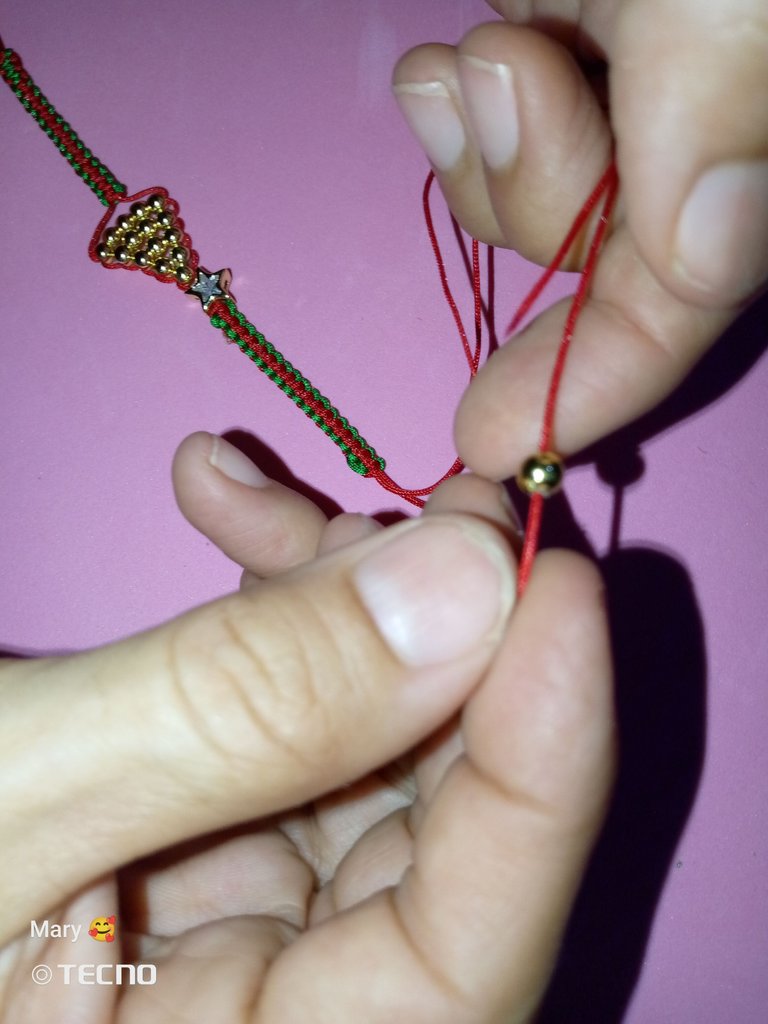
Una vez teniendo listo, cortamos y quemamos todos los hilos sobrantes.
Once ready, we cut and burn all the excess threads.
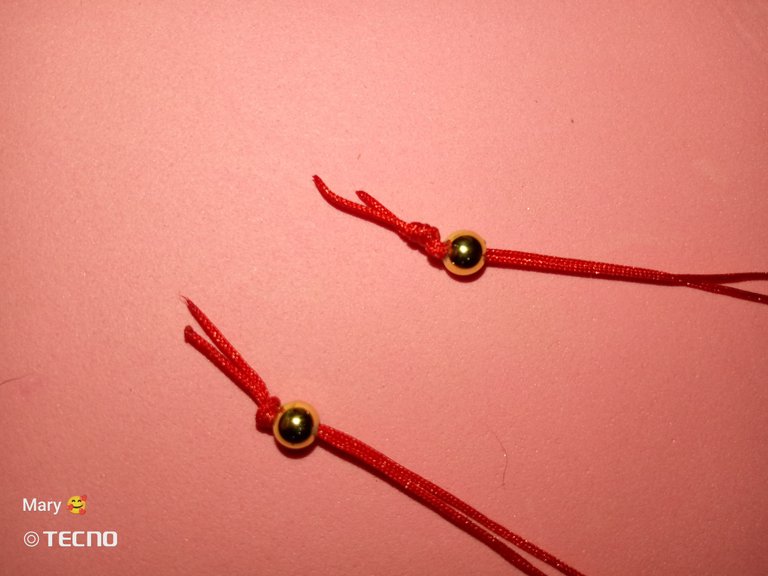
- 16
Colocamos en cada extremo de las puntas un balín de 4 mm cortamos y quemamos los sobrantes.
We place a 4 mm pellet at each end of the tips, cut and burn the excess.

- 17
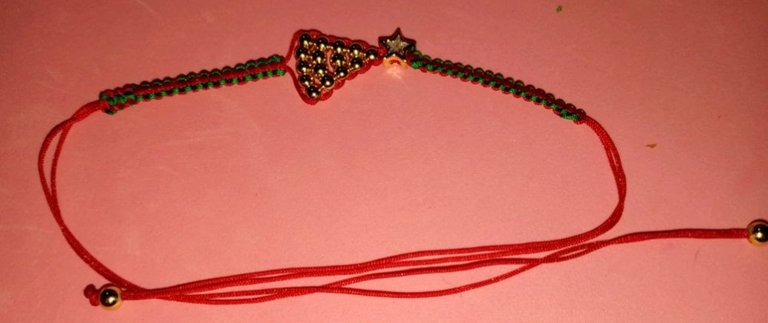
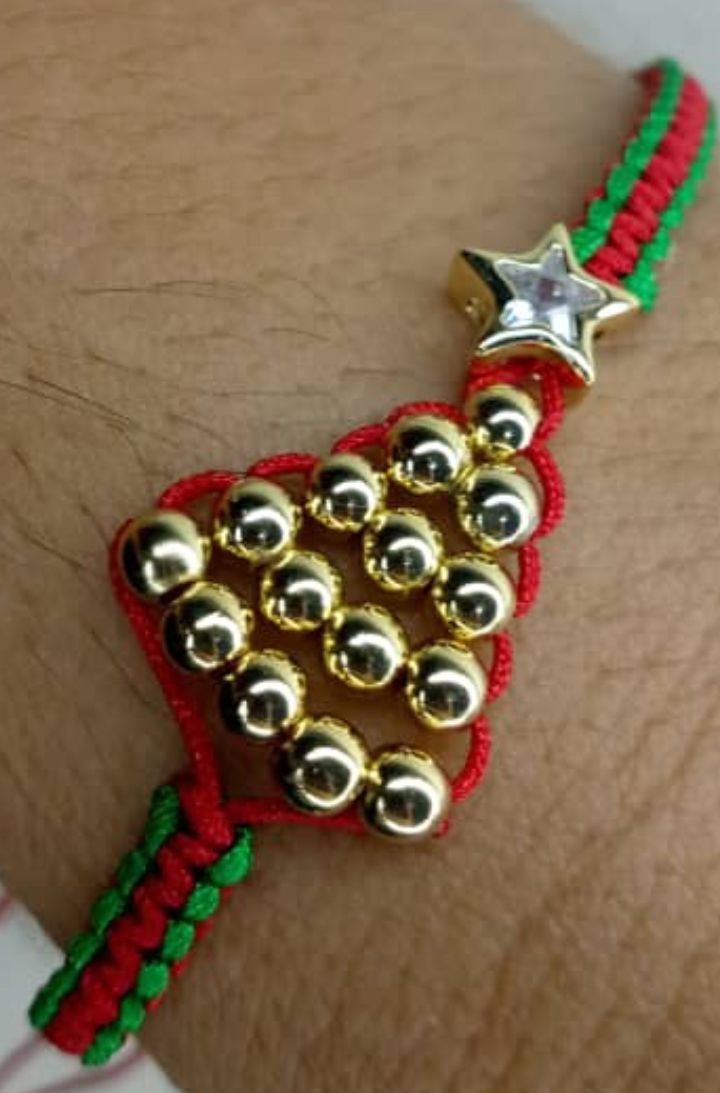
Para cerrar la pulsera solo unimos los dos hilos y realizamos el nudo plano con un trozo de nuestro hilo chino de más o menos 15cm, yo realicé seis nudos planos para cerrar esta pulsera.
To close the bracelet we just join the two threads and tie a flat knot with a piece of our Chinese thread of about 15cm, I made six flat knots to close this bracelet.

- 18
Finalmente cortamos y quemamos los hilos excedentes y listo! miren qué hermosura de pulsera para lucir en esta Navidad.
Finally we cut and burn the excess threads and that's it! Look what a beautiful bracelet to wear this Christmas.
Traducción realizada con DeepL.com
Editor de imágenes de Canva
Fotos tomadas con mi equipo Tecno GO 2023.
Translation made with DeepL.com
Canva image editor
Photos taken with my Tecno GO 2023 equipment.
0
0
0.000
Here is your Proof of Brian. I think you meant #ProofOfBrain

Source
Sorry, it was my spell checker😓
This bracelet is so beautiful and stylish. Love its design and that shows your creativity. Well done! 😊
Thanks!!
Nos encanta tenerte en la comunidad y más con un accesorio hermoso y digno de la época, un brazalete maravilloso de seguro lo usaría toda la navidad, el paso a paso está genial y nos encanta como lo detallas.
Actualmente tenemos un concurso navideño en el cual puedes participar, esperamos verte nuevamente por aquí 😉
Mil gracias por su apreciación, la verdad no estaba muy segura de lo q estaba haciendo pero lo que si estaba era muy entusiasmada mientras la realizaba... revisaré lo del concurso, grcs por la invitación
Esta pulsera con hilo chino te quedo muy linda!
Grcs muñeca!
Hermoso trabajo amiga! ✨💞
Mil grcs corazón!!
Muy linda, me encantó el diseño! ✨🌲👏
Gracias, me alegra que le haya gustado!!