[Esp-Eng] Que nunca te falten unos LINDOS ARETES 🦋😍 | May you never be short of CUTE ARETES 🦋😍 | by @solanaya94🌺
Las Mariposas🦋 son un símbolo de excelentes cambios.
Es importante siempre tener a la mano, unos lindos zarcillos para lucir y tener una linda imagen de presentación, y como podemos lograrlo? Pues elaborandolos nosotras mismas.
Butterflies🦋 are a symbol of excellent changes.
It is important to always have at hand, some
nice tendrilsto look and have a nice image of presentation, and how can we achieve it? Well, by making them ourselves.
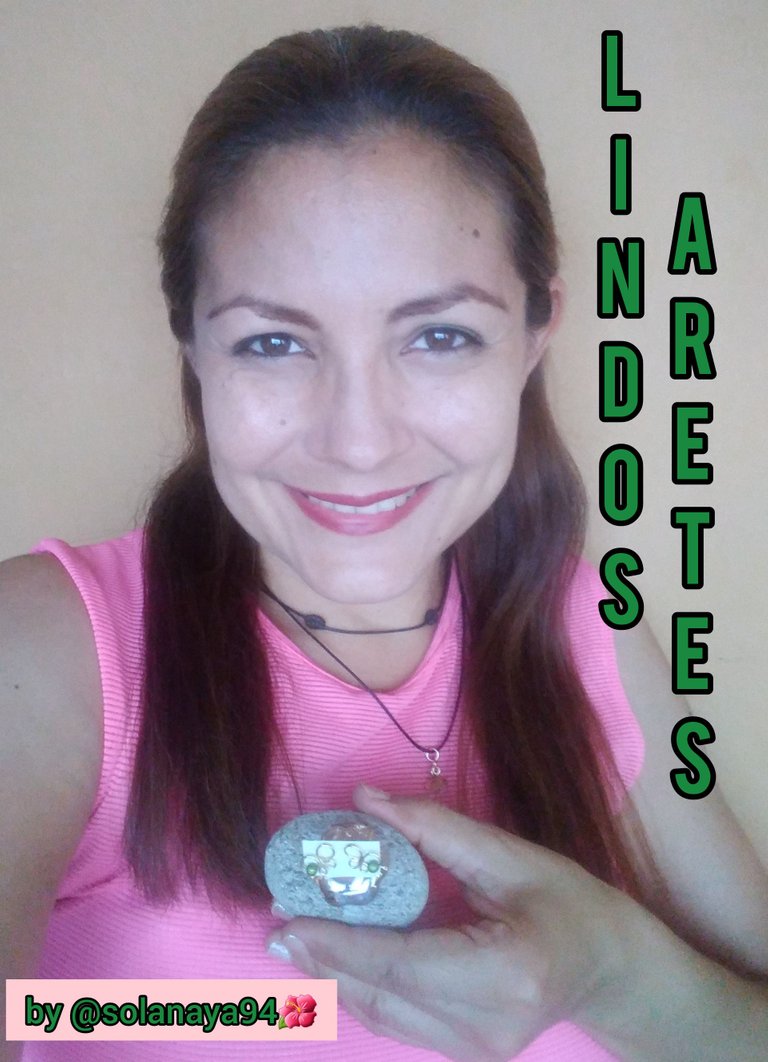
Hoy quiero compartir la elaboración de unos lindos aretes para las damas y niñas también, al estilo de un simbolo de las mariposas que emanan frescura.
Son muy fáciles y prácticos de hacer, con material de bisutería muy económico y accesible, los puedes combinar en diferentes colores y piedras en checo, sharoski, acrílico, entre otros.
A continuación acompañame a chequear los materiales y herramientas que utilizaremos.
Today I want to share the elaboration of beautiful earrings for ladies and girls too, in the style of a symbol of butterflies that emanate freshness.
They are very easy and practical to make, with very economical and accessible jewelry material, you can combine them in different colors and stones in Czech, sharoski, acrylic, among others.
Next, join me to check the materials and tools that we will use.
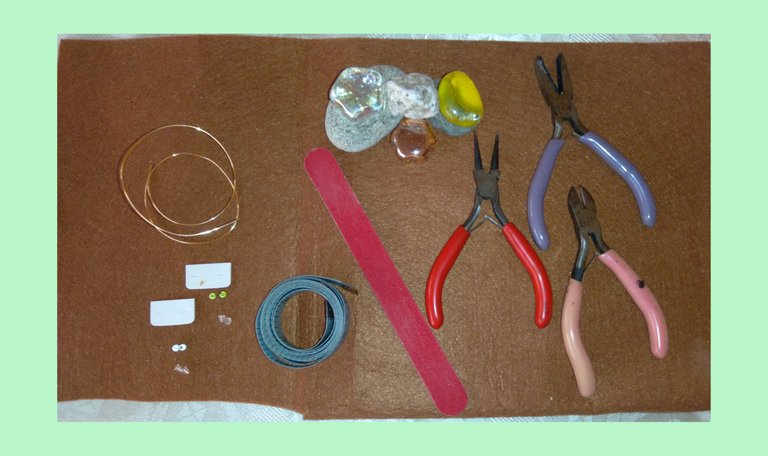
Materiales y Herramientas
Materials and Tools
| N° | Descripción |
|---|---|
| 1 | Pinza de punta |
| 2 | Pinza de punta plana |
| 3 | Pinza para cortar |
| 4 | Alambre tpc calibre 20 |
| 5 | A couple of acrylic stones, sharoski, czechs etc. |
| 6 | Un par de tapones de silicon para zarcillos |
| 7 | Una lima |
| 8 | Una cinta métrica |
N° Description 1 Tip clamp 2 Flat nose pliers 3 cutting pliers 4 20 gauge tpc wire 5 acrílicas, sharoski, checos etc 6 a pair of silicone plugs for earrings 7 a file 8 a tape measure
Consejos y recomendaciones
Tips and recommendations
El material utilizado (alambre tpc), para la elaboración de estos bellos Aretes, es muy duradero y práctico de conservar en cajitas o joyeros rellenos de algodón, no debe tener contacto con el perfume, agua y otros productos químicos, puede variar al contacto con el ph de la piel.
The material used (tpc wire), for the elaboration of these beautiful earrings, is very durable and practical to keep in boxes or jewelry boxes filled with cotton, should not have contact with perfume, water and other chemicals, may vary in contact with the pH of the skin.
Elaboración paso a paso (Lindos Aretes.)
Step by step elaboration of (Cute Earrings.)
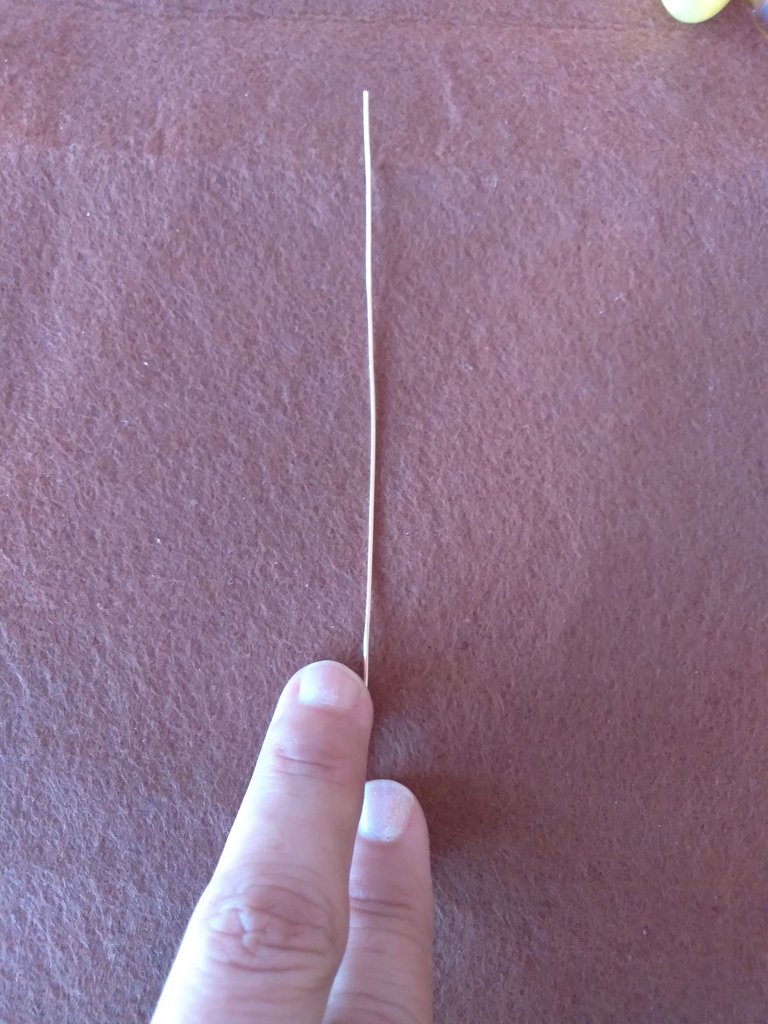
Paso N° 1. Extendemos el alambre tpc sobre nuestra mesa de
trabajo.
Step N° 1. We spread the tpc wire over our work
table.
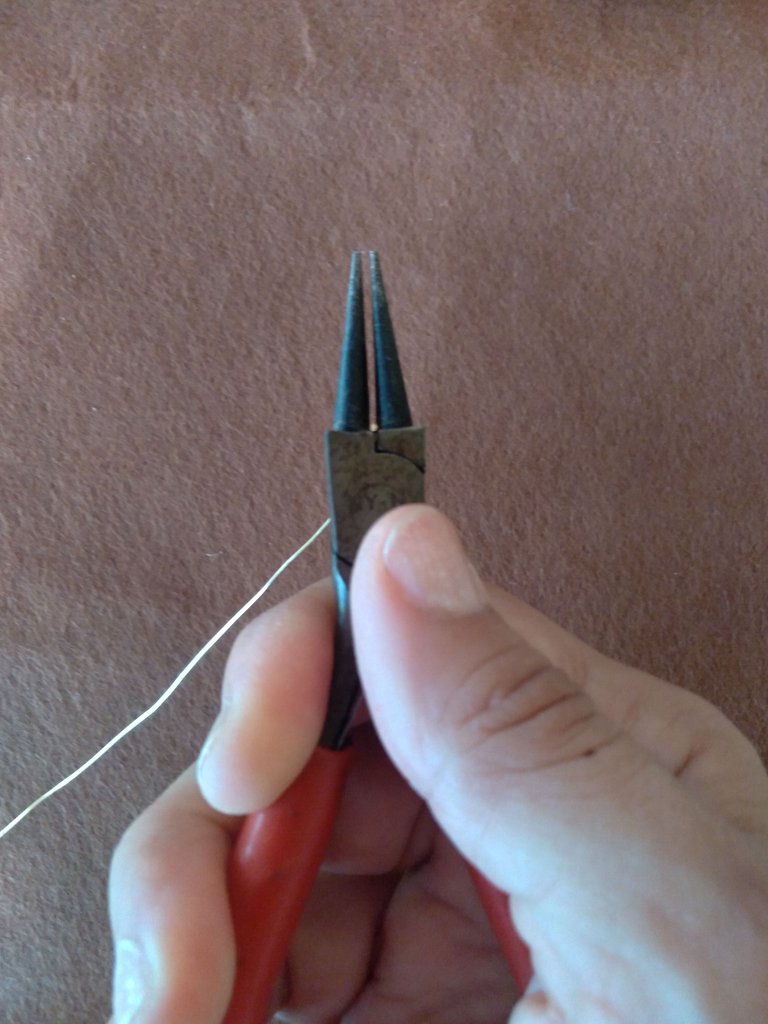
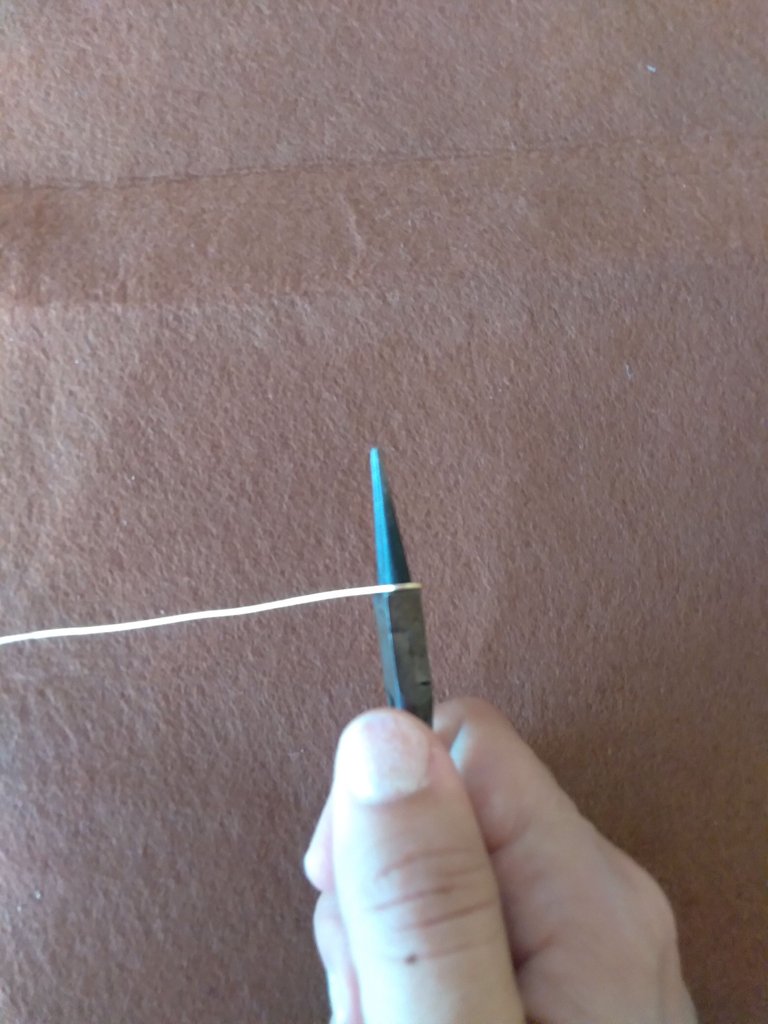
Paso N°2. Con la parte más gruesa de la pinza de punta tomamos un extremo del alambre y lo rodeamos, hasta formar la letra "P".
Step N°2. With the thickest part of the needle-nose pliers we take one end of the wire and go around it, until we form the letter "P".
Paso N°3. Con la parte más delgada de la pinza de punta tomamos el alambre al lado de un ala de la mariposa dejando un pequeño espacio giramos el alambre y lo pasamos por debajo, formando la mitad del cuerpo de la mariposa (una letra "B") 🦋.
Step N° 3. With the thinnest part of the needle-nose pliers we take the wire next to one wing of the butterfly leaving a small space we turn the wire and pass it underneath, forming half of the butterfly's body (one letter "B") 🦋.
Paso N°4. Con la parte más delgada de la pinza de punta tomamos el alambre justo al lado de la letra "B" dejando un pequeño espacio, giramos el alambre y lo pasamos por arriba.
Step N°4. With the thinnest part of the needle-nose pliers we take the wire right next to the letter "B" leaving a small space, turn the wire and pass it over the top.
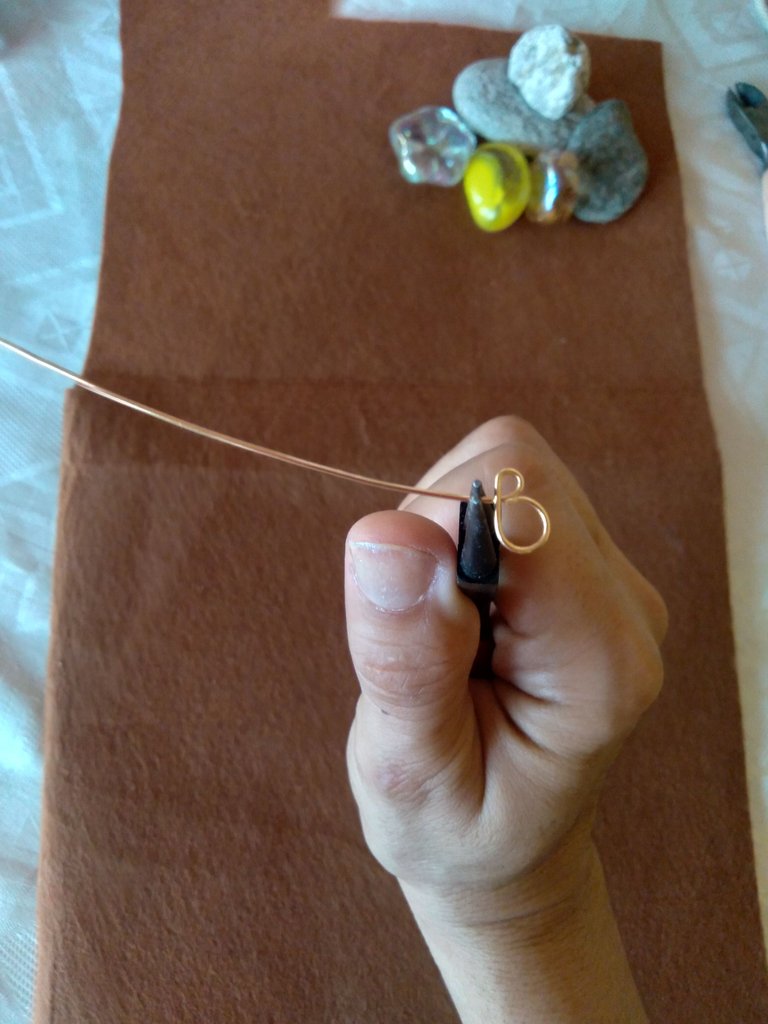
Paso N° 5. En este paso haremos la última ala de la mariposa🦋, con la pinza de punta en la parte más gruesa doblamos el alambre con la ayuda de la primera ala para que nos quede igual, y lo pasamos por debajo.
Step N° 5. In this step we will make the last wing of the butterfly🦋, with the needle-nose pliers in the thickest part we bend the wire with the help of the first wing so that it is the same, and we pass it underneath.
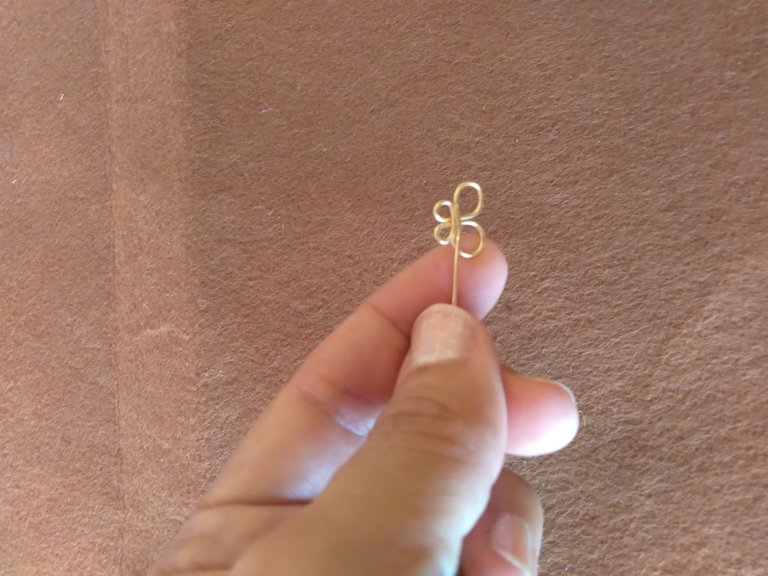
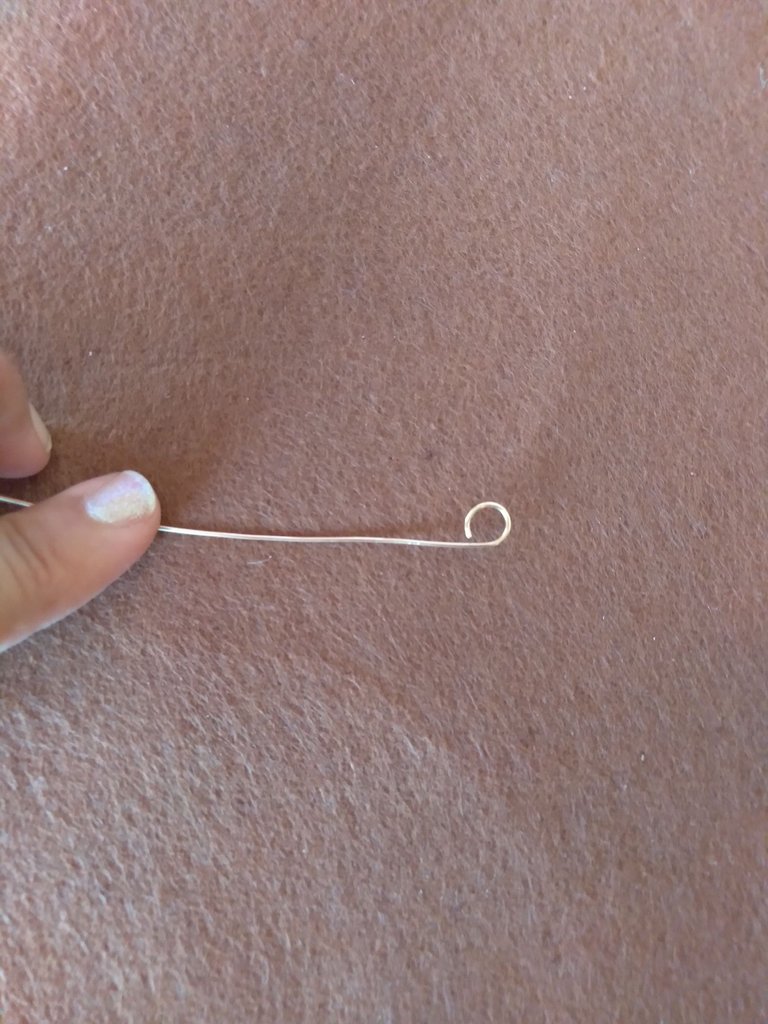
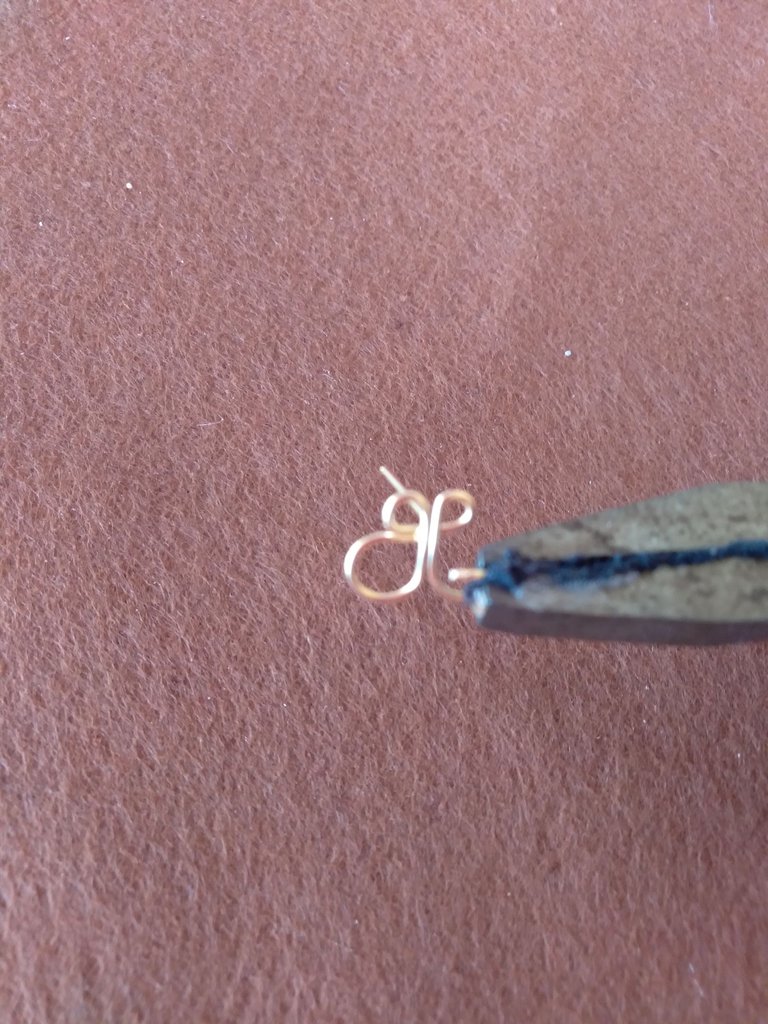
Paso N° 6. De esta forma completamos el cuerpo de la mariposa, el cual se observa así en la parte de abajo del arete.
Step N°6. In this way we complete the body of the butterfly, which can be seen at the bottom of the earring.
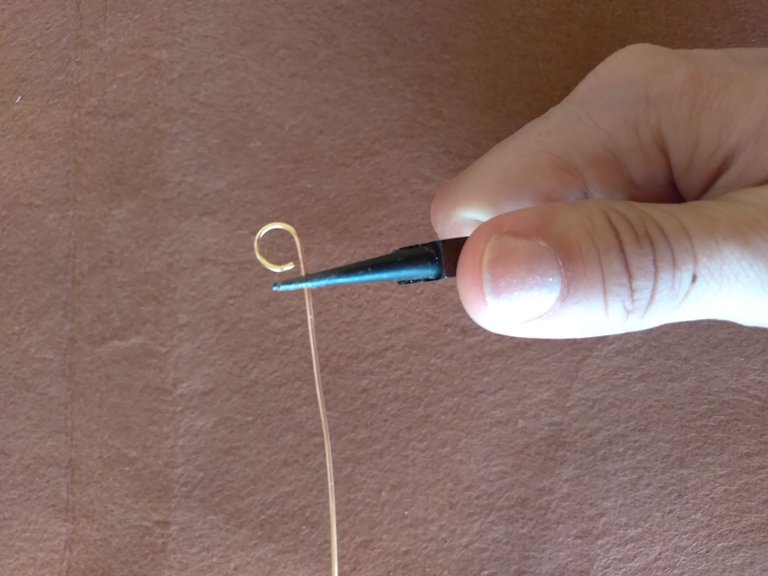
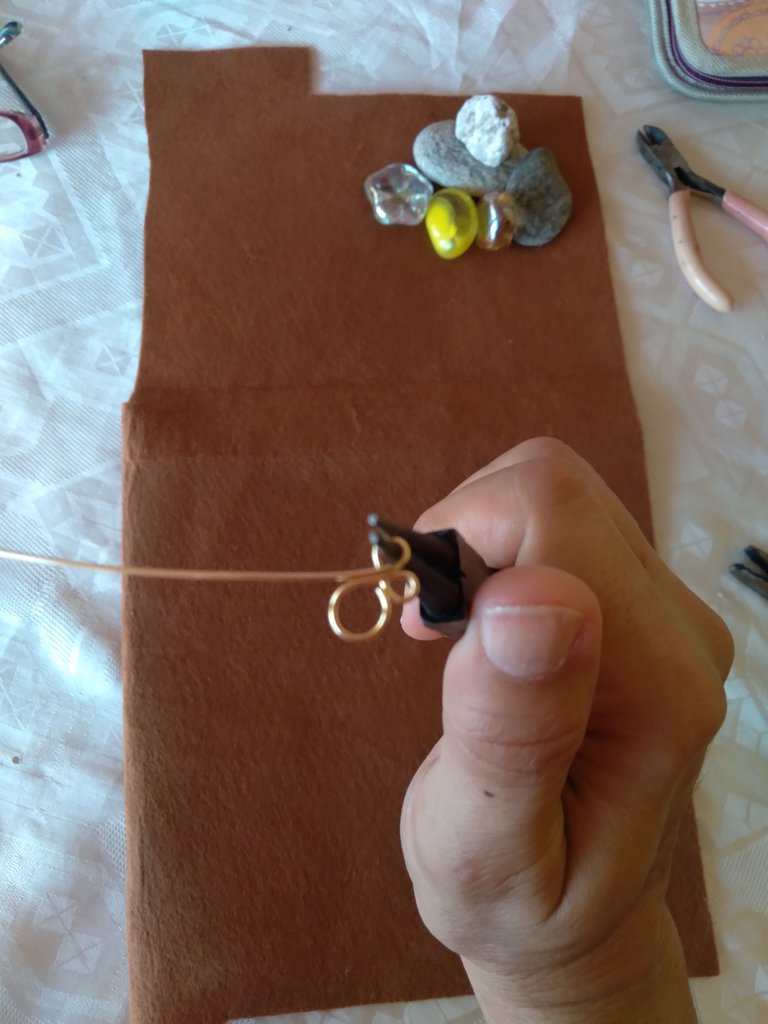
Paso N° 7. Con la pinza de de punta plana tomamos la mitad del cuerpo de la mariposa y doblamos hacia arriba el restante del alambre.
Step N° 7. With the flat nose pliers we take half of the butterfly body and bend upwards the remaining wire.
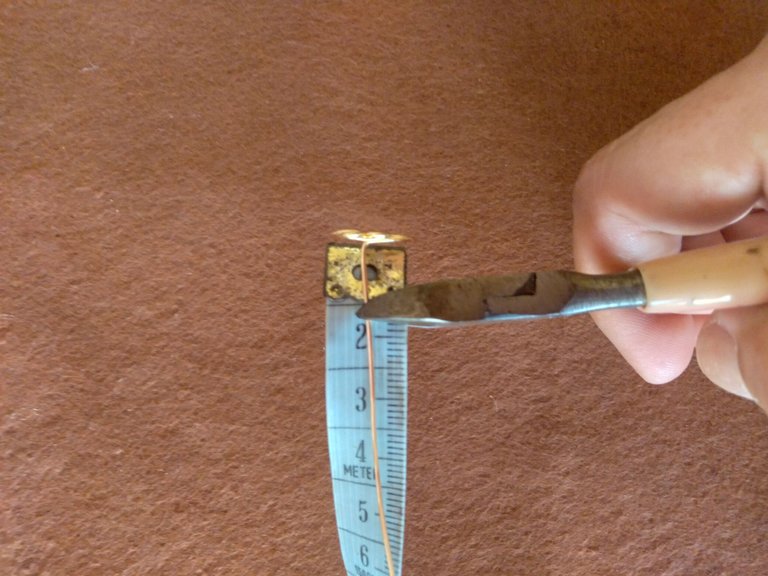
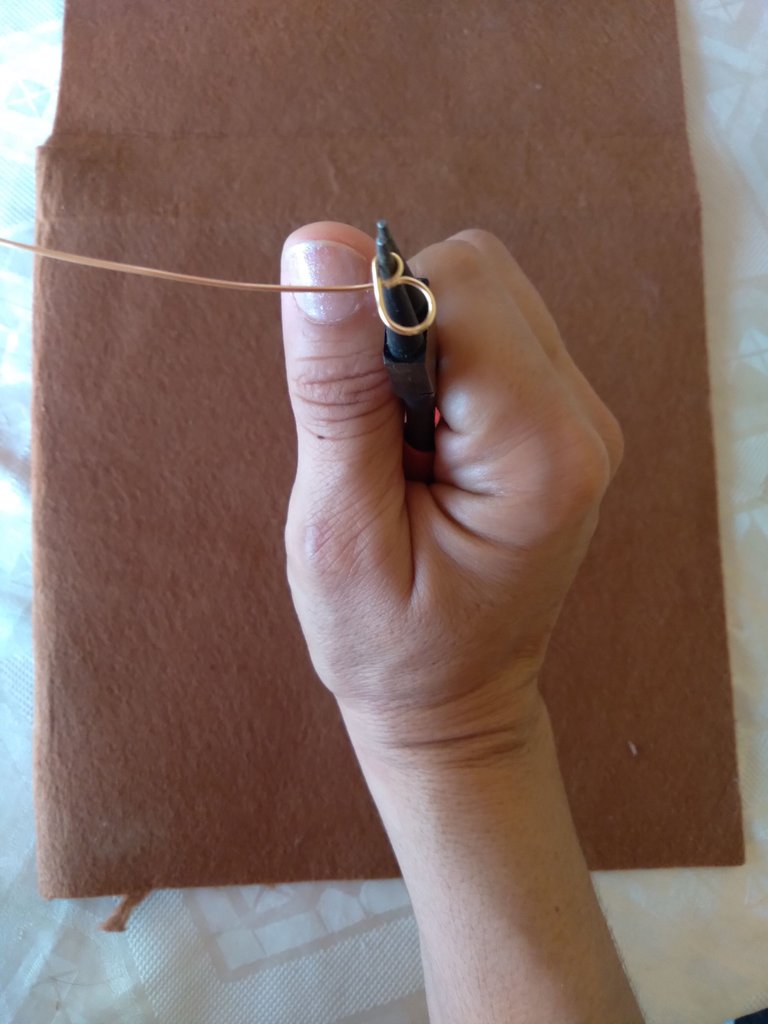
Paso N° 8. Con la cinta métrica desde el cuerpo de la mariposa, medimos 1 centímetro y cortamos el restante del alambre.
Step N° 8. With the tape measure from the body of the butterfly, measure 1 centimeter and cut the rest of the wire.
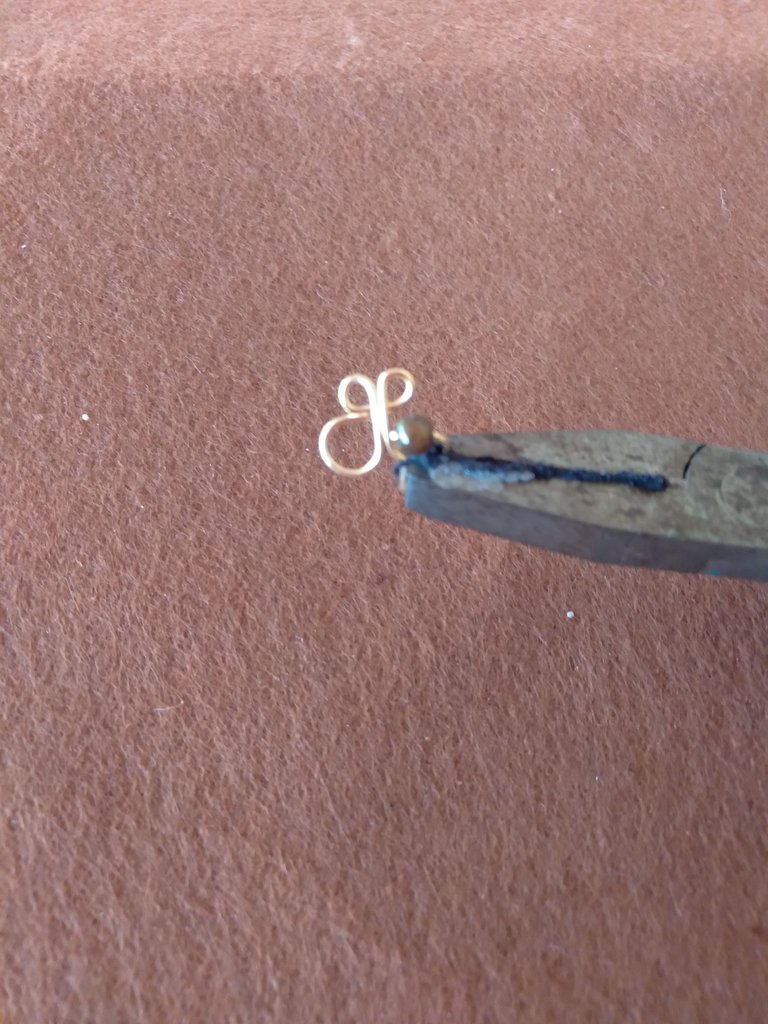
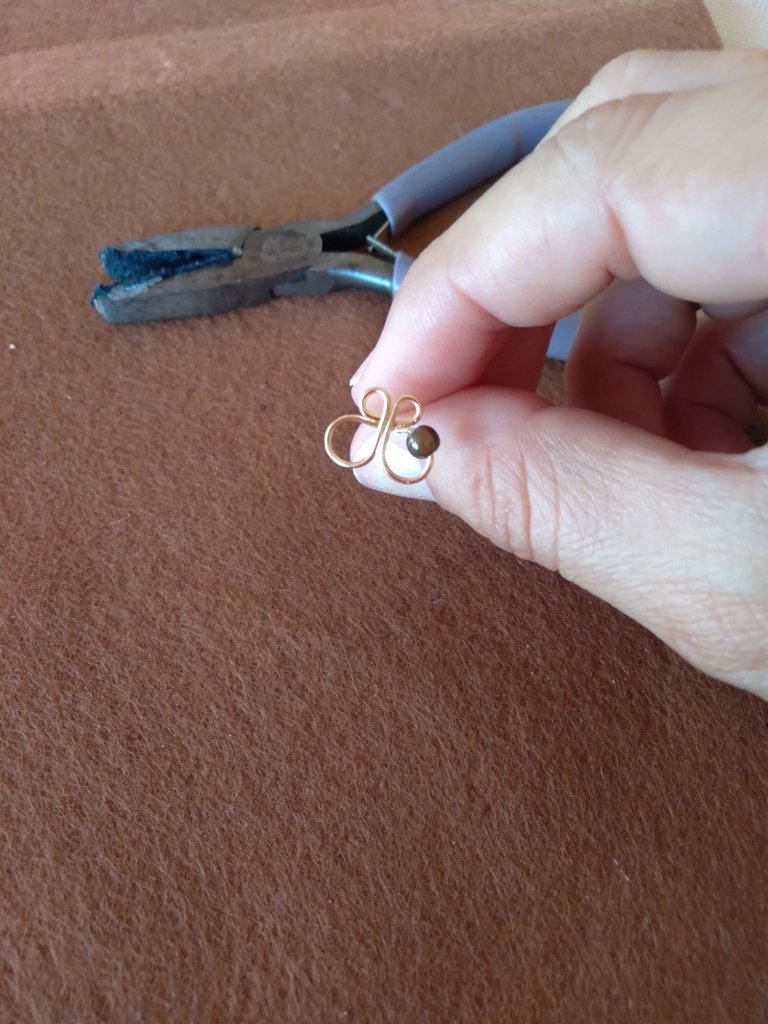
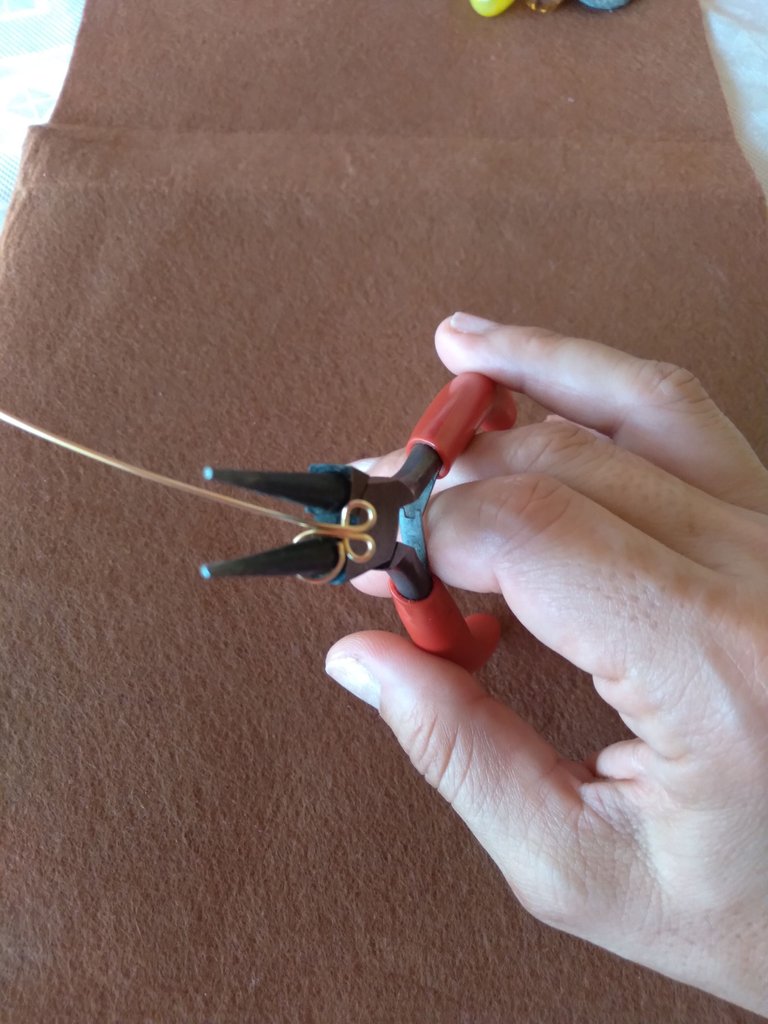
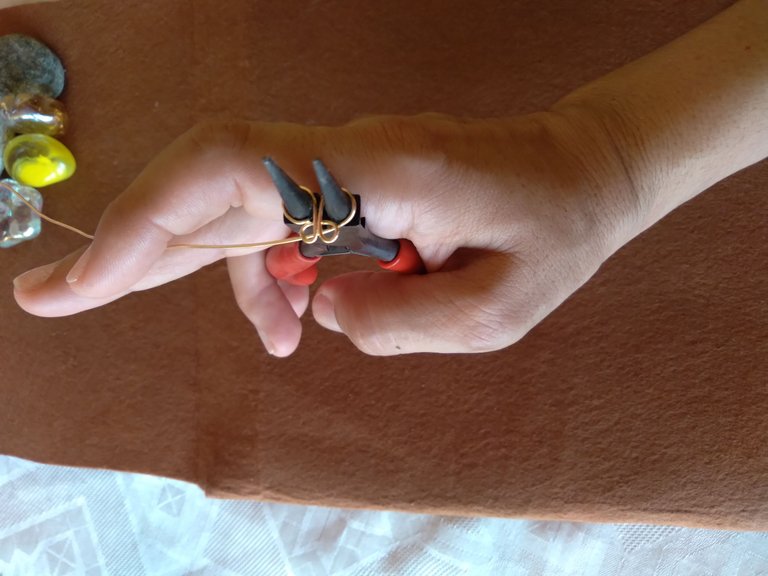
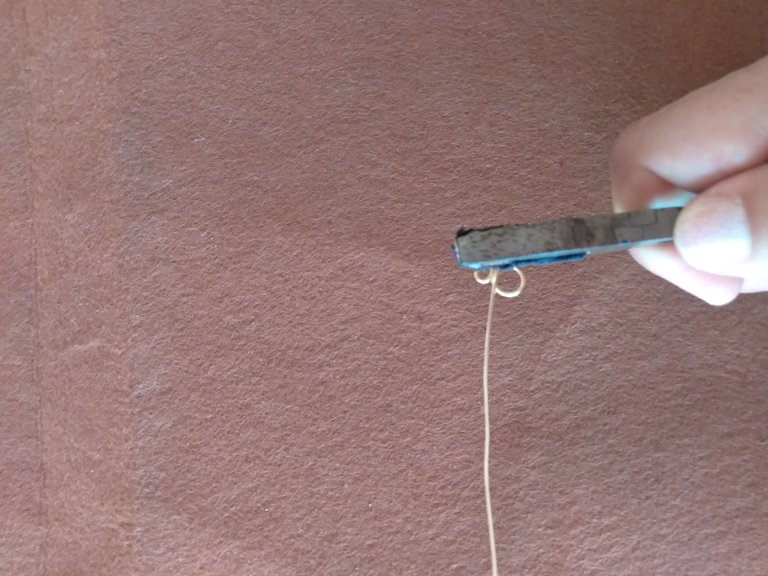
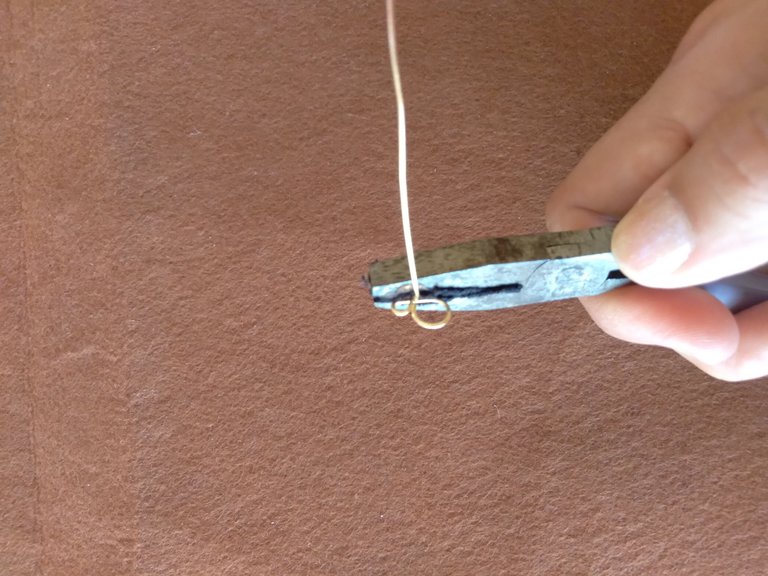
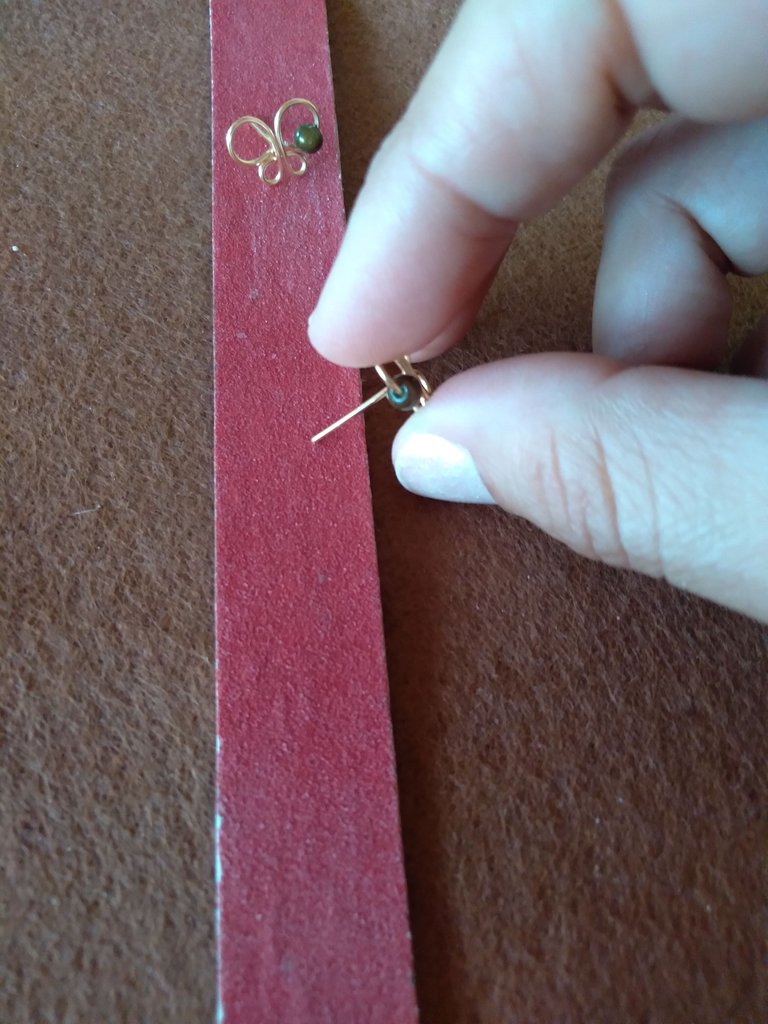
Paso N° 9. Con la ayuda de la pinza de punta plana nos ubicamos en el paso N° 2 y abrimos la letra "P" para insertar la piedra en acrílico y cerramos, mostrándose de esta manera en la foto.
Step N° 9. With the help of the flat tip tweezers we place ourselves in step N° 2 and open the letter "P" to insert the stone in acrylic and close it, showing this way in the photo.
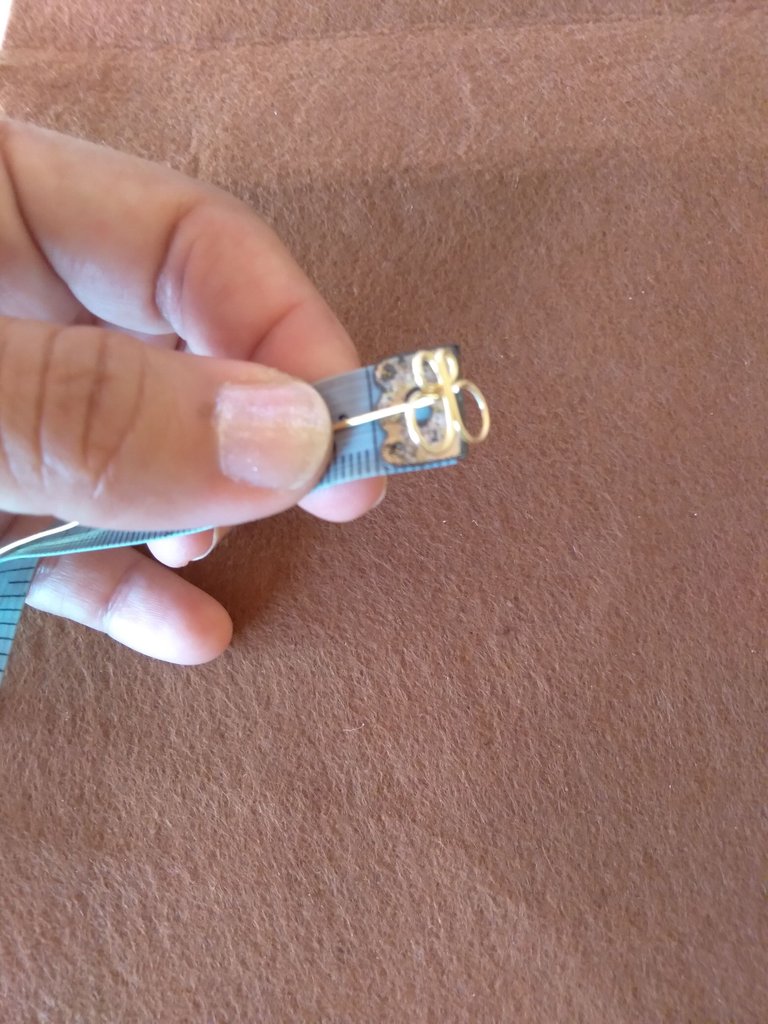
Paso N°10. Limar las puntas del Arete para no lastimar nuestras orejas al momento de colocar el zarcillo.
Step N°10.File the tips of the earring to avoid hurting our ears when placing the earring.
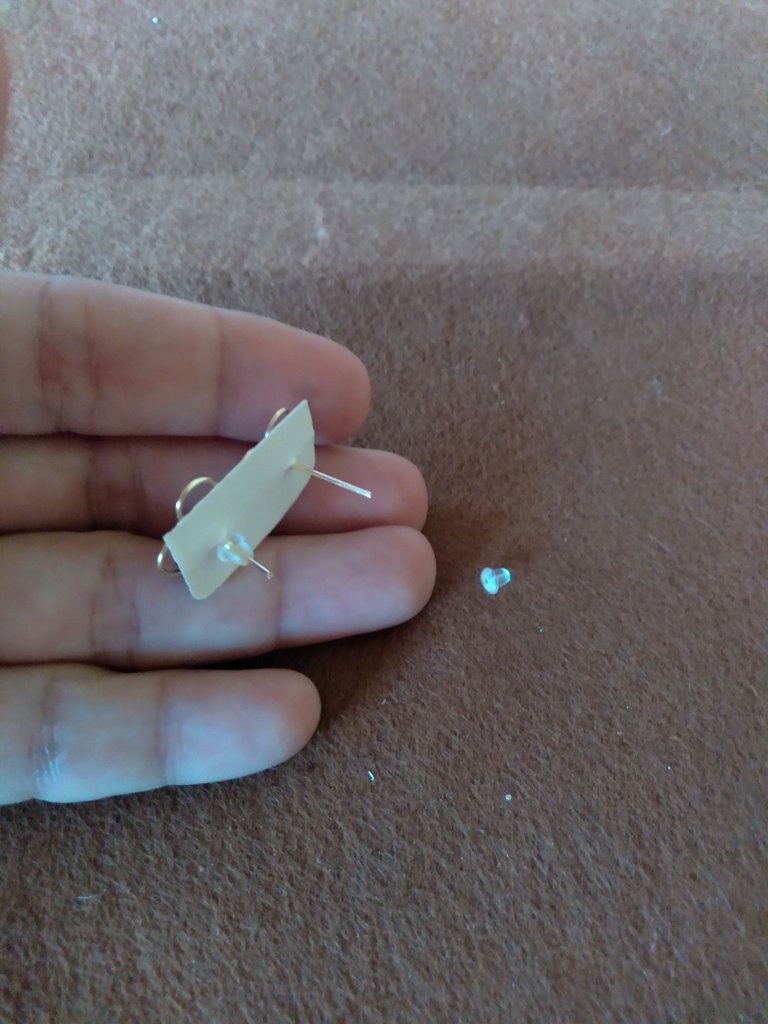
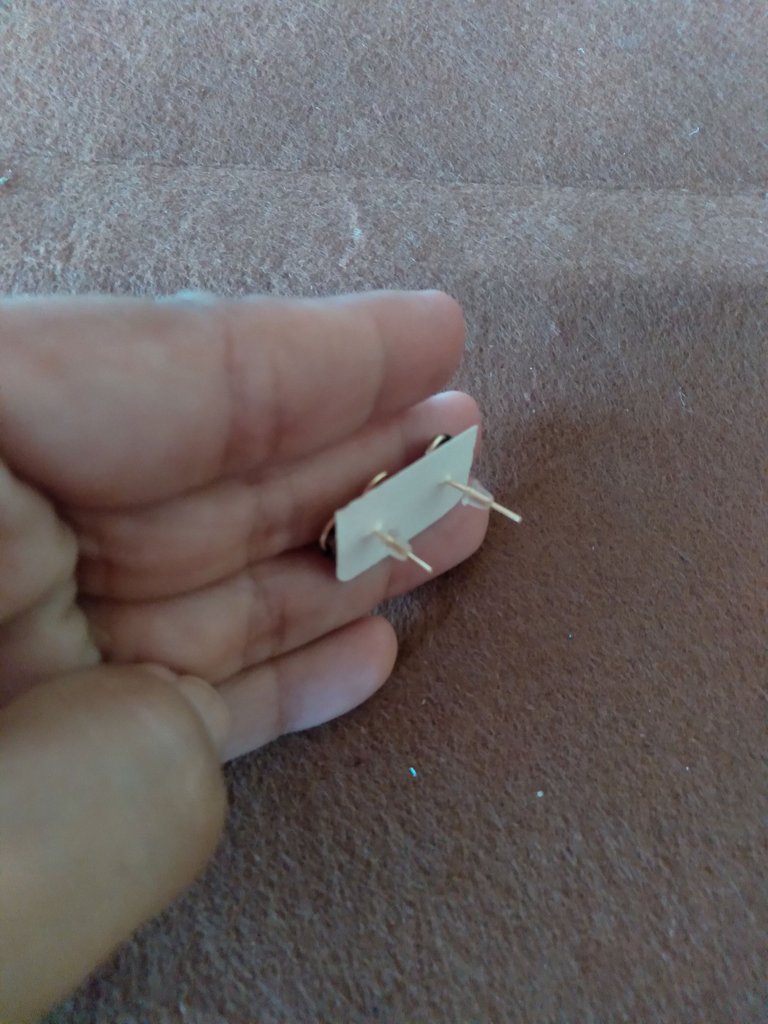
Paso N°11. Colocar los tapones de silicon a nuestros Aretes.
Step N°11. Place the silicone plugs on our Earrings.
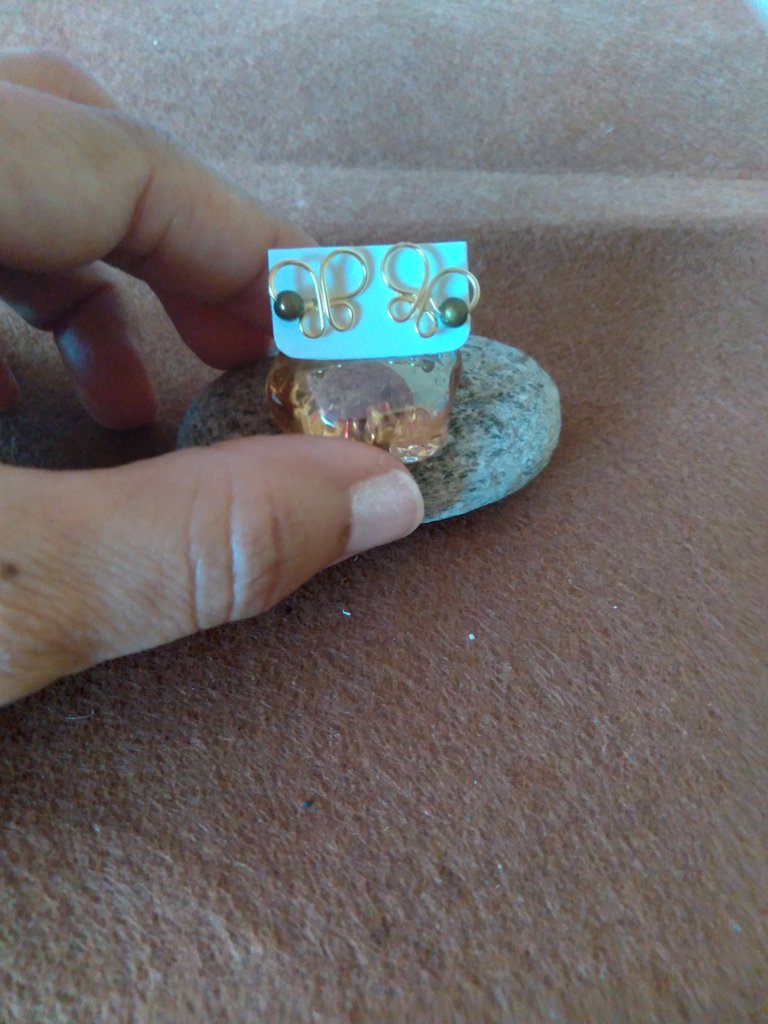
Y este es el resultado en la elaboración del paso a paso para la creación de estos Lindos Aretes. Les aseguro que les encantará muchísimo activarse en la práctica de este novedoso accesorio.
Gracias por acompañarme hasta aquí espero que haya sido de tu agrado.
And this is the result in the elaboration of the step by step for the creation of these cute earrings. I assure you that you will love to get active in the practice of this novel accessory.
Thank you for joining me here, I hope you enjoyed it.
🦋🦋🦋🦋🦋🦋🦋🦋🦋🦋🦋🦋🦋🦋
Traduccion del texto: en www.deepl.com
Fotos: aplicación inshot. Fotos del post (todos los derechos son de su autor(a) @solanaya94
Gift: www.canva.com
A través de mi celular Samsung A01
Text translation: at www.deepl.com
Photos: inshot app. Photos of the post (all rights are the author's @solanaya94
Gift: www.canva.com
Via my Samsung A01 cell phone
🦋🦋🦋🦋🦋🦋🦋🦋🦋🦋🦋🦋🦋🦋
Congratulations @solanaya94! You have completed the following achievement on the Hive blockchain and have been rewarded with new badge(s):
Your next target is to reach 500 comments.
You can view your badges on your board and compare yourself to others in the Ranking
If you no longer want to receive notifications, reply to this comment with the word
STOPTo support your work, I also upvoted your post!
Check out the last post from @hivebuzz: