COMO MONTAR CORREA DE TIEMPO
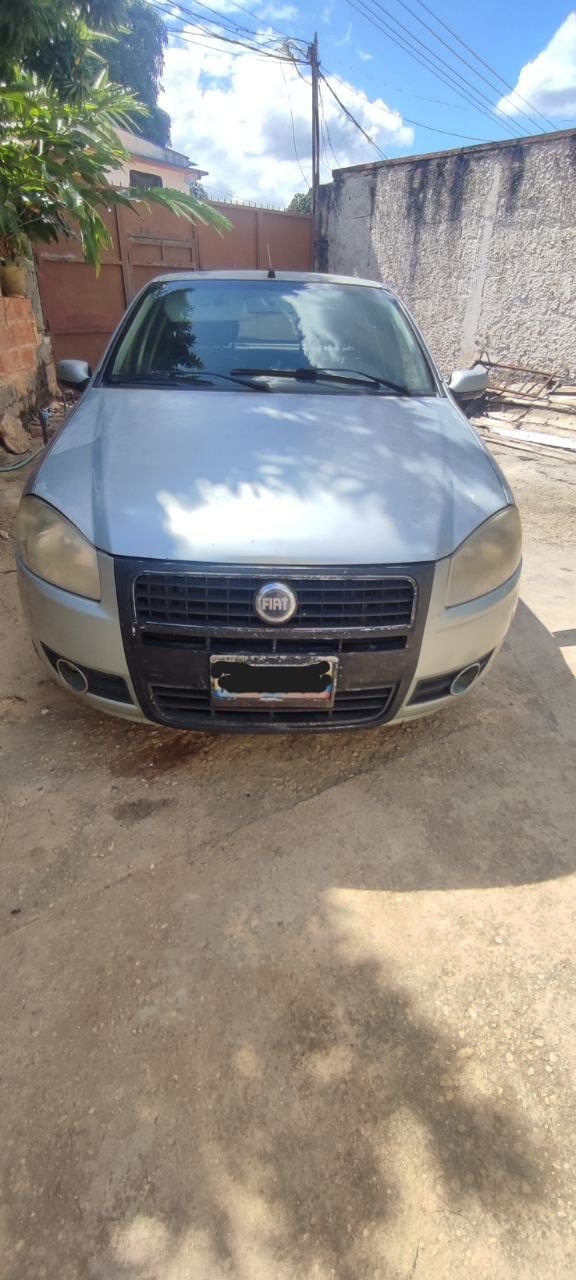
Hola, ¿qué tal como le va a esta excelente comunidad amante a los motores? Un placer estar de nuevo por acá y compartir con ustedes las anécdotas y experiencias con nuestro medio de trasporte, el cual requiere de diferentes tipos de mantenimientos y cuidados para andar sin preocupaciones en el camino
esta vez quiero compartir con ustedes lo aprendido la vez que lo lleve al taller mecánico para su cambio de correa de tiempo y bomba de agua y aproveche para que el mecánico me explicara más o menos como se hace el cambio de la correa de tiempo que es bastante fácil la verdad
herramientas a usar
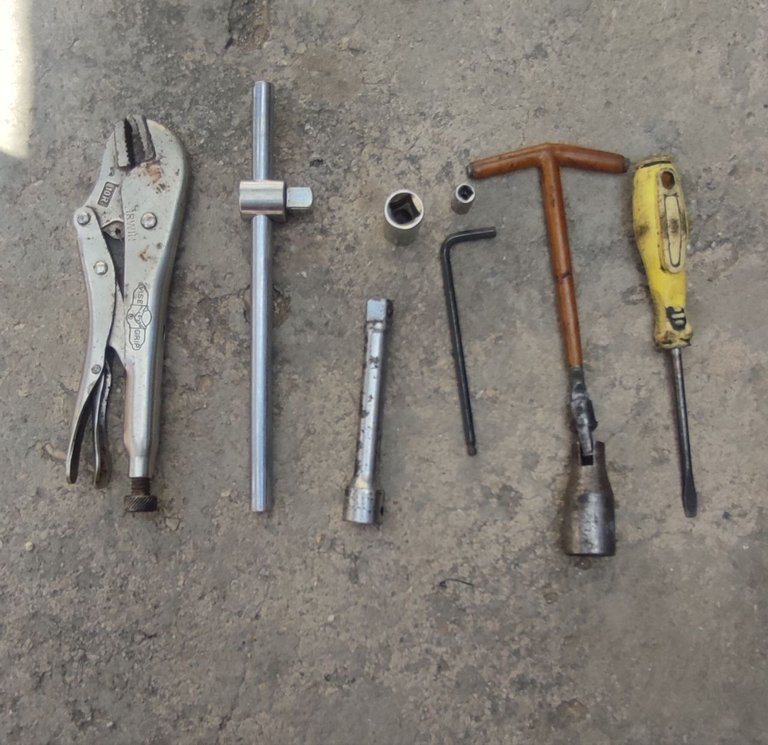
Acá te pondré las llaves y dados que necesitas para poder sacar la correa de tiempo y el tensor
Palanca de fuerza
Destornillador de pala
Saca bujías
Extensor
Alicate de presión
Llaves Allen
Dados 16 mm, 10 mm y 8 mm
Llave 11/16
Ayudante
Hello, how are you doing with this excellent engine-loving community? A pleasure to be here again and share with you the anecdotes and experiences with our means of transport, which requires different types of maintenance and care to ride without worries on the road.
this time I want to share with you what I learned the time I took it to the mechanic workshop to change the timing belt and water pump and I took the opportunity for the mechanic to explain me more or less how to change the timing belt which is quite easy the truth.
tools to use
Here are the wrenches and dies you need to remove the timing belt and the tensioner
Power lever
Spade screwdriver
Spark plug puller
Extender
Pliers
Allen wrenches
Sockets 16 mm, 10 mm and 8 mm
11/16" wrench
Helper
Paso a paso
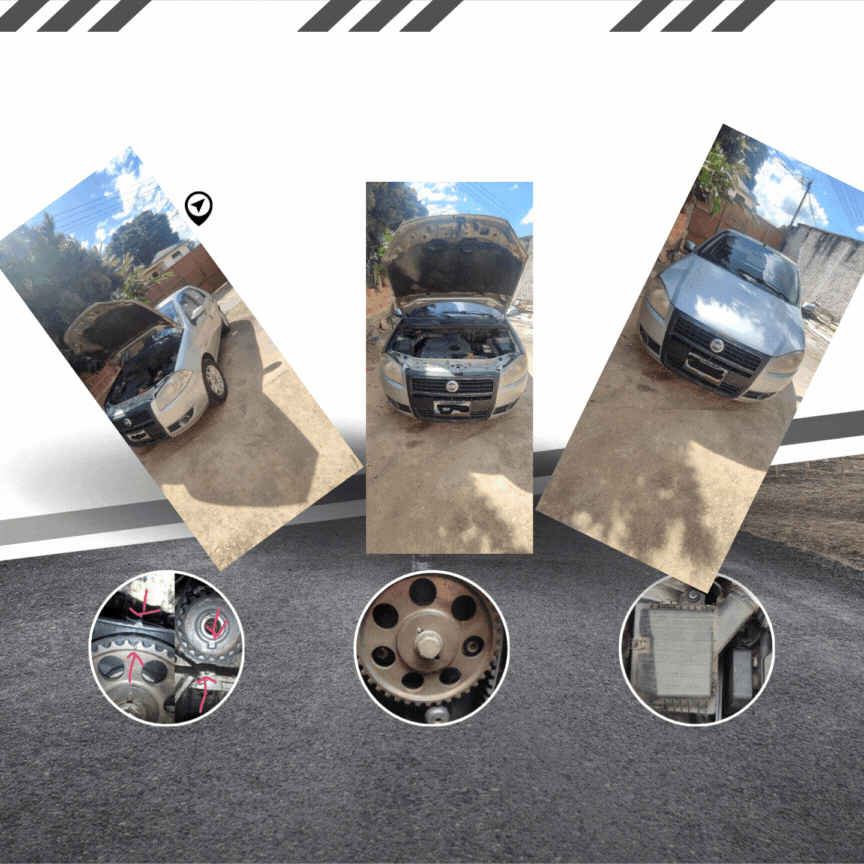
bueno, muchachos, los primeros sería buscar un lugar limpio donde allá sombra para que puedas trabajar tranquilo
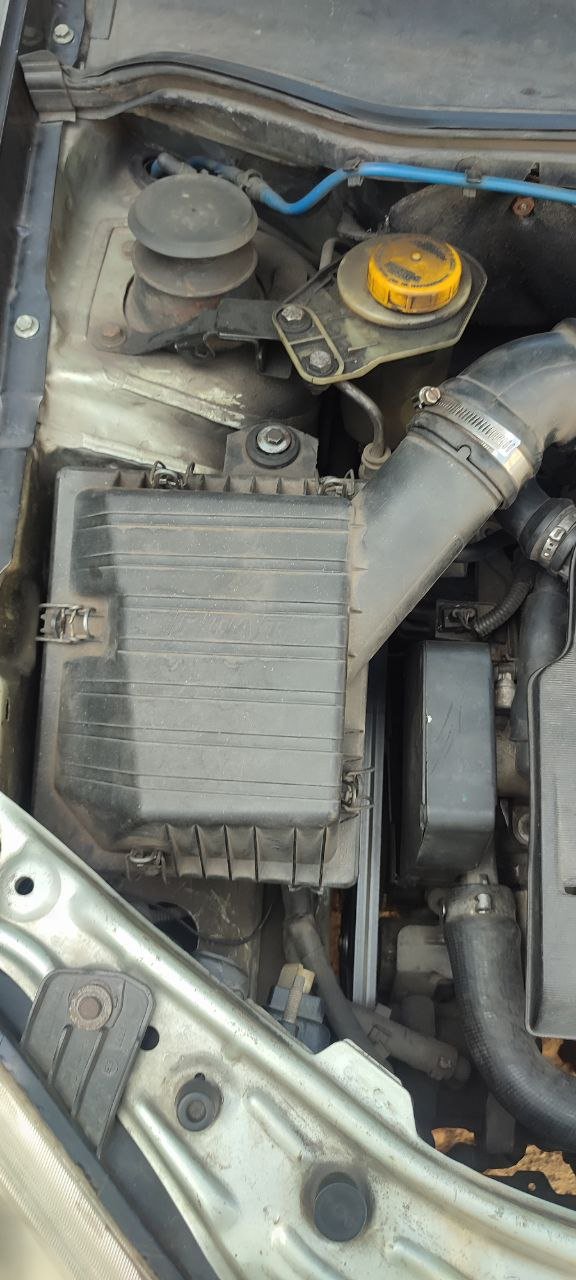
Así que procedemos a levantar el capo y empezamos a quitar el cofre, donde está ubicado el filtro de aire, para eso necesitamos el destornillador de pala y aflojar la abrazadera y con el dado 10 mm se afloja el tornillo para poder quitar esta pieza, es muy necesario quitarla, ya que te dará suficiente espacio para que trabajes más cómodos
Step by step
Well, guys, the first would be to find a clean place where there is shade so you can work quietly.
So we proceed to lift the hood and begin to remove the hood, where the air filter is located, for that we need the shovel screwdriver and loosen the clamp and with the 10 mm die loosen the screw to remove this piece, it is very necessary to remove it, as it will give you enough space to work more comfortable.
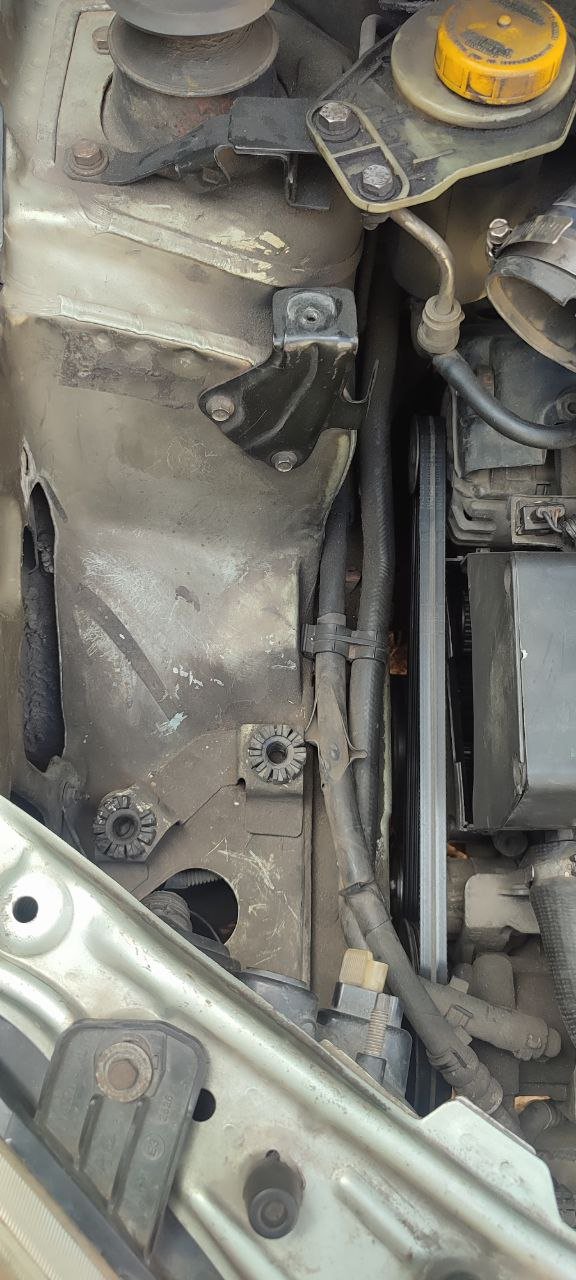
Lo segundo que tenemos que hacer es buscar el dado 8 mm y sacar el protector de la correa para así tener a la vista la polea del árbol de leva y si ven bien tiene una flechas que te indican su posición
The second thing we have to do is to look for the 8 mm die and remove the belt protector in order to see the camshaft pulley and if you see well it has arrows indicating its position.
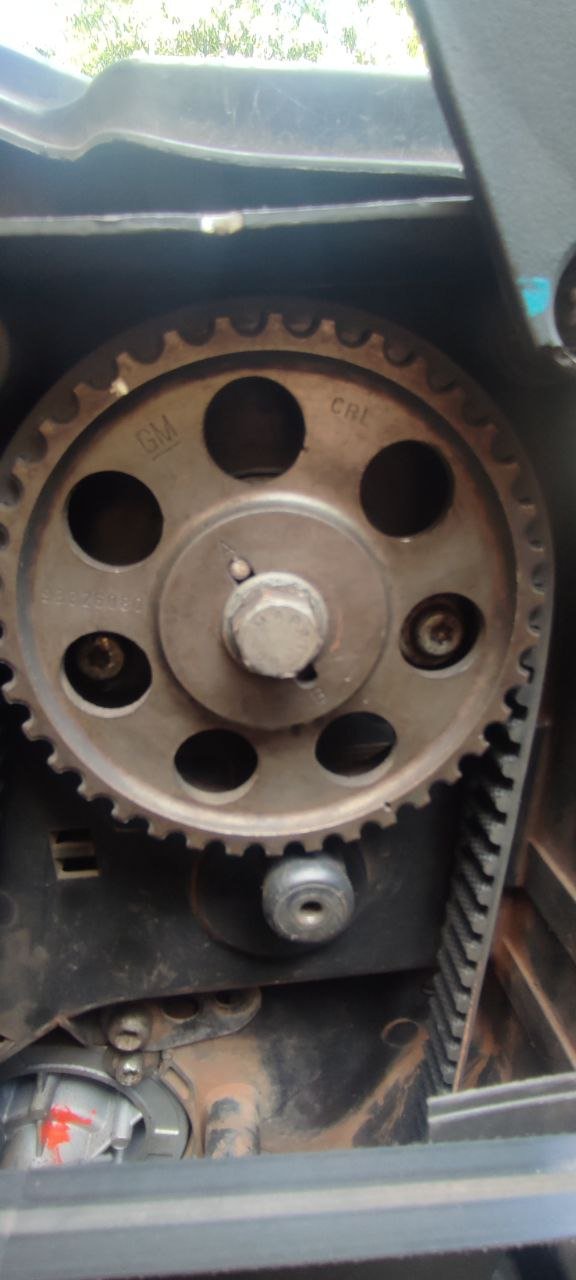
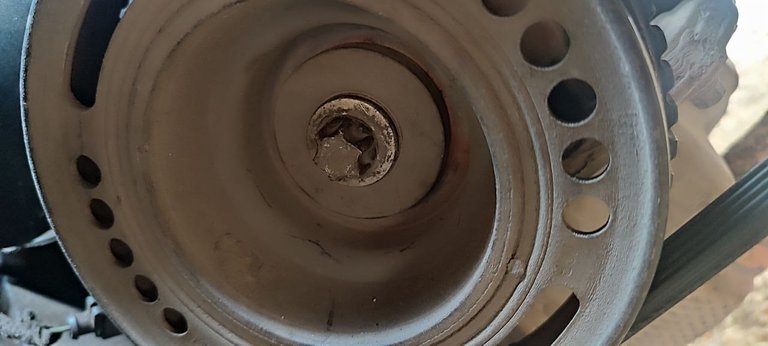
De tercero buscaremos el dado 16 mm con la palanca de fuerza y el extensor, si es necesario para poder sacar el tornillo que sujeta el cámper, la segunda polea que va sujeta al cigüeñal, aquí necesitaras a tu ayudante para qué pase suiche al carro mientras tú colocas la palanca de fuerza trancada con la meseta del carro y así poder aflojar el tornillo (desconozco si esa es la manera correcta de aflojar el tornillo) si se fijan al sacar la polea veremos unas marcas en el piñón que nos indica su posición
De cuarto y último buscaremos él, saca bujías para saber en qué posición está el primer pistón que para el cambio de la correa tiene que estar arriba, luego con la llave Allen y el destornillador se afloja el tornillo del tensor para sacar la correa
Third we will look for the 16 mm die with the force lever and the extender, if necessary to remove the screw that holds the camper, the second pulley that is attached to the crankshaft, here you will need your assistant to pass suiche to the car while you place the force lever locked with the plateau of the car so you can loosen the screw (I do not know if that is the correct way to loosen the screw) if you look to remove the pulley we will see some marks on the pinion that indicates its position.
Fourth and last we will look for him, pulls spark plugs to know what position is the first piston for the change of the belt has to be up, then with the Allen wrench and screwdriver loosens the tensioner screw to remove the belt
Armado
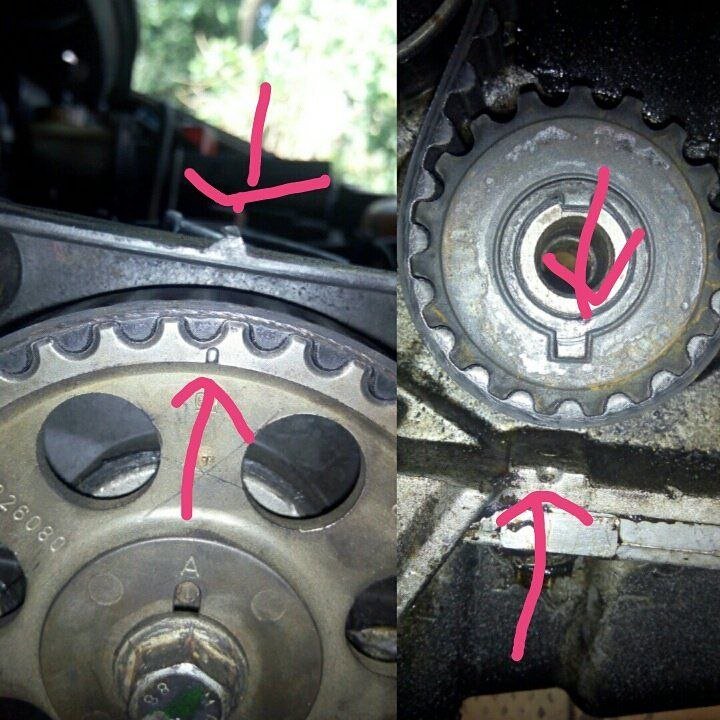
Bueno muchacho ya en este punto con todo el carro desarmado ya toca poner las piezas nuevas y volver armar que básicamente es lo mismo, pero en sentido contrario solo tienes que estar pendiente que el pistón al que le quitaste la bujía se encuentre arriba y que los puntos que trae la polea coincidan con los puntos del protector de plástico, ya que así sabrás que el tiempo está bien. Porque si hace todo como se indica el carro no tiene por qué fallar.
Una técnica que me explico el mecánico fue que a la hora de apretar la polea del cámper y la caja no sufra mientras se aprieta es colocar un destornillador bastante fuerte en un orificio de la caja donde se ven los dientes del plato, allí coloco el destornillador trancando esa pieza para apretar el tornillo del cámper y la caja no sufra, pero hay diferentes técnicas de apretar ese tornillo, también tienes que tener mucho cuidado con el sensor de árbol de leva, ya que si lo partes el carro no te encenderá hasta que reemplace esa pieza. Ya por último colocamos la correa de tiempo, le ponemos su tensor, aplicamos tensión y apretamos, tapamos, colocamos los protectores, todo es su sitio y ahora así a encender el carro.
Reassembly
Well boy already at this point with all the car disassembled and it is time to put the new parts and reassemble which is basically the same, but in the opposite direction you just have to be aware that the piston that you removed the spark plug is up and that the points that brings the pulley match the points of the plastic protector, because then you will know that the time is right. Because if you do everything as indicated the car should not fail.
A technique that the mechanic explained to me was that when tightening the camper pulley and the box does not suffer while tightening is to place a fairly strong screwdriver in a hole in the box where you see the teeth of the plate, there I place the screwdriver trancando that piece to tighten the camper screw and the box does not suffer, but there are different techniques to tighten that screw, you also have to be very careful with the camshaft sensor, because if you part the car will not turn on until you replace that piece. Finally we place the timing belt, we put its tensioner, apply tension and tighten, cover, place the protectors, everything is in place and now turn on the car.
Amigos, espero le allá gustado este tutorial de como cambiar la correa de tiempo de un fíat palio 1.8 fases tres, así que nos vemos en la próxima.
Friends, I hope you liked this tutorial on how to change the timing belt of a Fiat Palio 1.8 phase three, so see you in the next one.
Saludos @sergionatera gracias nuevamente por traer tu experiencia a #hivemotors, francamente se ve un proceso bastante sencillo en comparación con otros vehiculos, en mi caso debo desmontar cuerpo de aceleracion, multiple de admisión y tapa valvulas adicionalmente para poder colocar la herramienta de fijacion del arbol de levas y no se mueva el cigüeñal.
Que bueno que tu mecanico es amigable y se tomo el tiempo de explicarte, no es algo muy común, eso habla muy bien de él como profesional, por lo visto supo explicarte el proceso, sin embargo, permite una pequeña corrección, a la polea que te refieres como camper realmente se conoce como damper, creo que es mas un error de tipeo el corrector ortográfico a veces no juega en contra 😅
Por ultimo aprovecho para invitarte a tomar unos minutos y revisar las publicaciones que te interesen de otros miembros de la comunidad y dejar tu comentario, deseamos que haya mayor interacción, es una práctica orgánica y sana que deseamos llevar adelante, vaya para mis mejores deseos y unas feliz navidad 😊
Hola, qué tal si es un proceso bastante sencillo en comparación a otros vehículos que tiene que usar algunas herramientas especiales
y respecto a mi mecánico si no tiene ningún problema en explicar su trabajo ya varias veces hasta yo mismo lo he ayudado, no tiene ese tabú de me vas a quitar el trabajo si te explico, de igual forma uno le lleva el carro por temor a dañar algo jajjaja
oye muchas gracias por la corrección tenía esa duda si era camper o damper ya sé que es un damper
excelente amigo dalo por hecho me tomaré el tiempo para ver otras publicaciones este mundo de lo automotriz es muy genial cada día uno aprende cosas diferentes
FELIZ NAVIDAD PARA TI TAMBIÉN
Siempre para servirte amigo, gracias por tu apoyo, seguiremos atentos a tu contenido
Congratulations @sergionatera! You have completed the following achievement on the Hive blockchain And have been rewarded with New badge(s)
Your next target is to reach 2500 upvotes.
You can view your badges on your board and compare yourself to others in the Ranking
If you no longer want to receive notifications, reply to this comment with the word
STOPCheck out our last posts:
Support the HiveBuzz project. Vote for our proposal!