Elaboración de un gorro beanie | Making a beanie hat (ES/EN) 💞
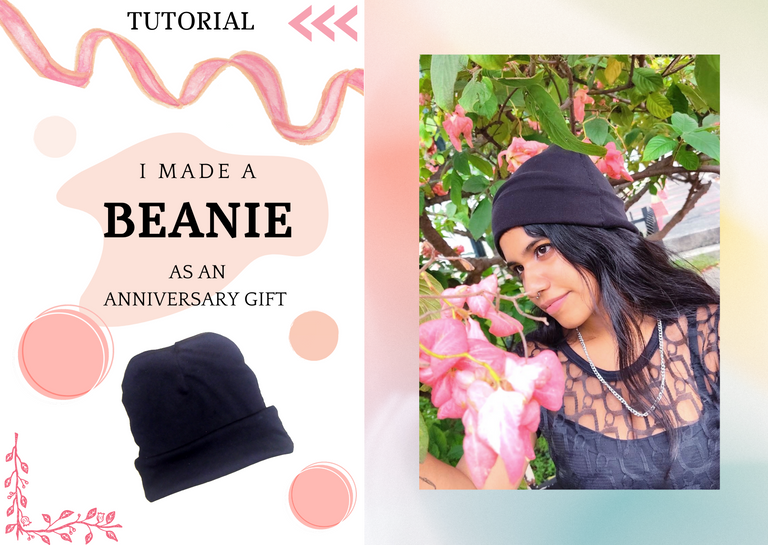

Hace poco fue el tercer aniversario de mi relación con mi novio, así que pensé en regalarle muchas cositas, entre ellas un gorro beanie, llevaba tiempo diciéndome que le encantaban. No obstante, cuando por fin tuve el dinero para comprarlo, la tienda donde sabía que lo vendían cerró, así que me propuse a hacerlo yo misma (cabe resaltar que no soy muy buena cosiendo, pero todo sea por el amor 😌😳😍).
A continuación les enseñaré cómo lo hice y algunas fotitos de cómo se ve puesto, espero que les guste. Si lo llegan a realizar algún día me etiquetan, por favor 😊. Seguro a ustedes les saldrá mejor JAJAJA 💖
Recently it was the third anniversary of my relationship with my boyfriend, so I thought about giving him a lot of little things, among them a beanie, he had been telling me for a long time that he loved them. However, when I finally had the money to buy it, the store where I knew they sold it closed, so I decided to make it myself (it should be noted that I'm not very good at sewing, but all for love😌😳😍).
Next I will show you how I made it and some pictures of how it looks on, I hope you like it. If you make it someday, please tag me 😊. I'm sure you will do better HAHAHA 💖

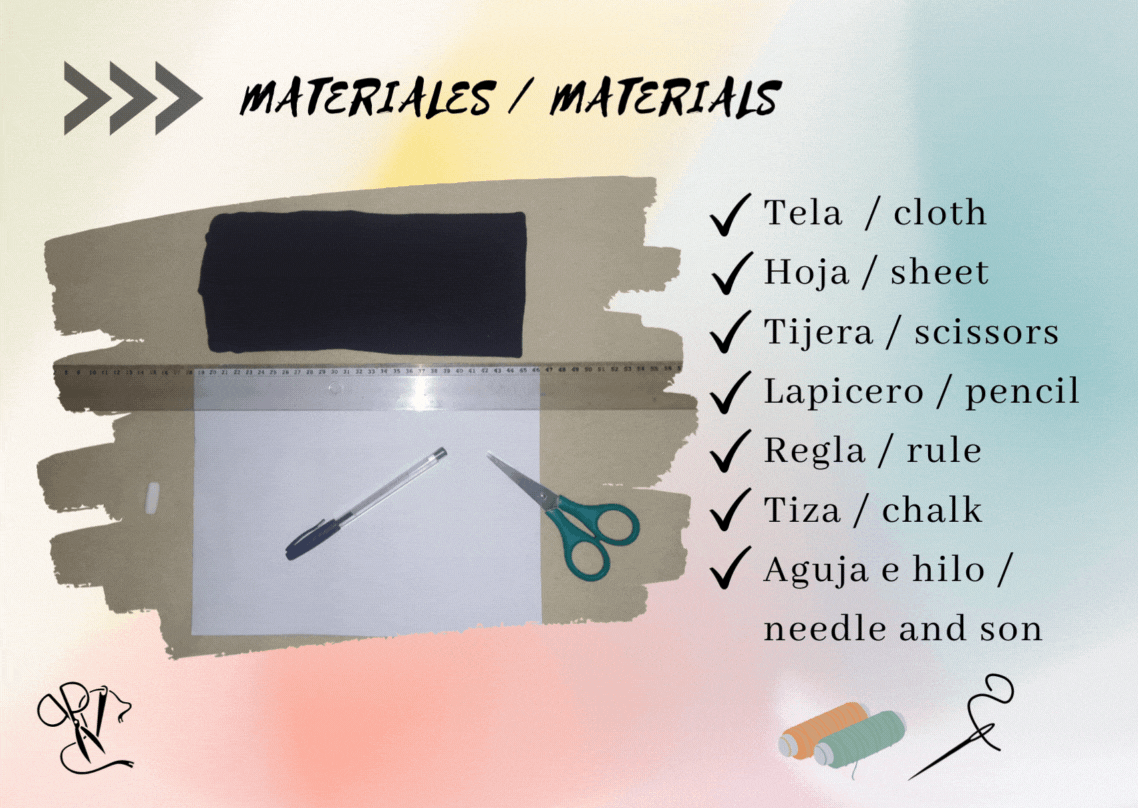
Materiales 💖
Dentro de los materiales que utilicé hay excepciones, por ejemplo:
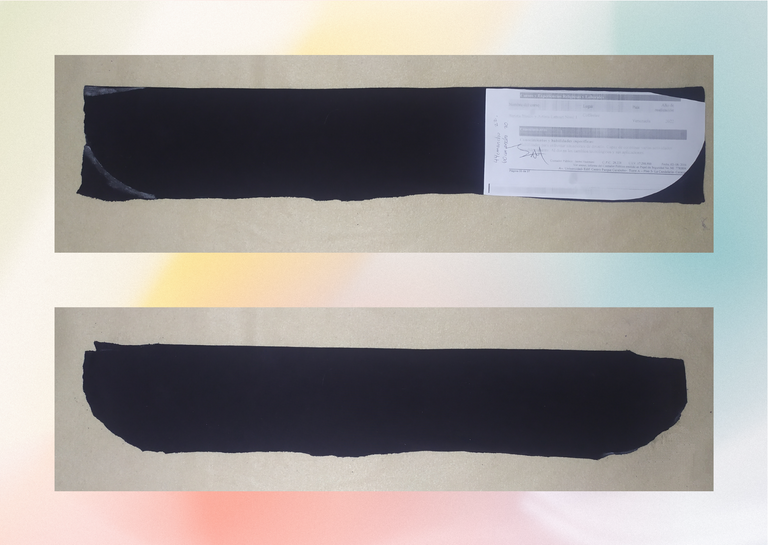
- En vez de tela, aproveché una camisa que no me quedaba. Era de algodón, esto ayuda a que el gorro sea ligero y que no de tanto calor (si prefieren uno grueso para el frío pueden usar tela de lana).
- Aproveché una hoja reciclable para elaborar mi patrón, pero ustedes pueden usar cartulina o el material que deseen.
- La tijera que utilicé es una normal. Tristemente, esas no tenían mucho filo y fue dificultoso cortar la tela, por eso recomiendo usar tijeras para telas.
- Si no tienen tiza pueden marcar la tela con jabón o cualquier cosa que no manche y marque tela fácilmente.
- Si tienen máquina de coser, no tienen que coser a mano con aguja e hijo (como me tocó a mí 😅).
Materials 💖
Among the materials I used there are exceptions, for example:
- Instead of fabric, I used a shirt that didn't fit me. It was made of cotton, this helps the hat to be light and not so hot (if you prefer a thick one for the cold you can use wool fabric).
- I used a recyclable sheet to make my pattern, but you can use cardboard or any other material you like.
- The scissors I used are regular scissors. Sadly, those were not very sharp and it was difficult to cut the fabric, so I recommend using fabric scissors.
- If you don't have chalk, you can mark the fabric with soap or anything that doesn't stain and marks fabric easily.
- If you have sewing machine, you don't have to sew by hand with needle and son (as it was for me 😅).
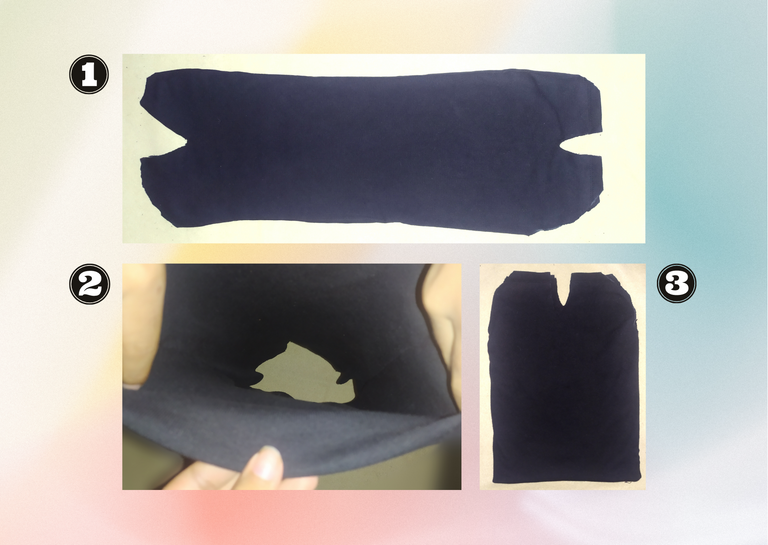
1 💕
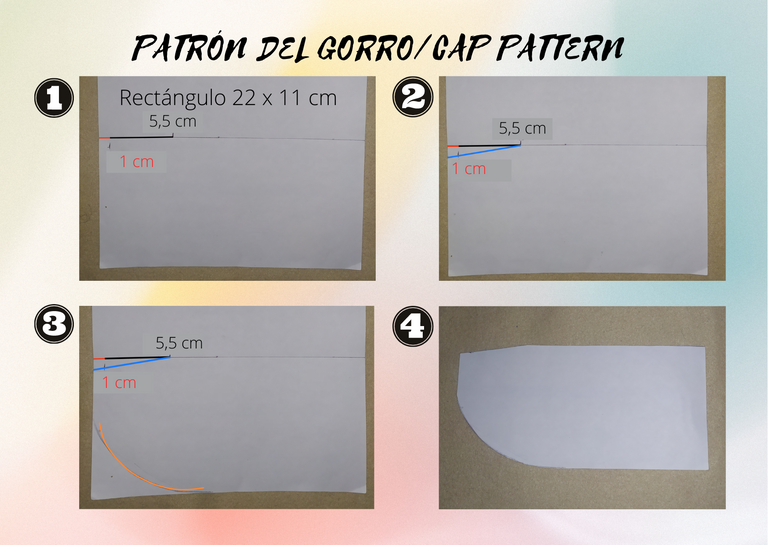
2 💕
Procedemos a cortar lo trazado y listo (hice lo mejor que pude con las tijeras que tenía, disculpen si no es un acabado prolijo).
We proceed to cut the tracing and that's it (I did the best I could with the scissors I had, sorry if it is not a neat finish).
3 💕
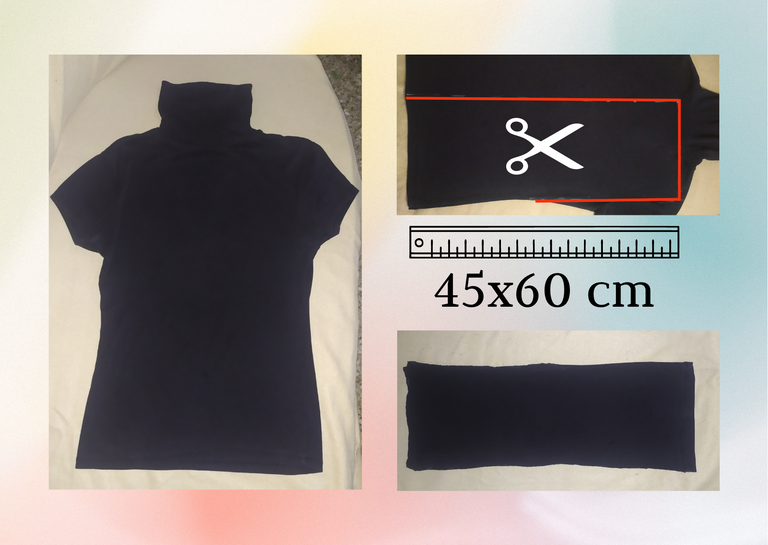
Una vez cortado, ya puedes abrir y coser a mano los lados, de ser necesario, sin tocar aún la parte de la curvatura del gorro.
The next step is to fold the fabric in half lengthwise and sew (this only if you sew by machine). In case of hand sewing, don't sew things yet, as the seam may come undone. Fold the fabric lengthwise again and mark the pattern on both corners following the shape you see in the pictures, and then cut.
Once cut, you can now open and hand sew the sides, if necessary, without touching the curved part of the hat.

4 💕
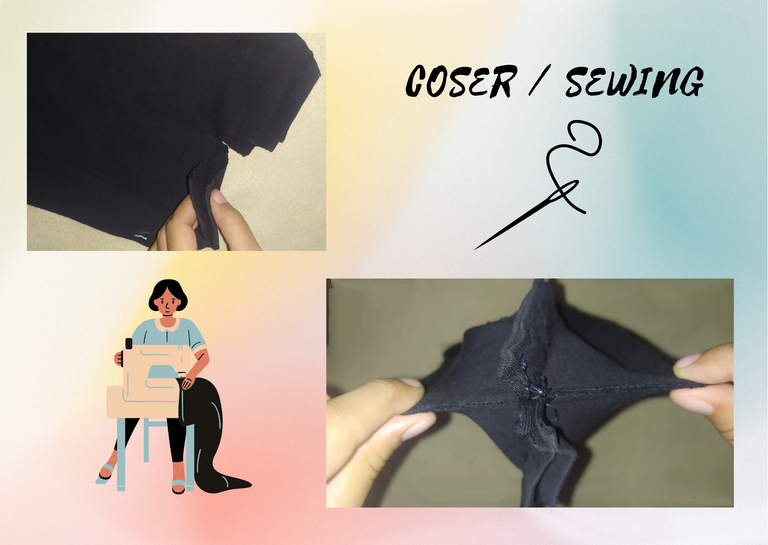
Faltaría coser la parte de arriba. Para esto, hay que doblar la tela de manera en que quede la costura por dentro y que se pueda ver por el centro, como se muestra en la foto número 2. Así va a quedar nuestro gorro con doble tela.
Once that part is sewn, our fabric will look like in the photo of number 1.
Now we need to sew the top part. To do this, fold the fabric so that the seam is on the inside and can be seen in the center, as shown in photo number 2. This is how our hat with double fabric will look like.
5💕
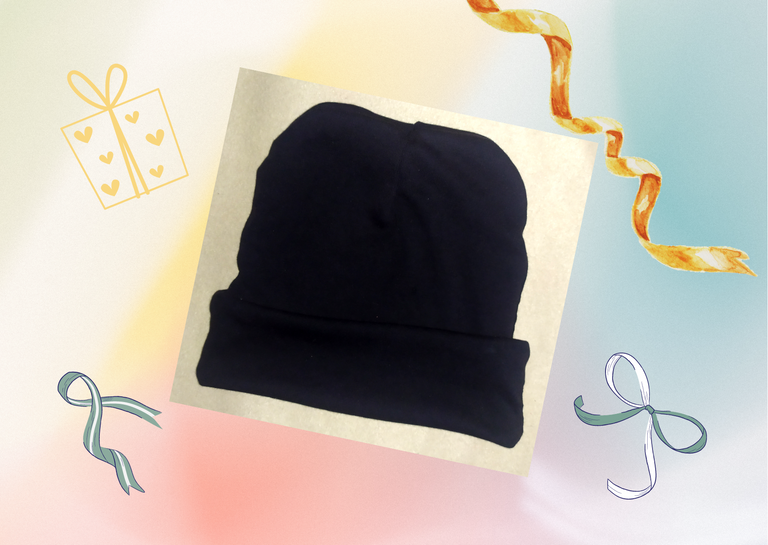

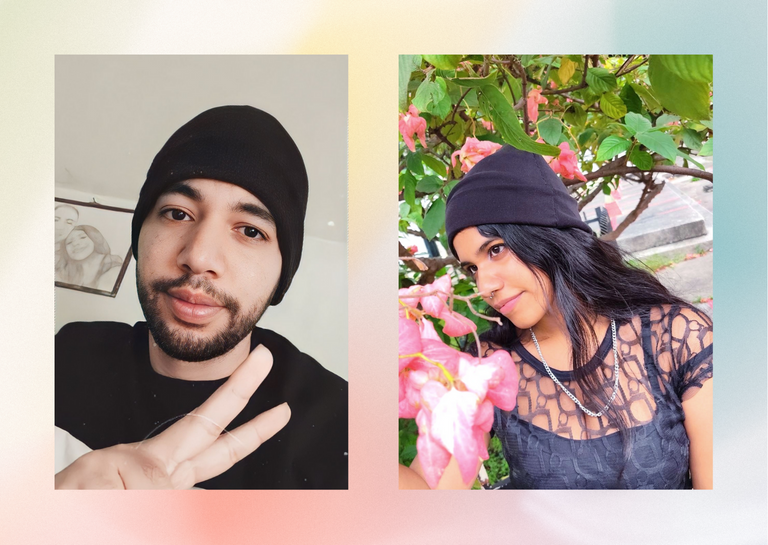
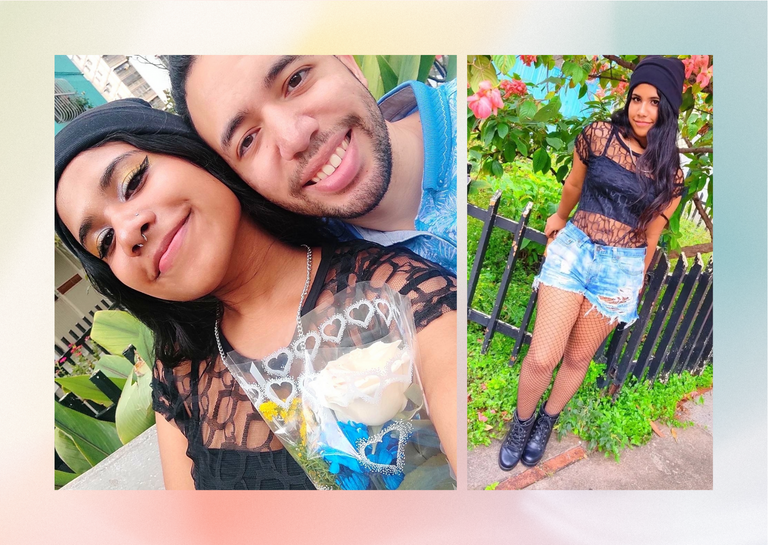
El día de nuestro aniversario, mi novio me dejó usar el gorro porque me quedaba bonito y me tomó muchas fotos lindas con él, por eso me ven a mí usándolo en varias de las fotos. Actualmente, el gorro que le regalé es una de sus prendas favoritas y se lo coloca muy seguido, que tierno 😍❤️
Sin más que decir, espero que les haya gustado todo, cualquier cosita me dicen o me preguntan, y gracias por llegar hasta aquí, les mando un gran abrazo 😉💖
The day of our anniversary, my boyfriend let me wear the hat because it looked nice on me and he took a lot of nice pictures with it, that's why you see me wearing it in several of the pictures. Currently, the hat I gave him is one of his favorite garments and he wears it very often, how cute 😍❤️
Without more to say, I hope you liked everything, any little thing tell me or ask me, and thanks for coming here, I send you a big hug 😉💖

• Las fotos que utilicé son propias, algunas se encuentran en mi cuenta de instagram privada @scarleth.lee.
The pictures I used are my own, some are on my private instagram account @scarleth.lee.
• Edité las imágenes y los banners con ayuda de Canva.
I edited the images and banners with the help of Canva.
• Texto traducido con deepL.
Text translated with deepL
📲✨
Que bonito trabajo, me gustó mucho la forma de reciclar ropa que ya no utilizamos.
Feliz aniversario 🎉 y que sean muchos más. Un abrazo y bendiciones para ti.
🎆🎇🎉🎊🌧️💐✨🌾🌱🌹🌙🌿🍃🥀⚡🌺☘️🍀🌈🌷⭐🪴🌵🌸🌟💮🌴🌳💫☀️💮☔🌲🌳🌍🌌🌠☄️🏵️🐝🌻🌼🍄🐞🦋💙☕💜🍍🎆🎇🎉🎊🎆🎇🎉🎊🌧️💐✨🌾🌱🌹🌙🌿🍃🥀⚡🌺☘️🍀🌈🌷⭐🪴🌵🌸🌟💮🌴🌳💫☀️💮☔🌲🌳🌍🌌🌠☄️🏵️🐝🌻🌼🍄🐞🦋💙☕💜🍍🎆🎇🎉🎊
!PIZZA
Muchas gracias por tu comentario, me alegra mucho que te gustara, un abrazo y bendiciones para ti también, espero que estés muy bien 😘😘💛
https://twitter.com/1268416168500527104/status/1596583056869138435
https://twitter.com/1484281013413023756/status/1596637116863287299
https://twitter.com/1098230499619848192/status/1596896427120087041
https://twitter.com/1596273036864413698/status/1596933513474822144
The rewards earned on this comment will go directly to the people( @dayadam, @richjr, @enfocate ) sharing the post on Twitter as long as they are registered with @poshtoken. Sign up at https://hiveposh.com.
Thank you for sharing this post on HIVE!
Your content got selected by our fellow curator sharminmim & you just received a little thank you upvote from us for your great work! Your post will be featured in one of our recurring compilations which are aiming to offer you a stage to widen your audience within the DIY scene of Hive. Next time make sure to post / cross-post your creation within the DIYHub community on HIVE and you will receive a higher upvote ;) Stay creative & HIVE ON!
Please vote for our hive witness <3
Hola @scarletcorner. Que lindo detalle realizaste para tu aniversario, es muy lindo dar un regalo hecho con amor y con tus propias manos, me imagino que tu novio quedo feliz. Excelente proceso y la reutilización de materiales que tienes a la mano y puedes reciclar. Maravilloso. Felicidades y muchos éxitos... ✨
!LADY
!PIZZA
View or trade
LOHtokens.@dayadam, you successfully shared 0.1000 LOH with @scarletcorner and you earned 0.1000 LOH as tips. (1/1 calls)
Use !LADY command to share LOH! More details available in this post.
Muchas gracias 😊💕 Si, mi novio quedó muy feliz con su regalo, le regalé otras cositas también, pero le encantó más el gorro porque lo realicé con mucho amor 😊💕 Te mando un abrazote 😘
Que hermosos te ha quedado el gorro. Felicidades
Gracias amiga 😊❤️
Hola Scarlett. Que lindo detalle que tuviste con tu novio, el gorro te quedó muy bien, se les ve lindo a los dos. Es un buen accesorio para complementar sus outfits ❣️.
Bienvenida a la comunidad Needle Work Monday 😊. Cada semana los trabajadores de la aguja de todo el mundo compartimos nuestro trabajo, patrones, consejos, ideas y atajos mientras nos apoyamos unos a otros. El objetivo es inspirar a Hive blockchain a darle una oportunidad a la artesanía.
Los lunes usamos la etiqueta #needleworkmonday y los demás días usamos la etiqueta #needlework sin la palabra lunes. Compartimos y publicamos nuestro trabajo directamente desde la página de la Comunidad.
Animamos a nuestros miembros a que compartan el proceso de su trabajo a través de fotos. Esto no sólo valida su trabajo sino que nos lleva al viaje creativo con ustedes.
Para más información sobre lo que hacemos y para nuestras pautas de publicación por favor visita nuestras FAQs.
También te invito a unirte a nuestro Discord! https://discord.gg/RJK8n96N
Saludos, buen domingo ❤️.
Muchas gracias por la bienvenida, que gran explicación, estaré al tanto de realizar todo correctamente y de compartir mi trabajo, nos estamos viendo 😊
Un abrazo ❤️
Me gusta que sea un proyecto hecho con material reciclado, para hacer cosas lindas solo se necesita creatividad, este gorrito sería algo que usaría guardaré tu proyecto, gracias por compartir.
Si, es genial lo que podemos realizar con cosas que no utilizamos jeje.
Ya mi novio me dijo que quería más de otros colores, pronto me comprará la tela y me pondré manos a la obra a hacerlos mucho mejor 😌💕
Wow miren ese potencial de hacer gorros je, yo tengo 2 que me lo diseñaron de la tienda Sugar Magic en Maturín, y que me pusiesen BTS al frente, con tu proceso me puedo imaginar como lo hicieron.
Que chévere, debieron quedar muy bonitos, sería fino hacer más con logos de bandas de k-pop, lo tendré en cuenta para el futuro jajaja 😊
Hermoso detalle para regalar! Lo que más me gusta de todo el trabajo, es que lo realizaste a mano y reciclando! Te quedó excelente! Felicitaciones!
Sí, cuando se quiere se puede 🤣❤️
Me encantó tu post la maquetacion y todos los pasos como los muestras 😃
Gracias, me alegra que te gustara 😉
No soy experto en manualidades pero lo aprecio y me gusta apoyar estos trabajos, me encanta como has detallado cada uno de los pasos 😉👍
Saludos un abrazo 🤗
Muchas gracias por el apoyo, un abrazo 😊❤️
@scarletcorner amiga , está ideal para esta época de frío, gracias por compartir tu creación, saludos 🤗
Si, toca hacer unos cuantos para el frío jaja 🤣😊