ESP-ING Paso a paso de como elaborar un porta llaves / Step by step of how to make a key holder. @roquiro2
Hola querida comunidad de @GEMS gustosamente encuentro aquí para compartir mi paso a paso para realizar un porta llaves el cual realice con mucho cariño para esta comunidad.
Hello dear community of @GEMS I gladly meet here to share my step by step to make a key holder which I make with great affection for this community.
Así que acompáñenme en su elaboración / So join me in making it.
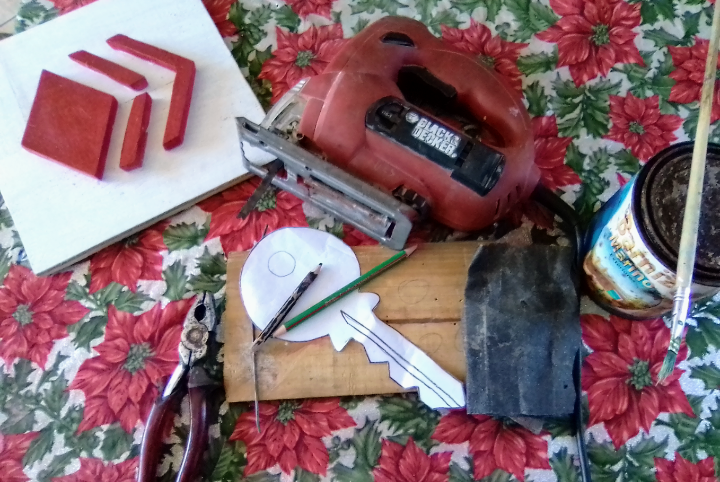
Las herramientas y materiales que utilice para elaborar este porta llaves fueron las siguientes:
- Caladora
- Madera ( machimbrado )
- Un molde de una llave
- Alambre grueso
- Lijas
- Alicate
- Barniz
- Pincel
- Color rojo
The tools and materials that I used to make this key holder were the following:
- Jigsaw
- Wood (tongue and groove)
- A mold of a key
- Thick wire
- Sandpaper
- Pliers
- Varnish
- Brush
- Red color
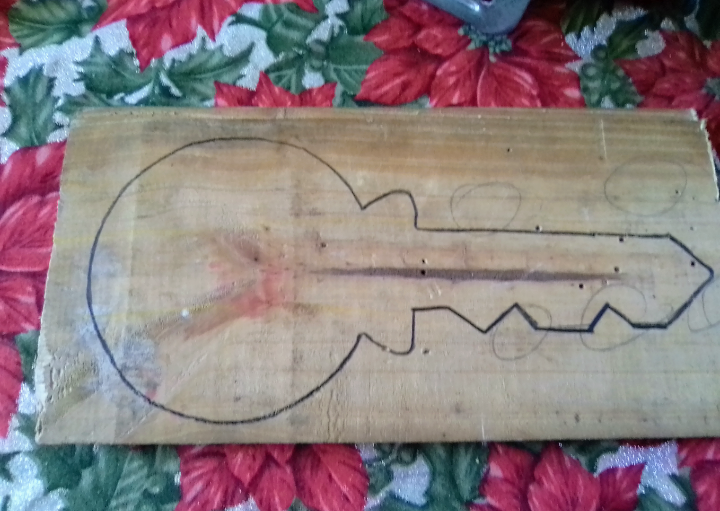
Paso 1
Para iniciar con la elaboración del porta llaves lo primero que hice fue marcar en la madera la forma de la llave con la ayuda del molde de papel.
Step 1
To start making the key holder, the first thing I did was mark the shape of the key on the wood with the help of the paper mold.
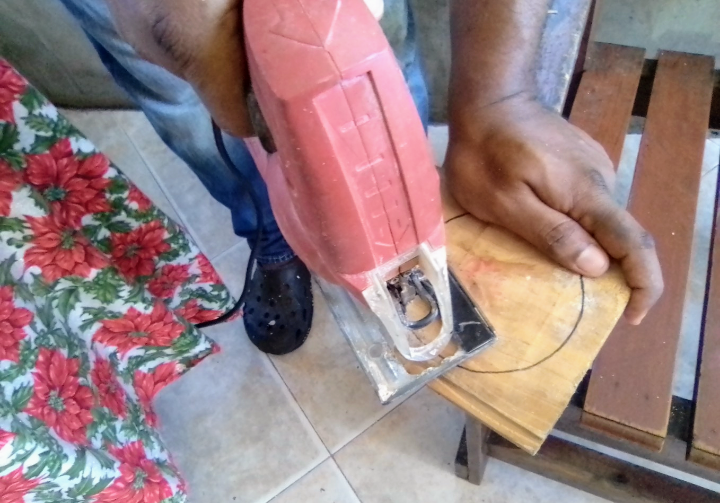
Paso 2
Una vez marcada la llave en la tabla con la mucho cuidado procedi a cortarla con la caladora para asi obtener mi llave .
Step 2
Once the key was marked on the table, I carefully proceeded to cut it with the jigsaw to obtain my key.
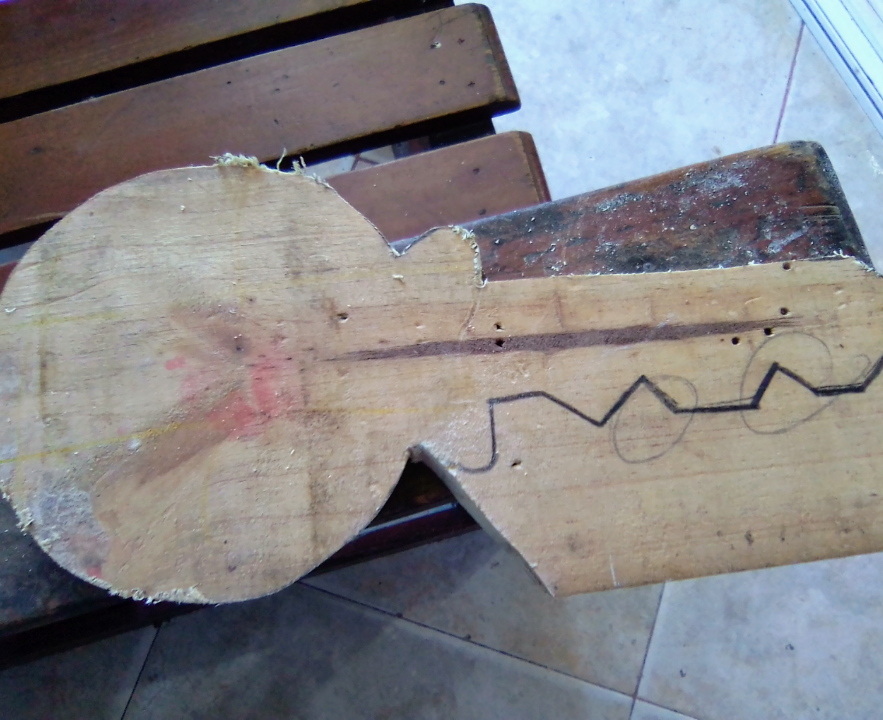
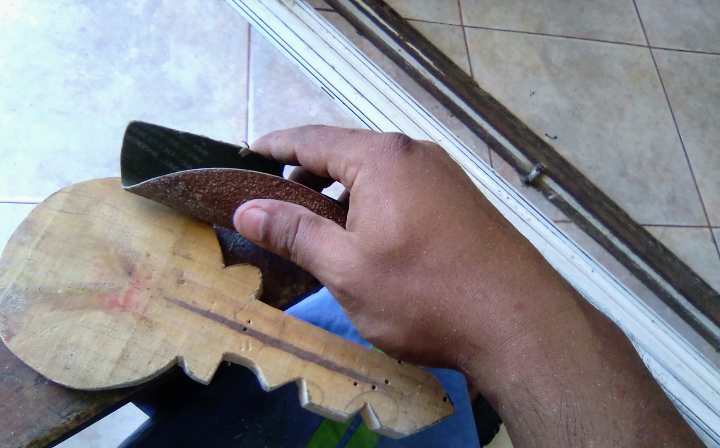
Paso 3
Obtenida mi llave procedi a pasarle las lijas para así suavizar los bordes y corregir algunas imperfecciones mayores.
Step 3
Obtained my key I proceeded to pass the sandpaper to smooth the edges and correct some major imperfections.
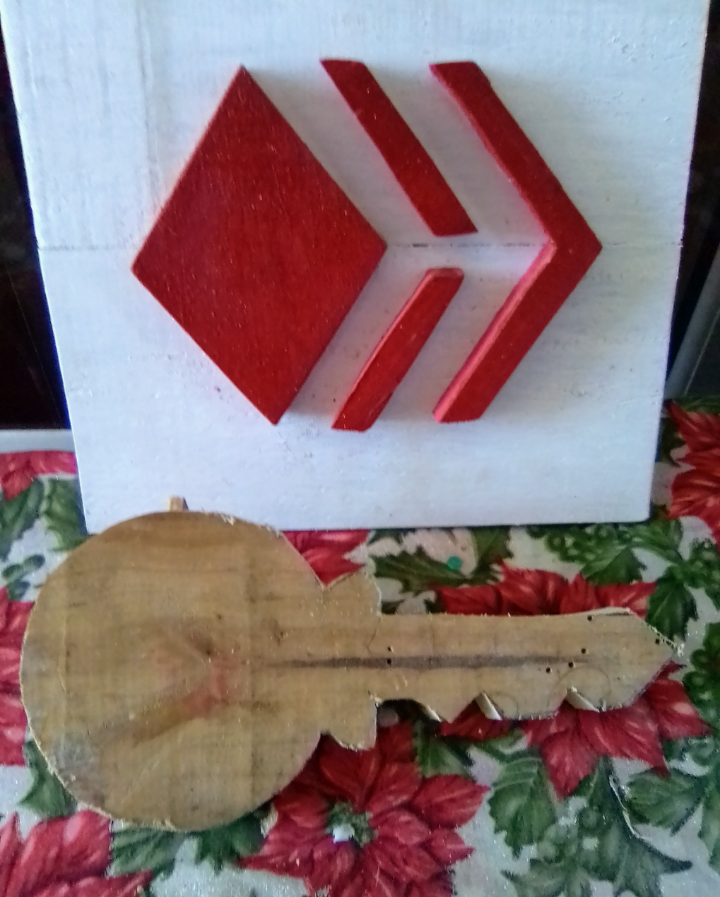
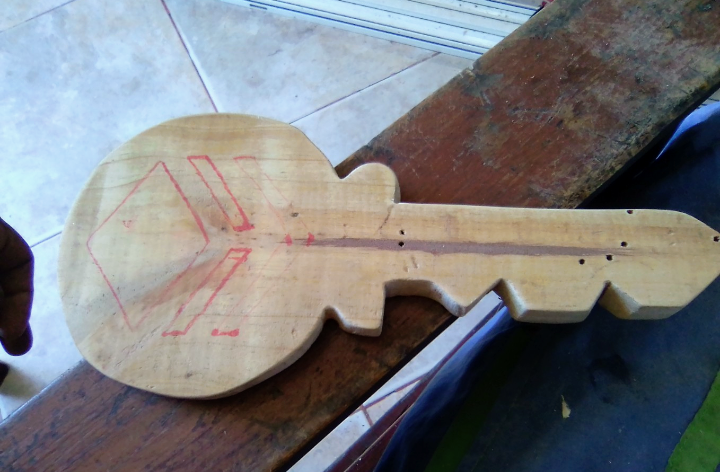
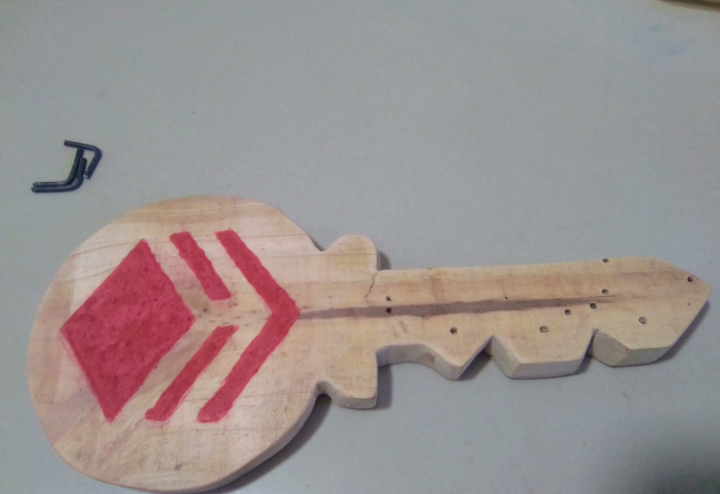
paso 4
En este paso decidí darle un toque especial a mi portallaves y dibuje el logo de HIVE para si darle un poco de exclusividad.
Step 4
In this step I decided to give my key holder a special touch and draw the HIVE logo to give it a bit of exclusivity.
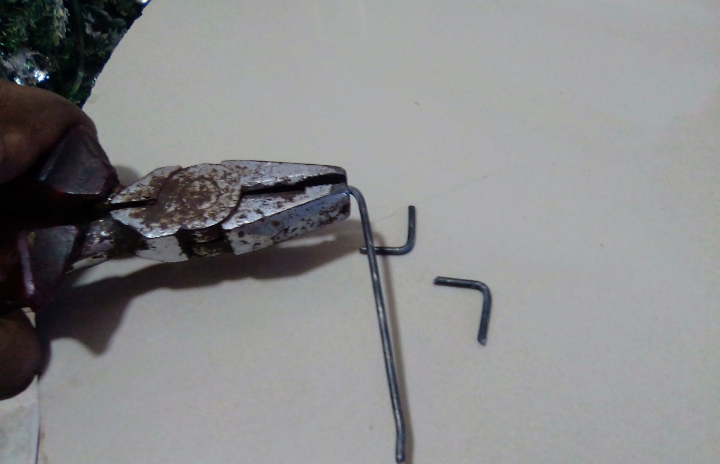
Paso 5
Fue cortar y doblar tres pedazo de alambre en los cuales se colocarán las llaves.
Step 5
It was cutting and bending three pieces of wire on which the keys were placed.
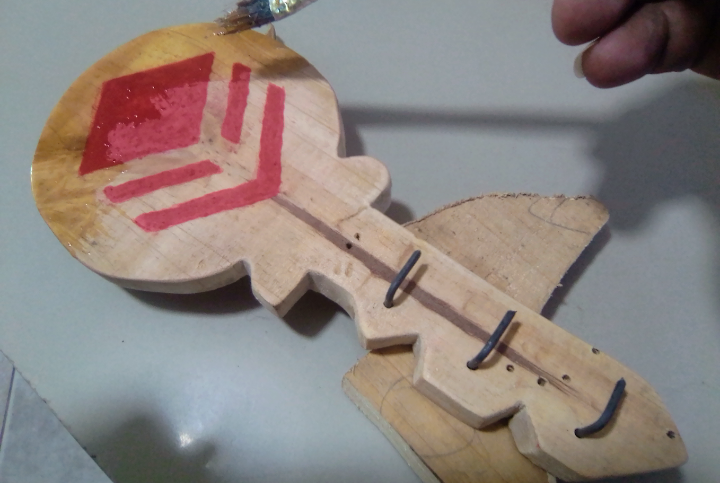
Paso 6
En ese paso le abrí tres pequeños agujero al portallaves donde coloque con mucho cuidado los ganchos.
Step 6
In that step I opened three small holes in the key holder where I carefully placed the hooks.
Paso 7
Para finalizar la elaboración de mi porta llaves le aplique una capa de barniz con la ayuda de un pincel esto para protegerla un poco y también para darle un poco más de vistosidad a mi creación y la puse a secar al sol.
Step 7
To finish the elaboration of my key holder I applied a layer of varnish with the help of a brush this to protect it a little and also to give my creation a little more showiness and I put it to dry in the sun.
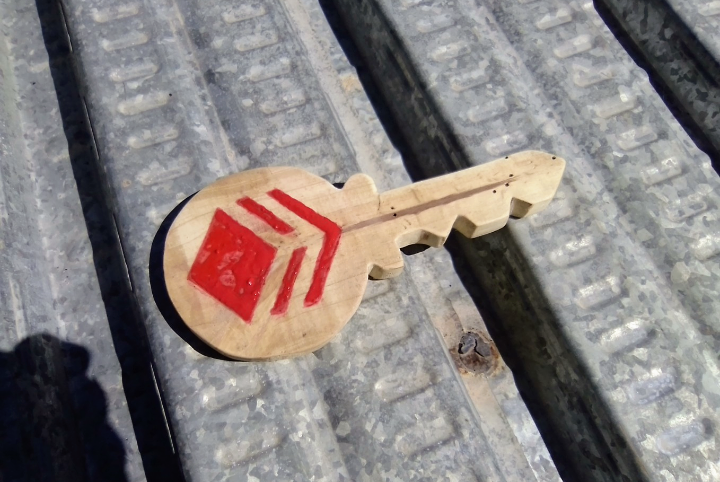
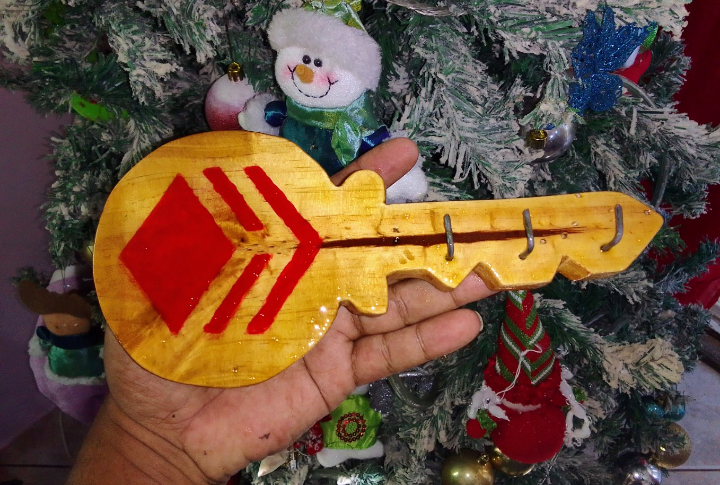
Resultado final / Final score
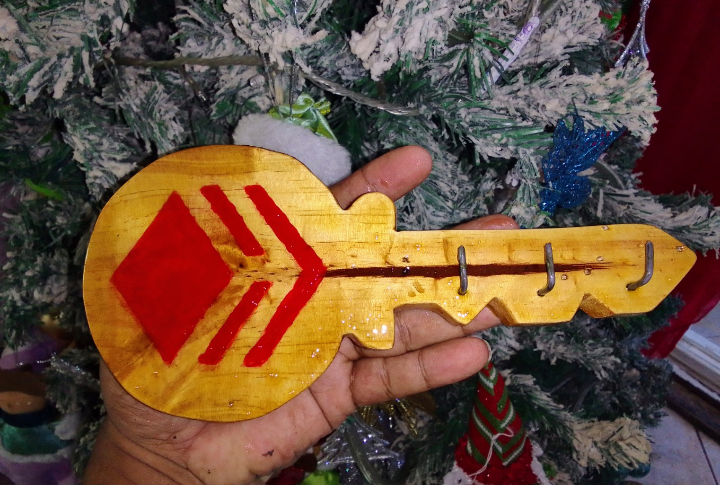
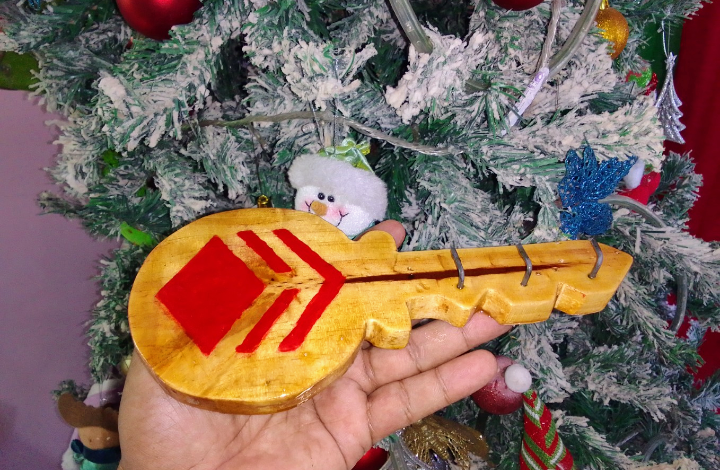
Apreciados amigo de esta magnifica comunidad esta fue mi elaboración detallada la la creación de un porta llaves espero que mi participación sea de su agrado. Hasta la proxima saludos
Dear friends of this magnificent community, this was my detailed elaboration of the creation of a key holder, I hope that my participation is to your liking. Until next time, greetings
That is some pretty cool artwork! We love to build and cut wood, although I am far from being as good as you are. But we also just started to do it and do not have the tools or the room to do it at home. But maybe someday this will change.
Keep up the great work!
Cheers,
@andy-plays
!gif amazing
Via Tenor
Que bonito trabajo, original y que nos servirá para ser más ordenados y para siempre recordar a Hive.
Muchas gracias por la vista y el apoyo si es un muy lindo detalle. saludos