Tutorial: How to repair a Smart TV CLX 32" Model UN32CLX, Dark (Esp-Eng)Screen
Saludos para todos los Hivers amantes de la electrónica y las reparaciones de electrodomésticos.
Llegó el momento de presentar la reparación de un Smart TV, uno de los televisores más populares en la actualidad.
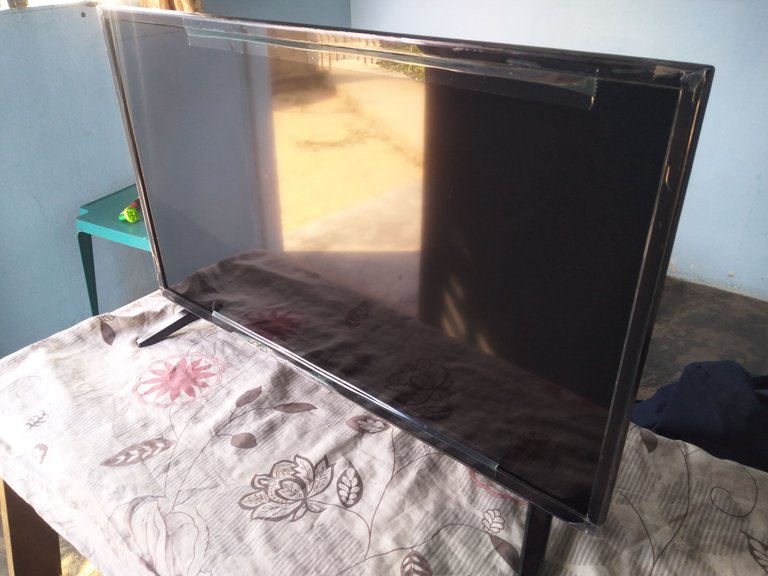
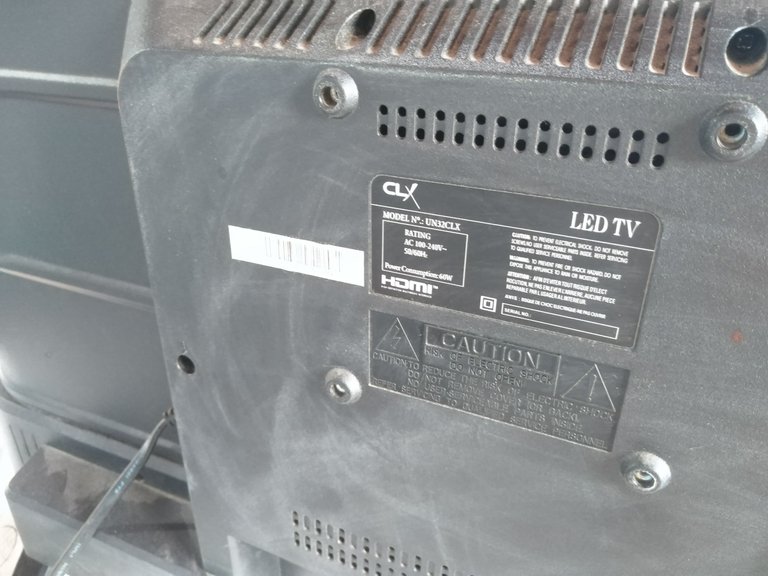
Marca: CLX 32 pulgadas
Modelo: UN32clx
Falla: La pantalla no tiene iluminación, la imágen se vé al fondo.
Greetings to all Hivers who love electronics and appliance repairs.
The time has come to present the repair of a Smart TV, one of the most popular TVs today.
Brand: CLX 32 inches
Model: UN32clx
Fault: The screen has no illumination, the image is seen in the background.
Lo más moderno también es más sensible, muchas personas tienen este tipo de televisores en casa pero cómo están acostumbrados a los televisores convencionales o del tipo LCD, creen que el cuidado es el mismo y los dejan enchufados directamente a la toma de la red eléctrica sin ningún tipo de protección.
Un televisor que está en modo Stand by sigue recibiendo un voltaje, por esa razón cuando hay fluctuaciones de corriente podemos escuchar que dicen: El televisor se me daño estando apagado.
The most modern is also more sensitive, many people have this type of televisions at home but as they are accustomed to conventional televisions or LCD type, they believe that the care is the same and leave them plugged directly into the mains socket without any protection.
A television that is in Stand by mode continues receiving a voltage, for that reason when there are fluctuations of current we can hear that they say: *The TV was damaged when it was switched off.
Esto sucede frecuentemente, así que lo mejor es tenerlo conectado en un estabilizador de voltaje o en un UPS, porque los Smart TV tienen un circuito más sensible, menos robusto, en comparación con los TV Crt y LCD.
Sí han seguido la secuencia de mis reparaciones podrán notar la enorme diferencia que existe en cuanto a las tarjetas electrónicas de los monitores, TV LCD y ahora este Smart TV.
En este modelo de televisor podemos observar que solo hay 2 tarjetas, la más grande tiene doble función, en ella se encuentra la fuente de poder y la parte lógica también, y la inferior es la tcom, es decir la tarjeta que controla la pantalla.
This happens frequently, so it is best to have it connected to a voltage stabilizer or UPS, because Smart TVs have a more sensitive circuit, less robust, compared to Crt and LCD TVs.
If you have followed the sequence of my repairs you will be able to notice the enormous difference that exists regarding the electronic cards of the monitors, LCD TV and now this Smart TV.
In this model of TV we can observe that there are only 2 cards, the biggest one has double function, in it is the power supply and the logic part as well, and the lower one is the tcom, that is to say the card that controls the screen.
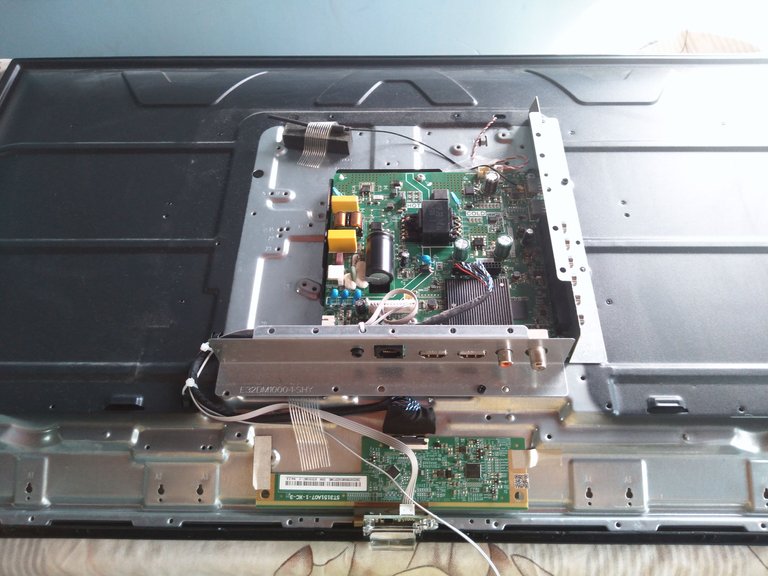
Procedemos a abrir el TV, este tipo de televisores son muy fáciles de abrir, primero por lo liviano y segundo por la poca cantidad de componentes que lo conforman.
Al destornillar la carcasa procedemos a desacoplar el Flex de la pantalla y luego retiramos la cubierta quedando abajo la pantalla dentro de su carcasa frontal.
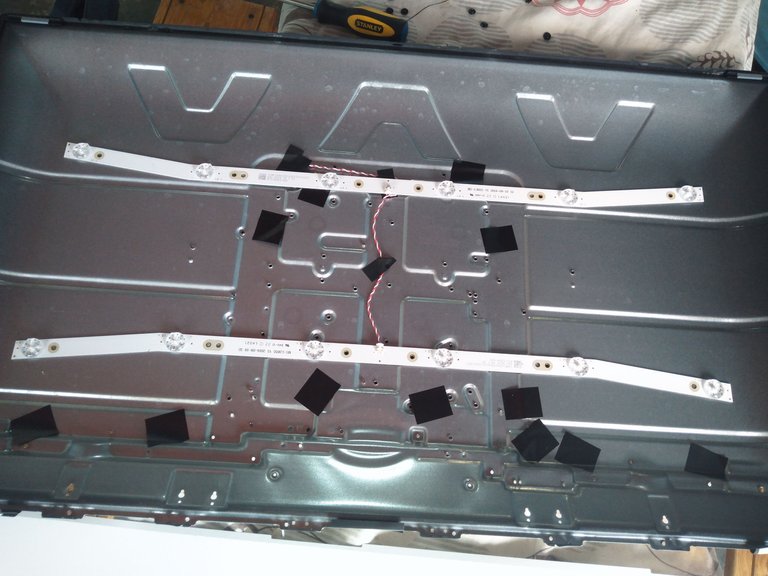
Para diagnosticar este televisor debemos revisar los paneles leds que le dan la iluminación a la pantalla, esto es lo principal.
Por qué? Porque el televisor enciende, transmite sonido, y también imágen, solo estando ausente la iluminación y los que dan iluminación son los leds.
We proceed to open the TV, this type of televisions are very easy to open, first by the lightness and second by the small amount of components that make it up.
When unscrewing the casing we proceed to uncouple the Flex from the screen and then remove the cover, leaving the screen inside its front casing.
To diagnose this TV we must check the LED panels that give the lighting to the screen, this is the main thing.
Why? Because the TV turns on, transmits sound, and also image, only being absent the illumination and those that give illumination are the leds.

Debemos cubrir con un paño la pantalla para evitar la entrada de polvo o residuos del ambiente.
Luego empezamos con la revisión de los leds para saber sí realmente la tira está dañada.
En dado caso de que las dos tiras de LEDs estén buenas, entonces debemos revisar el circuito encargado de energizar las tiras leds.
We must cover with a cloth the screen to avoid the entrance of dust or residues from the environment.
Then we start with the revision of the LEDs to know if the strip is really damaged.
In case both LED strips are good, then we must check the circuit in charge of energizing the LED strips.
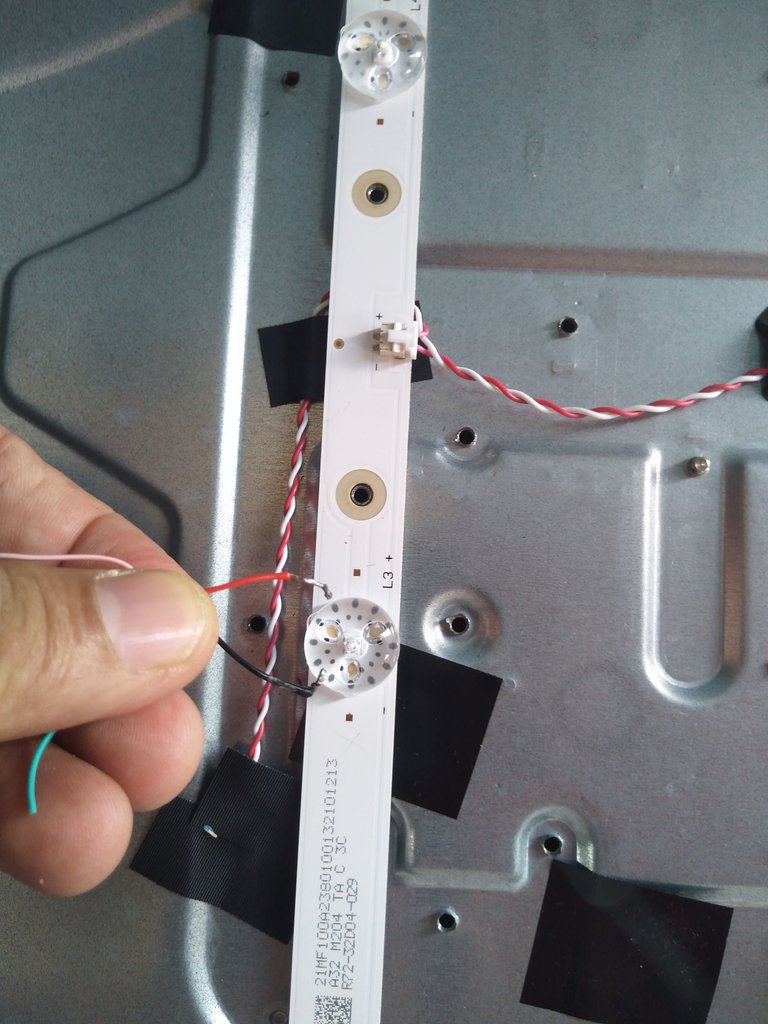
Una forma sencilla, rápida y segura para probar los leds, es la de probarlos con los 5 voltios de un cargador de celular.
Observen que en el panel led se encuentra un signo positivo + quiere decir que allí debemos colocar el cable positivo del cargador y en el otro extremo el negativo.
Al ponerle energía al panel el led iluminará y así seguimos uno a uno hasta encontrar el que no ilumina.
A simple, fast and safe way to test the leds, is to test them with the 5 volts of a cell phone charger.
Note that on the led panel there is a positive sign + which means that there we must place the positive cable of the charger and at the other end the negative.
When we put energy to the panel the led will illuminate and so we continue one by one until we find the one that does not illuminate.
Cuando encontremos el led dañado podemos determinar que la falla es esa y debemos reemplazar el panel o la tira de leds.
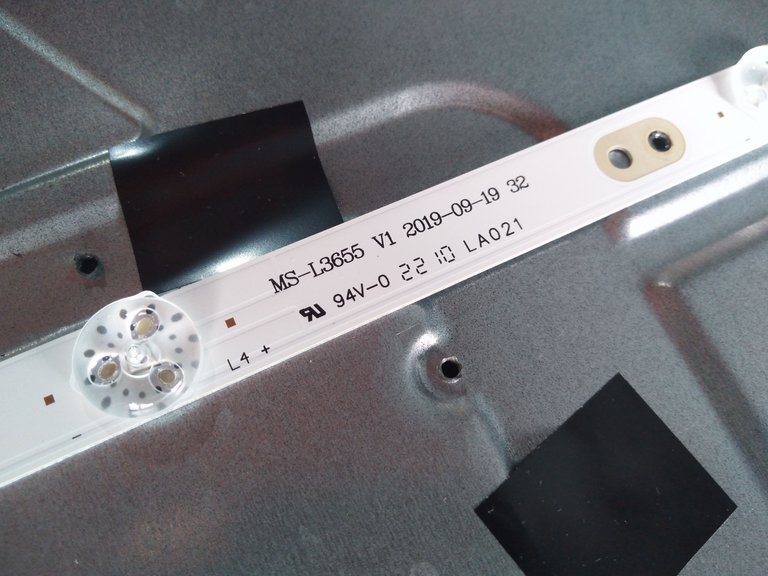
Ahora debemos saber pedir el panel leds adecuado para el televisor, esto es muy importante.
Debemos observar el código de la tira de LEDs u con este código vamos a pedirlo, además, es propicio que cuentes la cantidad de leds que tiene la tira, la forma y la posición donde está situado el conector por donde ingresa la energía.
When we find the damaged led we can determine that the fault is that and we must replace the panel or led strip.
Now we must know how to order the right led panel for the TV, this is very important.
We must observe the code of the LED strip and with this code we will order it, in addition, it is appropriate that you count the number of LEDs that has the strip, the shape and position where the connector is located where the power enters.
Al tener esta información volvemos a armar el televisor para evitar cualquier daño en la pantalla, luego tendremos que abrirlo nuevamente cuando tengamos el repuesto en nuestras manos.
El par de tiras leds costó 20$ por Mercadolibre, la tienda vende el par, no hace ventas de tiras leds individuales y esto se debe a que es mejor colocar los leds nuevos de una vez porque sí hubo un daño en una tira, seguramente la otra también pudo debilitarse.
Having this information we reassemble the TV to avoid any damage to the screen, then we will have to open it again when we have the replacement in our hands.
The pair of led strips cost 20$ by Mercadolibre, the store sells the pair, it does not make sales of individual led strips and this is because it is better to place the new leds at once because if there was damage in a strip, surely the other could also be weakened.
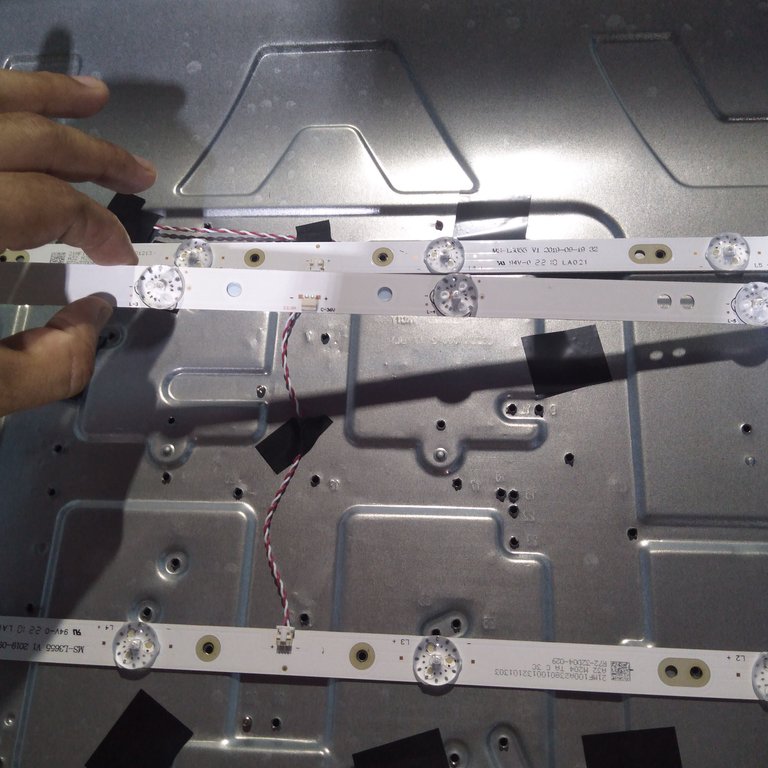
Procedemos a abrir nuevamente el televisor y reemplazamos las tiras leds, esto es muy sencillo, solo debemos retirar unos tornillos, desconectar los panel y colocar los nuevos.
We proceed to open the TV again and replace the LED strips, this is very simple, we just have to remove some screws, disconnect the panel and place the new ones.
Al colocar todo en su posición procedemos a encender el televisor y vemos el resultado de nuestra reparación.
Aquí vemos el televisor con la pantalla iluminada, debemos dejarlo un rato encendido y probar su funcionamiento antes de decirle al cliente que está listo.
When we put everything in position we proceed to turn on the TV and we see the result of our repair.
Here we see the TV with the illuminated screen, we must leave it on for a while and test its operation before telling the customer that it is ready.
Es importante mantenerlo en observación porque no vaya a ser que en el circuito haya alguien componente adicional dañado.
Lo mantiene encendido por una hora y el televisor siguió funcionado con normalidad.
It is important to keep it under observation because it is not possible that there is an additional component damaged in the circuit.
He kept it on for an hour and the TV continued to work normally.
Le informé al cliente que ya su televisor estaba reparado y que podía venirlo a buscar.
Cuando vino a retirarlo le dí todas las recomendaciones para que pueda tener larga vida.
El cliente me dijo que no lo enchufaba en un estabilizador de voltaje y que lo dejaba enchufado permanentemente. Así que va a tomar sus precauciones.
I informed the customer that his TV was already repaired and that he could come and pick it up.
When he came to pick it up I gave him all the recommendations so that it could have a long life.
The customer told me that he did not plug it into a voltage stabilizer and that he left it plugged in permanently. So he is going to take his precautions.
Hemos concluido otra reparación compañeros, espero que este tutorial les sirva de orientación o de guía para el futuro.
Todas las fotografías fueron tomadas con mí Smartphone Huawei Dub-Al00.
Traducido con Deepl

Yo no se nada sobre reparaciones, pero me gustó todo lo que haces y con esto he aprendido algo nuevo jaja, me alegra saber que lograste reparar la TV y gracias por compartir, saludos.
Hola amigo, me da gusto saber que se despertó en ti el interés sobre este contenido.
Siempre es bueno conocer algo nuevo, uno nunca sabe cuando le pueda servir.
Saludos hermano @rmm32 oye que interesante este post me gustó mucho, hace que se vea fácil cambiar estás tirars lec, de verdad es que tenemos que proteger los televisores, así lo tenemos nosotros con un protector inteligente que me a funcionado muy bien.
De verdad muchas gracias por esta información te envío un fuerte abrazo 🤗
Hola amigo, me da gusto recibir tu comentario, qué bueno que cuentes con un UPS para proteger tu televisor, es lo ideal, con esos dispositivos podemos largar la vida de los equipos más sensibles.
No, encantado de ver este post, gracias por todas las recomendaciones 👍🏻
Wow! Excelente post informativo.
Siento que estos televisores son super delicados, compré uno, tiene menos de 1 año, mi hija pequeña sin querer le dió un pequeño golpe abajo, no en la pantalla como tal, sino en el marco, basto y sobró para que no se viera más, a veces me provoca llorar 😢.... Voy a tratar de encontrar a alguien que sea un experto en repararlo.
Hola amiga, que lamentable lo de tú televisor, pero sobre fijas en las imágenes mostradas, podrás ver que en la parte inferior de la pantalla se encuentra el Flex de la pantalla.
Pudo haber sido que ese golpe aflojó ese conector y por esa razón no se vé la imágen.
Solo debes atreverte a destapar la cubierta de atrás, sacar el Flex y volverlo a colocar para ver si vuelve la imágen.
Puedes pedirle ayuda a otra persona en tu casa.
Sí no resulta, entonces se lo llevas a un técnico que trabaje con televisores modernos.
Excelente reparacion, das muy buenos consejos, lastima que no fuiste recompensado, suele pasar. Pensé que revisarías el circuito que energiza los led así descartas que este entregando el voltaje y corrientes adecuados, porque para que se dañe un led de esos tuvo que ser la razón, o por lo menos lo hicistes y no lo comentas aca.
Hola amigo, lo importante es que el contenido está gustando y le puede ser útil a otros compañeros.
Deduje que la razón fue por la falta de protección para el televisor, los voltajes para la alimentación de los leds eran correctas, no se detectó variación de voltaje.
Debemos proteger nuestros dispositivos con estabilizadores de voltaje, los picos altos y bajos son fatales para estos dispositivos.
Gracias por comentar.
Excelente hermano muy buenas recomendación.
Yo recuerdo que en una ocasión intenté reparar uno pero todo salió muy mal con esas lamparitas led ya que había que reemplazar una y lamentablemente con la estación de calor logré hacerle más daño del que necesitaba reparación 🤣😅
Hola amigo, hay un dicho que dice qué echando a perder es que se aprende jaja.
Quizás le colocaste demasiada temperatura a la estación de calor. Pero para retirar leds lo ideal es sacarlos calentando desde abajo.
Para eso fabriqué una plancha. En estos días la voy a mostrar y explicar cómo la hice, es muy buena y segura. Les haré un vídeo demostrativo.