Diy: How to repair a 3.5 mm sound plug (Esp-Eng)
Saludos comunidad HiveDiy
A veces nos encontramos con problemas que se pueden solventar de manera sencilla cuando tenemos el conocimiento no la idea de cómo funcionan las cosas.
Cuando las personas saben sobre nuestras habilidades acuden a nosotros y a la vez aprenden vienendo, por esa razón siempre trato de explicar mis reparaciones de forma muy sencilla, con el único propósito de enseñar a los demás.
Greetings HiveDiy community
Sometimes we encounter problems that can be solved in a simple way when we have the knowledge not the idea of how things work.
When people know about our skills they come to us and at the same time they learn by coming, for that reason I always try to explain my repairs in a very simple way, with the only purpose of teaching others.
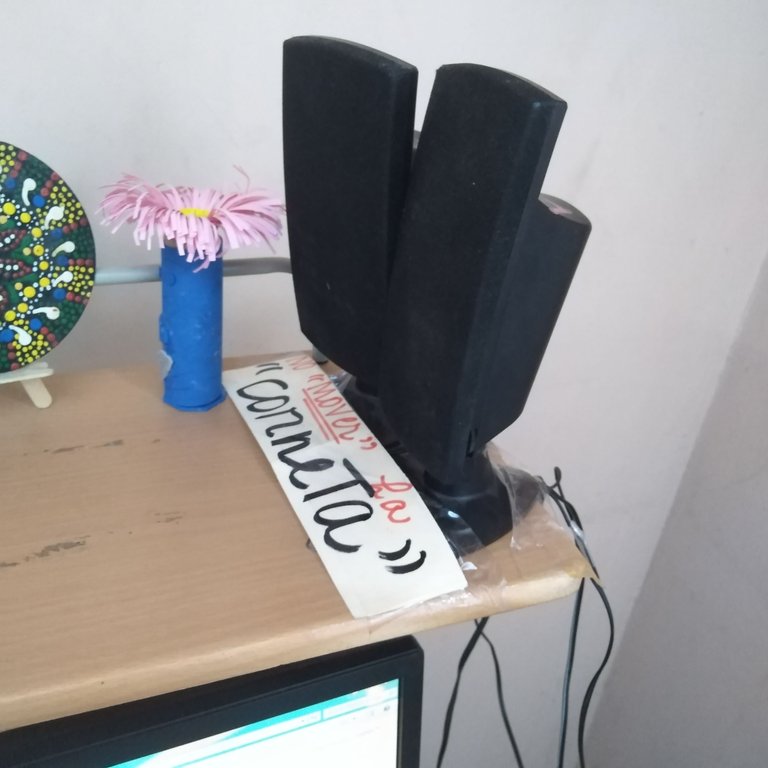
En casa, en la oficina, en cualquier lugar nos podemos encontrar con un dispositivo de sonido que nos hace más ameno el ambiente gracias a la música que se puede escuchar a través de las cornetas, pero con el tiempo los plug o cables que se encargan de transmitir el sonido se dañan.
La persona que se acostumbra a escuchar musica puede experimentar un sentimiento de soledad cuando las cornetas no suenan.
At home, in the office, in any place we can find a sound device that makes the environment more pleasant thanks to the music that can be heard through the horns, but over time the plug or cables that are responsible for transmitting the sound are damaged.
The person who is used to listen to music can experience a feeling of loneliness when the bugles do not sound.
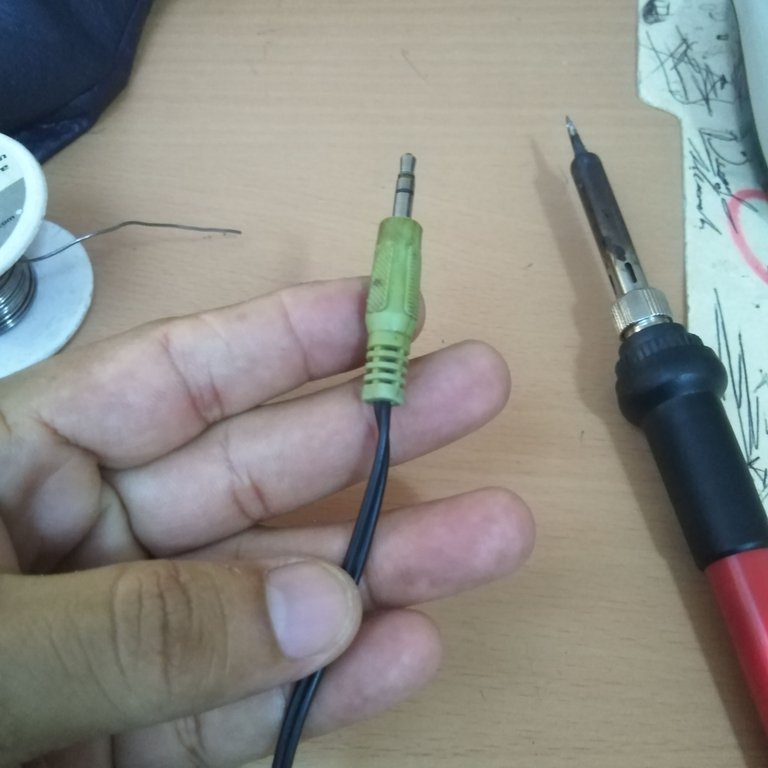
Bueno, precisamente esto le sucedió a una amiga el día de hoy en su oficina, de un momento a otro las cornetas dejaron de sonar, pero cuando movía el cable las corneta sonaban y al instante dejaban de sonar.
Como la mayoría de las veces cargo mi bolso con las herramientas, le dije que la ayudaría con ese problema de una vez.
Sin duda alguna el problema venia del plug de audio.
Well, precisely this happened to a friend of mine today in her office, from one moment to another the bugles stopped sounding, but when she moved the cable the bugles sounded and instantly stopped sounding.
As most of the time I carry my bag with the tools, I told her I would help her with that problem at once.
Without a doubt the problem was coming from the audio plug.
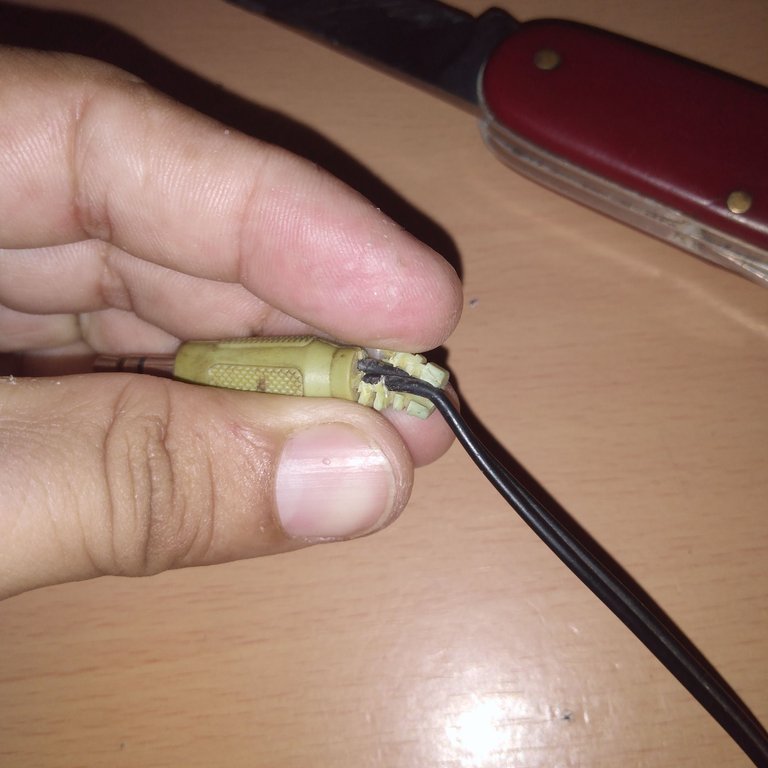
Entonces la solución era desnudar el plug, quitarle la cubierta para poder llegar a las soldaduras donde llegan los cables que van hacia las cornetas.
Con la ayuda de la navaja fui cortando la goma que cubre el plug, si no tienen experiencia con esto les recomiendo que lo hagan con cuidado, primero para no cortarse y segundo, para que puedan ver a dónde llegan los cables.
So the solution was to strip the plug, remove the cover to be able to reach the soldering points where the wires go to the horns.
With the help of the knife I cut the rubber covering the plug, if you do not have experience with this I recommend you to do it carefully, first to avoid cutting yourself and second, so you can see where the wires go.
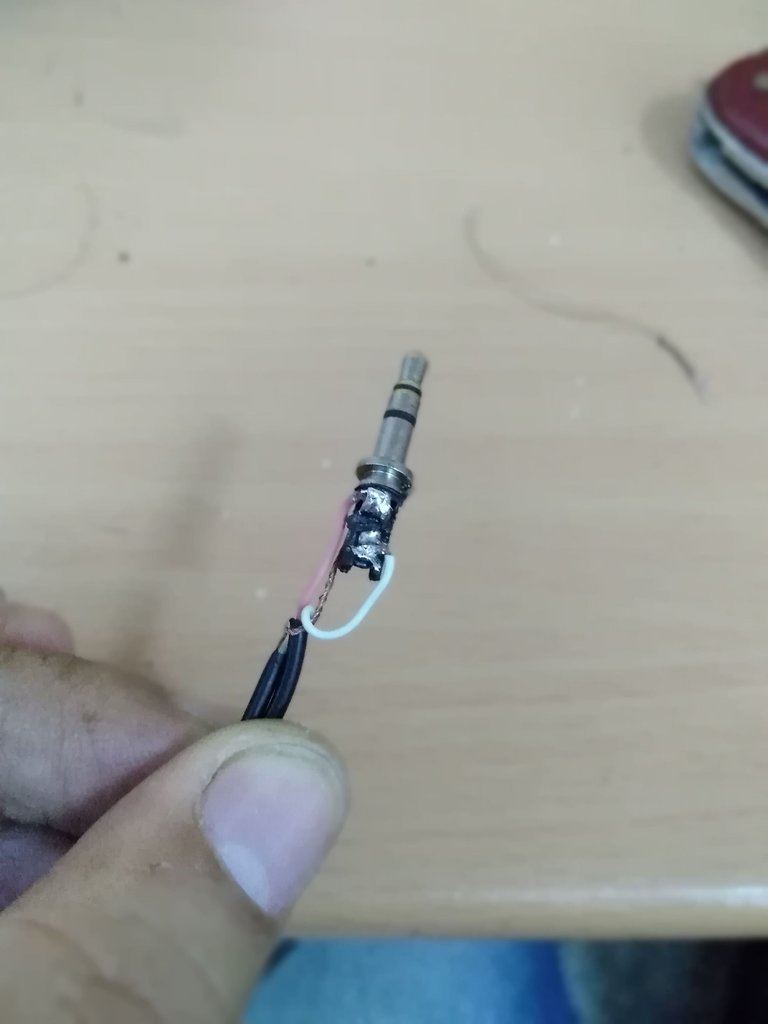
Como verán,hay tres cables, uno rojo que estaba suelto, el blanco y otro son cubierta.
As you will see, there are three wires, a red one that was loose, the white one and the other one are covered.
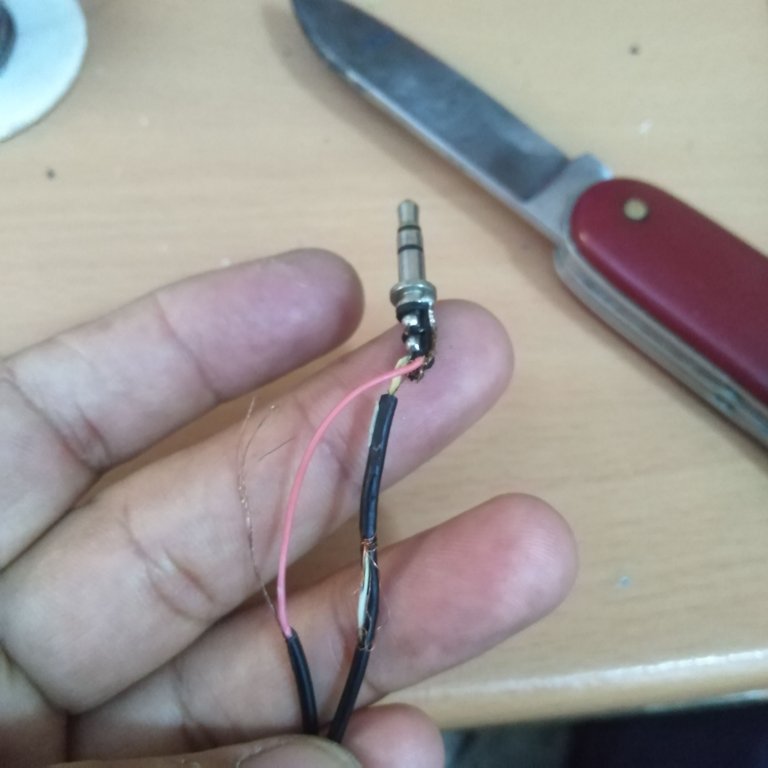
Estos cables tiene su posición en el plug, el cable desnudo, sin cubierta, es el cable tierra, el blanco es de la corneta izquierda L y el rojo de la derecha R.
Entonces, al fijarnos en la posición que va cada cable, podemos cortarlos para volver a pelar el cable y de esta forma soldarlos nuevamente.
These wires have their position in the plug, the bare wire, without cover, is the ground wire, the white wire is from the left horn L and the red wire from the right one R.
Then, looking at the position of each wire, we can cut them to strip the wire again and solder them again.
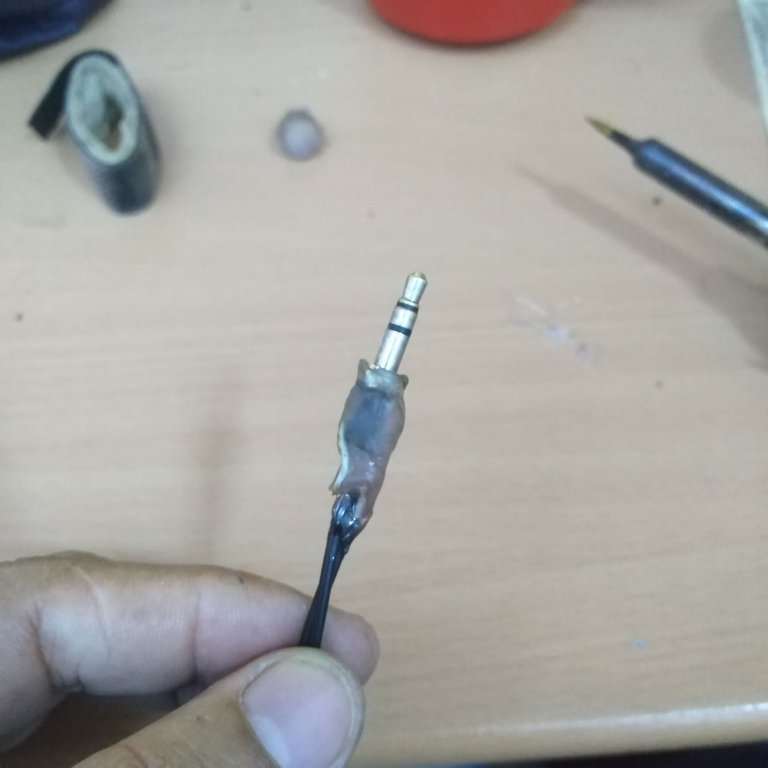
Ahora con los cables bien soldados debemos cubrir el plug para protegerlo y darle una apariencia más estética.
Para ello derreti Silicon en barra, poco a poco fuí moldeando el silicón encima del plug.
Now with the wires well soldered we must cover the plug to protect it and give it a more aesthetic appearance.
To do this I melted silicon in bar, little by little I molded the silicone on top of the plug.
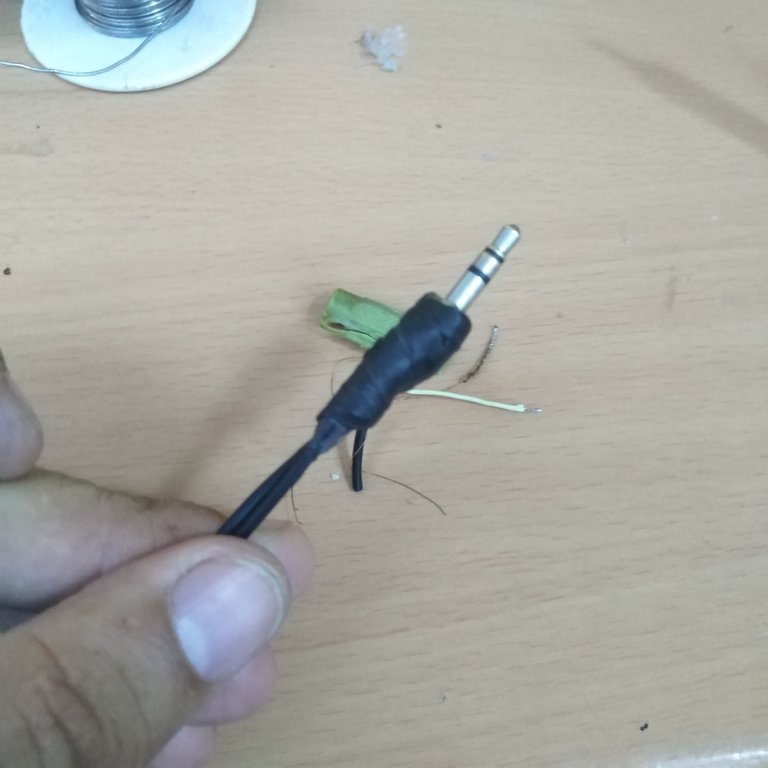
Para reforzar la cubierta le coloqué teipe de goma 3m, este es un aislante utilizado para cubrir cables de alta tensión, es muy bueno y bastante útil porque se estira y se adhere perfectamente a la superficie.
Ya con el plug cubierto y los cables soldados, solo queda devolverle la alegría a la oficina de mi amiga con buena música.
To reinforce the cover I put 3m rubber teipe, this is an insulator used to cover high voltage cables, it is very good and quite useful because it stretches and adheres perfectly to the surface.
Now with the plug covered and the wires soldered, the only thing left to do is to bring joy back to my friend's office with good music.
Así de fácil se ha reparado el plug de estas cornetas de computadora y así mismo se puede reparar cualquier plug.
Solo debemos atrevernos a hacer las cosas con nuestras propias manos, sabemos que a lo mejor no contamos con ciertas herramientas, pero al tener el conocimiento de cómo se hacen las cosas, en cualquier momento podríamos solventar la situación.
Gracias a todos por su atención, espero verlos en una próxima reparación.
This is how easy it has been to repair the plug of these computer speakers and any plug can be repaired in the same way.
We just have to dare to do things with our own hands, we know that maybe we do not have certain tools, but having the knowledge of how to do things, at any time we could solve the situation.
Thank you all for your attention, I hope to see you in a next repair.
Todas las fotografías fueron tomadas con mí Smartphone Huawei Dub-Al00.
Traducido con Deepl

¡¡¡Buen trabajo!!! Gracias por publicar tu excelente contenido en Hive Diy, asombroso tutorial, gracias a tu publicación, podre reparar unos que tengo guardados para repararlos en su momento, muchas gracias por compartir.
Tu comunidad artesana ahora es testigo

Qué tutorial tan asombroso, resulta que es algo que me está pasando con unos audífonos que tengo para mi teléfono, por supuesto el cable es más delgado y delicado, de hecho no tengo siquiera un cautín para poderlos reparar como es, pero quisiera por lo menos me funcionaran un tiempo mientras compro unos nuevos, tu tutorial me vino como anillo al dedo, gracias por compartir bro.
Bueno amigo, un cautín es una herramienta muy útil, incluso es muy práctica para realizar trabajos de manualidades. Su costo oscila entre los 3$ y 7$ aproximadamente. Invierta en uno y verá que lo útil que será en su hogar.
Congratulations @rmm32! You have completed the following achievement on the Hive blockchain And have been rewarded with New badge(s)
Your next target is to reach 8000 upvotes.
You can view your badges on your board and compare yourself to others in the Ranking
If you no longer want to receive notifications, reply to this comment with the word
STOPBuen trabajo hermano, esos plug cuando se les parte un cable son bastantes molestos y nos crean un gran problema pues quedamos totalmente sin audio en las bocinas o a intermitencia lo cual es tedioso. Lo bueno es que son fáciles de repar como bien nos mostraste en tu buen tutorial. Saludos hermano
Hola amigo, gracias por visitar mi publicación. Los cables son muy frágiles y por esa razón se dañan rápido. Pero debemos buscar soluciones prácticas.
Siempre es bueno contar con este tipo de conocimientos para ahorrar algo de dinero y de paso para solucionarnos la vida. Además, los auriculares siempre son tan frágiles, está bueno saber arreglarlos. Gracias por compartir tu trabajo 💕
Así es amiga, el conocimiento es valioso y nos puede ser útil en cualquier momento.
Exacto, los auriculares se dañan con frecuencia y uno de los puntos débiles es ese plug.
Amigo bastante educativo este post, seguro a mi esposo le encantará revisarlo para aprender.
Gracias amiga, bueno compártela, espero se anime y también pueda crear contenido de este tipo si ya es un Hivers, y si no lo es, bueno!! Invitelo.
https://twitter.com/hivediy47901/status/1779021023582539838