Diy: How to convert a lamp into a light bulb / Cómo convertir una lámpara en bombillo (Esp-Eng)
Saludos Artesanos Hivers.
Es muy grato para mí presentar un nuevo tutorial, algo que seguramente les llamará la atención y algunos pondrán a prueba.
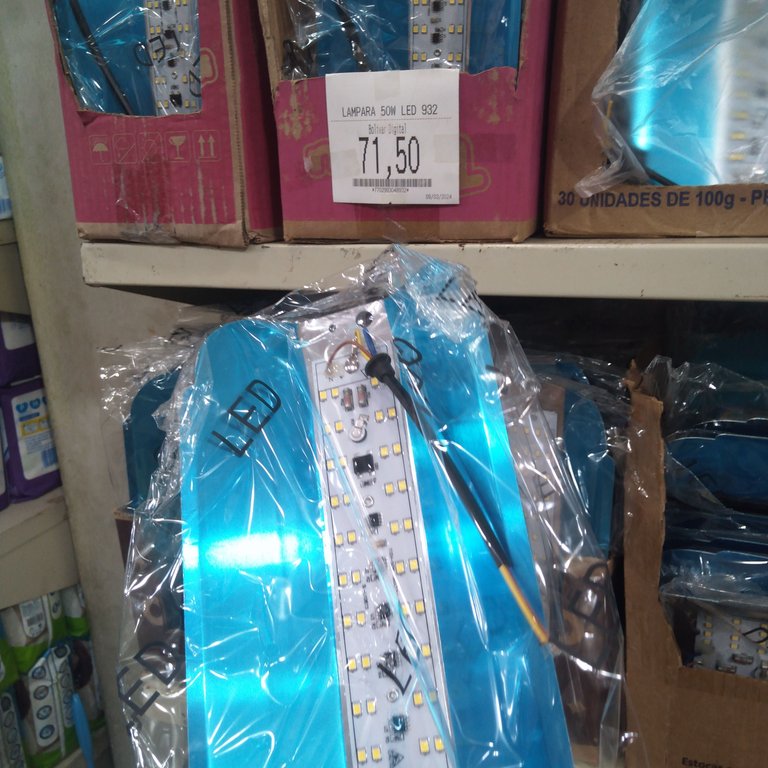
Desde hace ya un año he ido cambiando los bombillos de mi casa por las novedosas lámparas leds. Este tipo de lámparas nos brindan una iluminación bastante clara y cada espacio de la casa queda bastante iluminado.
Greetings Huvers Artisans.
It is a pleasure for me to present a new tutorial, something that will surely catch your attention and some of you will test it.
For a year now I have been changing the bulbs in my house for the new led lamps. This type of lamps give us a very clear illumination and every space in the house is quite illuminated.
Pero las lámparas leds que se venden en los establecimientos vienen con un cable suelto, es decir sin un conector.
Esto se debe a que este tipo de lámparas ha sido diseñada para usarlas en exteriores.
But the led lamps sold in stores come with a loose wire, i.e. without a connector.
This is because this type of lamp is designed for outdoor use.
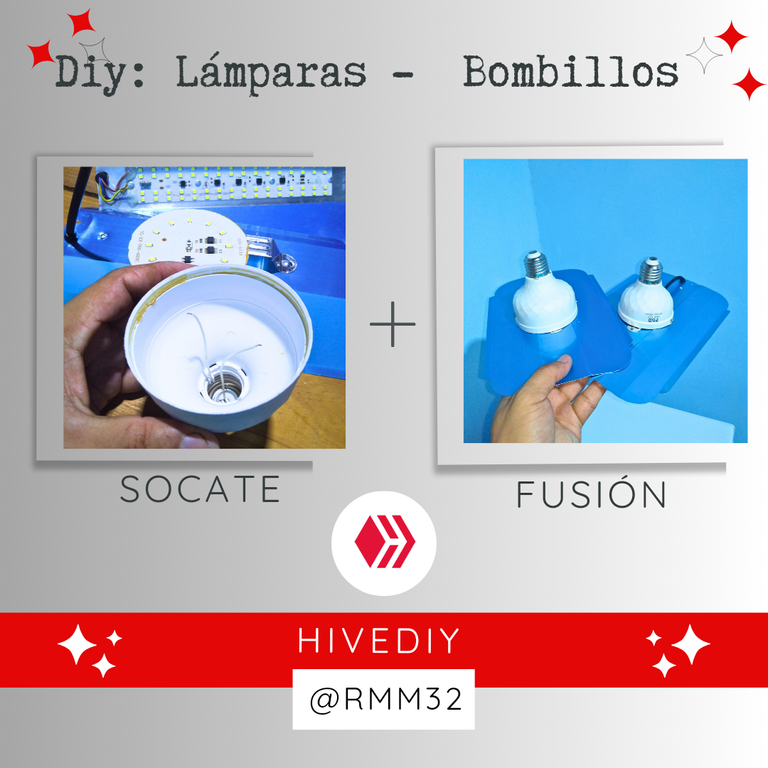
Entonces decidí idear una forma para transformarlas en Lámparas tipo bombillos, para lograr hacerlo ubiqué la parte de la rosca de los bombillos leds que se me fueron quemando poco a poco y que por cierto duran muy poco,con la finalidad de acoplarlos a la lámpara.
Podría parecerles algo engorroso de hacer, pero la verdad es bastante sencillo porque estos bombillos se desarman prácticamente con las manos.
Then I decided to devise a way to transform them into bulbs type lamps, to do so I located the threaded part of the LED bulbs that were burning me little by little and that by the way last very little, in order to attach them to the lamp.
It could seem something cumbersome to do, but the truth is quite simple because these bulbs are practically disassembled with the hands.
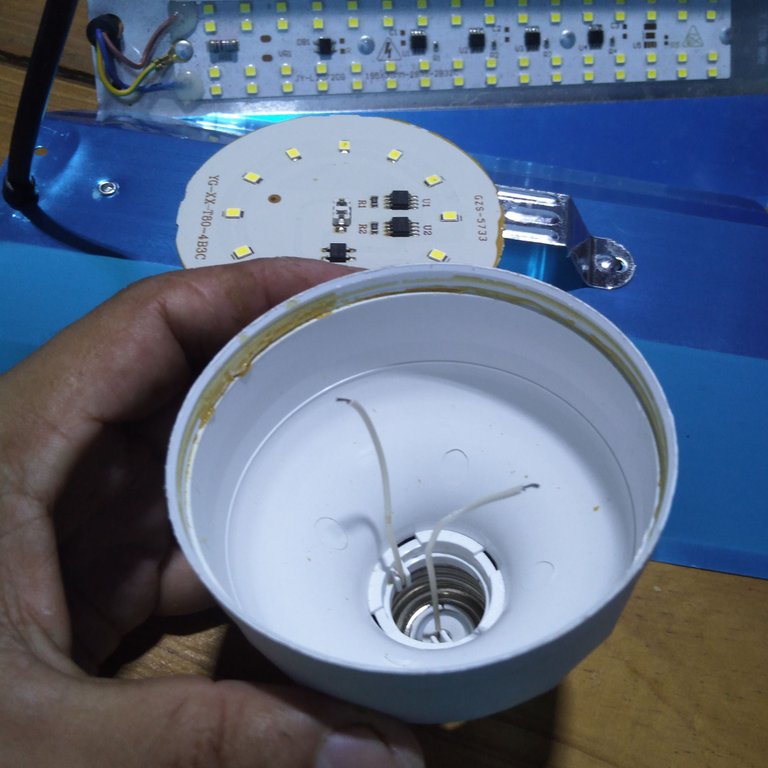
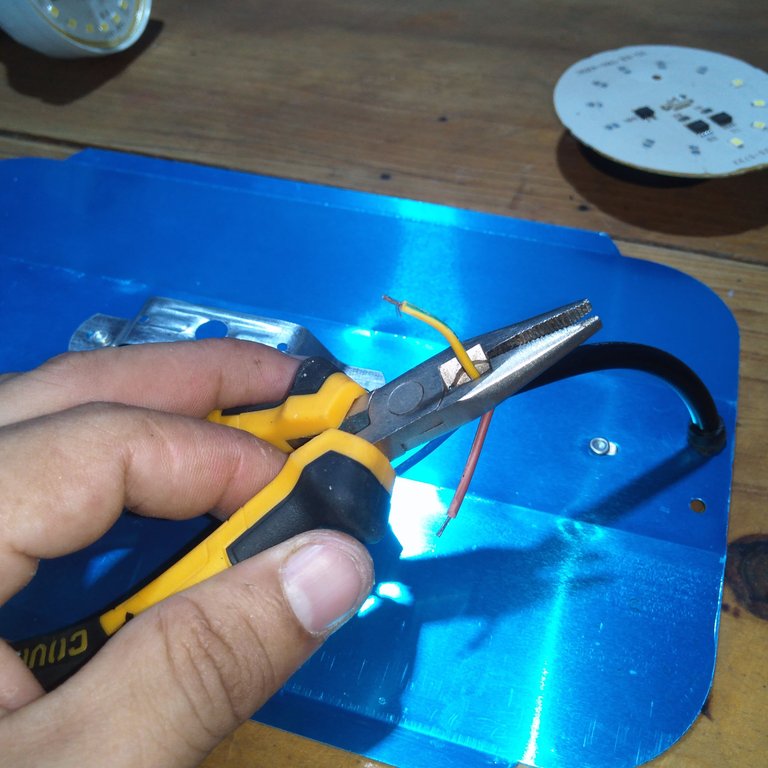
Al retirar la cubierta de plástico descubrirlos el circuito, un pequeño panel de aluminio que se desmonta al pasarle un cuchillo por ella bordes.
Luego se cortan los dos cables que vienen del socate y ya tenemos la parte útil para acoplar la lámpara.
When removing the plastic cover we discover the circuit, a small aluminum panel that is disassembled by passing a knife through it edges.
Then the two cables that come from the socate are cut and we already have the useful part to couple the lamp.
Luego solo tenemos que deshabilitar el cable de color amarillo con verde que es el de tierra, ya que en los socates no está habilitada esa protección.
Así que solo utilizaremos el de color marrón y el de color azul, es decir, línea y neutro.
Then we only have to disable the yellow and green wire which is the ground wire, since in the sockets this protection is not enabled.
So we will only use the brown and blue wires, i.e. line and neutral.
Soldamos cada cable en uno de los que vienen del socate, para hacerlos es preferible utilizar estaño, de esta forma no se va a soltar.
We solder each wire in one of the wires coming from the socket, to make them it is preferable to use tin, this way it will not come loose.
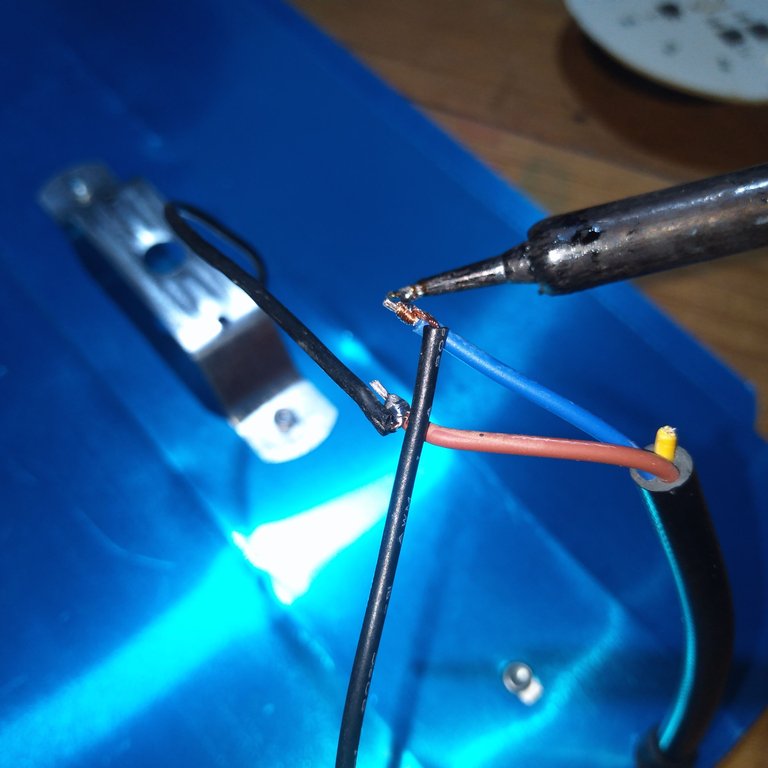
Luego aislamos con teipe de electricidad para evitar contacto con el otro cable y la carcasa o disipador de aluminio de la lámpara.
También podemos utilizar como aislante el Silicon caliente y reforzar con teipe de electricista.
Then we insulate with electrical teipe to avoid contact with the other cable and the aluminum housing or heatsink of the lamp.
We can also use as insulator the hot Silicon and reinforce with electrician's teipe.
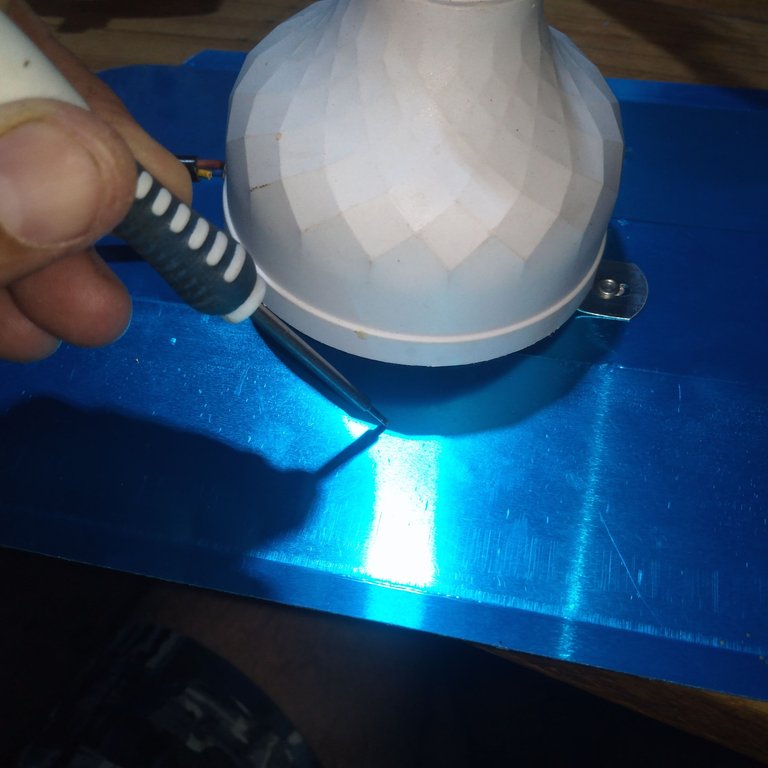
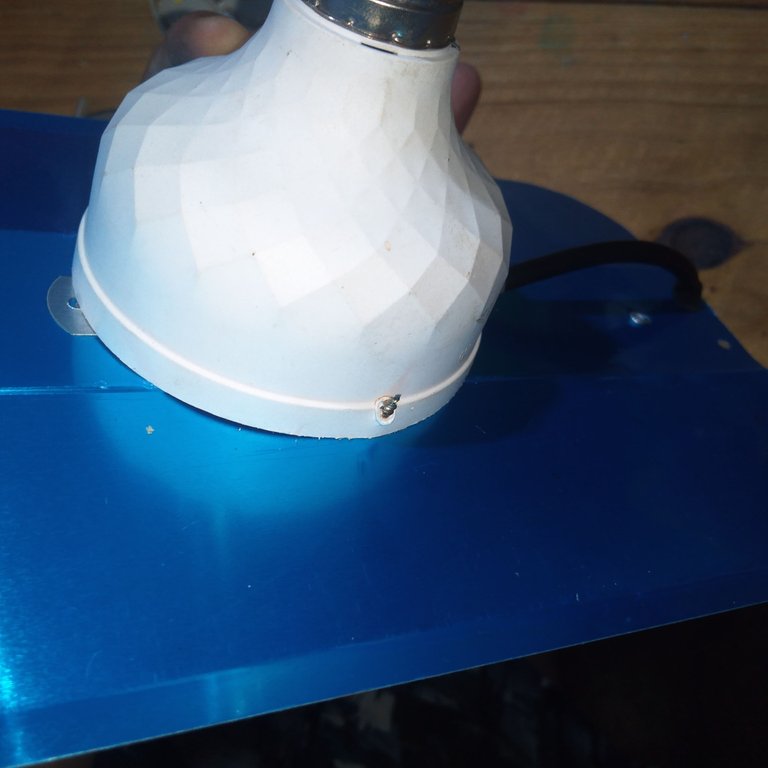
Para acoplar la carcasa del bombillo con la lámina de la lámpara, abrimos un pequeño orificio en la lámina de aluminio, está lámina es delgada m, así que con la punta de un destornillador lo podemos hacer.
Medimos más o menos la distancia donde debemos perforar, de manera que el socate nos quede en el centro y pueda tener buena simetría.
To couple the bulb housing with the lamp sheet, we open a small hole in the aluminum sheet, this sheet is thin, so with the tip of a screwdriver we can do it.
We measure more or less the distance where we have to drill, so that the socket is in the center and can have good symmetry.
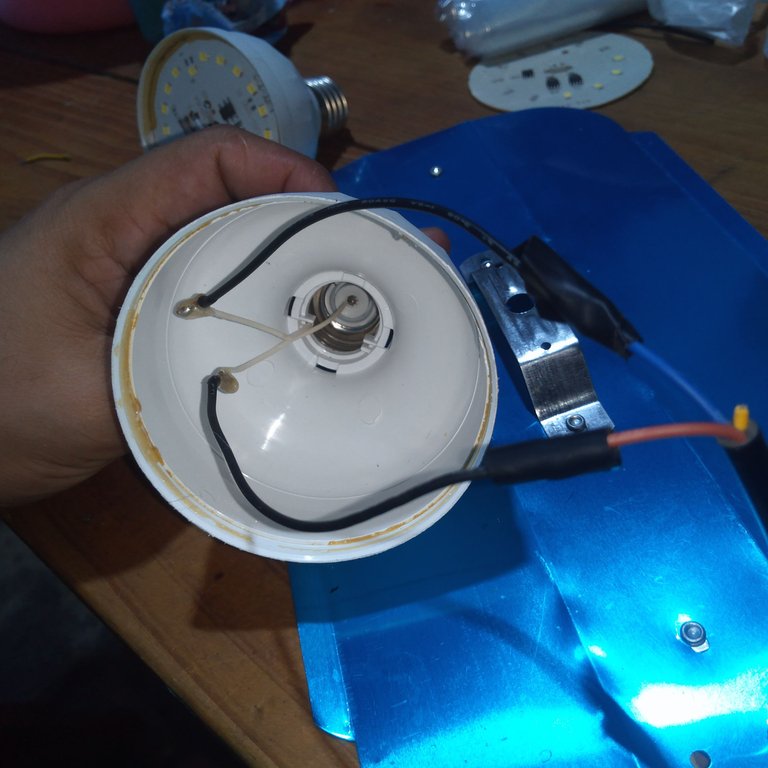
Abrimos también un orificio en la la carcasa del bombillo y luego introducimos un tornillo tira fondo para sujetarlo bien.
En mi caso prefiero atornillar de abajo hacia arriba, de esta manera si las puntas traspasan mucho la carcasa del bombillo, estás queden del otro lado y no se vean al momento de apagar la lámpara.
We also open a hole in the bulb housing and then insert a screw to hold it well.
In my case I prefer to screw from the bottom up, so that if the tips go too far through the bulb housing, they stay on the other side and are not visible when the lamp is turned off.
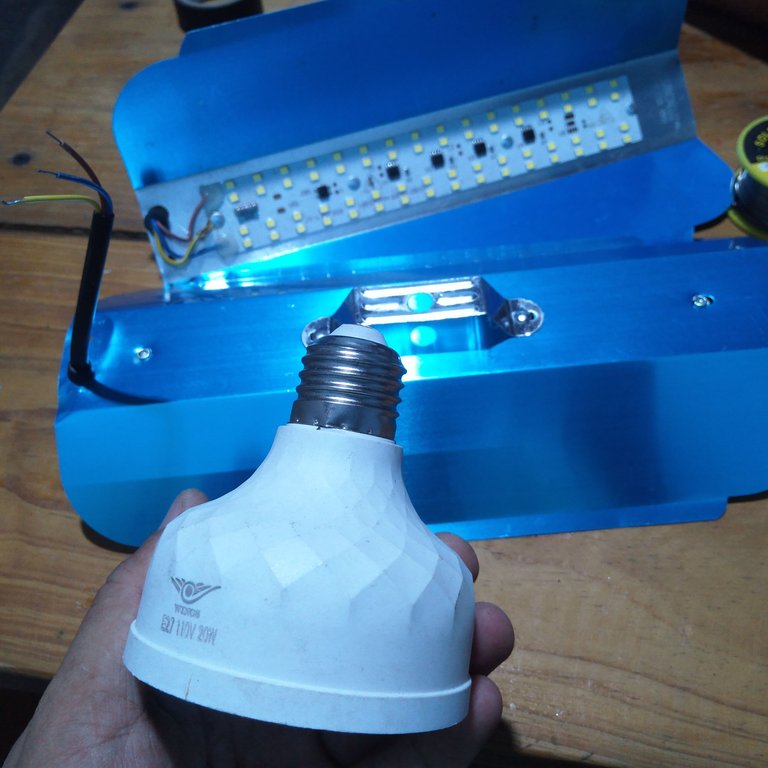
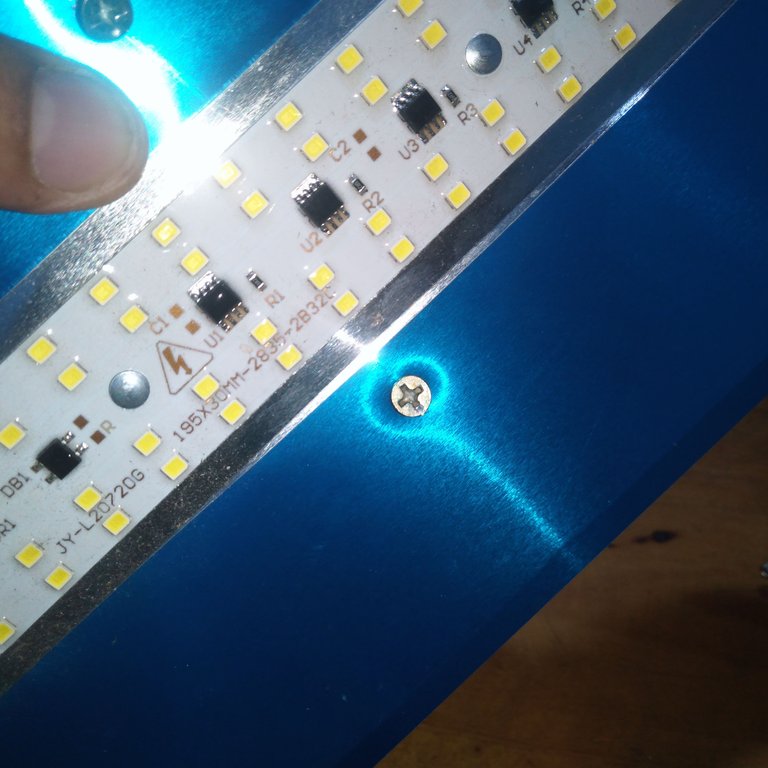
Quedarían de esta forma, el tornillo al ras de la lámina de aluminio.
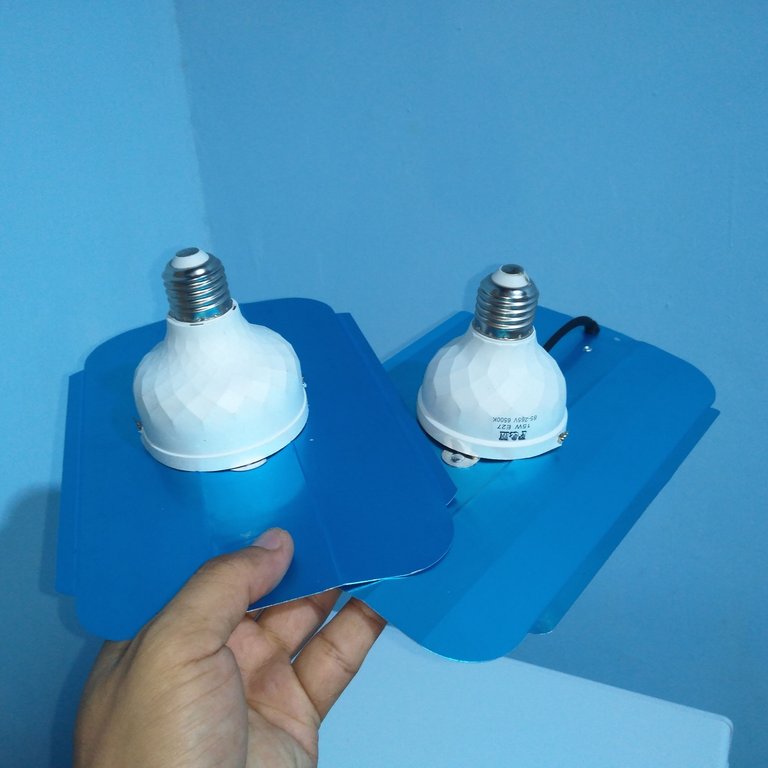
En este punto ya tendremos las lámparas tipo bombillos listas para instalar.
They would look like this, the screw flush with the aluminum sheet.
At this point we will have the bulb type lamps ready to install.
Ahora las podemos colocar donde lo deseemos, solo debemos enroscar en el socate y listo, nuestros espacios quedarán bien iluminados.
Una de estas lámparas las donaré a la escuela de mi niña, para que el salón de clases quede más iluminado.
Now we can place them wherever we want, just screw them into the socket and that's it, our spaces will be well illuminated.
I will donate one of these lamps to my daughter's school, so that the classroom will be more illuminated.
Las lámparas leds tienen una duración más prolongada que los bombillos leds, ya tengo una instalada hace un año y es de la sala, la cual permanece más tiempo encendida.
Sí las utilizamos en un espacio donde solo se prenda en cortos períodos, imagínense lo mucho que pueden durar.
Led lamps have a longer life than led bulbs, I already have one installed a year ago and it is in the living room, which stays on longer.
If we use them in a space where they are only turned on for short periods of time, imagine how long they can last.
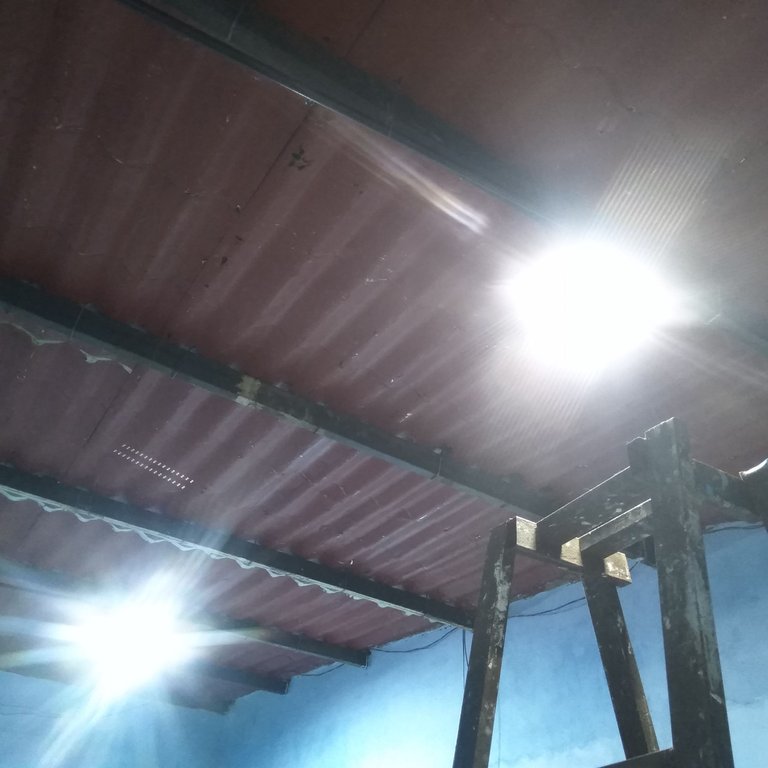
Mi sala está bien iluminada y debe estar así porque la casa tiene el techo alto, además me gusta tener mucha claridad debido a que cuando hago mis trabajos de electrónica necesito buena iluminación.
Ésta lámpara es de 80 watts, pero la primera lámpara es de 100 watts porque debajo es donde colocó la mesa para hacer mis trabajos de electrónica.
Espero que esta idea les pueda servir y la pongan en práctica en su casa. Esto le ahorrará molestias al momento de instalar, desinstalar o al moverlas a otro lado.
Gracias a todos por visitar mi publicación.
My living room is well illuminated and it must be this way because the house has a high ceiling, besides I like to have a lot of light because when I do my electronics work I need good illumination.
This lamp is 80 watts, but the first lamp is 100 watts because underneath is where I place the table to do my electronics work.
I hope this idea can be useful for you and that you can put it into practice in your home. This will save you hassle when installing, uninstalling or moving them somewhere else.
Thank you all for visiting my publication.
Todas las fotografías fueron tomadas con mí Smartphone Huawei Dub-Al00.
Traducido con Deepl

Excelente propuesta para los amantes electrónicos.
Gracias amiga! Espero haya sido de su agrado.
This is great ingenuity. Well lit too. Bravo
https://twitter.com/hivediy47901/status/1783030660451406313
Excelente idea amigo lo felicito
Gracias amiga,siempre es bueno compartir ideas.

Muy buena esta adaptación, no la Había visto desde esta perspectiva, útil e indispensable para los espacios de trabajo. Saludos!
Hola amigo, resulta bastante práctico, de verdad que me ha sido de mucha utilidad este tipo de adaptación y más aún por lo duraderas que son estas lámparas cuando las utilizamos para interiores.
Congratulations @rmm32! You have completed the following achievement on the Hive blockchain And have been rewarded with New badge(s)
Your next target is to reach 400 comments.
You can view your badges on your board and compare yourself to others in the Ranking
If you no longer want to receive notifications, reply to this comment with the word
STOP