[ESP/ENG] Reparé una cocina eléctrica / I repaired an electric stove

Hoy les contaré como repare una cocina eléctrica, esta cocina la trajo un amigo a mi casa para que la revisara e intentará repararla, ya que según mi amigo la cocina no le funcionaba una de las hornillas.
Entonces, manos a la obra apreciados Hivers...
Today I will tell you how I repaired an electric stove, this stove was brought by a friend to my house to check it and try to repair it, because according to my friend the stove was not working one of the burners.
So, let's get to work, dear Hivers...

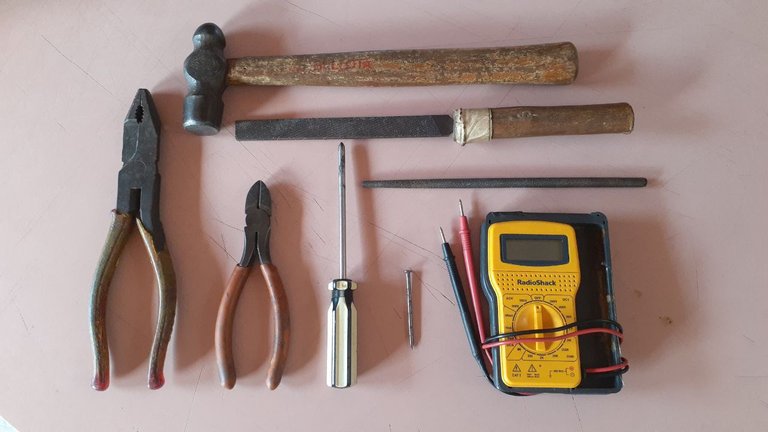
Las herramientas que utilizaré el día de hoy para la realizar la reparación son las siguientes, un martillo, un alicate, una pinza de corte, un destornillador de estrella, una lima plana, una lima redonda, un clavo y un multímetro digital.
The tools that I will use today to make the repair are the following, a hammer, pliers, cutting pliers, a Phillips screwdriver, a flat file, a round file, a nail and a digital multimeter.
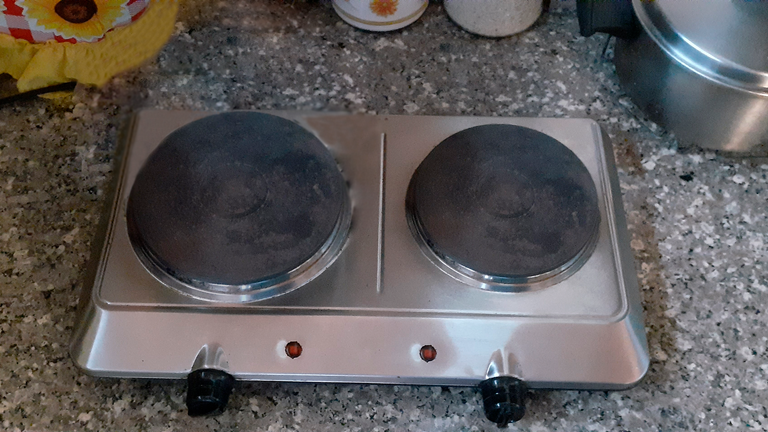
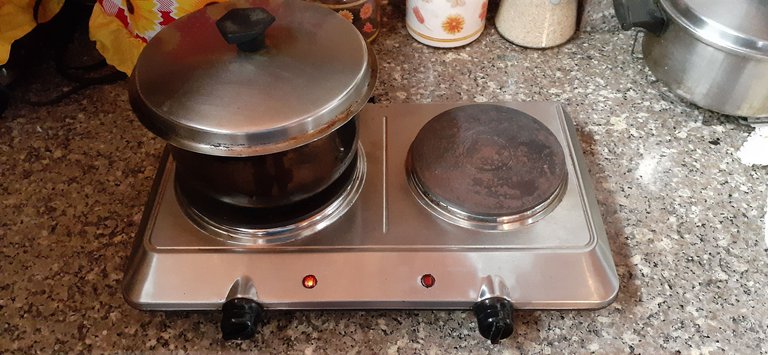
Esta es la cocina eléctrica a la que le realizaré la revisión y la reparación, es una cocina con acabado en acero pulido bastante compacta y elegante, posee una hornilla pequeña y una grande, según el tamaño de las ollas en las que cocinemos.
This is the electric stove to which I will perform the review and repair, is a kitchen with polished steel finish quite compact and elegant, has a small burner and a large, depending on the size of the pots in which we cook.
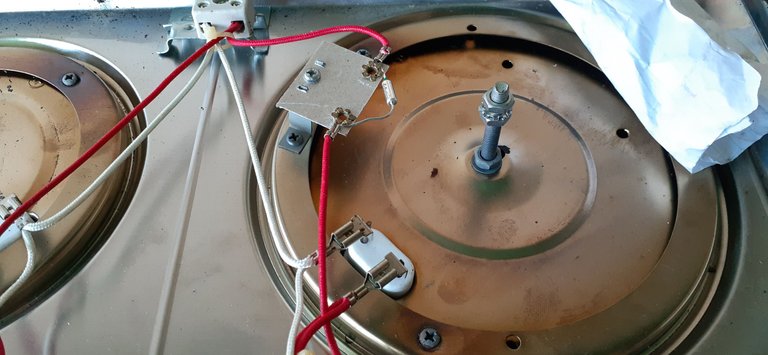
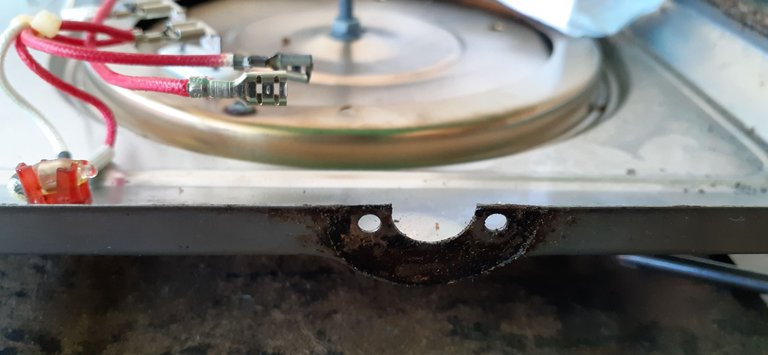
Inicialmente destape la cocina eléctrica y procedí a realizar una inspección visual del cableado y los demás componentes. En este caso lo primero que revisé fue el fusible térmico, ya que la falla más frecuente es que éste se dañe y por ello no enciendan las hornillas, dicho fusible se encuentra sujeto mediante remaches metálicos a sus correspondientes cables eléctricos y a su vez a un lámina aislante, como pueden observar en la fotografía.
Initially I uncovered the electric stove and proceeded to make a visual inspection of the wiring and other components. In this case the first thing I checked was the thermal fuse, since the most frequent failure is that it is damaged and therefore do not turn on the burners. by means of metallic rivets to its corresponding electrical cables and in turn to an insulating sheet, as you can see in the photograph.
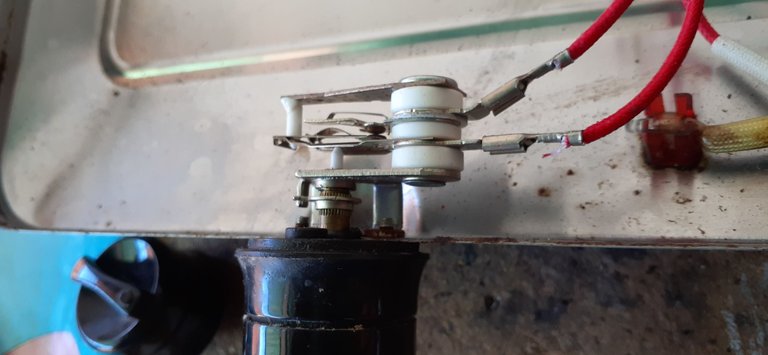
El siguiente paso en la revisión fue probar con la ayuda del multímetro la hornilla que no funciona y el termostato de dicha hornilla, dando como resultado que la hornilla se encuentra en perfecto estado pero el termostato se encuentra defectuoso, seguramente por sobrecalentamiento.
The next step in the revision was to test with the help of the multimeter the burner that does not work and the thermostat of this burner, giving as a result that the burner is in perfect condition but the thermostat is defective, surely by overheating.
Entonces, procedí a retirar el termostato dañado de la cocina eléctrica para sustituirlo. Luego de haber retirado el termostato fui en busca de un termostato igual.
So, I proceeded to remove the damaged thermostat from the electric stove to replace it. After removing the thermostat I went in search of the same thermostat.
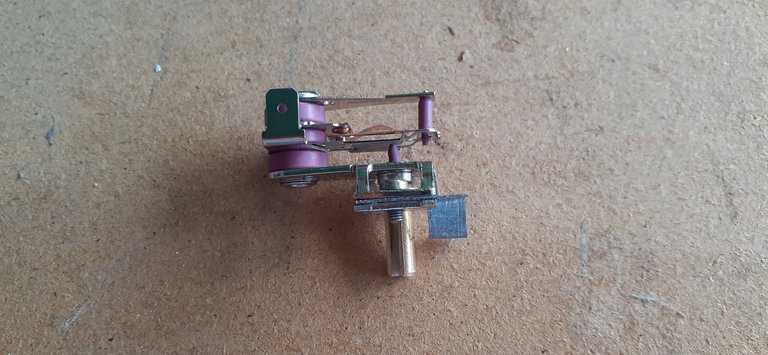
Lamentablemente no conseguí exactamente el mismo modelo de termostato que utiliza la cocina eléctrica, pero encontré un reemplazo, que con una adaptación podría trabajar muy bien.
Unfortunately I did not get the exact same model thermostat that the electric stove uses, but I found a replacement, which with an adaptation could work just fine.
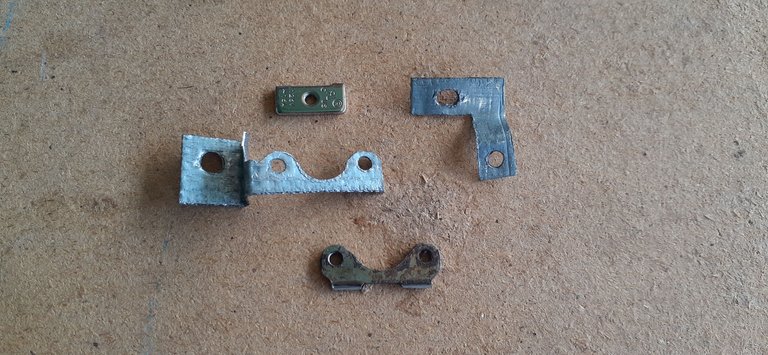
Una vez que idee la forma correcta de realizar la adaptación, fabrique las piezas necesarias para poder fijar el nuevo termostato en la base de la cocina eléctrica. Estas piezas las hice con unos trozos de lámina metálica y dos partes del termostato que estaba defectuoso, todo esto con la ayuda del alicate, la pinza para cortar, el martillo, un clavo y las limas.
Once I figured out the correct way to make the adaptation, I made the necessary pieces to fix the new thermostat to the base of the electric stove. These pieces were made with some pieces of sheet metal and two parts of the thermostat that was defective, all this with the help of pliers, cutting pliers, a hammer, a nail and files.
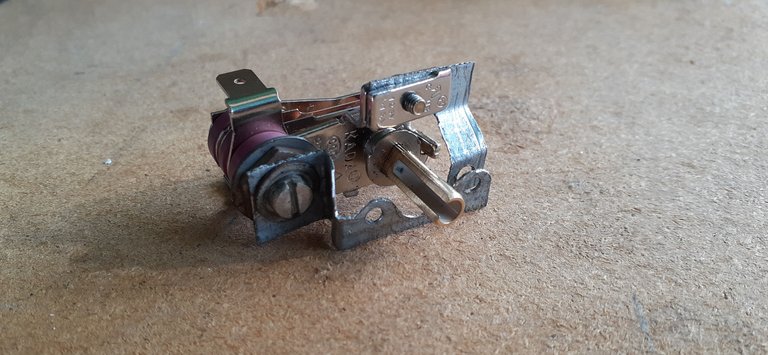
Y es así como se ven las piezas que fabrique para realizar la adaptación ya estando montadas en el nuevo termostato, tuve que pensar un buen rato y hacer algunas pruebas pero finalmente encontré la manera de realizar dicha adaptación.
And this is how you can see the pieces that I made to make the adaptation already being mounted in the new thermostat, I had to think a good time and to make some tests but finally I found the way to make this adaptation.
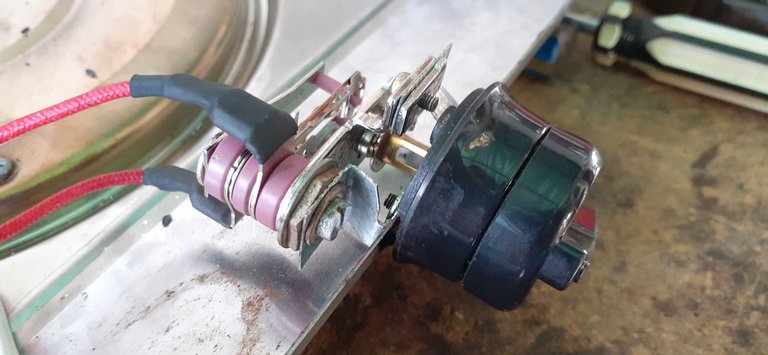
El siguiente paso fue montar el termostato con las adaptaciones en el chasis de la cocina eléctrica, por suerte la adaptación quedó muy bien hecha y todo encajó perfecto. Lo siguiente fue conectar los terminales de los cables de la hornilla en el termostato, pero antes corté dos trozos de termo encogible , para proteger dichos terminales, luego si realicé la conexión y con la ayuda de un encendedor fijé bien el termo encogible.
The next step was to mount the thermostat with the adaptations in the chassis of the electric stove, luckily the adaptation was very well done and everything fit perfectly. The next step was to connect the terminals of the cables of the burner in the thermostat, but before I cut two pieces of shrink thermo, to protect these terminals, then I made the connection and with the help of a lighter I fixed well the shrink thermo.
Finalmente armé la cocina eléctrica y realicé una prueba con ella, en este caso probé la hornilla que anteriormente no funcionaba debido al termostato defectuoso, montando una olla con agua y una vez que el agua comenzó a hervir, di por concluida la prueba. Luego de un rato volví a realizar la prueba para asegurarme que todo funcionara adecuadamente. En conclusión una reparación exitosa.
Finally I assembled the electric stove and I made a test with it, in this case I tested the burner that previously did not work due to the defective thermostat, I assembled a pot of water and once the water began to boil, I concluded the test. After a while I tested again to make sure everything was working properly. In conclusion a successful repair.
Hasta la siguiente publicación!
Until the next post!
Todas las fotografías fueron tomadas con mi celular SAMSUNG Galaxy A20.
All photographs were taken with my SAMSUNG Galaxy A20 cell phone.
El separador de texto y las demás imágenes son de mi autoría.
The text separator and other images are of my authorship.
Translated with www.DeepL.com/Translator (free version)

https://twitter.com/robertsreinold/status/1489723112358916102
The rewards earned on this comment will go directly to the person sharing the post on Twitter as long as they are registered with @poshtoken. Sign up at https://hiveposh.com.
Muy útil para quienes usamos esos aparatos, recuerdo que termine botando algunos pensando que ya no tenían remedio, pues siempre se dañan donde mismo, por más cuidado que tengamos.
Excelente tutorial! bienvenido!
Aprovecho dejarte la invitación a nuestro Discord: https://discord.gg/tYENgKmTHA
Hola, muchas gracias! Me alegra que la información sea útil, esa es la idea, aportar contenido de calidad y que a su vez sea de ayuda para quien lo necesite.
Muchos aparatos tienen la posibilidad de una segunda vida, no los botes 😅. Saludos🙌