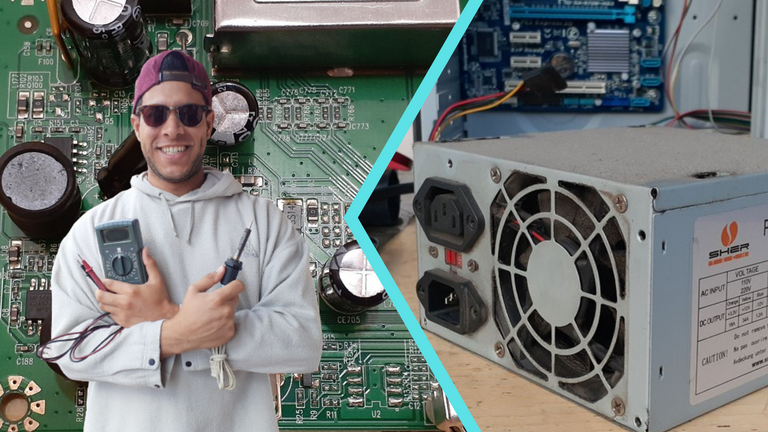
[ESP/ENG] Mantenimiento a una fuente de poder de una PC? / How to service a PC power supply?
Hoy les traigo un sencillo tutorial para que ustedes mismos puedan hacerle mantenimiento a la fuente de poder de sus computadoras.
Entonces, manos a la obra apreciados Hivers...
Today I bring you a simple tutorial so that you can do maintenance to the power supply of your computers.
So, let's get to work, dear Hivers...

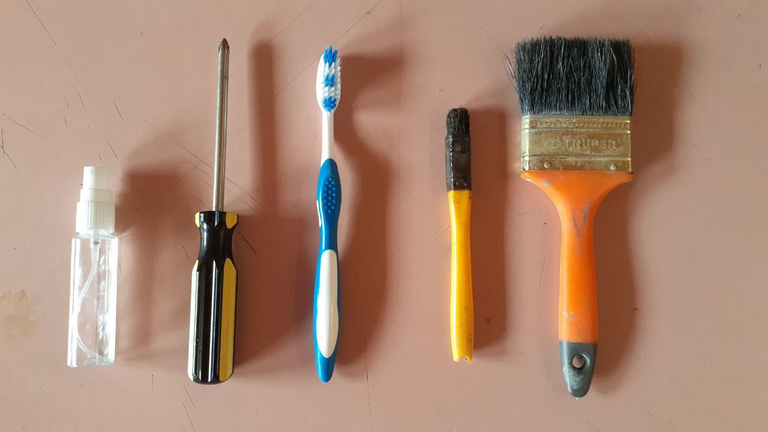 |  |
Comenzaremos haciendo mención de las herramientas y equipos que utilizaremos en el proceso de hacerle mantenimiento a la fuente de poder de PC, utilizaremos de alcohol en spray, un destornillador de estrella, un cepillo de dientes viejo, una brocha fina, una brocha un poco más gruesa y también utilizaremos una aspiradora.
We will start by mentioning the tools and equipment that we will use in the process of maintaining the PC power supply, we will use alcohol spray, a Phillips screwdriver, an old toothbrush, a fine brush, a slightly coarser brush and we will also use a vacuum cleaner.
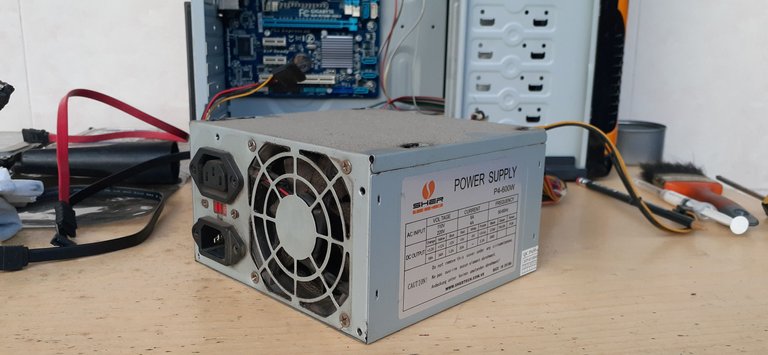
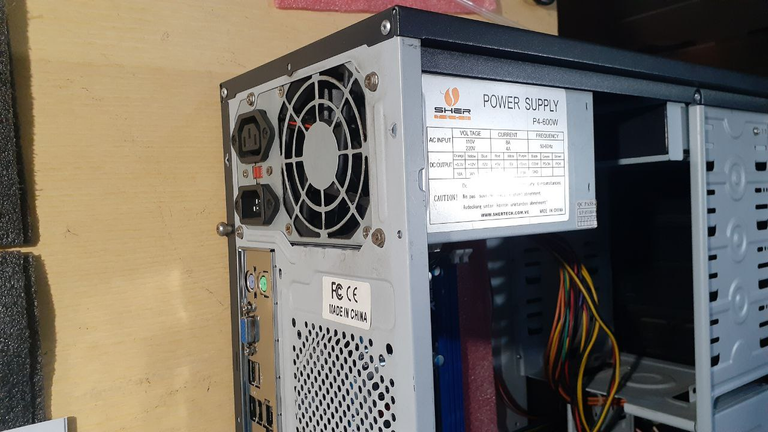
Y bien, aquí tenemos la fuente de poder de PC en cuestión, una fuente de poder de aproximadamente 600W, la cual estaba instalada en mi computadora de escritorio, saqué la fuente de poder cuidadosamente y la puse encima de la mesa para tomarle una fotografía y así poder realizar este sencillo procedimiento.
Es de una marca genérica por lo que no es una fuente de poder certificada, esto quiere decir que los voltajes y corrientes nominales que se encuentran en la etiqueta no necesariamente son los que realmente suministrará la fuente de poder.
And well, here we have the PC power supply in question, a power supply of approximately 600W, which was installed in my desktop computer, I took the power supply out carefully and put it on the table to take a picture of it so I could perform this simple procedure.
It is a generic brand so it is not a certified power supply, this means that the rated voltages and currents found on the label are not necessarily what the power supply will actually supply.
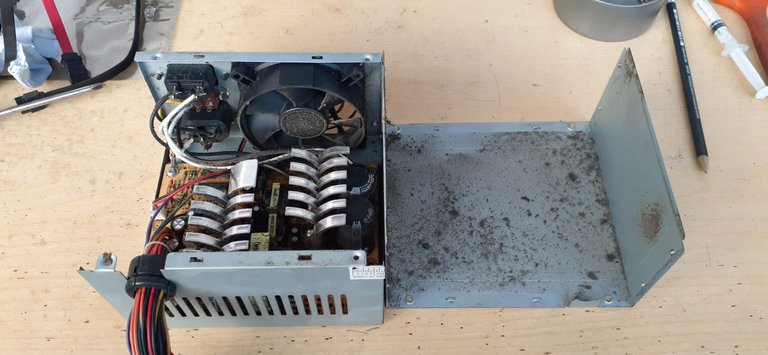
Entonces, comenzando con el mantenimiento de la fuente de poder, lo primero que realizaremos será destapar la parte superior de la fuente de poder, retiramos los 4 tornillos que sujetan la carcasa superior, podemos observar que hay una gran acumulación de polvo que se encuentra adherida a la carcasa, a la tarjeta y la parte interior de la fuente de poder, donde se encuentran la tarjeta electrónica, los disipadores y el fan cooler.
Bueno, con la ayuda de la brocha gruesa procederemos a limpiar cuidadosamente la carcasa superior, también haciendo uso de la aspiradora para que el polvo que retiremos no se esparza en el ambiente, por si tenemos problemas de alergias esto no nos afecte.
Aspiramos también la tarjeta electrónica y luego comenzamos a retirar los tornillos que sujetan la tarjeta electrónica al chasis.
So, starting with the maintenance of the power supply, the first thing we will do is to uncover the top of the power supply, remove the 4 screws that hold the upper casing, we can see that there is a large accumulation of dust that is attached to the casing, the card and the inside of the power supply, where the electronic card, the heatsinks and the fan cooler are located.
Well, with the help of the thick brush we will proceed to carefully clean the upper casing, also making use of the vacuum cleaner so that the dust that we remove does not spread in the environment, in case we have problems of allergies this does not affect us.
We also vacuum the electronic card and then begin to remove the screws that hold the electronic card to the chassis.
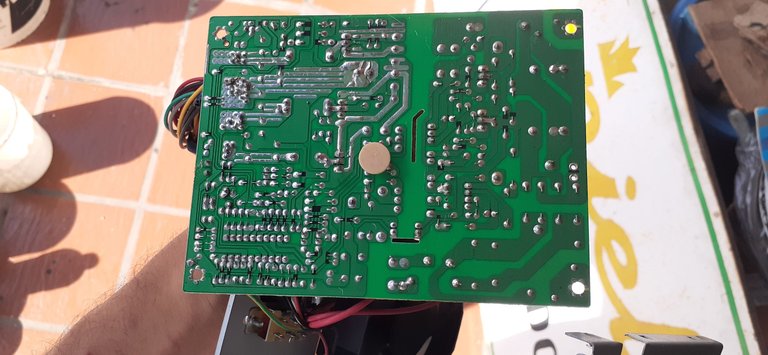
Una vez que hemos retirado la tarjeta electrónica del chasis, procedemos a limpiarla cuidadosamente con la ayuda del cepillo de dientes viejo, también con la brocha fina y la brocha gruesa, al mismo tiempo teniendo cerca la aspiradora para que no se esparza el polvo a nuestro alrededor.
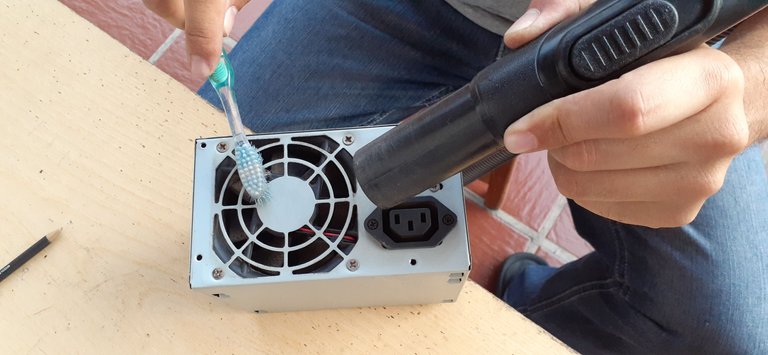
También limpiamos el fan Cooler con la ayuda de el cepillo de dientes.
Para el mantenimiento del fan cooler ya tenemos un post en una publicación previamente realizada, les dejo el enlace por aquí: https://peakd.com/hive-102066/@reinoldroberts/espeng-como-hacerle-mantenimiento-a-un-fan-cooler-how-to-service-a-fan-cooler
Por la parte de atrás de la placa electrónica rociar con un poco de alcohol en spray, tallamos un poco con el cepillo de dientes y volvemos a aplicar alcohol dejando que este se seque.
Once we have removed the electronic card from the chassis, we proceed to clean it carefully with the help of the old toothbrush, also with the fine brush and the coarse brush, at the same time keeping the vacuum cleaner close so that the dust does not spread around us.
We also clean the fan cooler with the help of the toothbrush.
For the maintenance of the fan cooler we already have a post in a previous publication, I leave the link here: https://peakd.com/hive-102066/@reinoldroberts/espeng-como-hacerle-mantenimiento-a-un-fan-cooler-how-to-service-a-fan-cooler
On the back of the electronic board spray a little alcohol spray, carve a little with the toothbrush and reapply alcohol and let it dry.
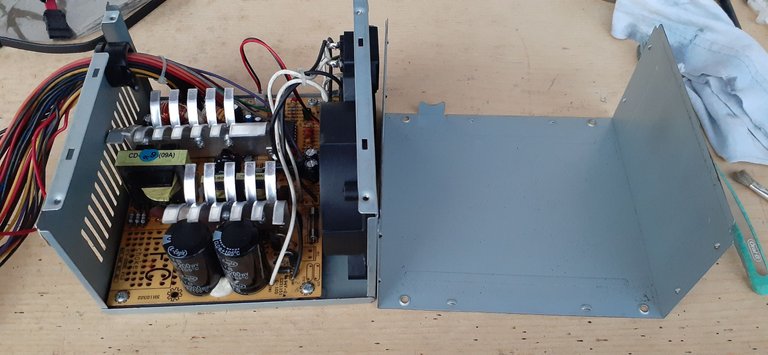
Cuando hayamos limpiado perfectamente toda la fuente de poder, como lo son en la carcasa superior el chasis la placa electrónica y el fan cooler y los cables procederemos a armar la fuente de poder.
When we have cleaned perfectly all the power supply, as they are in the superior casing the chassis the electronic plate and the fan cooler and the cables we will proceed to assemble the power supply.
Finalmente, luego de armar la fuente de poder, procedemos a instalarla en la PC.
Finally, after assembling the power supply, we proceed to install it in the PC.

Hasta la siguiente publicación!
Until the next post!
Todas las fotografías fueron tomadas con mi celular SAMSUNG Galaxy A20.
All photographs were taken with my SAMSUNG Galaxy A20 cell phone.
El separador de texto y las demás imágenes son de mi autoría.
The text separator and other images are of my authorship.

https://twitter.com/robertsreinold/status/1482381269388386304
The rewards earned on this comment will go directly to the person sharing the post on Twitter as long as they are registered with @poshtoken. Sign up at https://hiveposh.com.
Muy buena explicación amigo @reinoldroberts , lo felicito, me encanto.
Gracias! Espero que sea de ayuda. Saludos.