[ESP-ENG] Cómo hacer un rizado de pestañas / How to do an eyelash lifting
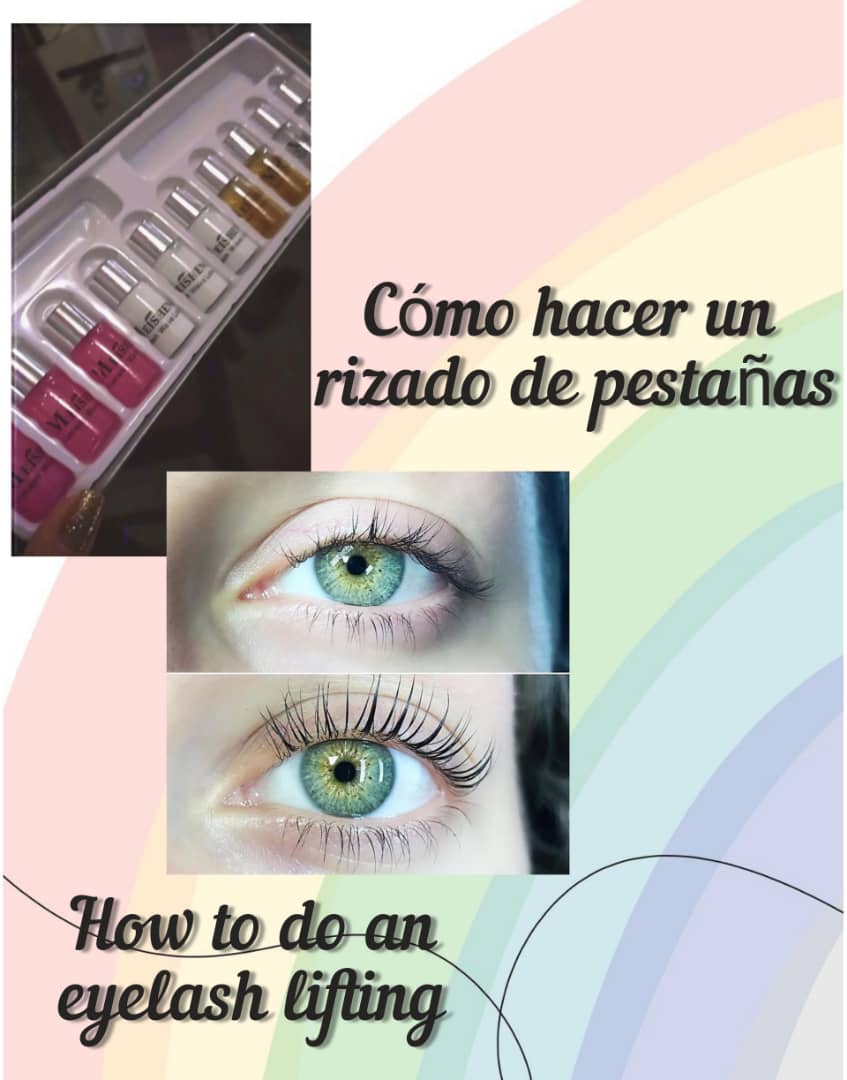
Imagen de nuestra propiedad, realizada con Inshot.
Hello friends of this beautiful community! Today I am here to tell you how to do an eyelash lift with the Meisheng brand :D. Here I show you the before of my model (mi sister AVRA).
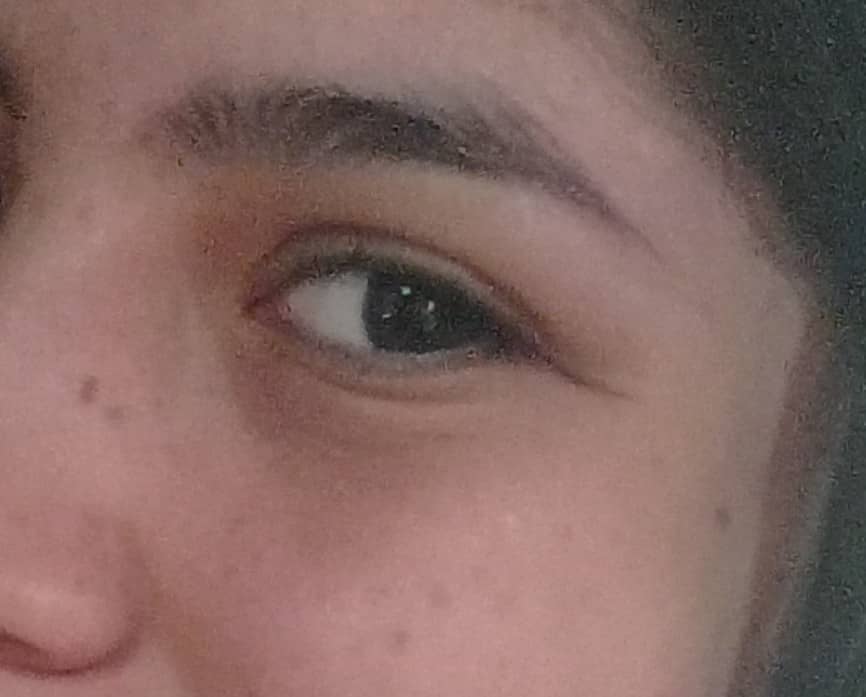
Imagen de nuestra propiedad.
Realmente es algo muy sencillo. Este kit cuenta con cuatro pasos: agente caliente (rosado), que prepara a las pestañas para el proceso; el fijador (blanco); el humectante (amarillo) y el limpiador (transparente).
It really is something very simple. This kit has four steps: hot agent (pink), which prepares the lashes for the process; the fixer (white); the moisturizer (yellow) and the cleanser (clear).
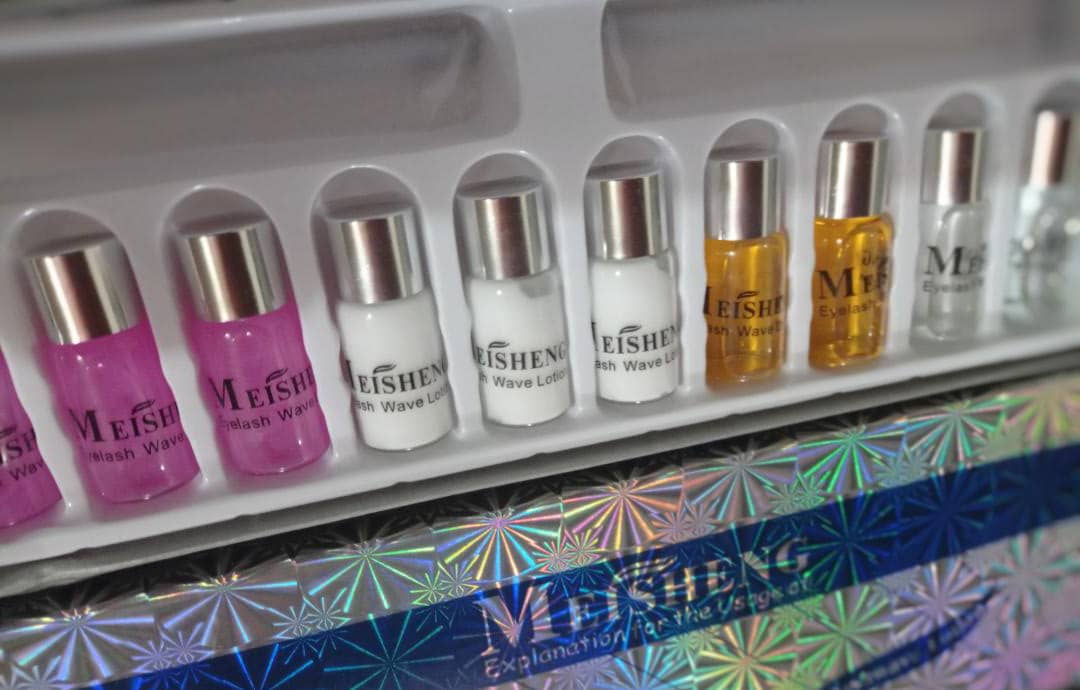
Imagen de nuestra propiedad.
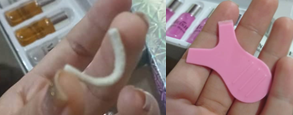
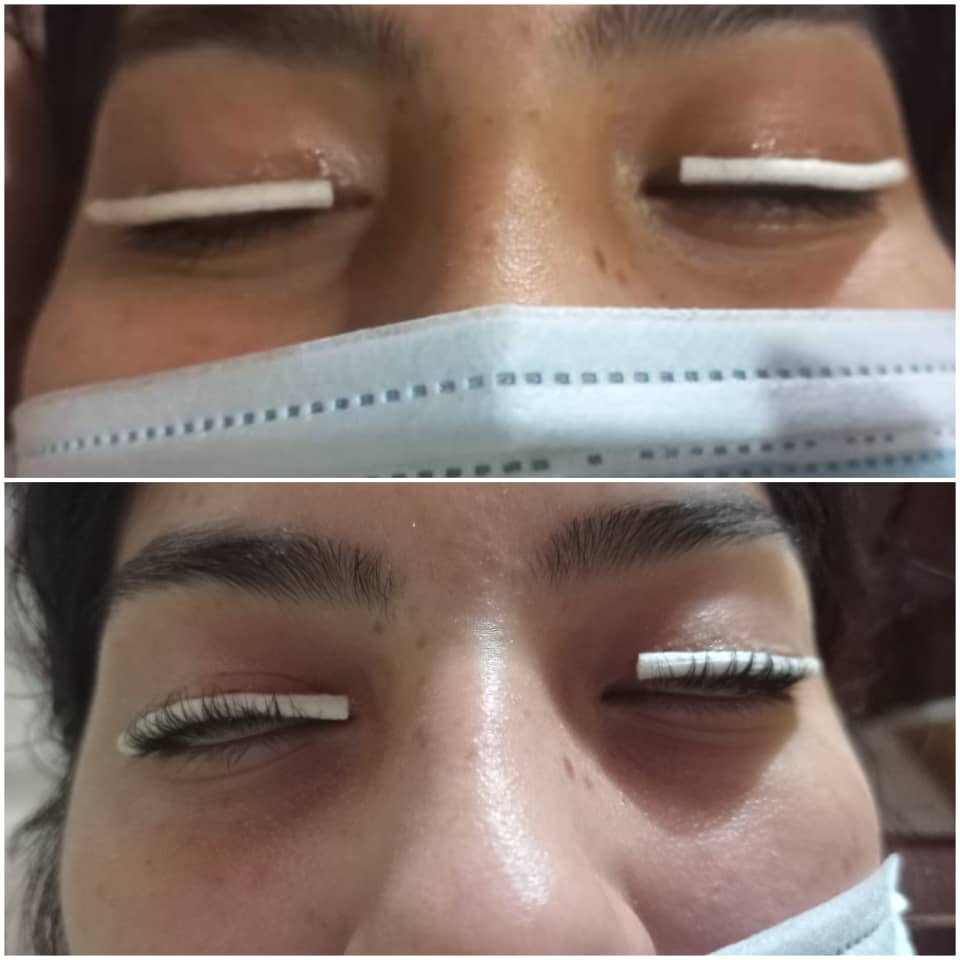
Antes de iniciar el proceso debemos limpiar muy bien las pestañas; luego colocamos los rodillos en el parpado del ojo, justo en la línea de las pestañas (colocamos pega de pestañas de ser necesario, ya que deben quedar bien adheridos). Antes de esto le damos forma de U al rodillo, de manera que tengan la forma perfecta para encajar en el ojo. Al tener los rodillos perfectamente colocados, con algún objeto que se nos haga sencillo, pegamos las pestañas poco a poco al rodillo (muchas personas utilizan palitos de naranja, sin embargo, yo utilizo un peine muy práctico que les mostraré a continuación).
Before starting the process we must clean the tabs very well; then we place the rollers on the eyelid, right on the lash line (we put eyelash glue if necessary, since they must be well adhered). Before this we give the roller a U shape, so that they have the perfect shape to fit in the eye. Having the rollers perfectly placed, with some object that is easy for us, we stick the eyelashes little by little to the roller (many people use orange sticks, however, I use a very practical comb that I will show you below).
Fotografías de nuestra propiedad.
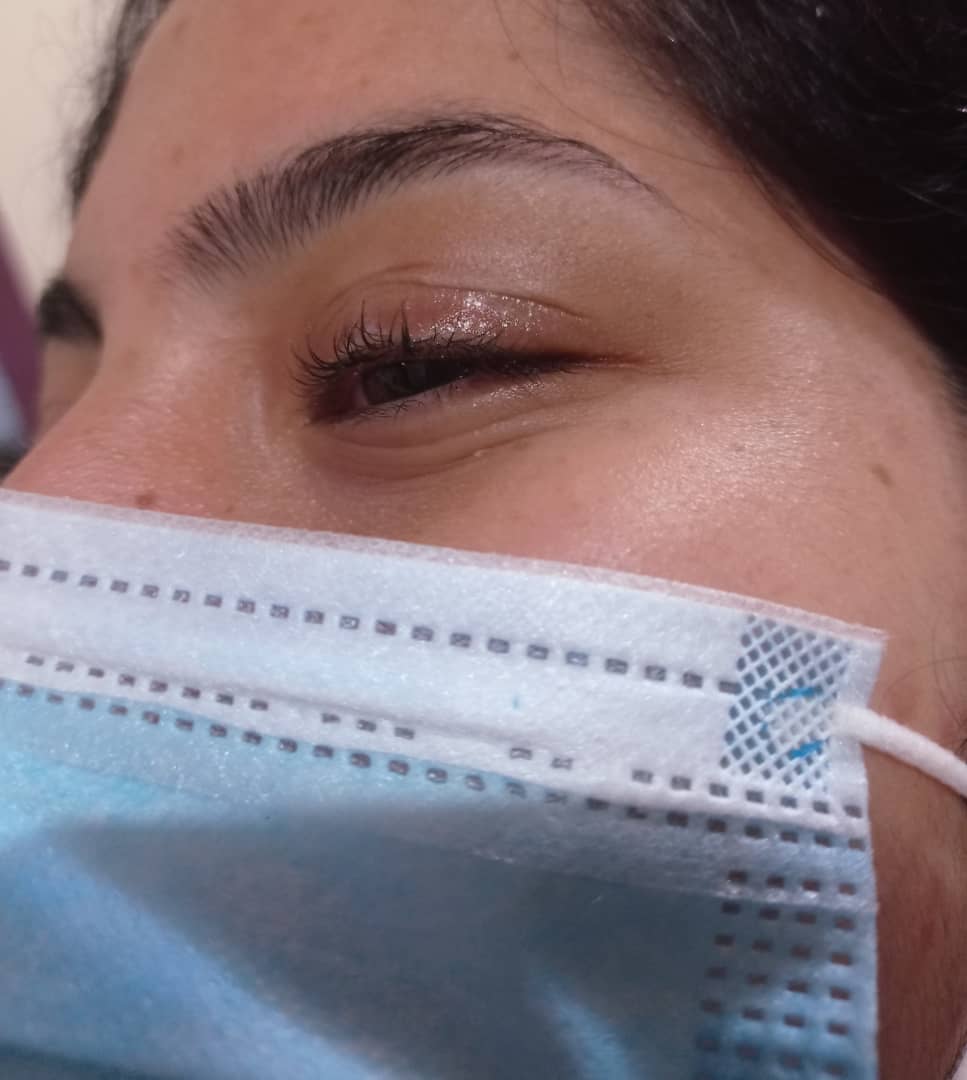
Once the lashes are well adhered to the roller, we apply the pink step with a cotton swab. We let it act for 15 minutes if we work with thin lashes, 20 minutes on intermediate lashes and 25 minutes on thick lashes. After this time, we add the white step with a new swab for the same amount of time as the previous step. Then we added the yellow step with another swab for at least 10 minutes. And finally we clean with the last step, we separate the eyelashes from the roller and very carefully remove the roller from the eyelid.
Fotografía de nuestra propiedad.
Es muy común que al retirar el rodillo la piel se torne ligeramente rosa, esto debido a que es una piel bastante sensible que ha permanecido bastante tiempo con el rodillo colocado. Pero no se preocupen, en 15 minutos y luego de limpiar muy bien la piel vuelve a la normalidad.
It is very common that when removing the roller the skin turns slightly pink, this is because it is quite sensitive skin that has remained with the roller in place for a long time. But don't worry, in 15 minutes and after cleaning very well, the skin returns to normal.
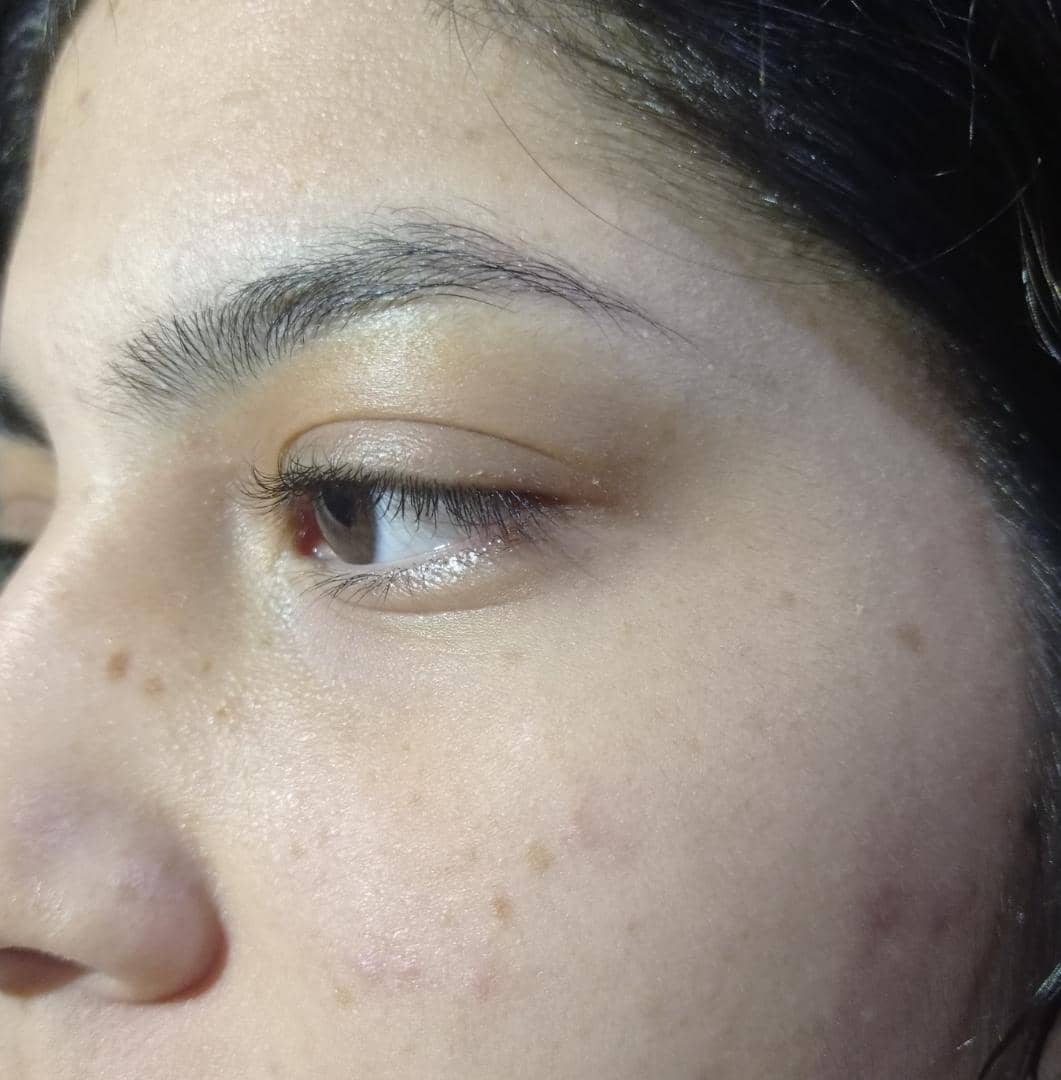
Acá podrán ver el resultado final. / Here you can see the final result.
Fotografía de nuestra propiedad.
Como pudieron notar, es un proceso muy sencillo, solo hay que tener mucha paciencia y amor por lo que hacemos :). Gracias por leerme.
As you could see, it is a very simple process, you just have to have a lot of patience and love for what we do :). Thanks for reading me.
With love, Lu.
Congratulations @redfamily! You have completed the following achievement on the Hive blockchain and have been rewarded with new badge(s):
Your next target is to reach 50 posts.
You can view your badges on your board and compare yourself to others in the Ranking
If you no longer want to receive notifications, reply to this comment with the word
STOPTo support your work, I also upvoted your post!
Check out the last post from @hivebuzz:
Support the HiveBuzz project. Vote for our proposal!