Create your own digital image (7)
It is important to emphasize that for this purpose, in addition to the geometric shapes of Power Point, we must not leave aside our wonderful creativity.
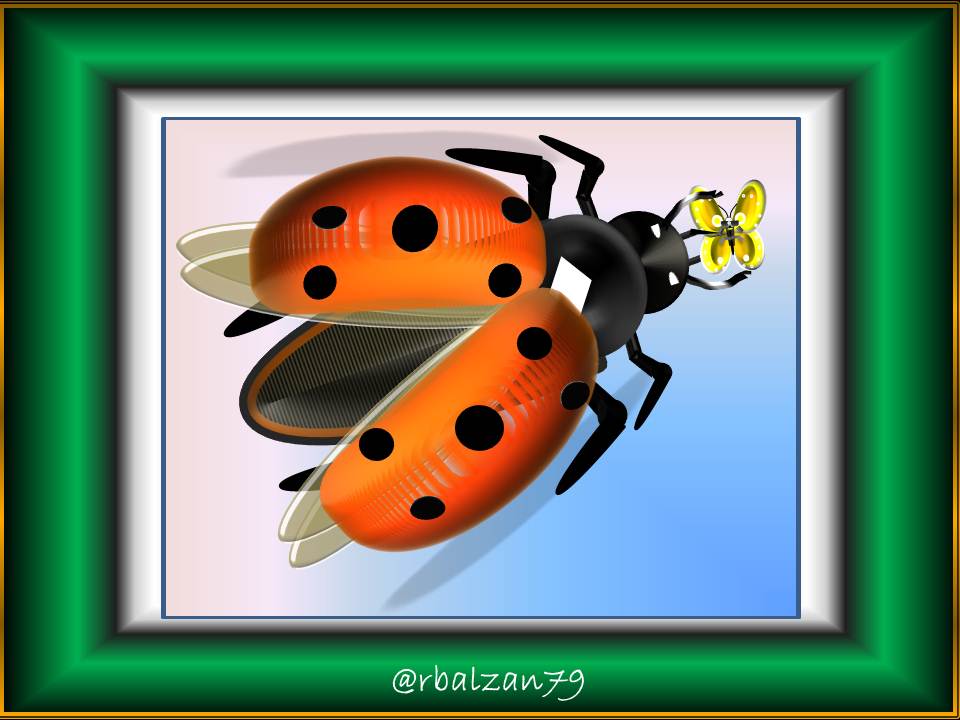
Without further details, let's get to know the image to be made:
Geometric shapes used
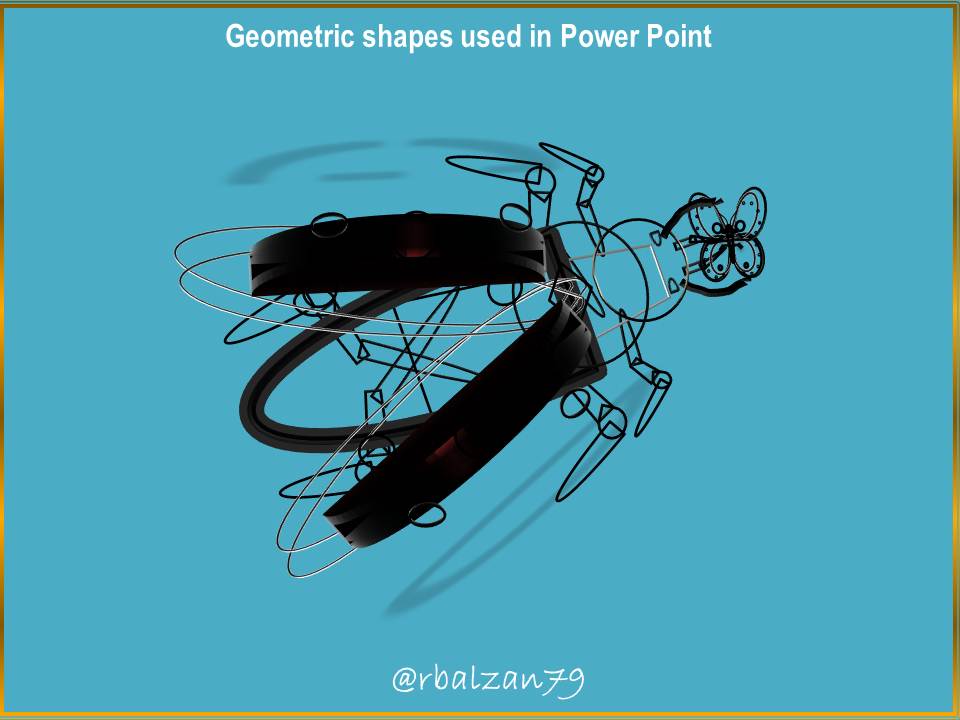
As you could see, we implemented some geometric shapes in the previous figure, therefore, it is important to describe them.
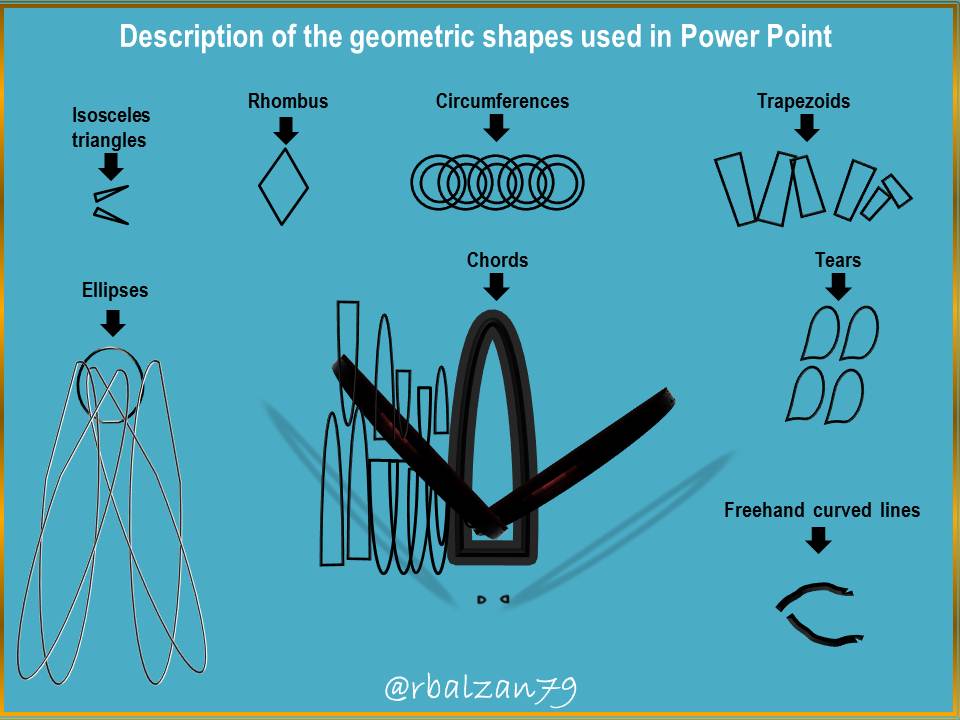
Description of the geometric shapes used
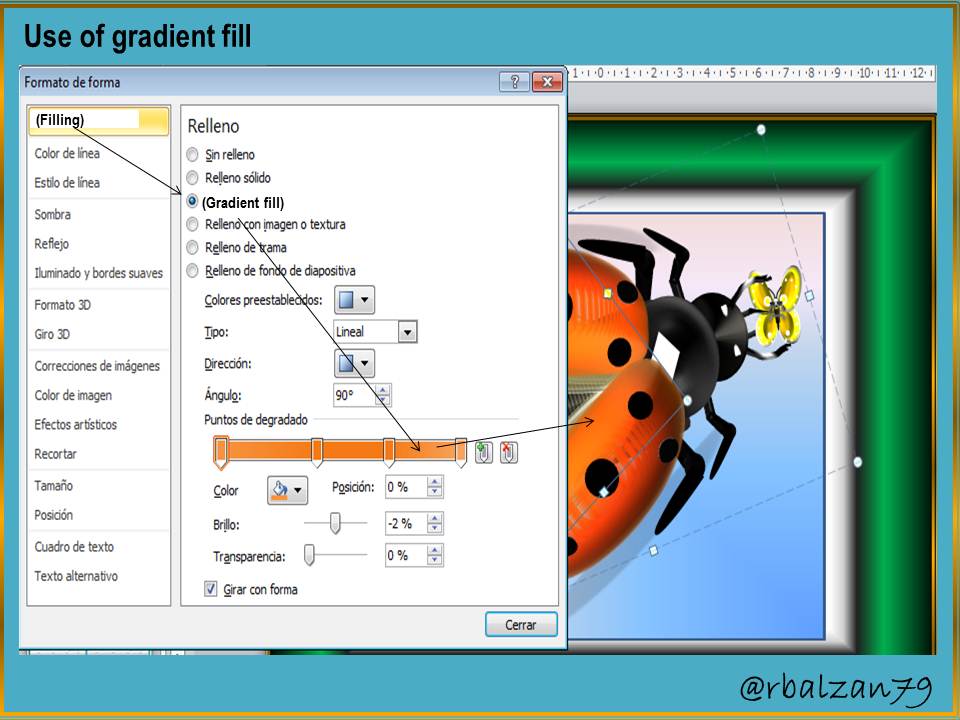
Versatile geometric shapes as described above, now it is important that each of you can know some forms of fillings, and for this, we will show you two examples as follows:
Filler selection
Among the most commonly used types of fillers are:
In this way we can give fill and color to our digital image, we also have another complement of great help for the relief effect (3D) for the design of our digital images as we will see below:
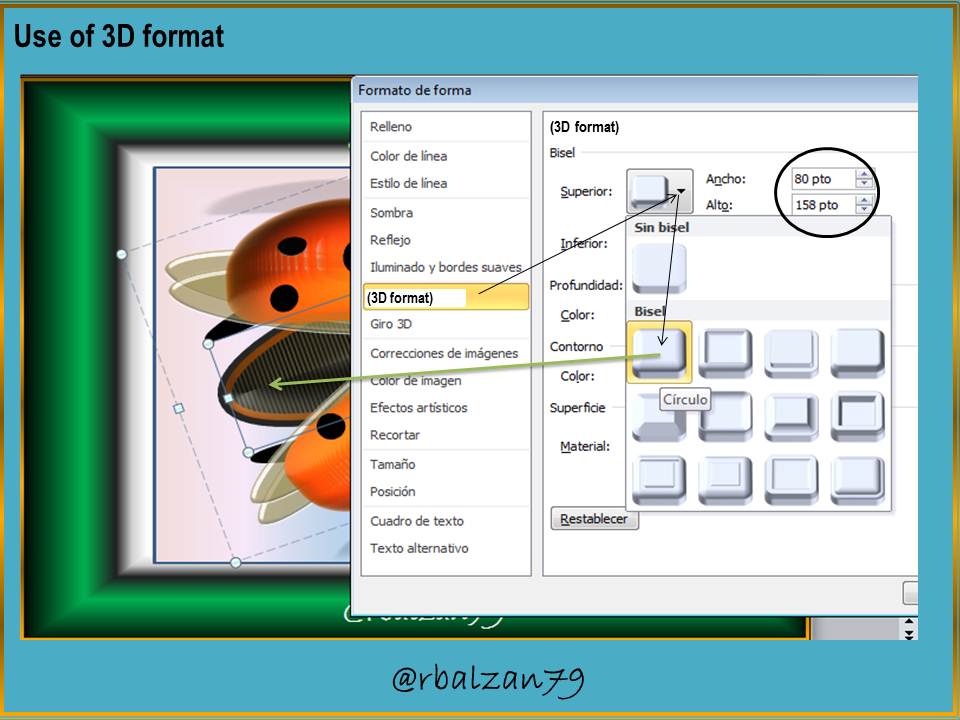
In this way we are filling each of the implemented geometric shapes, and also, giving them high relief characteristics as we could see in the previous figure through the 3D format option.
My dear readers, it is also important to remember the implementation of other options mentioned in the image tools, such as: sorting objects (front, back, front and back), grouping objects, etc.
Until another time, my dear and esteemed readers.
you used PowerPoint for this?, man do i need to get back on PowerPoint, this is so awesome, great work
Yes my friend this is done through Power Point, thank you for your positive comment. Greetings.