Create your own digital image (12)
The important thing is that they can look for each of the geometric shapes and combine them until they obtain the desired digital image, of course, this must be accompanied by our essential creativity.
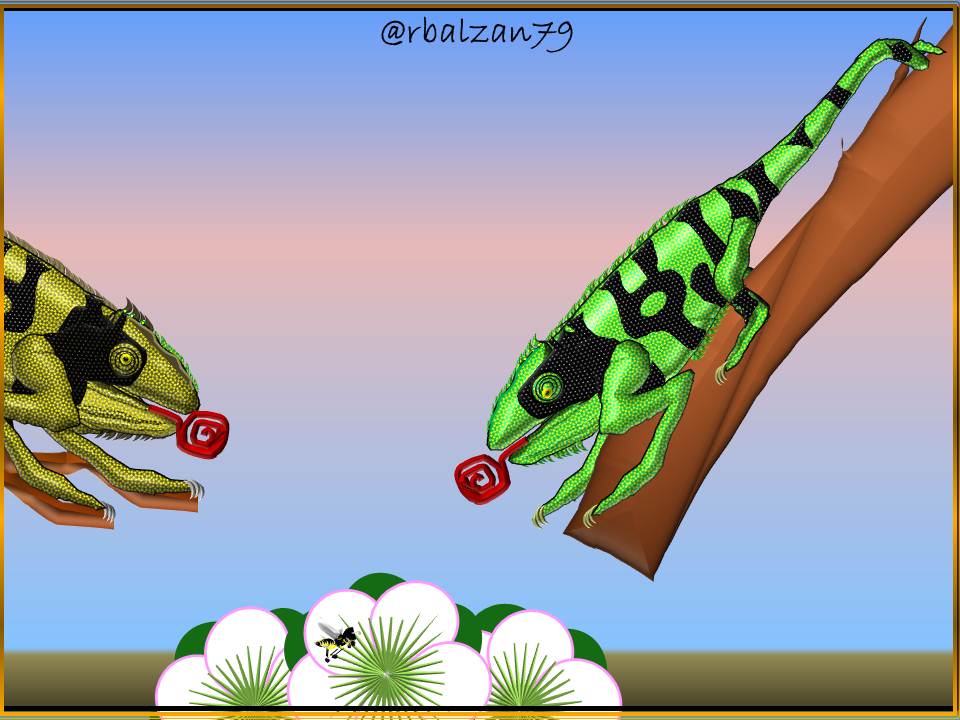
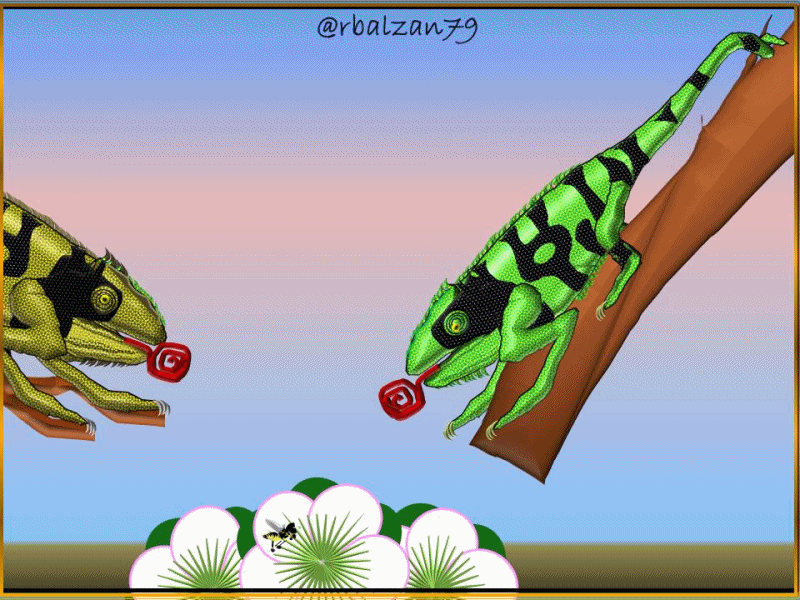
Without further details, let's get to know the digital image to be made:
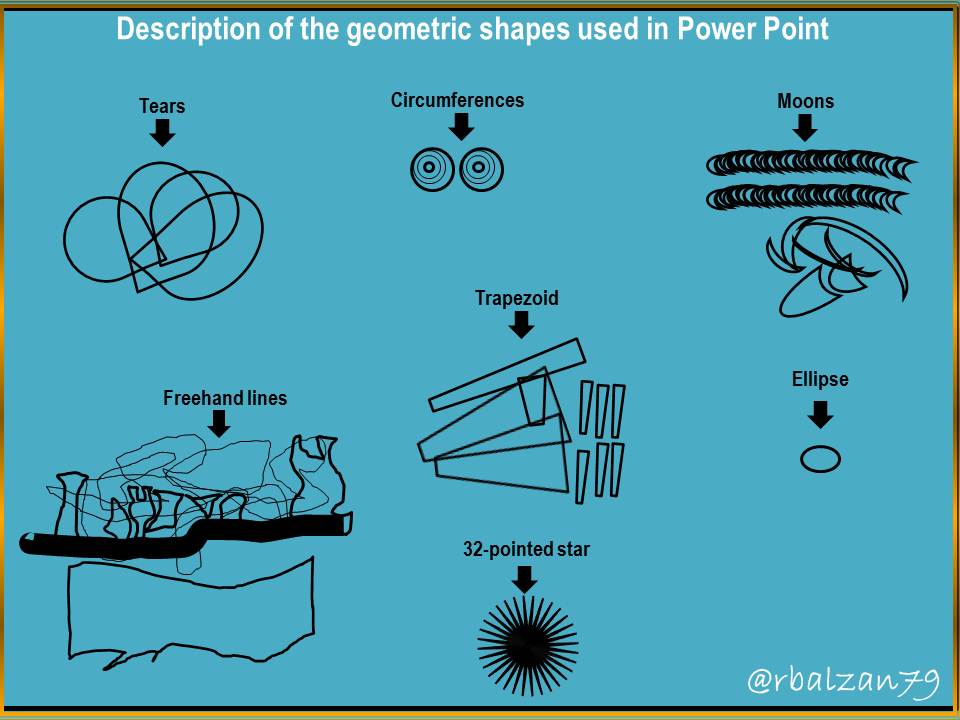
Geometric shapes used

As you could see, several very versatile geometric shapes have been implemented in the previous figure of two chameleons searching for food.
Description of the geometric shapes used
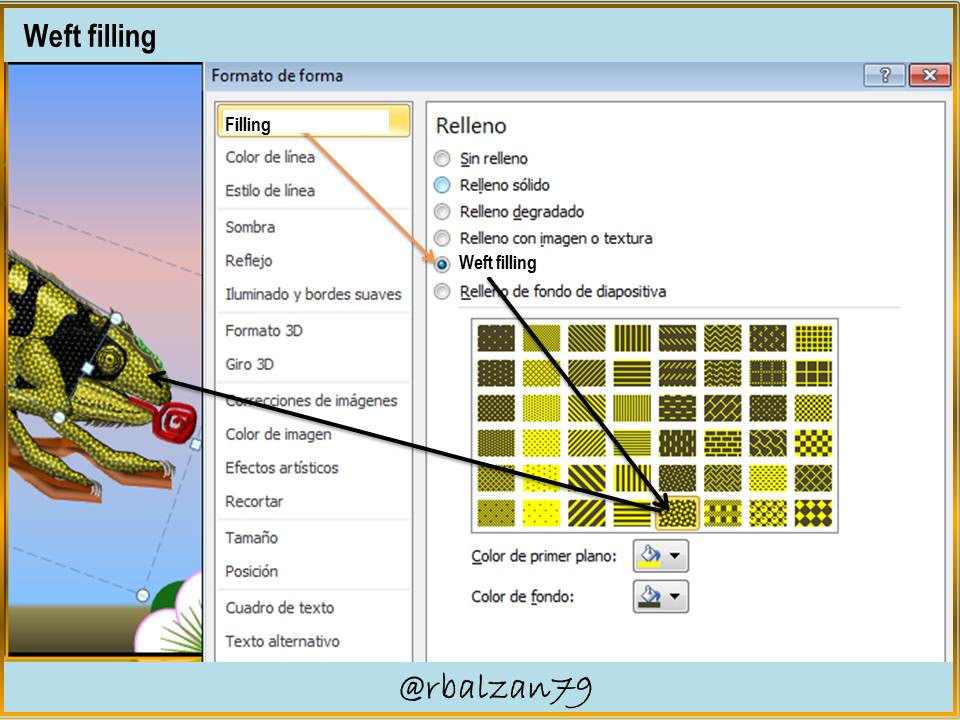
Really splendid geometric shapes described above, now it is important that you can know some forms of fillings, therefore, let's know some examples as follows:
Filler selection
Among the types of fillers used in this image are:
In the same way we find another complement of great help for the effect (3D) giving properties of high relief to our digital image as you can see below:
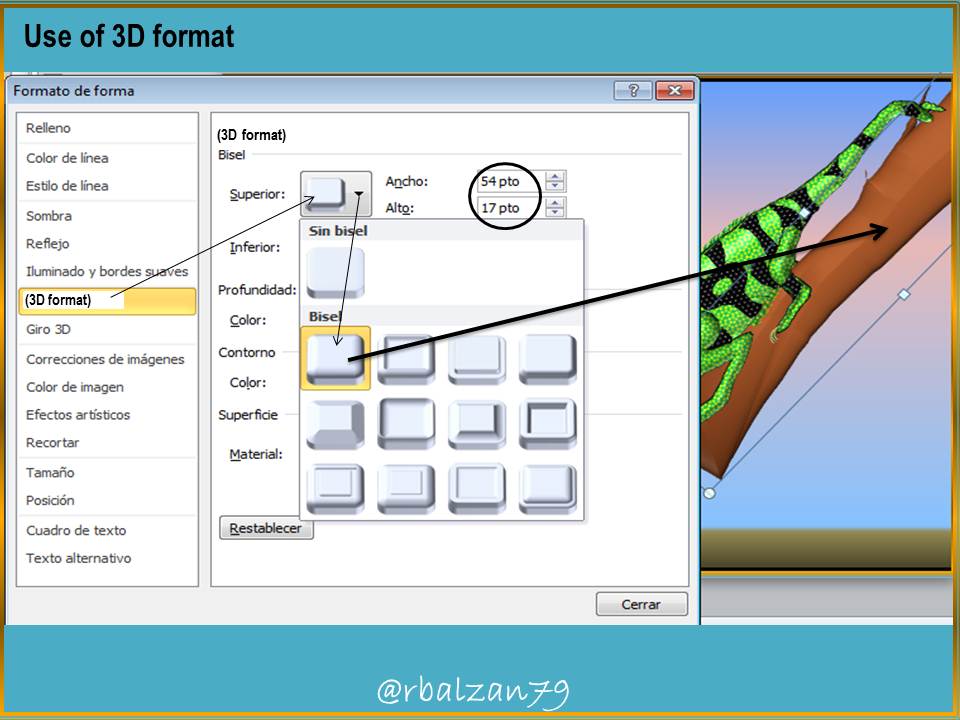
This way you can fill each of the geometric shapes used in the design of the digital image of your preference, also giving it high relief characteristics as we could see in the previous figure through the 3D format option.
It is very important to remember the implementation of other options mentioned in the image tools such as; sorting objects (front, back, front and back), grouping objects, all this leads us to our desired image as you have seen at the beginning of this tutorial.
Until another opportunity.
Note: The gif at the end of the tutorial was made using the PhotoScape application.
Congratulations @rbalzan79! You have completed the following achievement on the Hive blockchain and have been rewarded with new badge(s):
Your next payout target is 14000 HP.
The unit is Hive Power equivalent because post and comment rewards can be split into HP and HBD
You can view your badges on your board and compare yourself to others in the Ranking
If you no longer want to receive notifications, reply to this comment with the word
STOPCheck out the last post from @hivebuzz:
Support the HiveBuzz project. Vote for our proposal!