Tutorial de mi renderizado de ojos/ Tutorial process of my eye rendering

Hola comunidad de Hive y de Hivearte en está ocasión les traigo un tutorial/ proceso de mi coloreado de ojos en SAI , ya que dibujar ojos es algo que he perfeccionado desde que empecé en el dibujo digital y lo que más llama la atención de mis dibujos.
Hello Hive and Hivearte community, this time I bring you a tutorial/process of my eye coloring in SAI, since drawing eyes is something that I have perfected since I started in digital drawing and what most attracts the attention of my drawings.

Cabe destacar que yo no tengo tableta gráfica por ende utilizo mi mouse.
It should be noted that I do not have a graphics tablet, therefore I use my mouse.
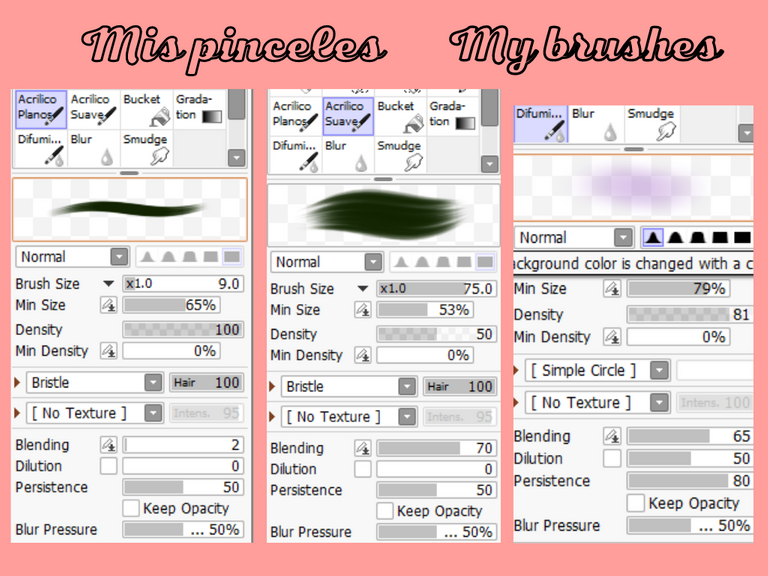
Estas son las configuraciones de mis pinceles
These are my brush settings
Paso nro 1: Boceto
Step #1: Sketch

El boceto queda muy a tu antojo, puedes usar referencias por si como a mí se te dificulta idear la forma en lo personal últimamente me ha gustado mucho los ojos con forma almendrada y ojos grandes. NO TE PREOCUPES SI NO TE SALEN EXACTAMENTE IGUALES porque los ojos son asimétricos y al no ser un dibujo realista. No se presionen
The sketch is very much to your liking, you can use references in case, like me, it is difficult for you to come up with the shape. Personally, lately I have really liked almond-shaped eyes and big eyes. DO NOT WORRY IF THEY DO NOT COME OUT EXACTLY THE SAME because the eyes are asymmetrical and it is not a realistic drawing. Don't be pressured
Paso nro 2: Lineart
Step #2: Lineart
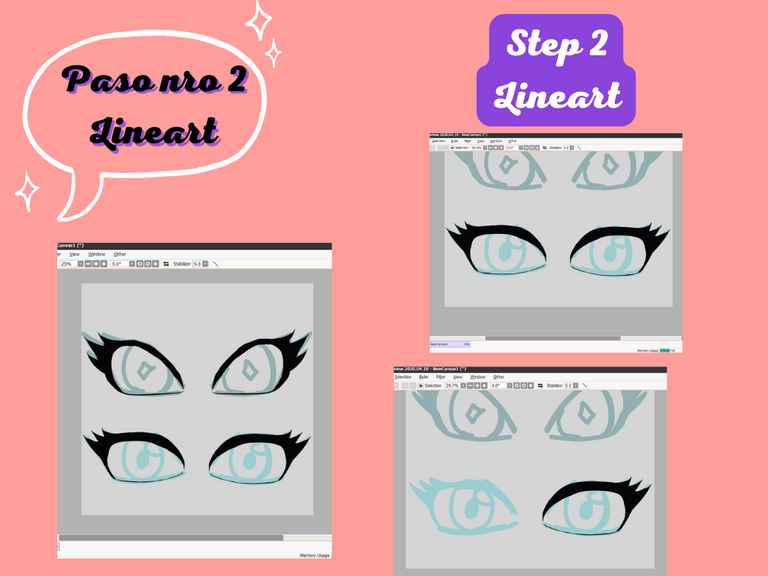
Bajale la opacidad a las capas de tu boceto a un 30%
El lineart a mí me cuesta mucho debido al mouse no tengo la precisión que yo quisiera, pero siguiendo la forma de mi boceto delineo y me ayudo mucho con la herramienta de borrador y la herramienta de “smudge” o “licuar” para hacerle ese piquito a las pestañas. Si al igual que yo no tienen una tableta gráfica SAI 2 cuenta con la herramienta estabilizador la cual es bastante útil
Lower the opacity of your sketch layers to 30%
Lineart is very difficult for me due to the mouse, I don't have the precision that I would like, but following the shape of my sketch I draw and the eraser tool and the “smudge” or “liquefy” tool help me a lot to make that little bit of tabs. If, like me, you don't have a graphics tablet, SAI 2 has the stabilizer tool, which is quite useful.
Paso nro 3: Colores base
Step #3: Base Colors
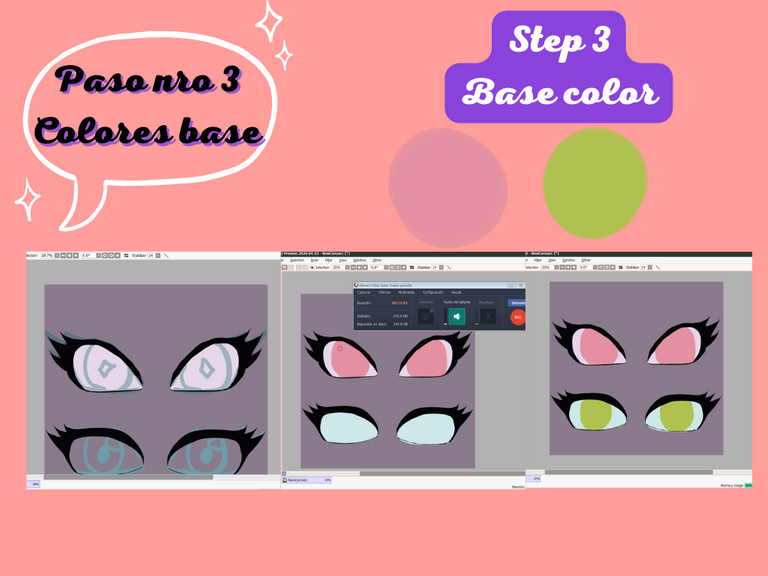
Ya que tienes tu lineart, guíate con la capa de tu boceto activada para colocar los colores base con el acrílico plano o cualquier pincel plano de tu preferencia.
Como tengo 2 pares de ojos los coloreare de Rosa y Verde, elijo tonos medios de manera que yo pueda oscurecer o aclarar en el render.
Once you have your lineart, guide yourself with your sketch layer activated to place the base colors with the flat acrylic or any flat brush of your choice.
Since I have 2 pairs of eyes I will color them Pink and Green, I choose mid tones so that I can darken or lighten them in the render.
Paso nro 4: Sombras base
Step #4: Base Shadows
El truco para elegir unas sombras base es no tratar de oscurecer tu color base con NEGRO. Vas a hacer un renderizado bastante apagado. En el caso del rosa escoge sombras fuchsias, rojizas PERO NO SOMBRAS QUE SEAN SOMBRAS GRISACEAS.
Y coloca las sombras de manera pegada a las pestañas como en una gradiente en donde el tono más oscuro estará arriba. Y a pesar de que ahora mismo estés agregando tonos cuando renderices puedes agregar más para mayor contraste.
The trick to choosing base shadows is to not try to darken your base color with BLACK. You're going to do a pretty dull render. In the case of pink choose fuchsia shades, reddish BUT NOT SHADOWS THAT ARE GRAY SHADES.
And place the shadows so close to the lashes as in a gradient where the darkest shade will be on top. And even though you're adding tones right now when rendering you can add more for more contrast.
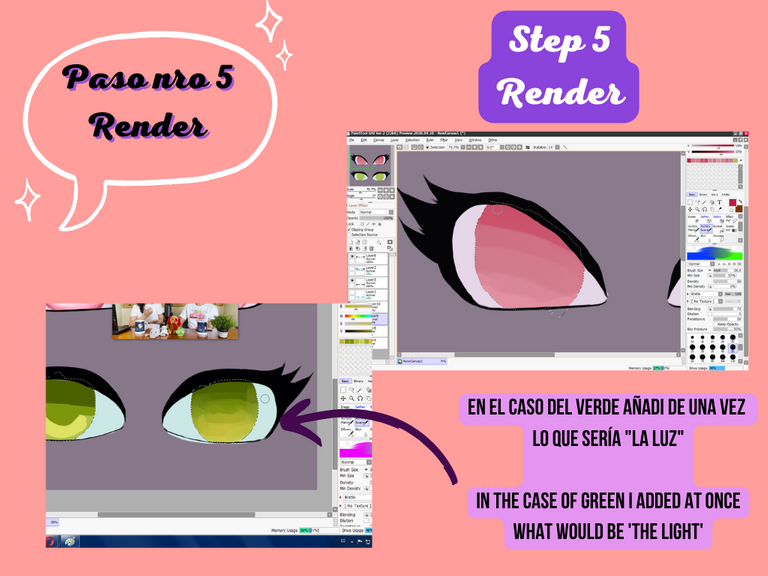
Paso nro 5: Renderizar
Step #5: Render
Renderizar es básicamente mezclar los colores base que ya tienes para crear una suave transición de un tono a otro.
Con el Rosa renderice solo las sombras con el tono base, en la misma capa de tono base.
Y en el caso del Verde quise de una vez colocar el tono más claro para el brillo del iris y use un tono amarillento.
Entonces utilizando mi acrílico suave ire mezclando los distintos tonos base que puse en los iris al igual que puedo ir agregando nuevos tonos conforme yo vaya logrando lo que quiero.
Rendering is basically mixing the base colors you already have to create a smooth transition from one hue to another.
With the Pink render only the shadows with the base tone, on the same base tone layer.
And in the case of Green I wanted to put the lighter tone for the brightness of the iris and use a yellowish tone.
Then, using my soft acrylic, I will mix the different base tones that I put on the irises, just as I can add new tones as I achieve what I want.

Uno a la vez como dije con el Rosa solo tengo las sombras, ahora procedo a colocar el brillo que siempre coloco en una forma de curva en la parte inferior del iris y bien puede ser en un tono muy saturado o un tono rozando el blanco sin ser blanco puro, en este caso experimente con un tono amarillento y un tono rosa muy saturado, usando el pincel de difuminado. Y para mayor efecto juego con los modos de capa sobretodo con el modo “Brillar” o “Shine”.
One at a time as I said with the Pink I only have the shadows, now I proceed to place the brightness that I always place in a curved shape in the lower part of the iris and it can be in a very saturated tone or a tone bordering on white without be pure white, in this case experiment with a yellowish tone and a very saturated pink tone, using the smudge brush. And for a greater effect, I play with the layer modes, especially with the “Brillar” or “Shine” mode.

Últimamente me gusta experimentar con las formas de las pupilas así que con un color casi que vinotinto hago una pupila y con un tono un poquito más claro con el mismo pincel de difuminado en el centro de la pupila para darle un poco de profundidad y que no se vea tan plano.
Lately I like to experiment with the shapes of the pupils so with a color almost burgundy I make a pupil and with a slightly lighter tone with the same blur brush in the center of the pupil to give it a little depth and not looks so flat.
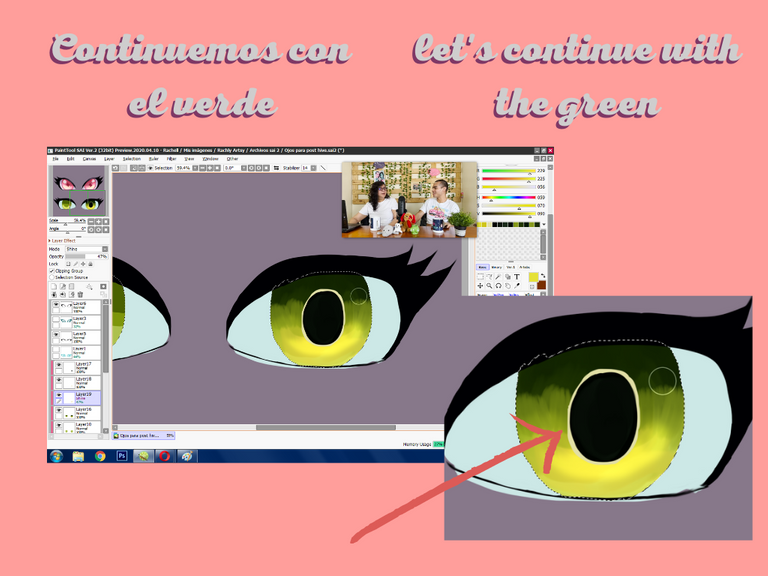
Con el verde use un pequeño borde blanco alrededor de la púpila.
With the green use a small white border around the pupil
Paso nro 6: Brillos
Step #6: Highlights
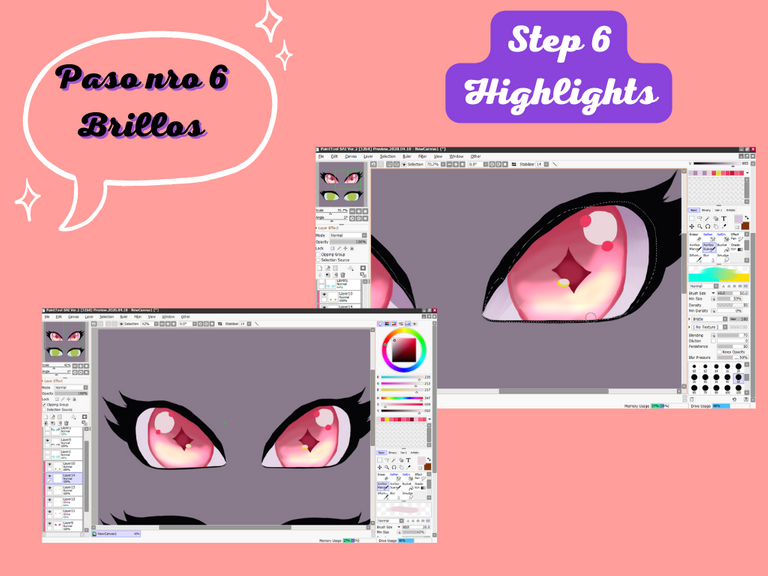
Con mi acrílico plano coloco tonalidades rozando el blanco pero sin que sean blanco puro. Y ubícalos donde te guste a mí gusto es incluir tonos saturados, un brillo en la parte superior a un lado y otro pequeño cerca de la pupila.
With my flat acrylic I place shades bordering on white but without being pure white. And place them where you like them. My taste is to include saturated tones, a shimmer at the top on one side and another small one near the pupil.
Paso nro 7: Sombra interna
Step #7: Inner Shadow

En la Esclerótica de nuestros ojos colocaremos en la parte superior un sombra grisácea, y renderizaremos para crear contraste y darle profundidad a nuestros ojos.
On the Sclera of our eyes we will place a grayish shadow on top, and render to create contrast and give depth to our eyes.
Paso nro 8: Pestañas
Step #8: Eyelashes
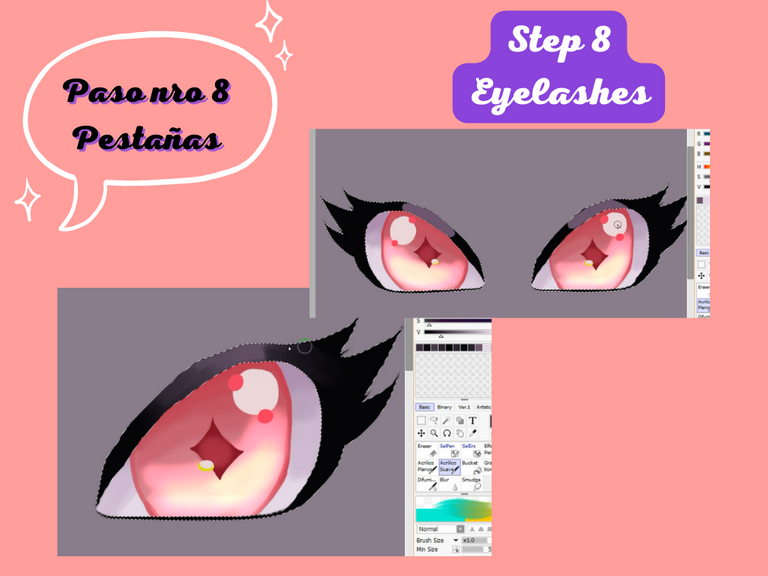
Ayudándonos de la herramienta de lazo para que no se salga del lineart colocaremos un tono grisáceo y renderizaremos para crear un suave contraste y no darle tanta planitud a las pestañas.
Helping us with the lasso tool so that it does not come out of the lineart, we will place a grayish tone and render to create a soft contrast and not give the tabs so much flatness.

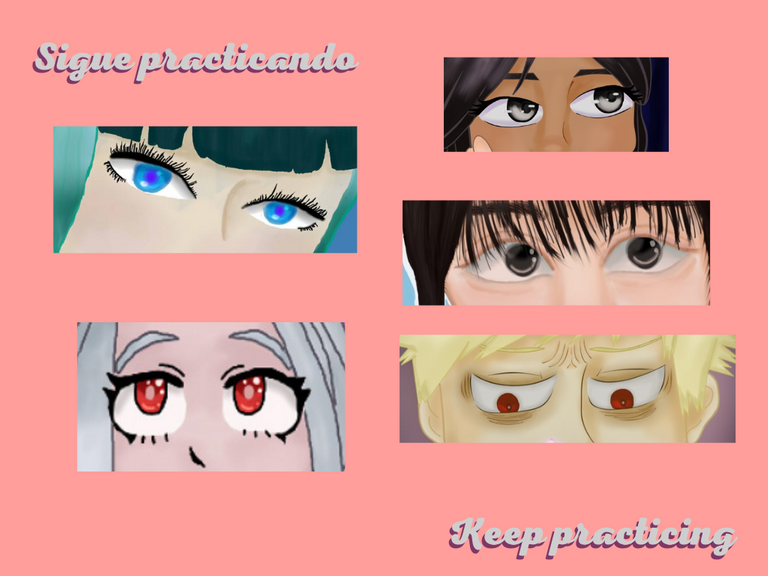
Resultado final:
Mi estilo de coloreado ha ido evolucionando pero viene de tratar de imitar el estilo anime y he creado y sigo creando un estilo inspirado tanto en el anime como en otros estilos de dibujo.
My coloring style has been evolving but it comes from trying to imitate the anime style and I have created and continue to create a style inspired by both anime and other drawing styles.
No se preocupen si sus coloreados o sus dibujos no son el resultado que esperan, el truco está en la práctica y en improvisar cada vez más conforme vayas dibujando, estudien referencias, tutoriales y demás. Mis primeros coloreados de ojos eran demasiado sencillos y no sabía cómo hacer para colocar sombras, seleccionar colores, darles expresividad.
Don't worry if your coloring or drawing isn't what you expect, the trick is to practice and improvise more and more as you draw, study references, tutorials, and more. My first eye colorings were too simple and I didn't know how to place shadows, select colors, give them expressiveness.
Espero que les haya servido este pequeño tutorial, no olviden seguirme y darme apoyo en mis redes sociales de dibujo.
I hope you have found this little tutorial useful, do not forget to follow me and give me support on my drawing social networks.