I Teach You How To Make An Eternal Rose 💗🌹 // Te Enseño A Realizar Una Rosa Eterna💗🌹
Eng
Greetings beautiful community, happy and blessed start of the week, I hope you are very well on this day, today I want to share with you this beautiful eternal rose, made with recycled materials, or materials that we have at home. Here I leave the step by step of how to do it.
Esp
Saludos hermosa comunidad, feliz y bendecido inicio de semana, espero se encuentren muy bien en este día, hoy quiero compartir con ustedes esta hermosa rosa eterna, realizada con materiales reciclados, o materiales que tenemos en casa. Acá les dejo el paso a paso de como la realice.


Eng
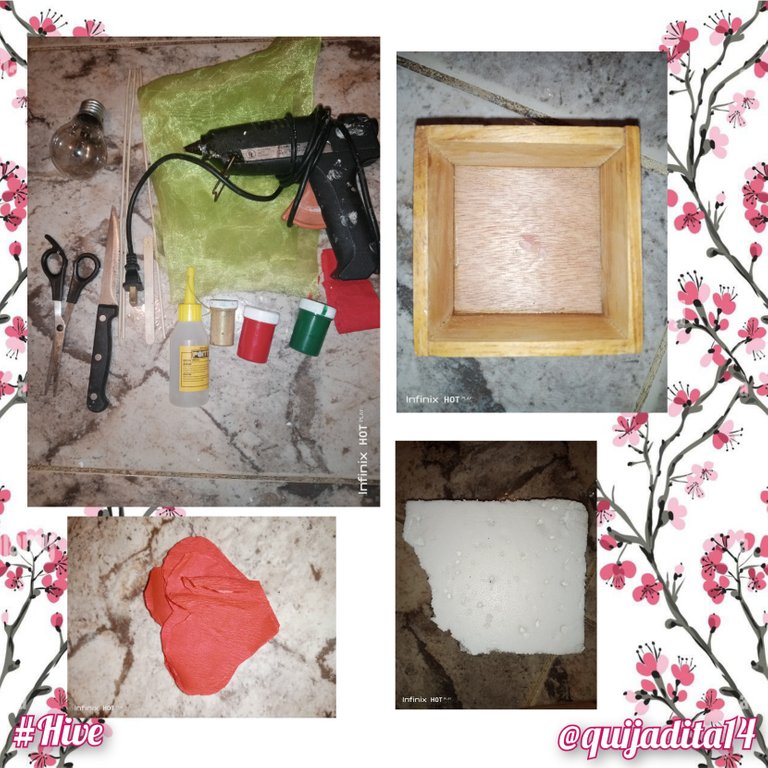
The materials I used were:
- Light bulb
- Scissors, knife, height chopsticks and wooden palette
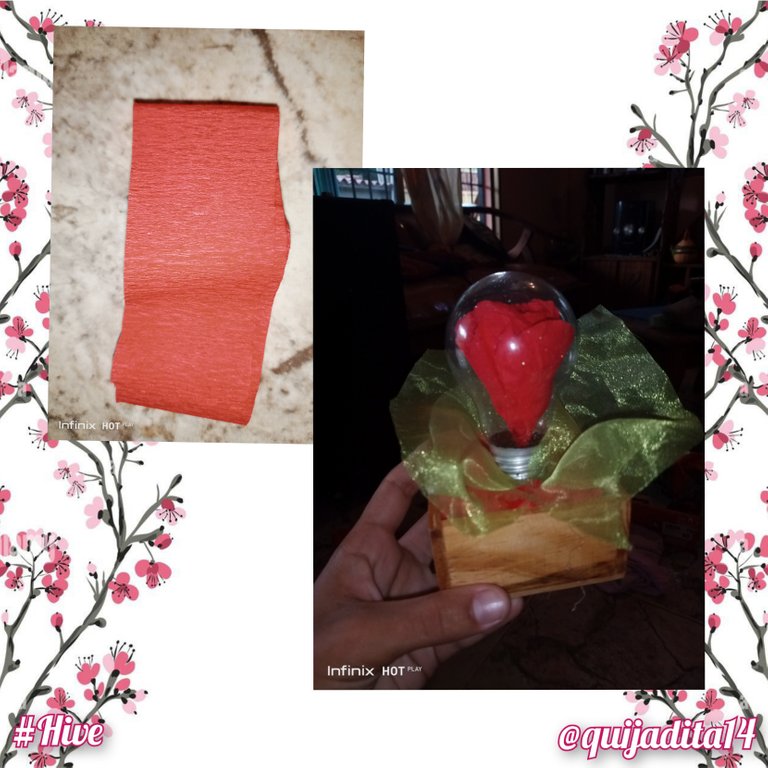
- Crepe paper in rectangles
- 4 red crepe paper hearts and 6 half red hearts
- Hot and cold silicone
- Transparent green fabric
- Tempera and golden frost
- Anime
- 6cm X 6cm wooden box
Esp
Los materiales que utilice fueron:
- Bombillo
- Tijera, cuchillo, palillos de altura y paleta de madera
- Papel crepe en rectángulos
- 4 Corazones de papel crepe rojo y 6 mitad de corazones de color rojo
- Silicón frio y caliente
- Tela transparente color verde
- Temperas y escarcha dorada
- Anime
- Caja de madera de 6 cm X 6 cm

Eng
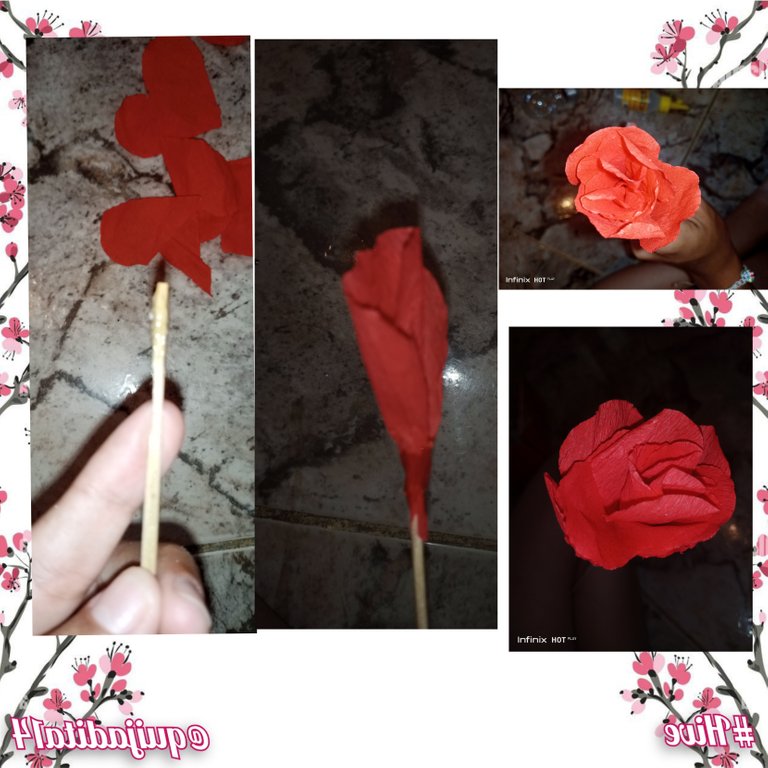
In the first step we are going to start by making a rose, I had previously published a tutorial on how to make them, this time I will briefly explain how to make them, we take a height toothpick, cold silicone and half of the hearts and begin to glue them by turning the toothpick , covering ties and spaces that are empty, this will give it the look we need, after having put the 6 half of red hearts we will put the 4 whole hearts using the same technique and covering the spaces very well, we will let the cold silicone dry so that our rose do not disarm when passing it through the light bulb.
Esp
En el primer paso vamos a comenzar realizando una rosa, anteriormente había publicada un tutorial de cómo realizarlas, en esta oportunidad explicare brevemente como realizarlas, tomamos un palillo de altura, silicón frio y la mitad de los corazones y comenzamos a pegarlos dándole vueltas al palillo, cubriendo empates y espacios que queden vacíos esto le dará el aspecto que necesitamos, luego de haber puesto las 6mitad de corazones rojos pondremos los 4 corazones enteros realizando la misma técnica y cubriendo muy bien los espacios, dejaremos secar el silicón frio para que nuestra rosa no se desarme a la hora de pasarla por el bombillo.

Eng
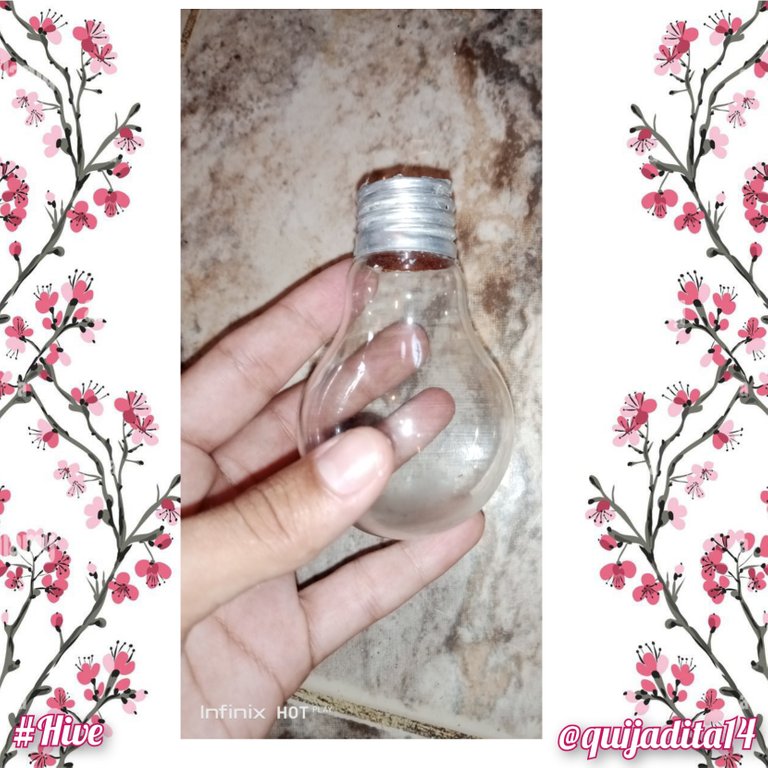
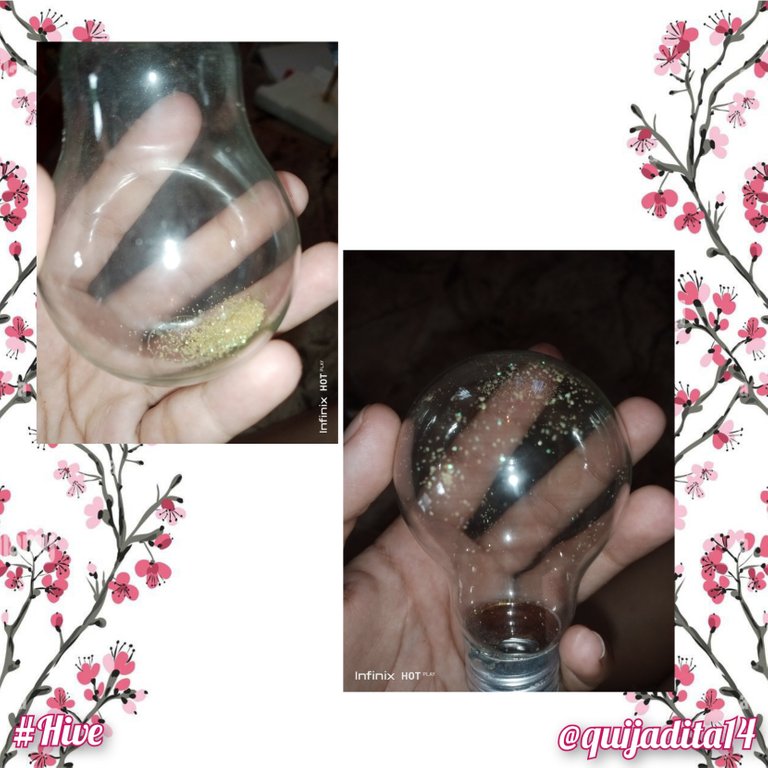
Continuing with the second step we are going to remove the back of the light bulb with the help of the knife, for this step I recommend leaning on a thick cloth so that you do not get hurt in the event that the light bulb breaks, once that part is removed from behind we are going to take our frost and we will pour about a spoonful inside the bulb and we will move it so that these are distributed throughout the bulb, being in the way shown in the image.
Esp
Continuando con el segundo paso vamos a retirarle la parte de atrás al bombillo con ayuda del cuchillo, para este paso les recomiendo apoyarse en un paño grueso de tal manera que no se lastimen en dado caso que el bombillo se rompa, una vez retirada esa parte de atrás vamos a tomar nuestra escarcha y echaremos alrededor de una cucharada dentro del bombillo y lo moveremos para que estas se distribuyan por todo el bombillo, quedando de la manera que muestra en la imagen.

Eng
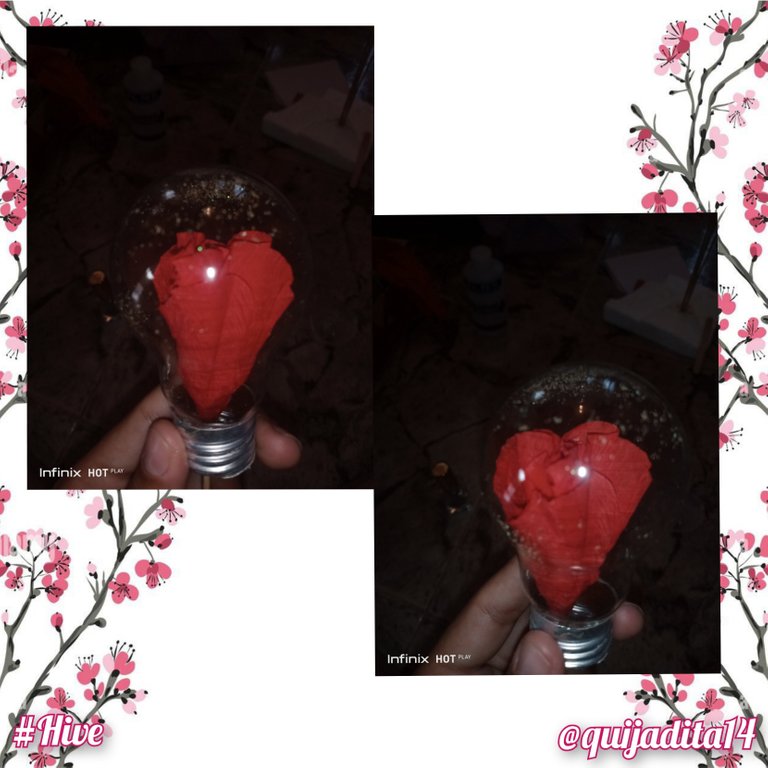
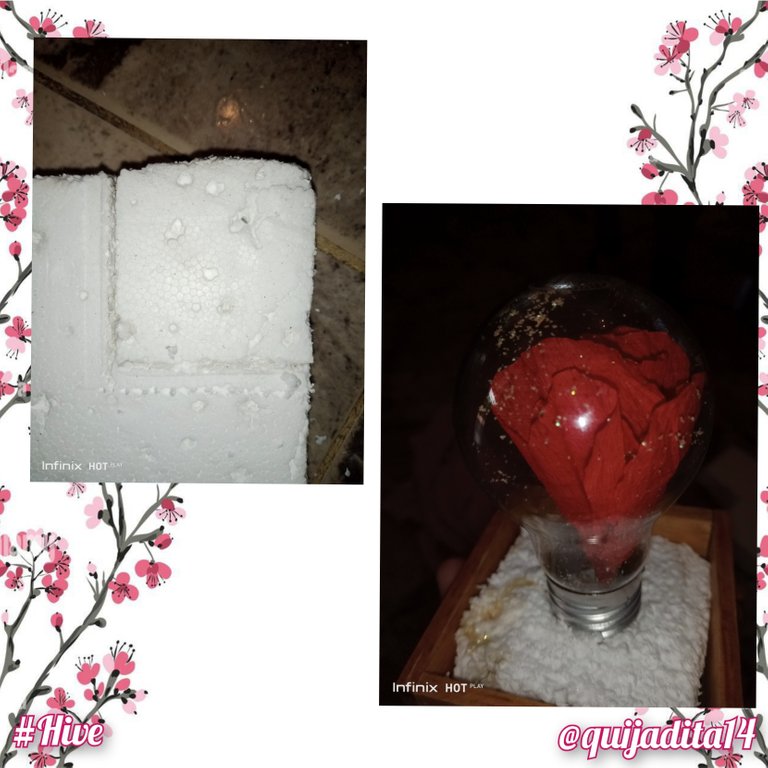
For step number three we are going to take our rose and we will roll it up to be able to pass it through the hole that we have made in the bulb, once the rose has passed we will turn it in the opposite direction so that it takes its shape again in the same way we are going to measure the height stick and we will cut it in a considerable height since then it will have to be placed in the anime, then we take the anime and mark the measurements of the wooden box where we will place our eternal rose, we cut the anime placing it inside the box and placing the light bulb with the rose in the center of the box with the anime to measure where it will be placed, here we have to try to make the mark as central as possible.
Esp
Para el paso número tres vamos a tomar nuestra rosa y la enrollaremos para poder pasarla por el hoyo que le hemos realizado al bombillo, una vez pasada la rosa le daremos vueltas en sentido contrario para que ella vuelva a tomar su forma de igual manera vamos a medir el palillo de altura y lo recortaremos en una altura considerable ya que luego se tendrá que colocar en el anime, seguidamente tomamos el anime y marcamos las medidas dela caja de madera donde colocaremos a nuestra rosa eterna, cortamos el anime colocándolo dentro dela caja y colocando el bombillo con la rosa en el centro de la caja con el anime para medir donde se colocara, acá tenemos que tratar que la marca quede lo más céntrica posible.

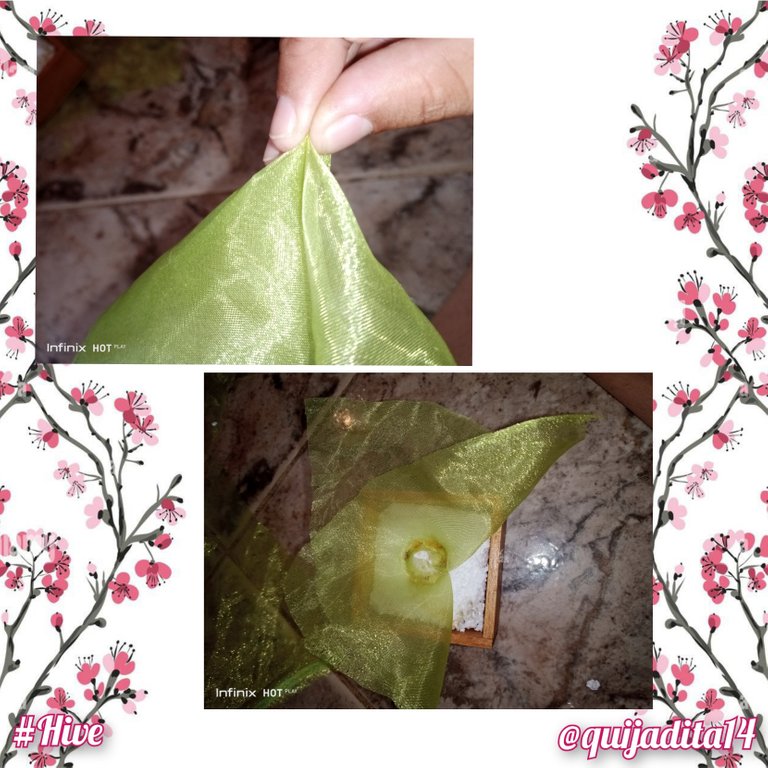
Eng
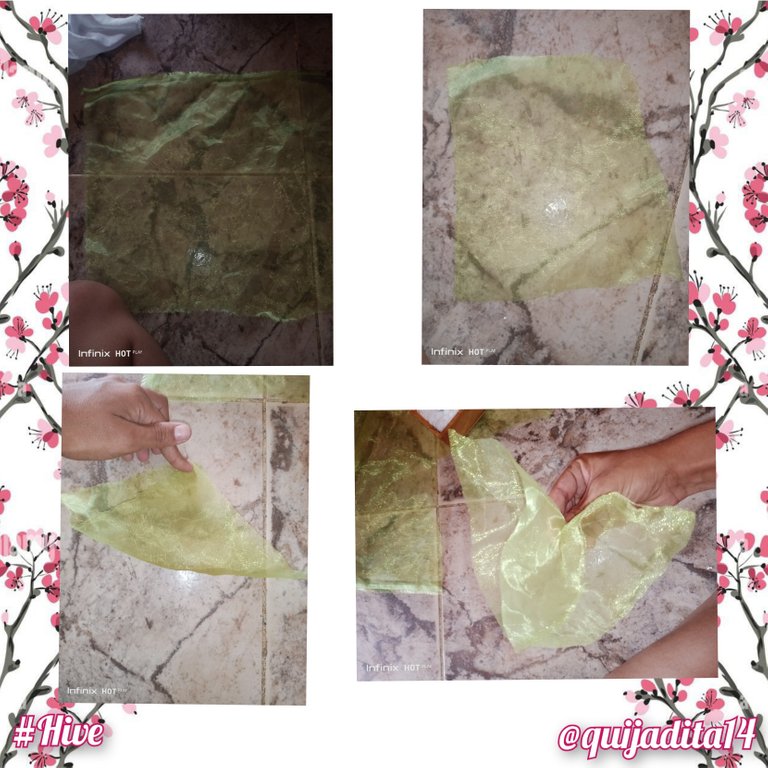
In step four we are going to take the transparent green fabric and we are going to cut a square of 10cm X 10cm, which we are going to fold the ends transversely making a triangle and then we are going to fold again the two ends that were left at the ends and we will take the lower that will be formed in which we are going to fix with a little hot silicone and we will make a small cut in the tip, then in the mark that we had made with the bulb we are going to place hot silicone and we will fix the transparent fabric in the anime with the help of the wooden palette since we must apply pressure and if we do it with our fingers we can burn ourselves, once the fabric is placed we apply hot silicone again and fix the light bulb with the rose, staying as shown in the image.
Esp
En el paso cuatro vamos a tomar la tela transparente verde y vamos a cortar un cuadrado de 10cm X 10cm, el cual vamos a doblar transversalmente las puntas realizando un triángulo y luego volvemos a doblar las dos puntas que quedaron en los extremos y tomaremos la punta inferior que se formara en la cual vamos fijar con un poco de silicón caliente y aremos un pequeño corte en la punta, luego en la marca que habíamos realizado con el bombillo vamos a colocar silicón caliente y fijaremos la tela transparente en el anime con ayuda de la paleta de madera ya que debemos hacer presión y si lo hacemos con los dedos nos podemos quemar, una vez colocada la tela volvemos aplicar silicón caliente y fijamos el bombillo con la rosa, quedando de la manera que muestra la imagen.
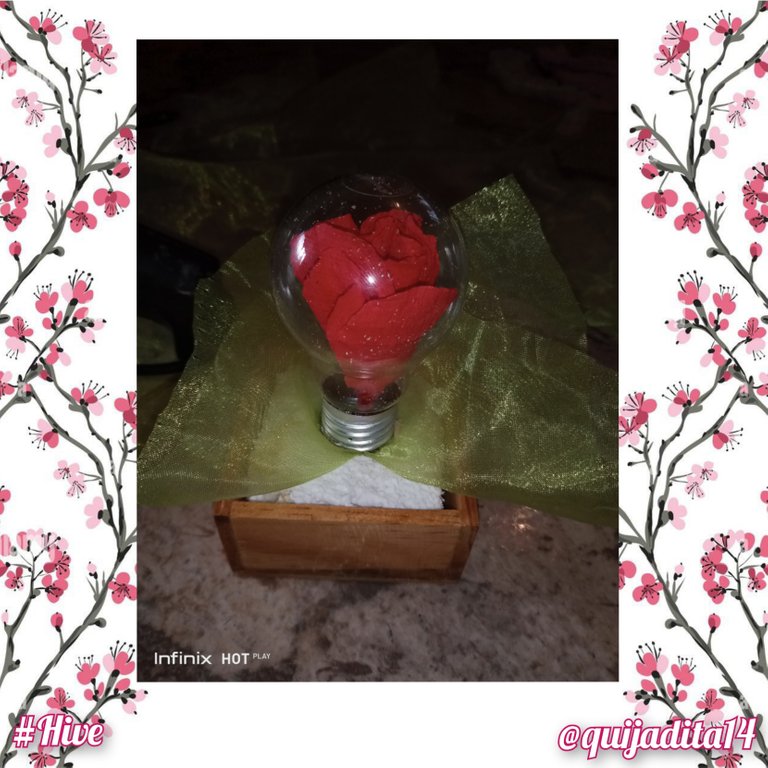

Eng
Continuing with the fifth step we are going to add the final touches, taking the red crepe paper grid and with the help of the cold silicone we are going to cover all the anime that is seen at the base of the bulb with the rose, giving it more depth, this other detail is optional since we take a height toothpick and the temperas and make small spirals and red dots around them on the front of the wooden box. And ready family we have finished our eternal rose.
Esp
Continuando con el quinto paso vamos agregar los toque finales, tomando el retículo de papel crepe rojo y con ayuda del silicón frio vamos cubrir todo el anime que se ve en la base del bombillo con la rosa, dándole más profundidad a la misma, este otro detalle es opcional ya que tomamos un palillo de altura y las temperas y le realice en la parte frontal dela caja de madera unos pequeños espirales y puntos rojos alrededor delos mismos. Y listo familia hemos terminado nuestra rosa eterna.
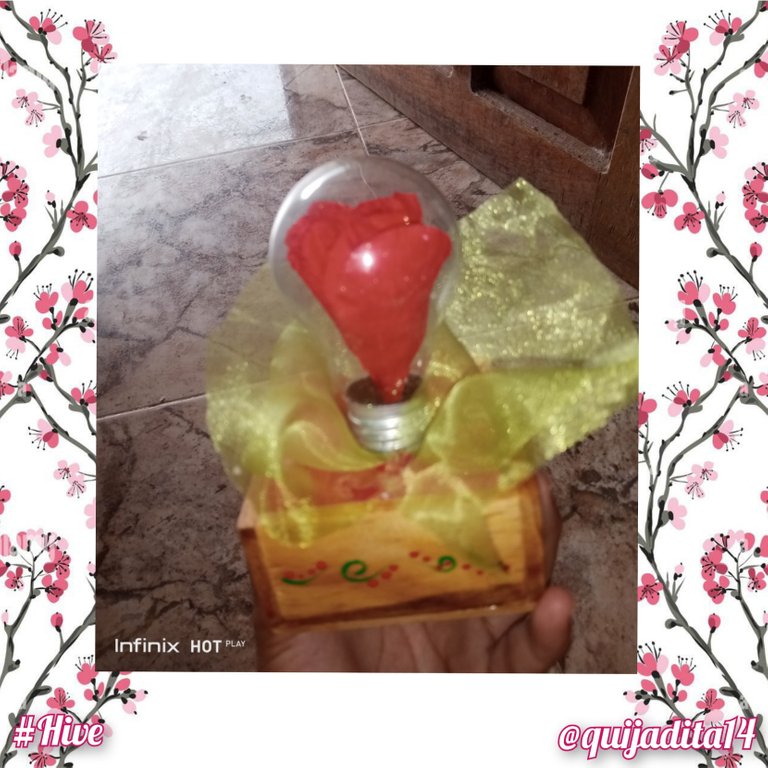
Eng
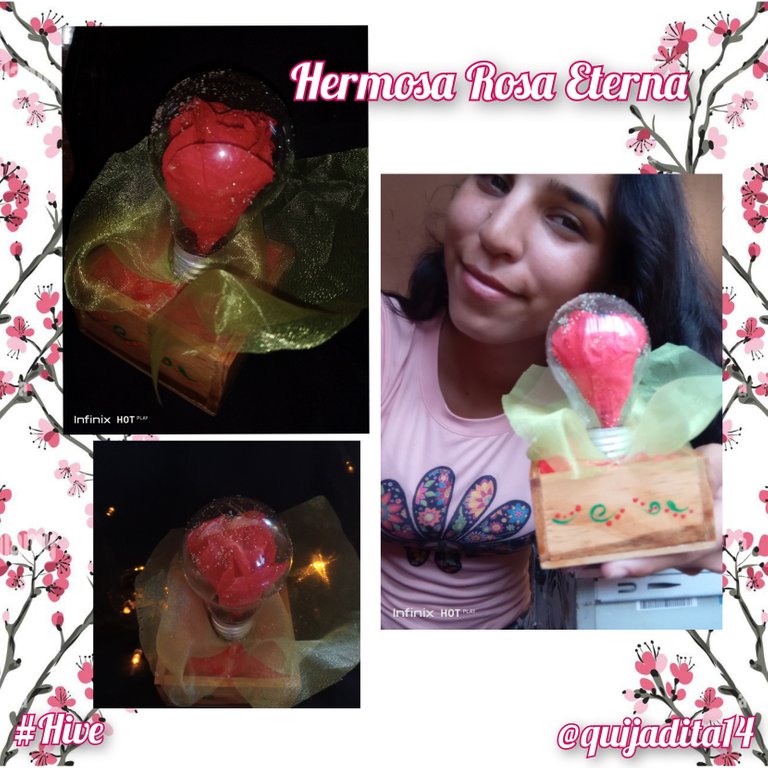
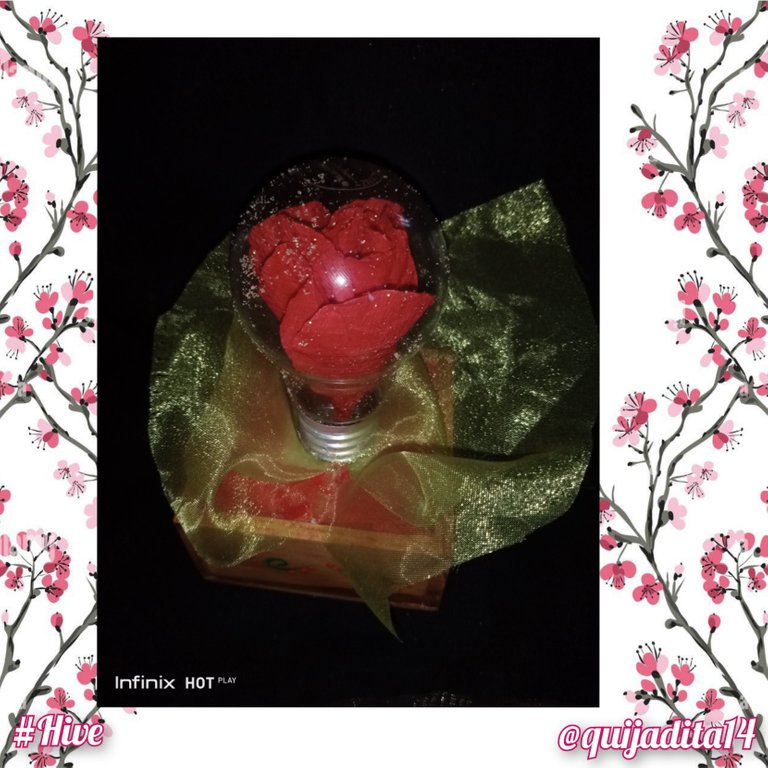
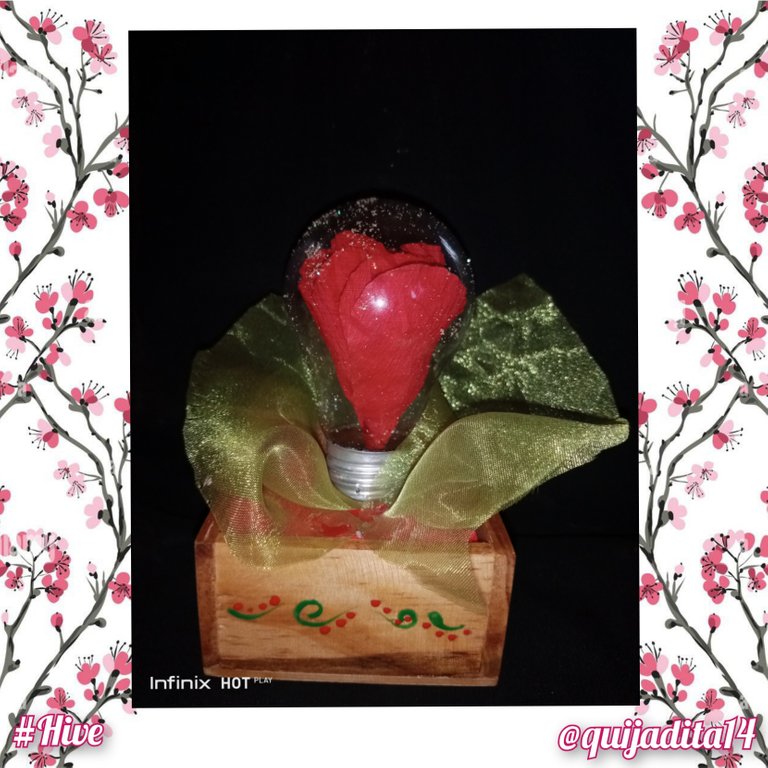
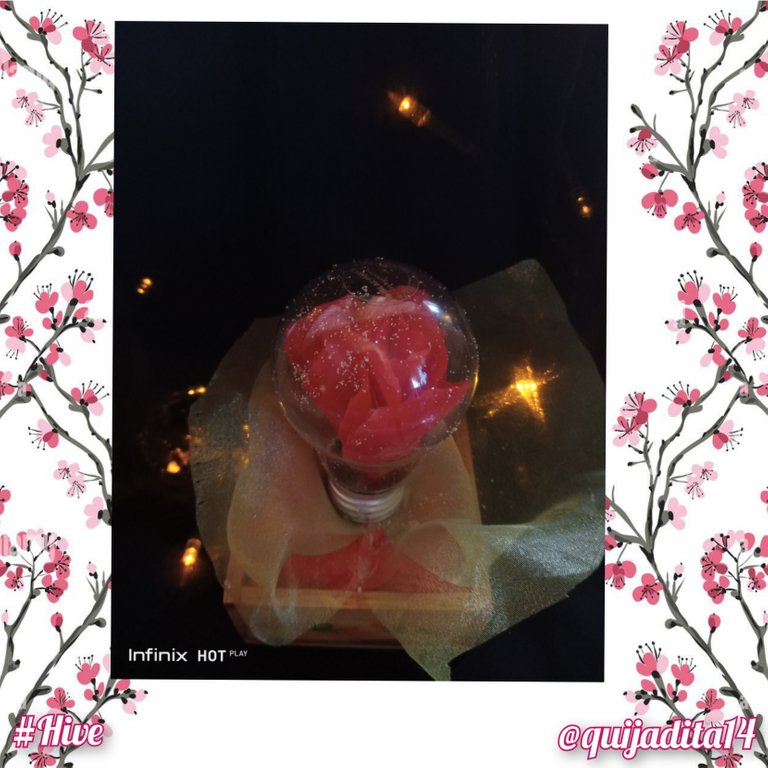
Here I leave a few photos so you can see how beautiful this ornament is and how striking it looks, we can place it in many places in our room or some part of the house and even place it on a photo of a family member or the image of a saint. I hope you liked it, I sent you a lot of greetings and success, kisses
Esp
Acá les dejo unas cuantas fotos para que puedan observar lo lindo que quedo este adorno y lo llamativo que se ve, podemos colocarlo en muchos lugares de nuestro cuarto o alguna parte de la casa e incluso colocárselo a una foto de un familiar o la imagen de un santo. Espero les haya gustado le envió mucho saludos y éxitos, besitos.
Eng
All photographs and text separators are my own, taken with an Infinix Hot 11 Play, edited in InCollage and the text was translated in Google translator
Esp
Todas las fotografías y los separadores de textos son de mi autoría, tomadas con un Infinix Hot 11 Play, editadas en InCollage y el texto fue traducido en Google traductor.

Que linda queda la flor con esa técnica.
Es una buena idea esa la de reciclar el bombillo, y así preservar la flor por mucho más tiempo.
Quedo bien linda esta manualidad.
Gracias por compartir el paso a paso.
Bendecida semana.
Thank you for sharing this amazing post on HIVE!
Your content got selected by our fellow curator @rezoanulvibes & you just received a little thank you via an upvote from our non-profit curation initiative!
You will be featured in one of our recurring curation compilations and on our pinterest boards! Both are aiming to offer you a stage to widen your audience within and outside of the DIY scene of hive.
Join the official DIYHub community on HIVE and show us more of your amazing work and feel free to connect with us and other DIYers via our discord server: https://discord.gg/mY5uCfQ !
If you want to support our goal to motivate other DIY/art/music/homesteading/... creators just delegate to us and earn 100% of your curation rewards!
Stay creative & hive on!
Congratulations @quijadita14! You received a personal badge!
You can view your badges on your board and compare yourself to others in the Ranking
Check out the last post from @hivebuzz:
Support the HiveBuzz project. Vote for our proposal!