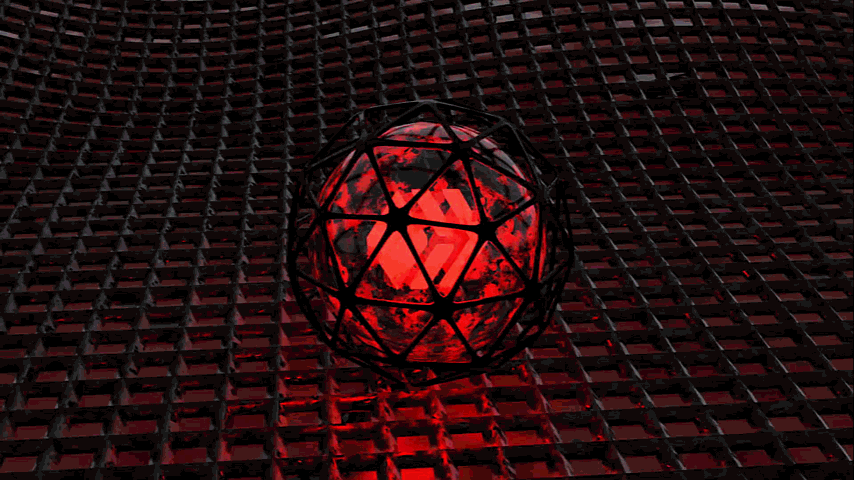
[Eng - Esp] Meta Bola en 3D | Blender tutorial
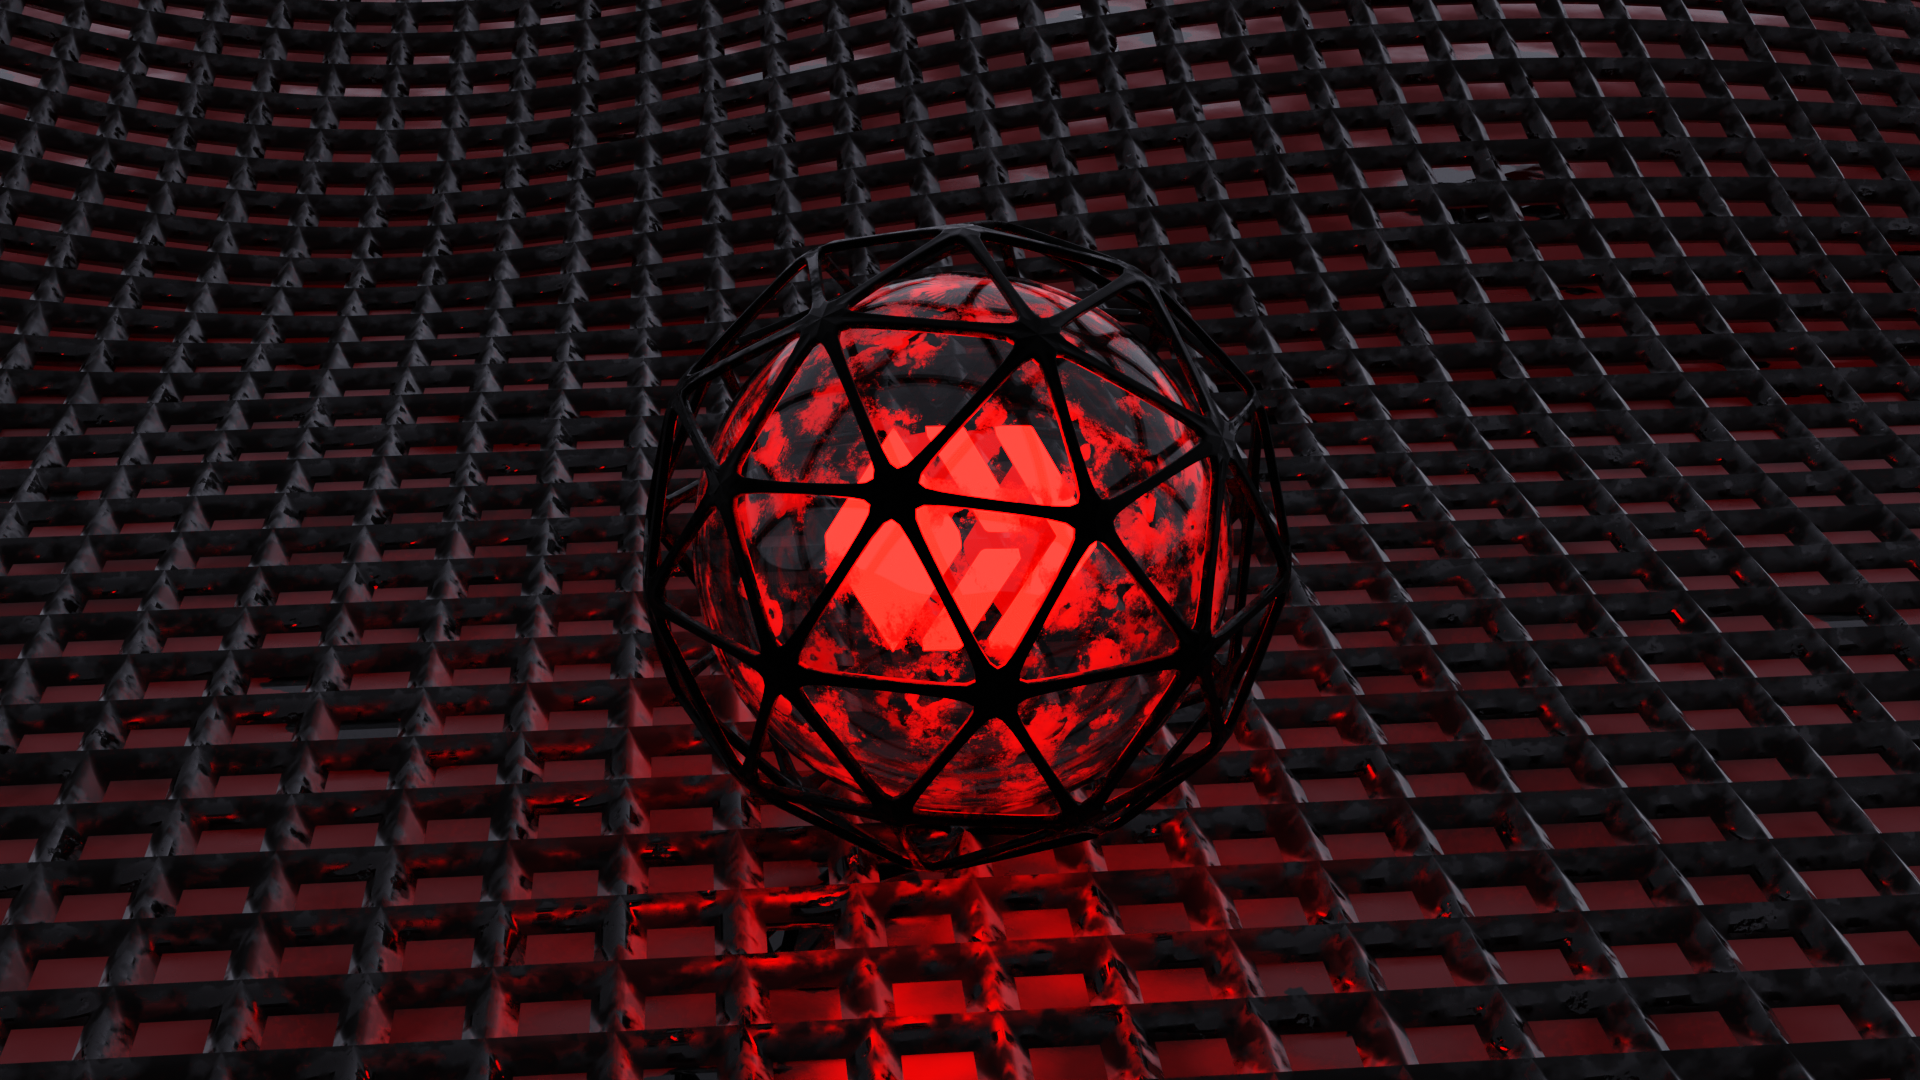
Hello Hivers, last week I made my first publication in this community and I wanted to continue doing it and this time I come with a model using modifiers, physical properties and emissions. This is a great exercise since the materials are procedural which means that everything is by mathematical calculations and not by textures that we load into our material. This gives us great flexibility when modeling. To do the modeling I used Blender 3.1 although 3.0 will also work. In addition to transforming the Hive logo into .svg format, use illustrator to convert the logo into a vector.

Pimer paso:
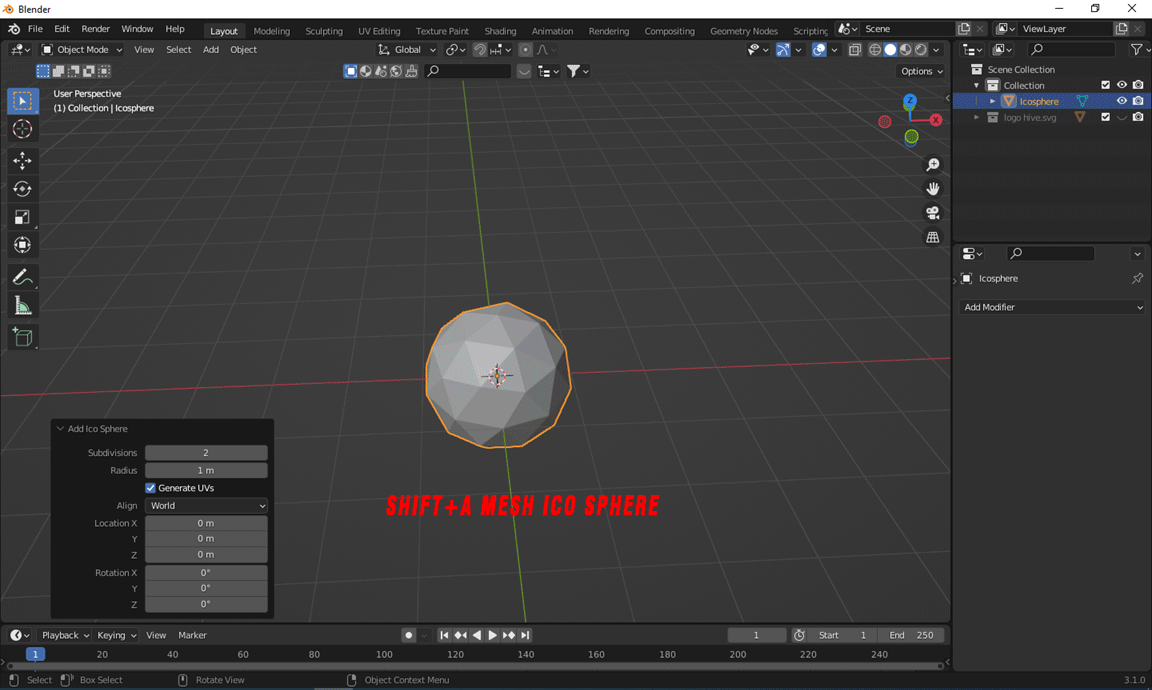
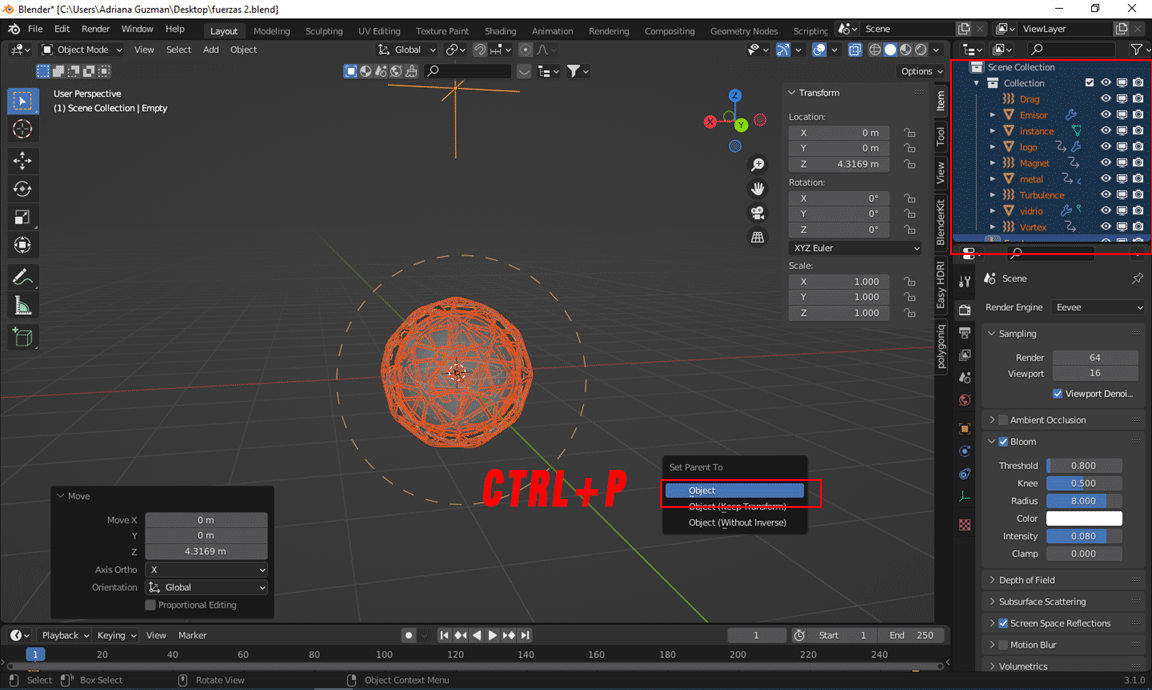
Primero comencé el modelado agregando una ICO Sphere con shift+a luego mesh ICO Sphere, a la ICO Sphere agregue el modificador Wireframe deje el thickness en 0.068 y un bevel con un amount de 0.1, después hice click en el botón secundario shade smooth. Importe el archivo .svg con el logo dentro de mi proyecto y agregue un modificado de solidify. La primera ICO sphere la hice un poco más grande con S y arrastre del mouse. Agregue una UV Sphere con shift+a mesh UV Sphere y luego botón secundario shade smooth, le agregue un modificador de solidify con un thickness de 0.02 por ultimo le agregue una propiedad física de collision. Duplique la UV Sphere con shift+D y quite todos los modificadores y las propiedades físicas, le agregue unparticulas con number en 100000 end 250 lifetime 250, la distribución en random, la rotación colocamos varios valores, el brownian los subimos a 10 y el drag y el damp a 1.
Segundo paso:
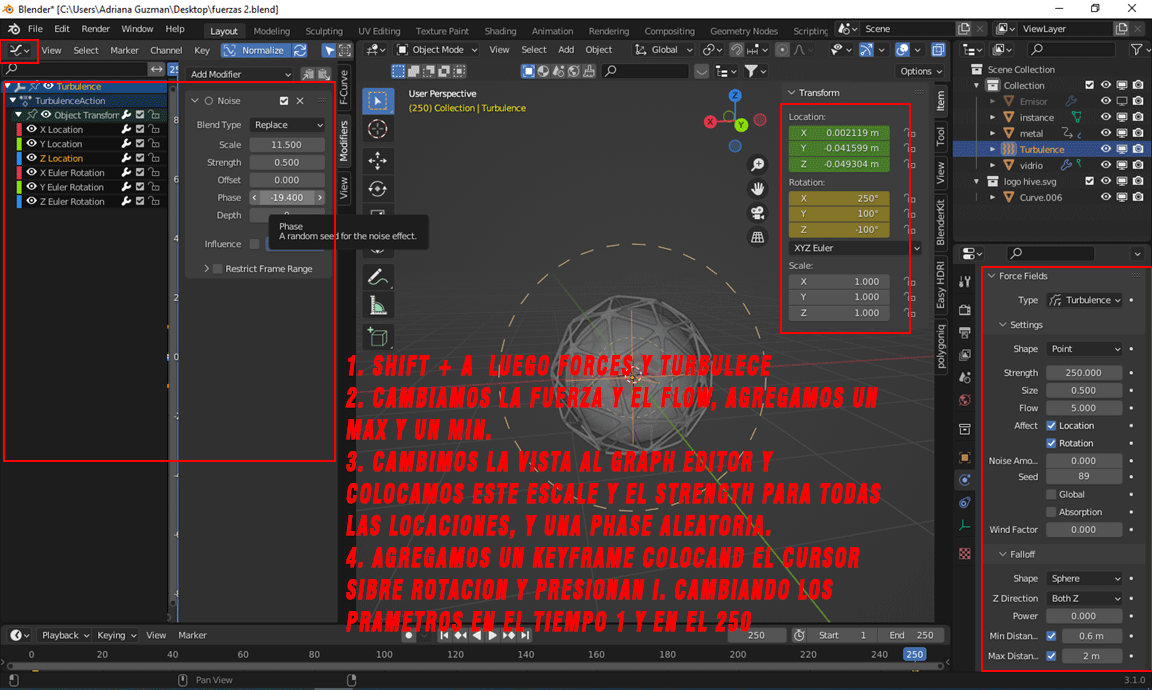
Tercer paso:
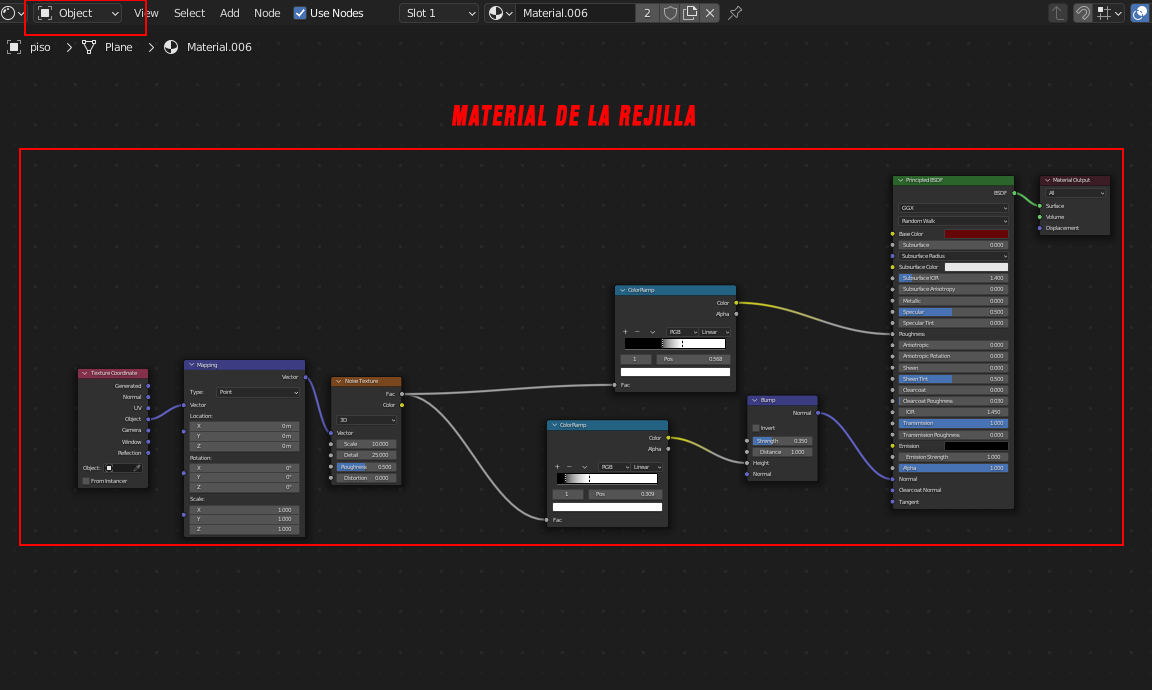
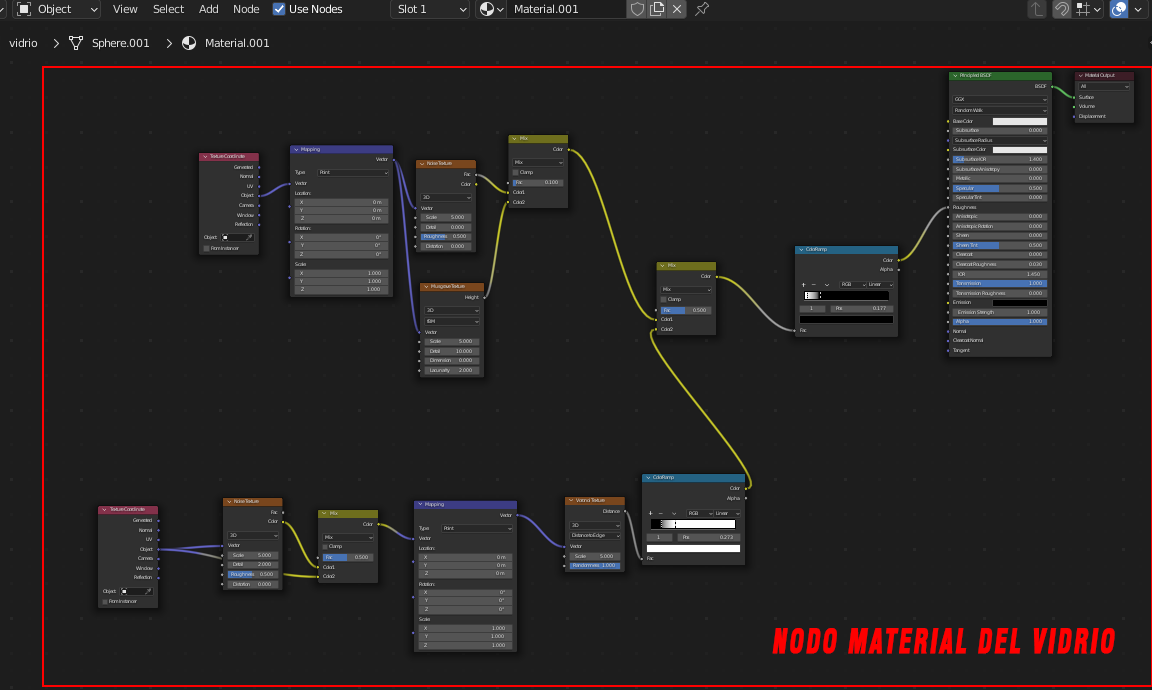
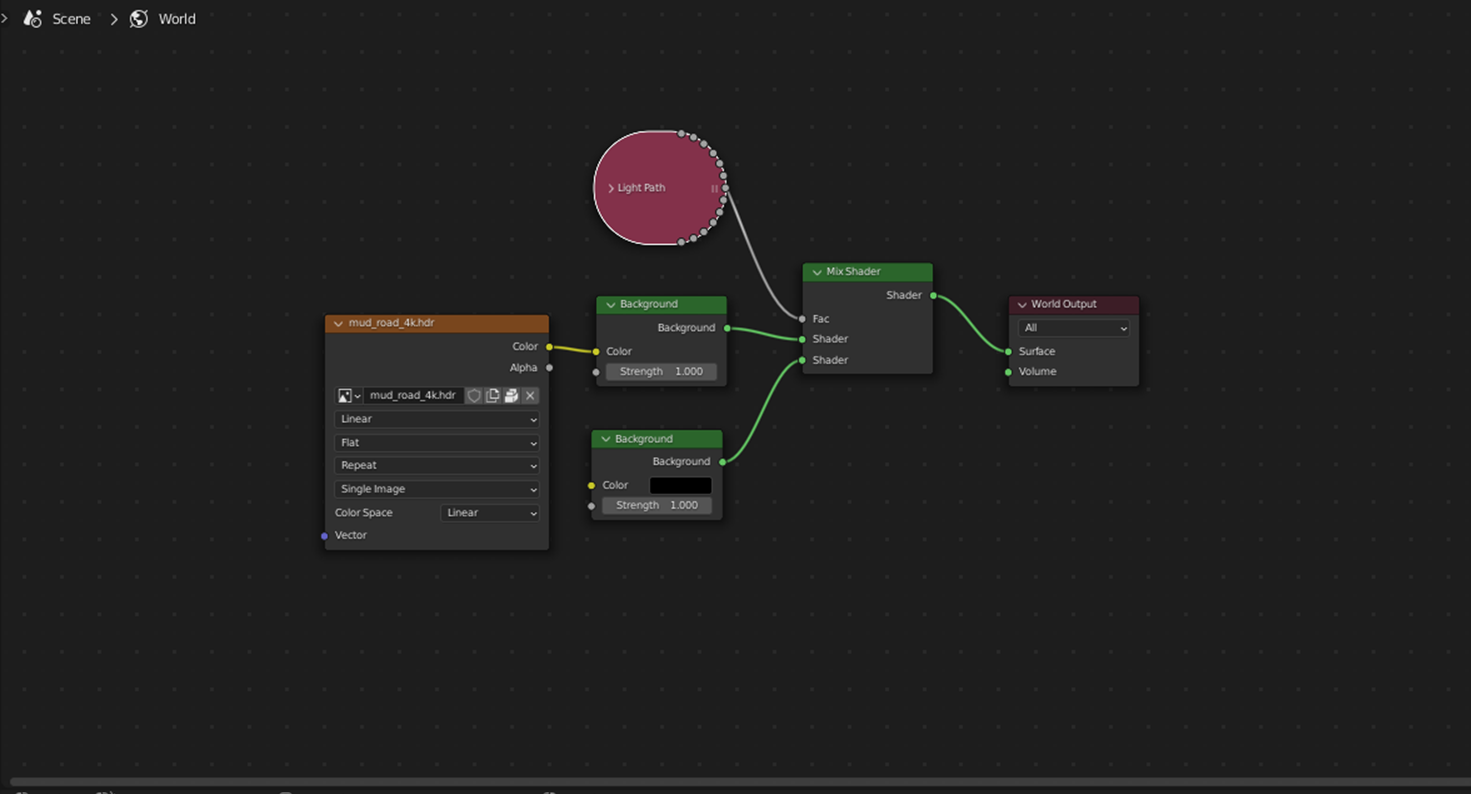
Add Light to the scene with an HDRI downloaded from Polyhaven are free and there is a wide variety. To add it to the scene I went to the top shading tab and changed from object to world shift+ to image texture and added the nodes as shown below. I did the same way with the procedural textures.
![]()

https://twitter.com/PinkgirlArt/status/1505278382690516994
The rewards earned on this comment will go directly to the person sharing the post on Twitter as long as they are registered with @poshtoken. Sign up at https://hiveposh.com.
Su post ha sido valorado por @ramonycajal
Muy bueno.. Siempre le hice ojitos a Blender pero se me hacía muy feo. Pero sin dudas es de lo más potente que hay :D
Es super potente y no tiene nada que envidiarle a los de pago como maya o cinema 4d. Lo mas complicado que aun me falta mucho por aprender es combinar algunos nodos. Pero se puede llegar a hacer cosas increíbles. comienza haciendo ejercicios con nodos de geometría se consiguen cosas fantásticas que no pesan tanto, también con arquitecturas low poly.
Esta genial este trabajo!
Muchas gracias :)!