Arriving on the island of Mata Nui to save it from the evil Makuta. || Lego Bionicle: Quest for the Toa (GBA). || Gameplay & Mini-guide.


Introduction.
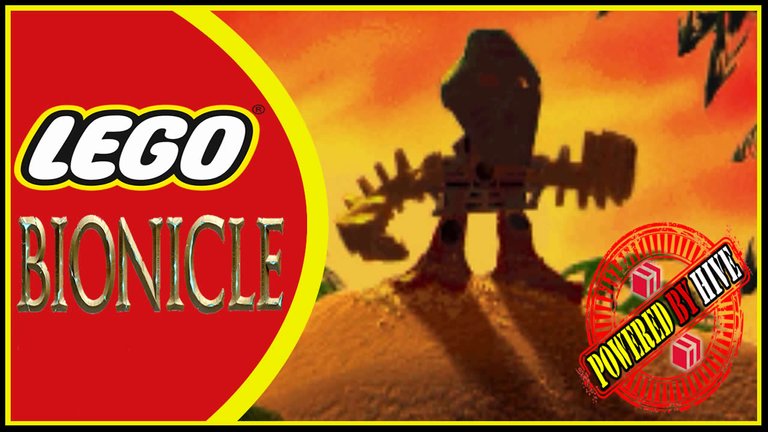
In 2001 Lego Bionicle: Quest for The Toa was released, which is an action-adventure video game that involves elements of platform gameplay quite marked. This video game was developed by the now defunct American video game company Saphire and was published by Lego Software for Nintendo's Game Boy Advance video game console. This video game is based on the line of Lego buildable action figures (Bionicle), which enjoyed great popularity and great sales successes in the 2000s among the various lines that the Lego toy company would have to its credit.
An important fact about Lego Bionicle: Quest for The Toa and the Bionicle line in general, is that it takes as major inspiration for the construction of all its Lore to the culture and various languages of the Polynesian islands, basing most of the names of the islands and characters in the Māori language. Due to its inspiration in the Polynesian is that we see that so marked island art throughout the Bionicle saga.


Mini-Guide #1
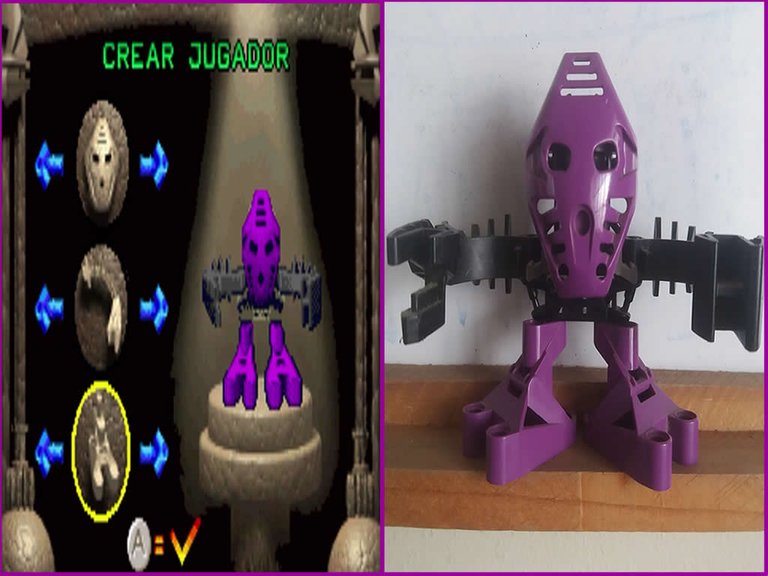
Our adventure begins with the young Takua, which we can rename to our liking at the time of starting a new game, to move to the selection and editing screen of our avatar, as shown in the image above. For a video game of 2001 for the Advance, I think it was a great success to include this ability to edit your avatar, being able to select between different colors for the mask, torso, arms and feet of the avatar, managing to offer a good number of customization options to the player.
Note: I customized my character taking as a reference the animated bionicle figure that I have since I was a child, which corresponds specifically to the Tohunga type Bionicle called Onepu. The truth, this caused me great satisfaction to be able to replicate almost perfectly this old action figure to my credit, as can be compared in the image above.
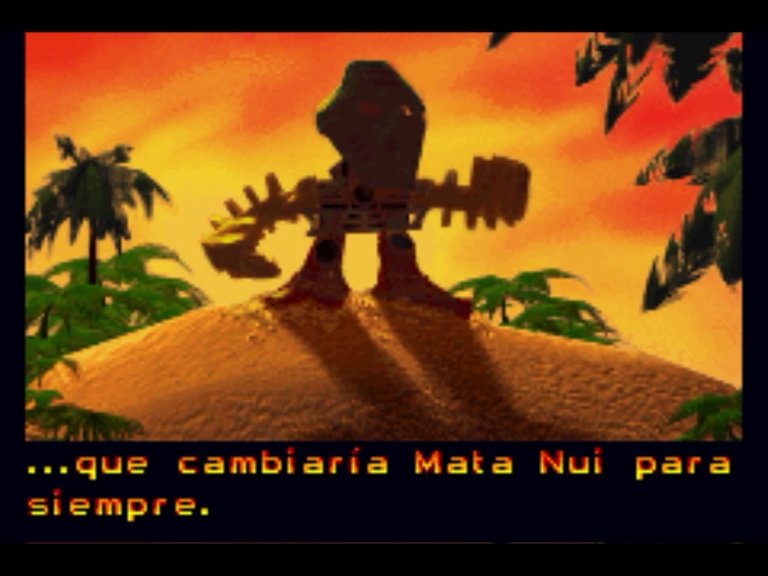
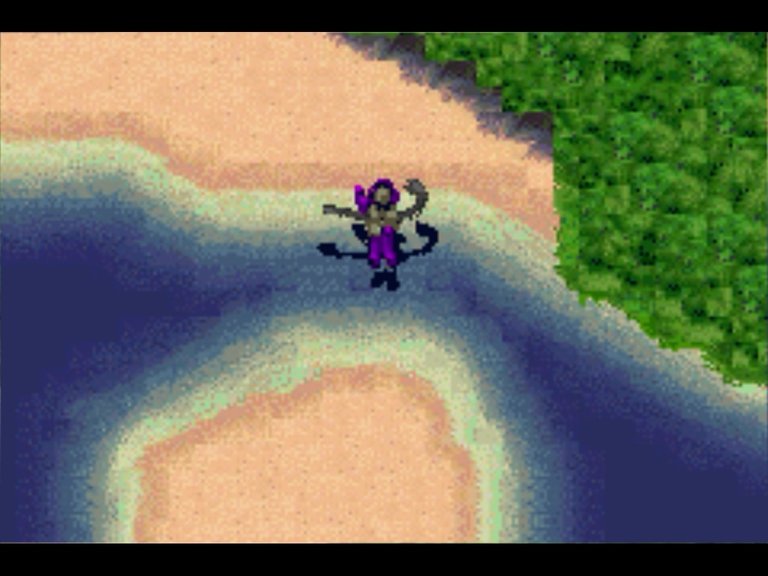
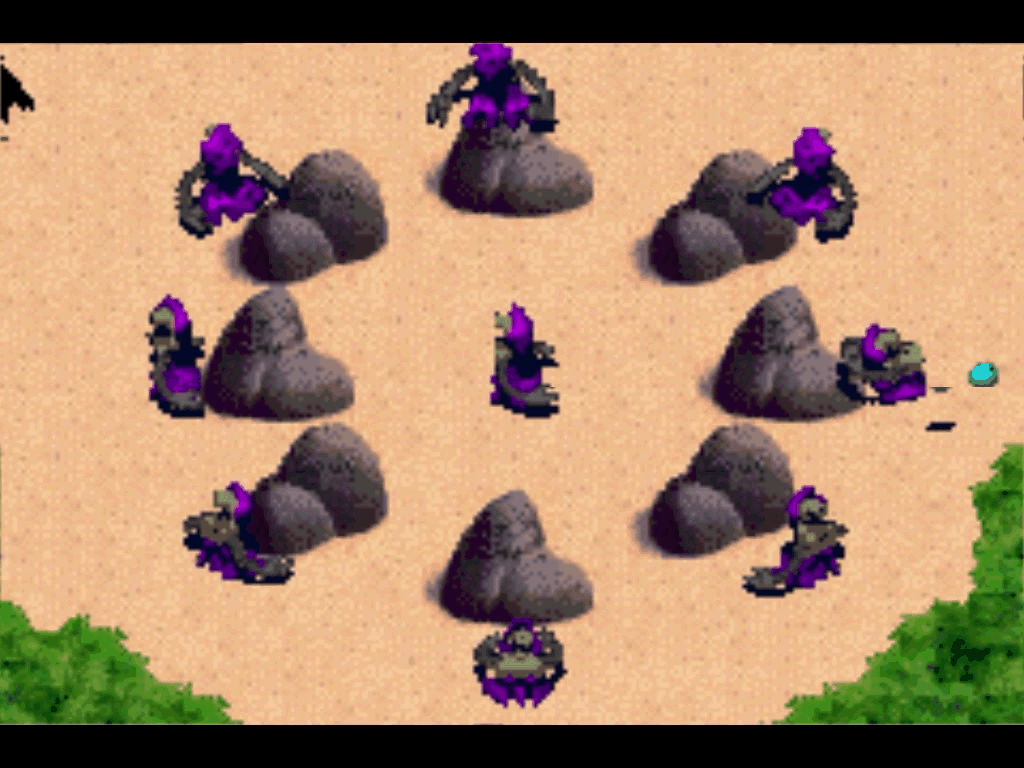
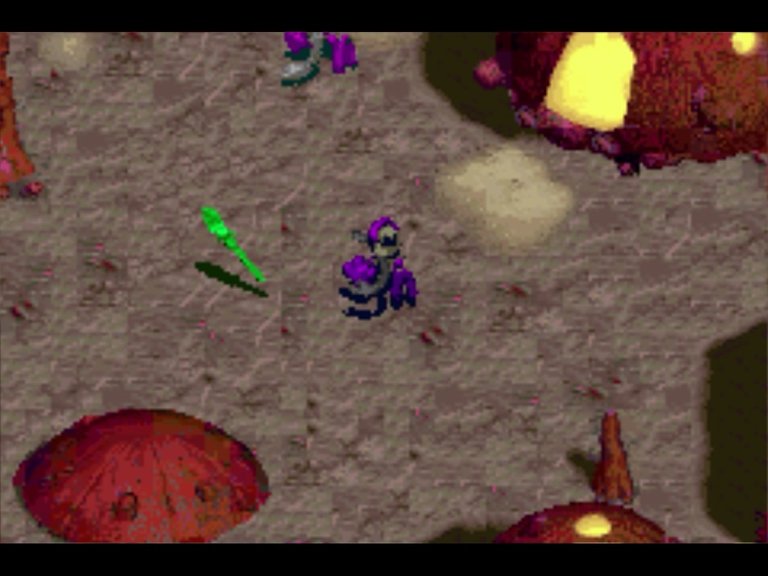
Right from the start we are shown the great tropical environment that characterizes the island of Mata Nui, where we briefly explain how a simple islander (our hero) would unknowingly initiate an important mission that would completely change the landscape of Mata Nui, an island that was under the oppressive yoke of the evil Makuta (main antagonist in this generation of Bionicle).
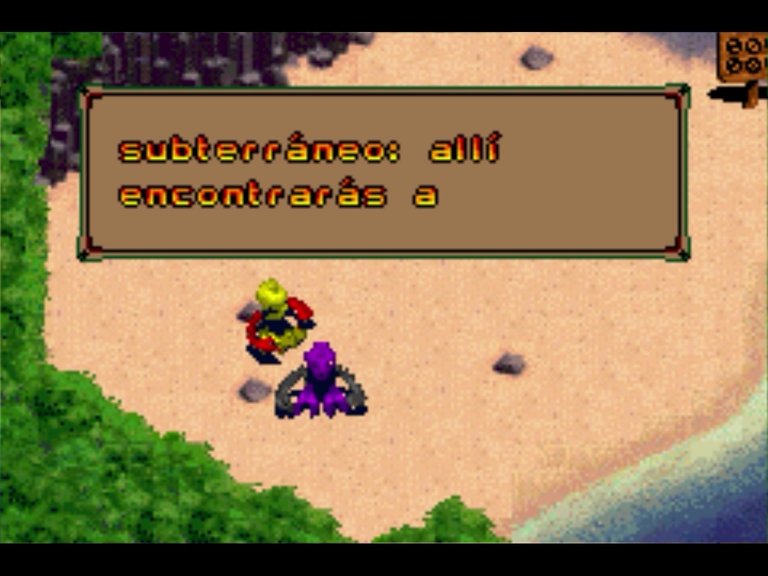
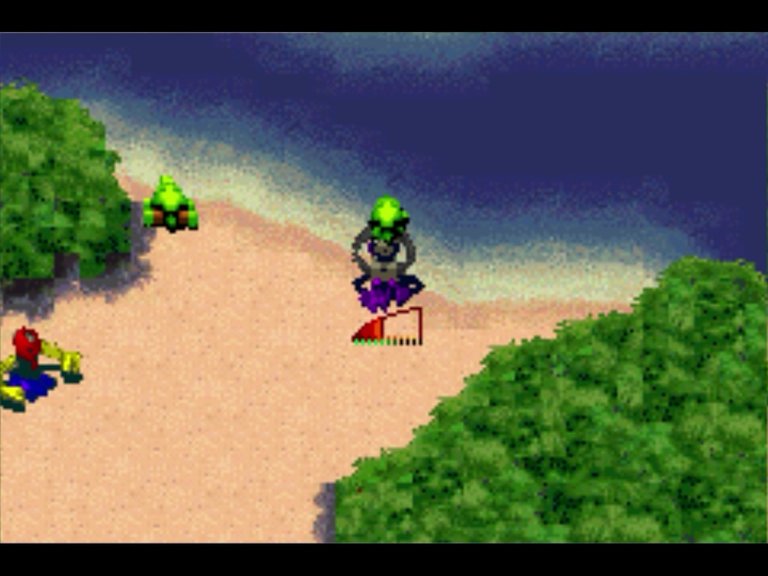
As we can see, we start on the coast of Mata Nui, where we will immediately meet an islander of similar class to our avatar, that is, a Tohunga, who will be giving us our first instructions.
a) The first thing to do is to go to the village of the old man Whenua, who is requesting our presence. While on the way you must read all the posters that you find because they contain important information about the gameplay of the game. Basically these posters play the role of the game's tutorial, in case you have not selected the training option when you start the game.
b) As I explained in the previous step, it won't be necessary to do the training by selecting the start option, since it is also in a new game, this way you won't have to repeat everything again.
c) The practice of jumping will be very important, because it is a skill that we will use very often during the course of the story, so I recommend you to practice a lot the jump in this first level, because as you can see in the gameplay, at the beginning it is a little difficult to get the hang of it.
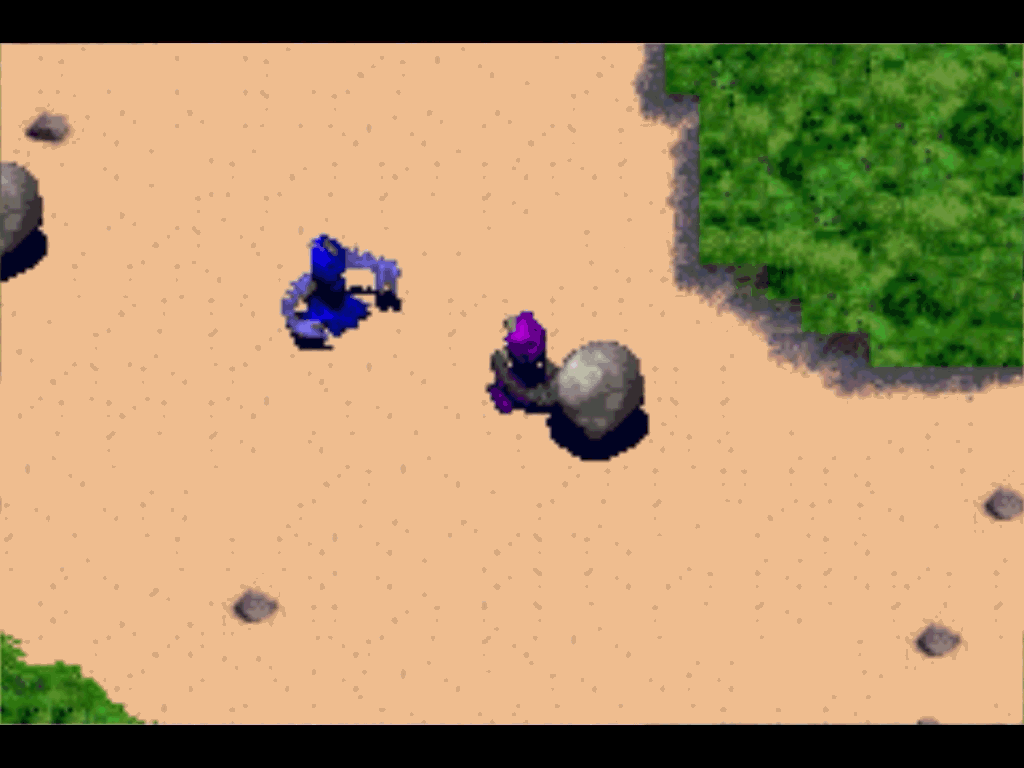
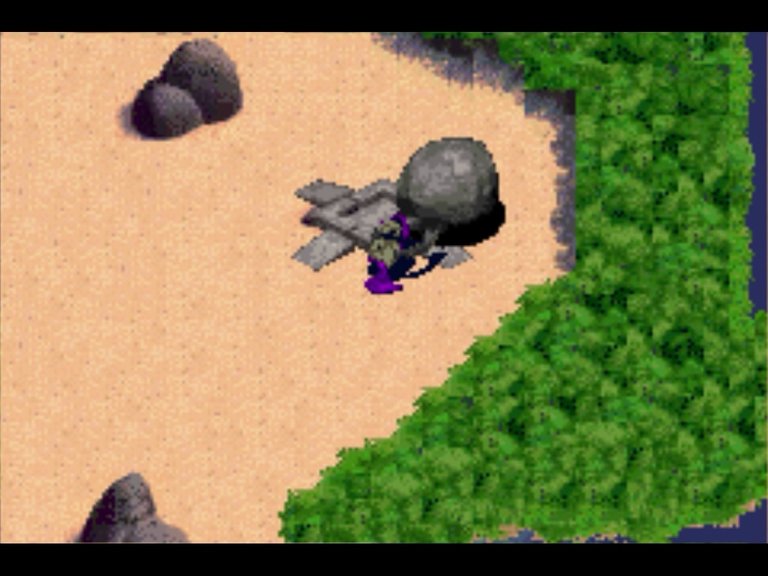
d) Pay attention to the villager whose color scheme is dominantly blue, he will be giving you important instructions about how to pick up objects -which in this case will be stones- and how to throw them, for this you will use the letter that you will have configured as A and then you will have to press it again to throw it. The distance and power of the throw will depend on the power indicator that will appear every time you are going to throw.
e) That kind of coconuts, known as Madu! fruit, will have the function of being our natural projectiles, and you can pick them up from the palm trees that you find on the island, you just have to approach the tree and press repeatedly A until the fruit begins to fall.
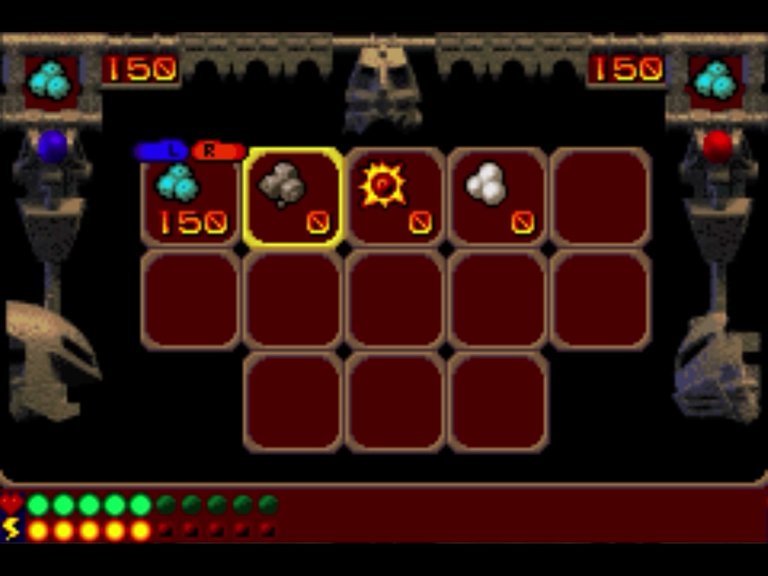
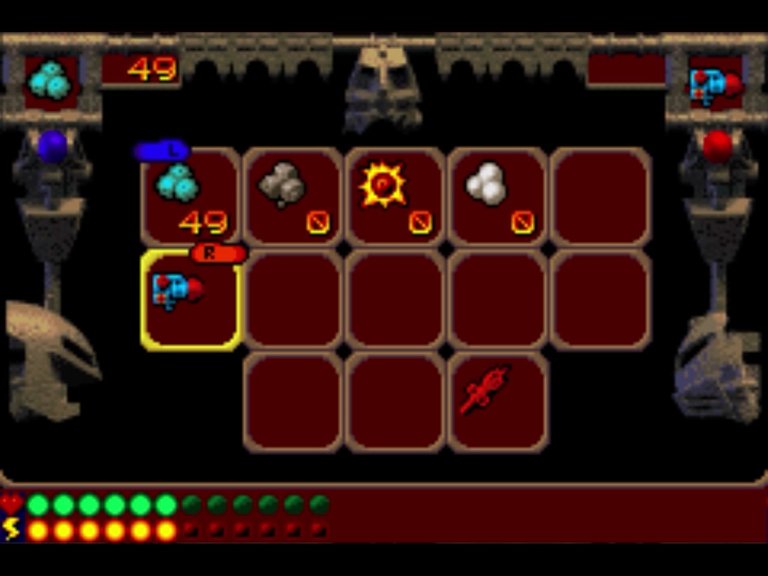
Another feature in the gameplay of Bionicle: Quest for the Toa, which I consider very nice when managing the resources obtained along the way, is the use of an inventory, which you can activate using "select" where among the different types of ammunition that you can throw, you can also select a variety of items such as power sticks and ranged hooks.
f) Don't skip the training where you will be assigned the task of throwing Madu! fruits at tohunga that look exactly like yours, and hit them with the fruit 20 times. This training is very important to get used to the controls of the game, which in my opinion tend to become somewhat cumbersome to use on many occasions.
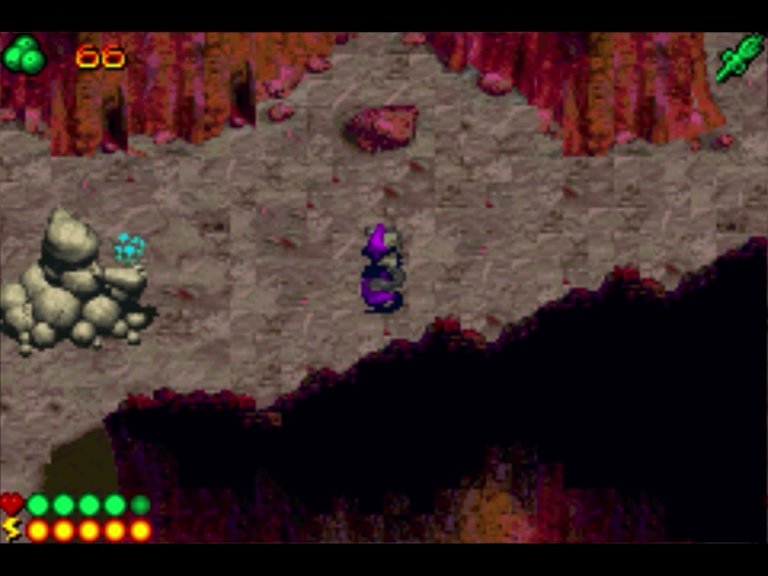
Another fellow Tohunga tells us that we can also lift the turtles in the same way that we can lift a medium-sized stone, and these are very important when crossing long distances over sea water, because we can use them as a kind of bridge. But you will always have to throw a Madu! fruit at the turtles to scare them so you can lift them up.
The last phase of the training is based on overcoming a puzzle with the help of stones of a larger size than the ones we threw previously, but these, unlike the others, can only be dragged due to their weight, but they are still useful when activating levels on the ground as it usually happens in this final part of the training.
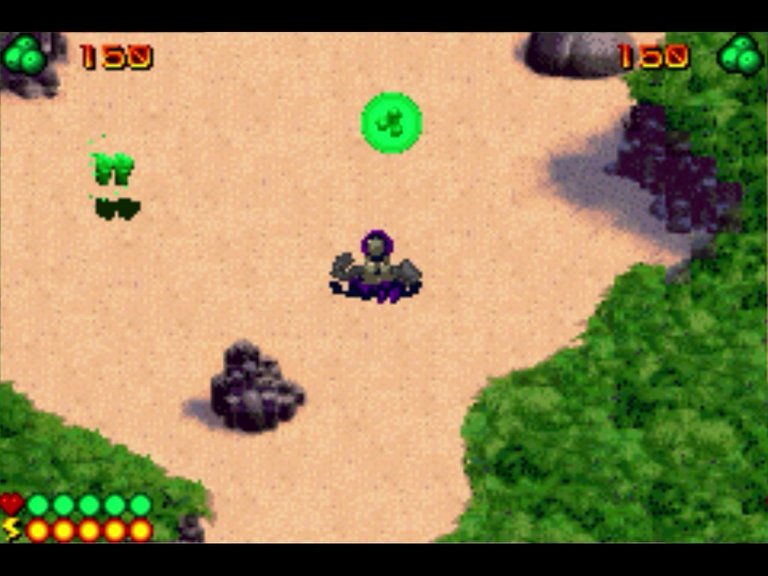
In the image above we can see what are the berries and fruits of the Vuata Maca Tree, which replenish health and energy respectively.
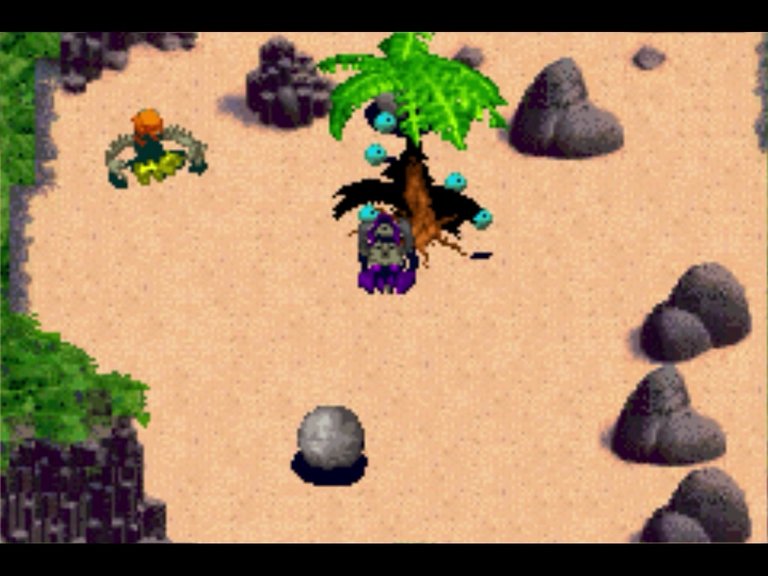
When we enter Whenua's cave, the villagers inform us that the old leader is kidnapped in the depths of the cave by the monster Vakuta, for which we will need to use the Vakama Fire Staff to light our way.
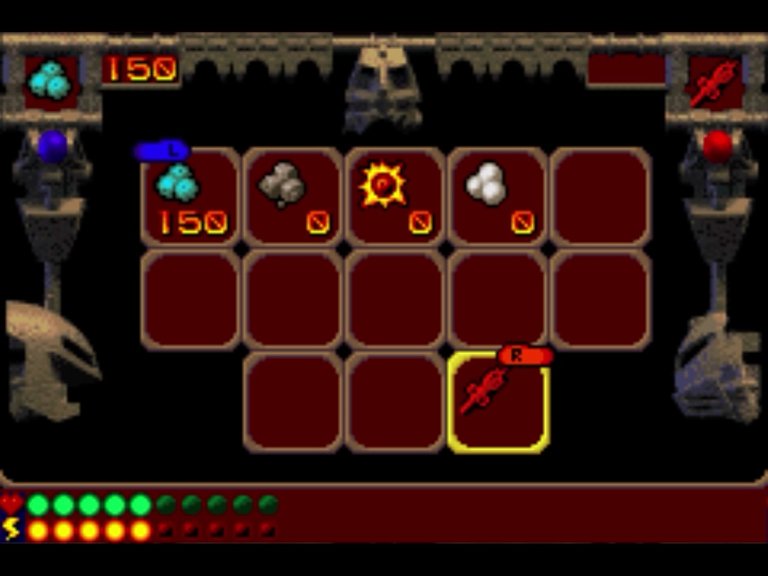
g) Before going to the east cave to rescue Whenua, you must equip Vakama's staff in the inventory, as shown in the image. I selected the R button to use it, but it is also possible to select the letter L to activate the staff.
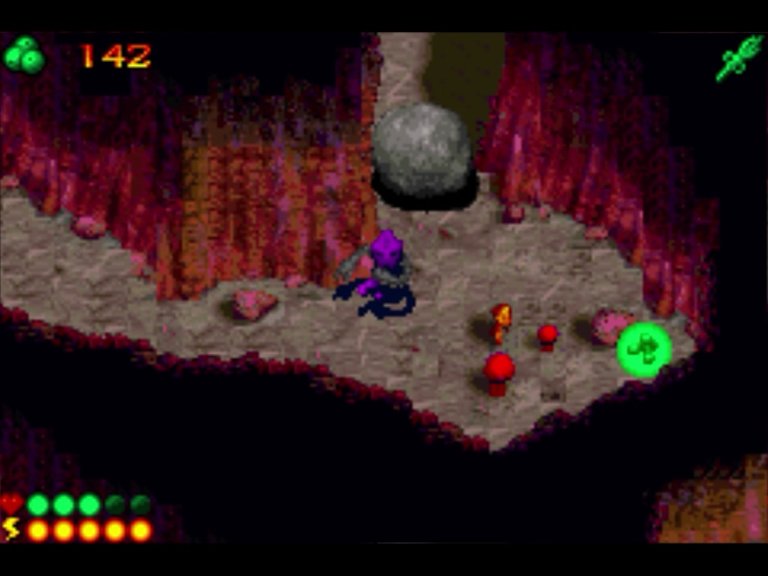
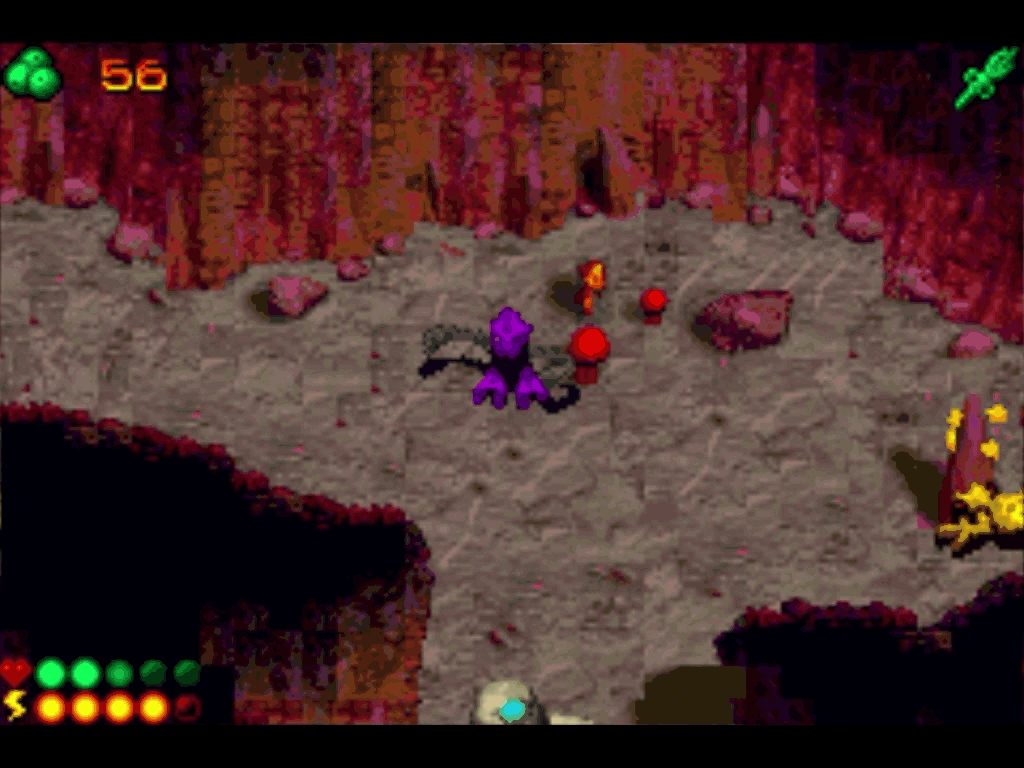
h) Once you enter the east cave, in addition to the enemies that are inside it, you must be very careful with the wandering stones that work as a kind of trap in some corners of the cave. In addition to the stones there are pointed pieces of stones that usually fall from the ceiling of the cave, but the trick to avoid being damaged by these pieces of stone is simply to be attentive to the ground, because these usually first show their shadow before falling and thus we can anticipate their place of fall. So be very attentive...
i) When you use the Fire Staff, you will stun all the monsters that dwell in the cave, and in addition to this, when these monsters are stunned you can carry them, just as if you were carrying a medium sized stone or one of the turtles seen during the training.
When we get to the place where the old man Whenua is imprisoned, immediately appears his jailer, that is the evil monster Vakuta, which is made entirely of rock, so it is very resistant to damage, but the trick to beat him I will be giving in the next item:
j) Use the staff to stun him and immediately attack him with Madu! fruits repeatedly, as this boss is quite resistant, but very slow, which gives us an excellent advantage over him.
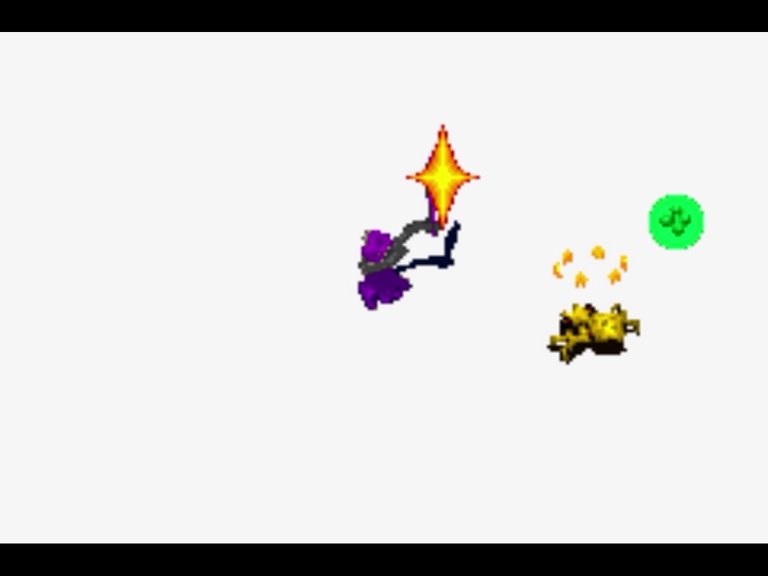
After rescuing the old man Whenua, he informs us of the theft of the sacred TOA stones, which are often used to tell the legends of the people of Mata Nui, and also informs us of the poisoning of the sacred Vuata Maca tree that is responsible for providing fruit and sustenance to the people of the island, so to restore health to the sacred tree, we must first get the two Vuata Maca crystals and return them to the tree.
At the end of the dialogue with the old leader, he gives us the Volo Lutu, which is a kind of mobile hook with which we can reach objects at a distance and is able to be equipped in the same way as the Fire Staff.
In this way I conclude this first episode and mini-guide of this wonderful game of Bionicle, soon we will continue the stories of the young Tohunga.
Thank you for reading :)
All the images & Gif's showed on this post are taken from my pc Screen and Cellphone camera.
This videogame is being emulated from Visualboyadvance-m.
Credits to the great Lego Toys company, and the Bionicle division for the development of this wonderful videogame and toys.


Introducción.
En el año 2001 salió a la venta Lego Bionicle: Quest for The Toa, el cual es un videojuego de acción y aventura que involucra elementos de juego de plataforma bastante marcados. Este videojuego fue desarrollado por la ya extinta compañia de videojuegos estadounidense Saphire y fue publicado por la compañía Lego Software para la consola de videojuegos de Nintendo, Game Boy Advance. Éste videojuego está basado en la línea de figuras de acción construibles de Lego (Bionicle), la cual gozó de mucha popularidad y grandes éxitos de ventas en la década de los 2000 entre las distintas líneas que la compañía de juguetes Lego tendría en su haber.
Un dato importante de Lego Bionicle: Quest for The Toa y de la línea de Bionicle en general, es que ésta toma como mayor inspiración para la construcción de todo su Lore a la cultura y diversos lenguajes de las islas polinesias, basando la mayoría de los nombres de las islas y personajes en el lenguaje Māori. Debido a su inspiración en las polinesias es que vemos ese tan marcado arte isleño en toda la saga Bionicle.
Mini-Guía #1
Nuestra aventura comienza con el joven Takua, el cual podremos renombrar a nuestro gusto al momento de iniciar una nueva partida, para así pasar a la pantalla de selección y edición de nuestro avatar, tal como se muestra en la imagen de arriba. Para ser un videojuego del año 2001 para la Advance, creo que fue un gran acierto incluir esta capacidad de edición de tu avatar, pudiendo seleccionar entre distintos colores para la máscara, torso, brazos y pies del avatar, logrando ofrecer un buen número de opciones de personalización al jugador.
Nota: Mi personaje lo personalicé tomando como referencia a la figura animada de bionicle que conservo desde que era un niño, el cual corresponde específicamente al Bionicle tipo Tohunga llamado Onepu. La verdad me causó una gran satisfacción el poder replicar casi a la perfección a esta vieja figura de acción en mi haber, tal cual como se puede comparar en la imagen de arriba.
De buenas a primeras se nos muestra el gran ambiente tropical que tanto caracteriza a la isla de Mata Nui, en donde brevemente se nos explica como un simple isleño (nuestro héroe) iniciaría sin saberlo una importante misión que cambiaría por completo el panorama de Mata Nui, isla que se encontraba bajo el yugo opresor del malvado Makuta (Antagonista principal en esta generación de Bionicle).
Como podremos ver, comenzamos en una costa de Mata Nui, en donde inmediatamente nos toparemos con un isleño de similar clase que nuestro avatar, es decir un Tohunga, que nos estará dando nuestras primeras instrucciones.
a) Lo primero es dirigirse hacia la aldea del anciano Whenua, el cual se encuentra requiriendo nuestra presencia. Mientras en el camino debes leer todos los carteles que te encuentres debido a que estos contienen importante información acerca del gameplay del juego. Básicamente estos carteles hacen el papel de tutorial del juego, en caso de que no lo hayas seleccionado la opción de entrenamiento al momento de iniciar el juego.
b) Como expliqué en el paso anterior, no será necesario que realices el entrenamiento seleccionando la opción del inicio, ya que él mismo se encuentra también en una nueva partida, de esta forma no tendrás que repetir todo nuevamente.
c) La práctica del salto será muy importante, ya que es una habilidad que usaremos muy a menudo durante el transcurso de la historia, por ello te recomiendo practicar mucho el salto en este primer nivel, porque como podrás ver en el gameplay, al principio cuesta un poco tomarle el hilo.
d) Atento al aldeano cuyo esquema de colores es dominantemente azul, éste te estará dando importantes instrucciones acerca de cómo recoger objetos --que en este caso serán piedras—y cómo lanzarlos, para ello utilizarás la letra que tendrás configurada como A y luego deberás apretarla nuevamente para lanzarla. La distancia y potencia que tendrá dicho lanzamiento dependerá del indicador de potencia que aparecerá cada vez que vayas a realizar un lanzamiento.
e) Esa especie de cocos, conocidos como la fruta ¡Madu!, tendrán la función de ser nuestros proyectiles naturales, y podrás recogerlos de las arboles de palmeras que encuentres en la isla, solo deberás de acercarte a dicho árbol y apretar repetidamente A hasta que la fruta comience a caer.
Otra característica en el gameplay de Bionicle: Quest for the Toa, que considero muy agradable al momento de gestionar los recursos obtenidos a través del camino, es el uso de un inventario, que puedes activar usando “select” en donde entre los distintos tipos de munición que podrás lanzar, también podrás seleccionar una gran variedad de ítems como bastones de poder y ganchos a distancia.
f) No te saltes el entrenamiento en donde se te asignará como tarea lanzar a los tohunga con exacta apariencia a la tuya, las frutas ¡Madu!, e impactarlos con dicha fruta en 20 ocasiones. Este entrenamiento es muy importante para acostumbrarse a los controles del juego, que en mi opinión suelen tornarse algo engorrosos de usar en muchas ocasiones.
Otro compañero Tohunga nos indica que también podemos levantar a las tortugas de igual manera que podemos levantar una piedra mediana, y estas son muy importantes a la hora de cruzar distancias largas sobre el agua del mar, debido a que las podemos utilizar como una suerte de puente. Pero siempre tendrás que lanzar una fruta ¡Madu! a las tortugas para asustarlas y así poder levantarlas.
La última fase del entrenamiento está basada en superar un puzzle con la ayuda de unas piedras de tamaño mayor a las que lanzamos anteriormente, pero estas a diferencia de las otras, solo se pueden arrastrar debido a su peso, pero aun así son útiles a la hora de activar niveles en el suelo como suele suceder en este tramo final del entrenamiento.
En la imagen superior podemos observar lo que son las bayas bulas y frutas del Arbol Vuata Maca, las cuales reponen salud y energía respectivamente.
Al momento de entrar en la cueva de Whenua, los aldeanos nos informan que el anciano líder se encuentra secuestrado en las profundidades de la cueva por el monstruo Vakuta, para lo cual necesitaremos usar el Bastón de fuego Vakama para de esta forma iluminar nuestro camino.
g) Antes de ir a la cueva del este para rescatar a Whenua, debes equiparte el bastón de Vakama en el inventario, tal cual como es mostrado en la imagen. Yo seleccioné el botón R para usarlo, pero también es posible seleccionar la letra L para accionar dicho Bastón.
h) Una vez adentrado en la cueva del este, además de los enemigos que se encuentran dentro de ésta, debes de tener mucho cuidado con las piedras errantes que funcionan como una suerte de trampa en algunas esquinas de la cueva. Además de las piedras se encuentran trozos de piedras puntiagudos que suelen caer del techo de la cueva, pero el truco para evitar ser dañado por estos trozos de piedra es sencillamente estar atento al suelo, debido a que estos suelen mostrar primero su sombra antes de caer y de esta forma podemos anticipar su lugar de caída. Así que muy atentos…
i) Cuando uses el Bastón de fuego, dejarás aturdido a todos los monstruos que moran en la cueva, y además de esto, cuando dichos monstruos se encuentren aturdidos podrás cargar con ellos, tal cual como si cargaras una piedra de tamaño medio o una de las tortugas vistas durante el entrenamiento.
Cuando llegamos al sitio donde se encuentra encarcelado el anciano Whenua, inmediatamente aparece su carcelero, es decir el malvado monstruo Vakuta, el cual se encuentra hecho totalmente de roca, por lo tanto es muy resistente al daño, pero el truco para vencerlo lo estaré dando en el siguiente ítem:
j) Utilizar el bastón para aturdirlo e inmediatamente atacarlo con las frutas Madu! en repetidas ocasiones, ya que éste boss es bastante resistente, pero muy lento, lo cual nos brinda una excelente ventaja por sobre él.
Luego de rescatar al anciano Whenua, éste nos informa del hurto de las sagradas piedras TOA, que suelen ser utilizadas para contar las leyendas del pueblo de Mata Nui, así como también se nos informa del envenenamiento del sagrado árbol Vuata Maca que se encarga de dar frutos y servir de sustento al poblado de la isla, por lo que para devolver la salud al sagrado árbol, debemos conseguir primero los dos cristales Vuata Maca y retornarlos al árbol.
Al concluir con el dialogo con el anciano líder, éste nos obsequia el Volo Lutu, que es una especie de gancho móvil con el cual podremos alcanzar objetos a la distancia y es capaz de equiparse de la misma forma que el Bastón de fuego.
De esta forma doy por concluida este primer episodio y mini-guía de este maravilloso juego de Bionicle, pronto continuaremos las historias del joven Tohunga.
Gracias por leerme :)
Todas las imagenes & Gif's mostrados en este post son tomadas desde el escritorio de mi PC y cámara de celular.
Este videojuego está siendo emulado a través del emulador Visualboyadvance-m.
Créditos a la gran compañia de juguetes Lego y a su división Bionicle por crear tan excelente videojuego y linea de juguetes.

This original content is powered by
Este contenido original esta potenciado por:
▶️ Watch on Youtube
Cuantos recuerdos de estas figura Lego y el videojuego del mismos. lo jugaba bastante pero nunca lo termine
Claro amigo KuronoKenshi, estos tipos de Lego Bionicle (Tohunga) fueron los que solían regalarnos en las cajitas felices de McDonald's ja ja. Saludos, y muchas gracias por pasarte por mi post, amigo.
Posted via D.Buzz
https://twitter.com/paultacticoofi/status/1511222290859577344
The rewards earned on this comment will go directly to the person sharing the post on Twitter as long as they are registered with @poshtoken. Sign up at https://hiveposh.com.