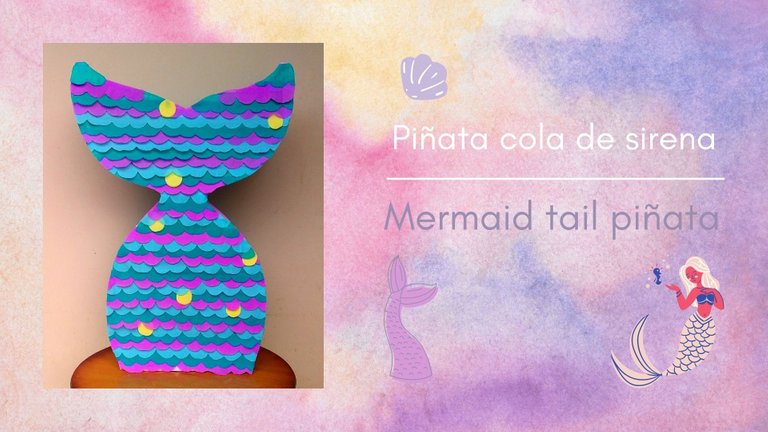
[ESP/ENG] 🐟 🐚 Haciendo una piñata cola de sirena | Making a mermaid tail piñata 🐚 🐟
🐚 BIENVENIDOS A MI BLOG | WELCOME TO MY BLOG 🐚
Saludos a la linda comunidad de hive! espero se encuentren muy bien. Estos días estuve un poco ausente por varios motivos y ya los empezaba a extrañar. Hoy quiero compartirles el proceso de cómo realicé una piñata cola de sirena para el cumpleaños de una prima. Es la primera piñata que hago, así que si tienen algunas recomendaciones me gustaría muchísimo leerlas en los comentarios.
Sin nada más que decir, empecemos. 🐟
Greetings to the beautiful hive community! I hope you are doing well. These days I was a little absent for various reasons and I was beginning to miss you. Today I want to share with you the process of how I made a mermaid tail piñata for a cousin's birthday. It's the first piñata I've made, so if you have any recommendations I'd love to read them in the comments.
With nothing more to say, let's get started. 🐟
Materiales | Materials:
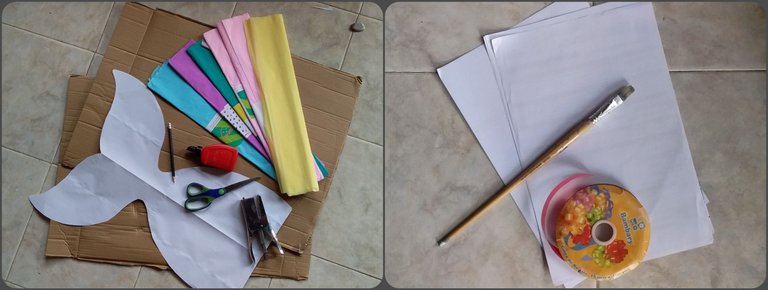
| Papel crepé (colores surtidos) | Grapadora | Tijeras |
|---|---|---|
| Pega | Lápiz | Cartón |
| Plantilla | Hojas de papel | Cinta |
| Pincel |
| Crepe paper (assorted colors) | Stapler | Scissors |
|---|---|---|
| Glue | Pencil | Cardboard |
| Stencil | Sheets of paper | Ribbon |
| Brush |
🐚 Proceso | Process 🐚
Paso 1 | Step 1
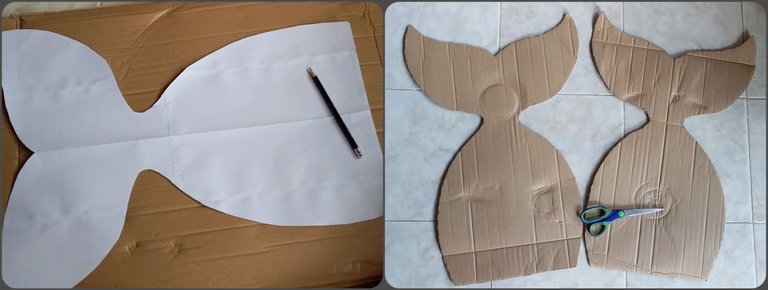
Lo primero que haremos será ubicar nuestra plantilla sobre un trozo grande cartón y marcarla con un lápiz, luego cortamos y repetimos el proceso para tener dos piezas iguales.
The first thing we will do is to place our template on a large piece of cardboard and mark it with a pencil, then cut and repeat the process to have two equal pieces.
Paso 2 | Step 2
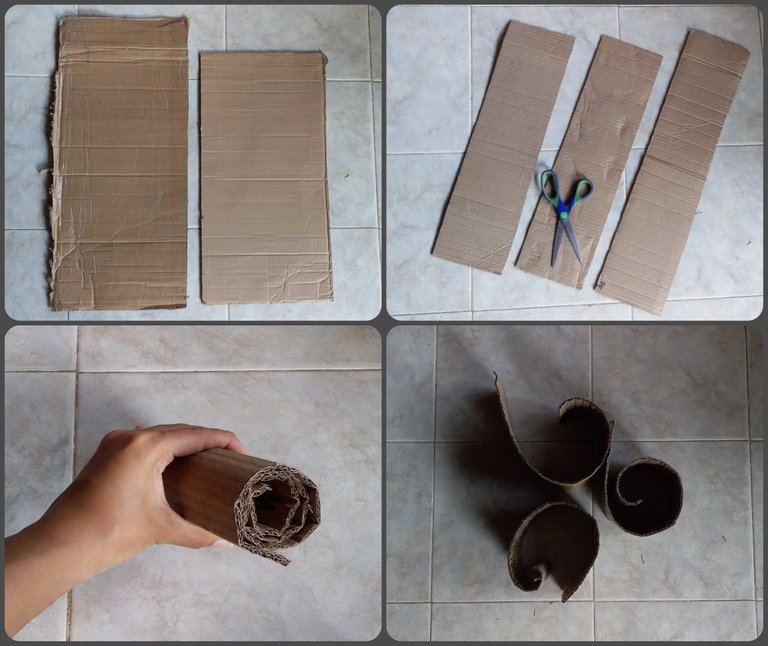
Lo siguiente será cortar varias tiras de cartón (todas deben tener la misma medida de ancho) y enrollarlas de ambos lados para que tengan mayor movilidad.
The next step is to cut several strips of cardboard (they should all have the same width) and roll them up on both sides for greater mobility.
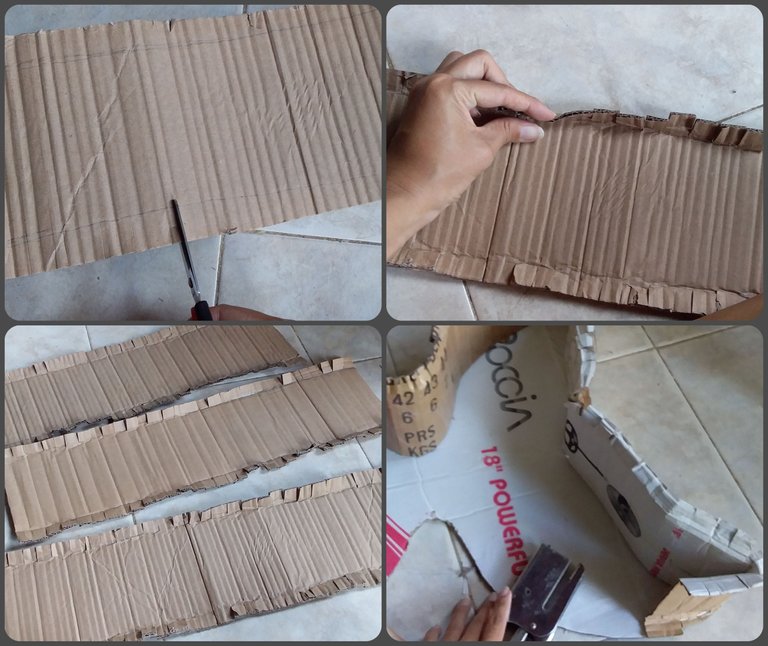
Haremos unos pequeños cortes a los lados, doblaremos para formar unas pestañas y empezamos a graparla a una de las piezas sacadas con la plantilla.
Nota: Con un lápiz puedes trazar una línea guía en las tiras de cartón para saber hasta donde cortar, doblar y así quedar parejas.
We will make a few small cuts on the sides, fold to form tabs and begin to staple it to one of the pieces taken out with the template.
Note: With a pencil you can draw a guide line on the cardboard strips to know where to cut, fold and thus be even.
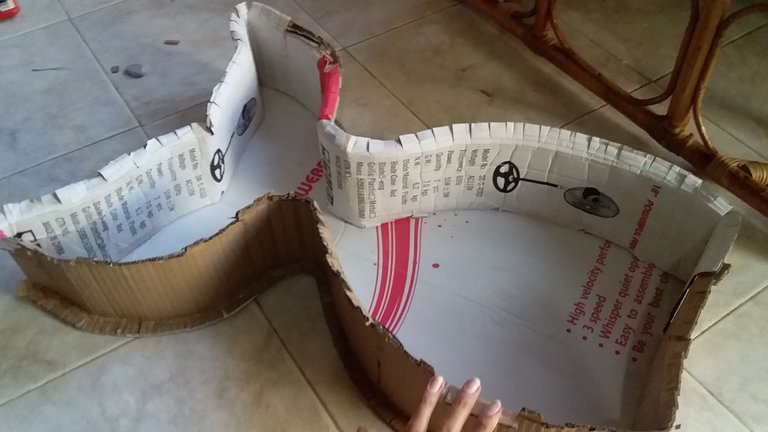
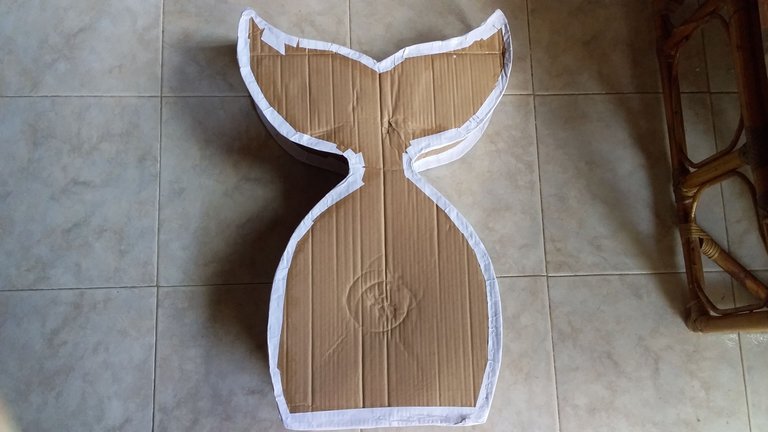
Al terminar, deberá verse algo así.
When finished, it should look something like this.
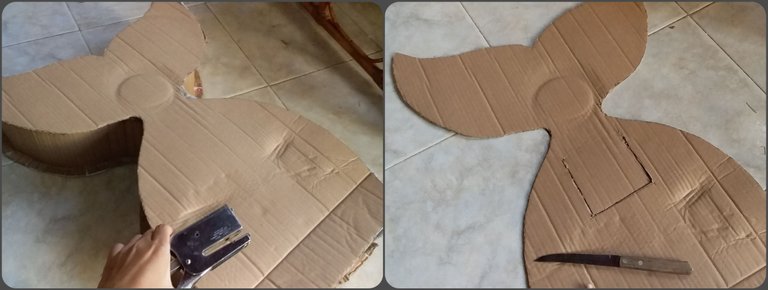
Antes de grapar la otra pieza de cartón, recomiendo hacerle un corte (como especie de puerta) para que sea más fácil llenar la piñata.
Before stapling the other piece of cardboard, I recommend making a cut (as a kind of door) to make it easier to fill the piñata.
Paso 3 | Step 3
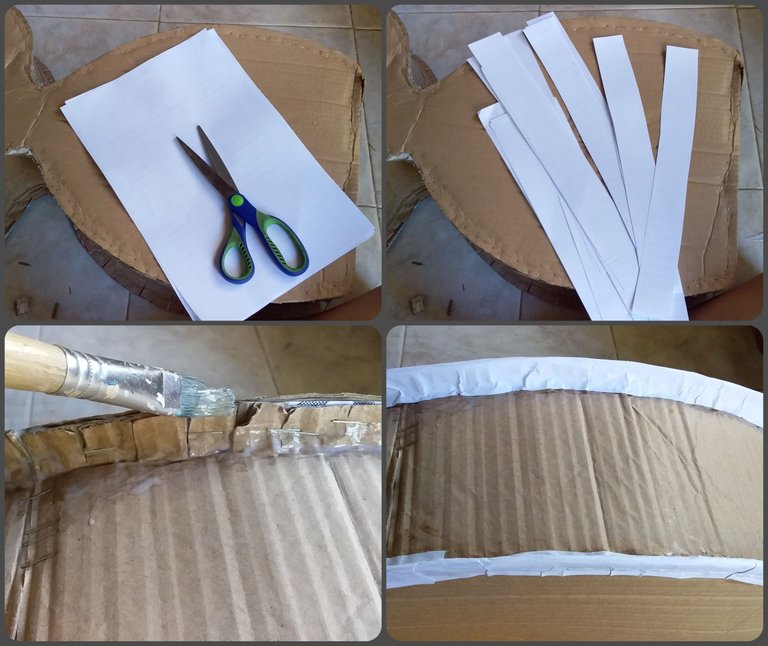
Para este paso tomaremos unas cuantas hojas de papel y las cortaremos en tiras, aplicamos un poco de pega en los bordes y las pegaremos.
For this step we will take a few sheets of paper and cut them into strips, apply some glue on the edges and glue the strips together.
Así es como queda.
This is how it looks.
Paso 4 | Step 4
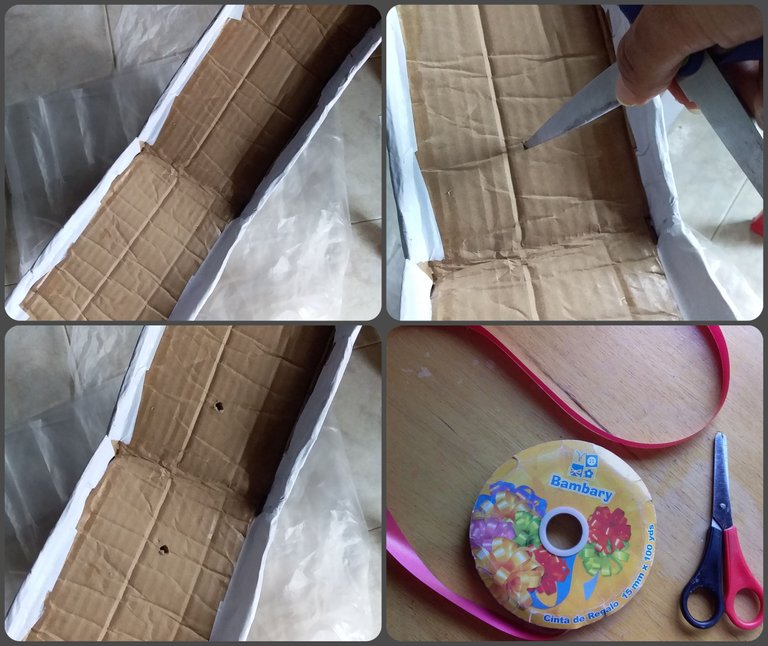
Para colgarla perforaremos la parte de arriba con unas tijeras y cortaremos un trozo de cinta.
To hang it we will pierce the top with scissors and cut a piece of ribbon.
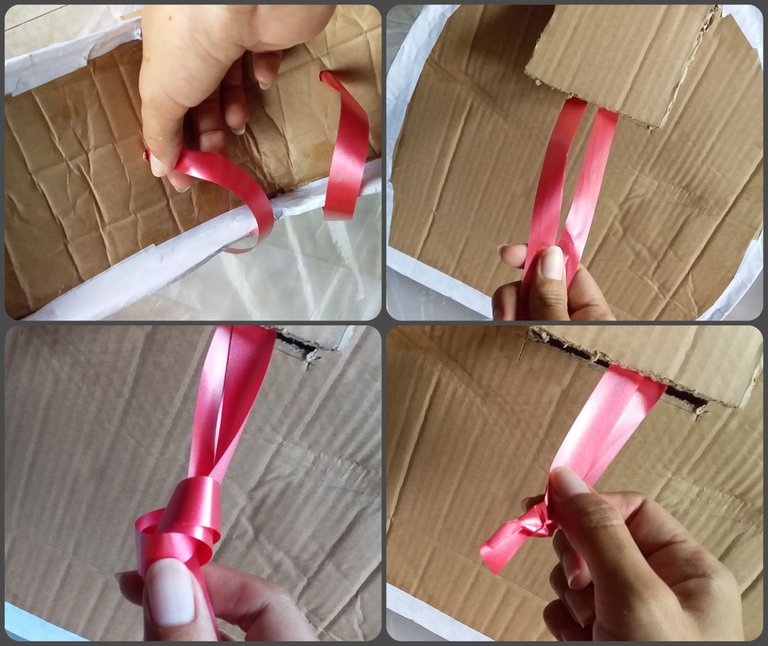
Pasaremos la cinta por las perforaciones y sacamos los extremos por el orificio que hicimos anteriormente. Para asegurarlo, ataremos un nudo.
Pass the ribbon through the perforations and pull the ends through the hole we made earlier. To secure it, tie a knot.
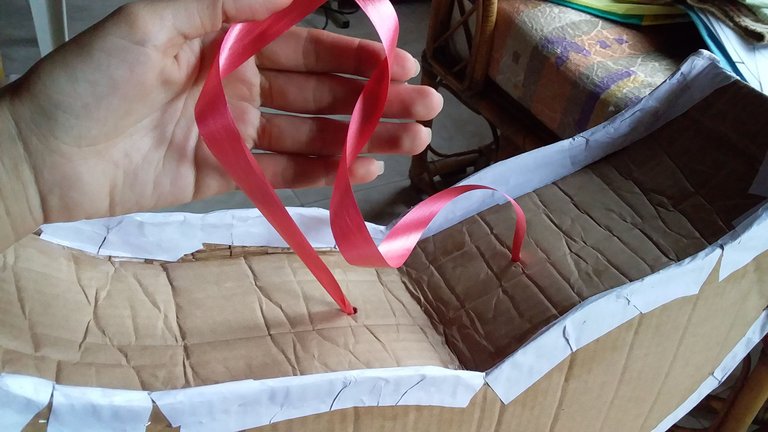
Jalamos por arriba y se verá asi.
Pull from the top and it will look like this.
Paso 5 | Step 5
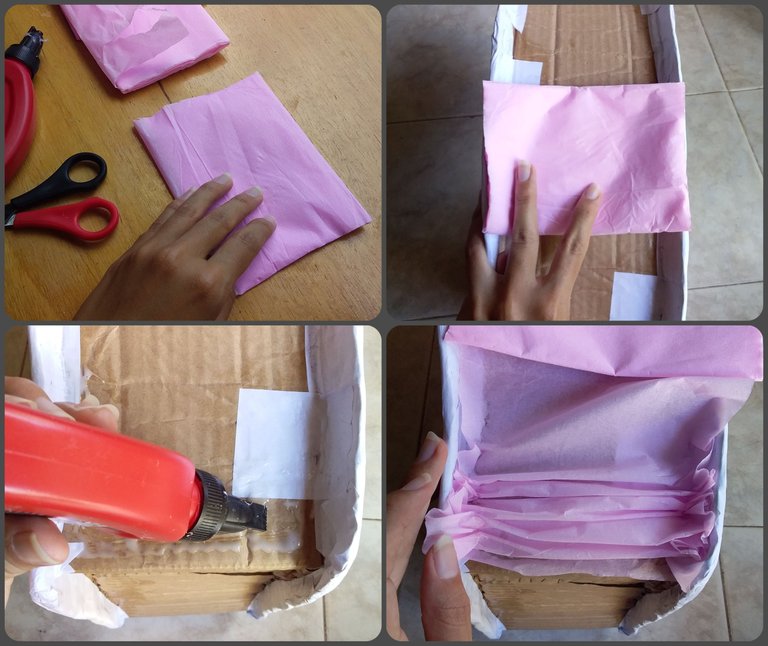
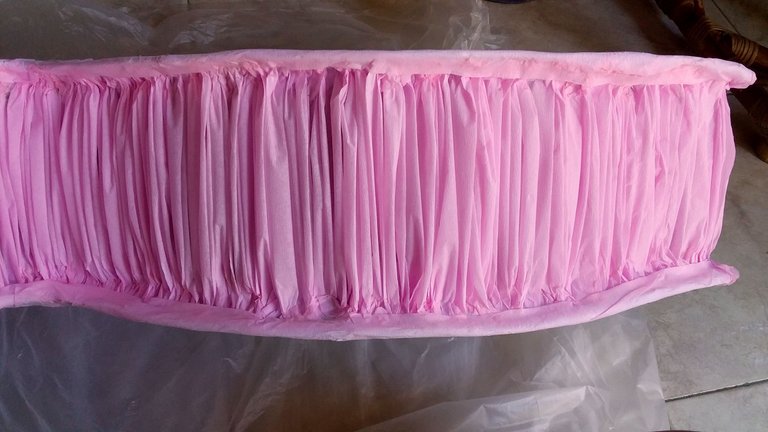
Ahora empezaremos a forrar por los lados con papel crepé. Cortaremos un pedazo un poco más ancho que la piñata e iremos pegando poco a poco, formando pequeños pliegues.
Now we will start lining the sides with crepe paper. We will cut a piece a little wider than the piñata and we will glue it little by little, forming small folds.
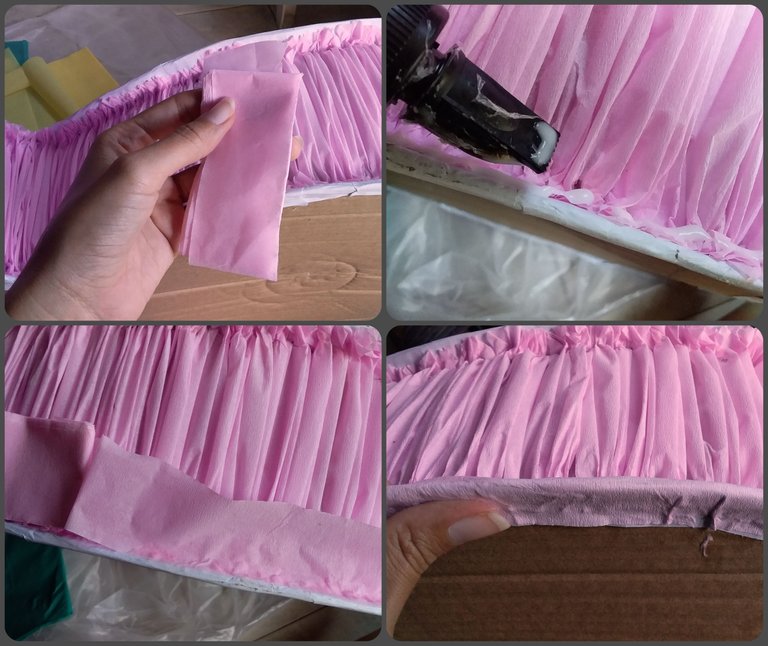
Luego de llenar todo, taparemos el excedente con un trozo de papel y así tendrá un mejor acabado.
After filling everything, we will cover the excess with a piece of paper so it will have a better finish.
Paso 6 | Step 6
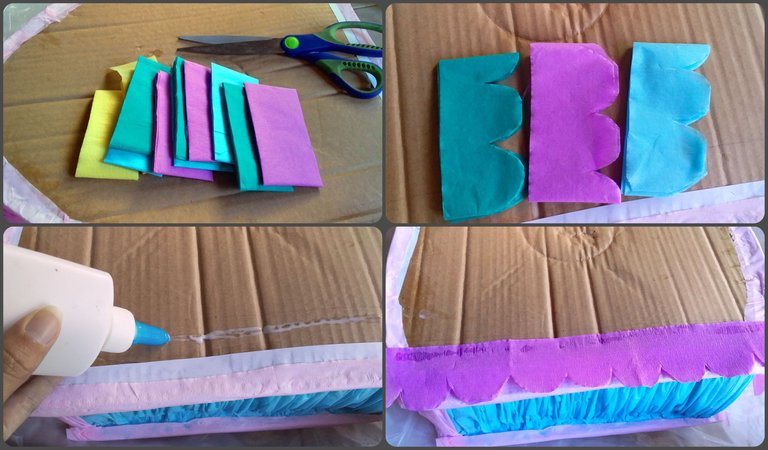
Ahora le daremos una forma redondeada a varias tiras de papel crepé para simular las escamas (como se ve en la foto). Pegaremos de abajo hacia arriba, capa por capa hasta llenar todo
Now we will give a rounded shape to several strips of crepe paper to simulate the scales (as shown in the photo). We will glue from bottom to top, layer by layer until we fill everything.
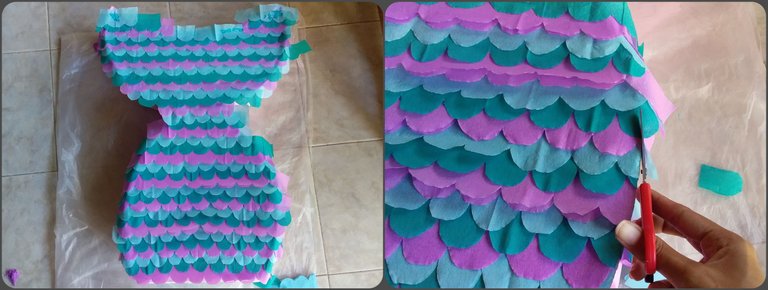
Una vez terminado, cortamos los excedentes y listo!
Once finished, we cut off the excess and that's it!
🐚 Resultado | Result 🐚
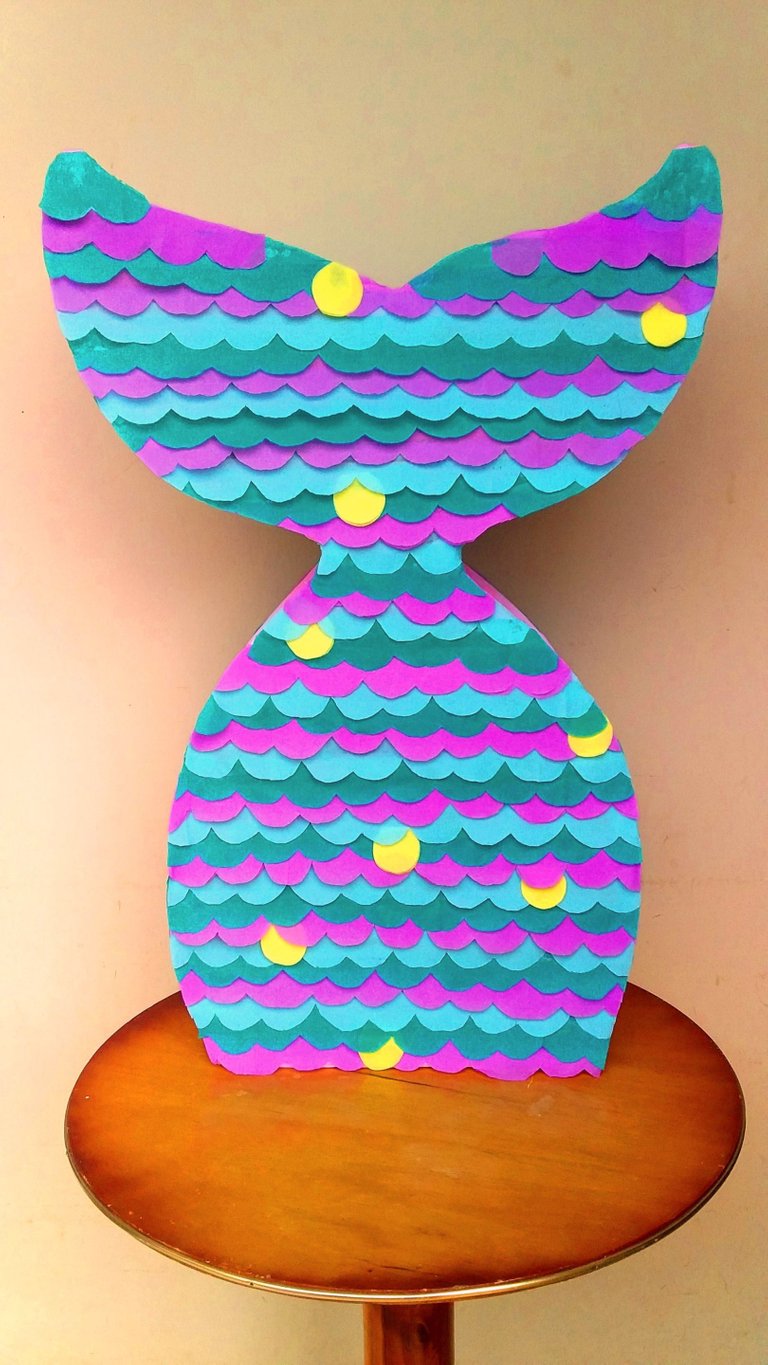
Este es el resultado final, el cual me gustó un montón. Espero les haya gustado y que me dejen sus comentarios!
This is the final result, which I liked a lot. I hope you liked it and leave me your comments!