[ESP/ENG]🥚🍳 Haciendo una boina de Gudetama! | Making a Gudetama beret!🍳🥚

Bienvenidos | Welcome
Holaa de nuevo, gente linda de Hive, espero que se encuentren muy bien. El día de hoy les traigo un tutorial donde les mostraré el proceso de cómo hice una preciosa boina.😍 Tenía esta tela de fieltro amarilla desde hace un tiempo y no encontraba qué hacer con ella, hasta que se me ocurrió hacer una boina, pero no quería algo tan simple, quería darle un toque especial 🤔 así que buscando ideas en pinterest encontré este modelo de Gudetama que me pareció de lo más divertida y linda. Espero que les guste mucho y lo hagan en casita.🍳🥚 Sin más qué decir, comencemos.
Hello again, beautiful people of Hive, I hope you are feeling great. Today I bring you a tutorial where I will show you the process of how I made a beautiful beret.😍 I had this yellow felt fabric for a while and I couldn't find what to do with it, until it occurred to me to make a beret, but I didn't want something so simple, I wanted to give it a special touch 🤔 so looking for ideas on pinterest I found this model of Gudetama that I found the most fun and cute. I hope you like it a lot and make it at home.🍳🥚 Without more to say, let's start.
Materiales | Materials:
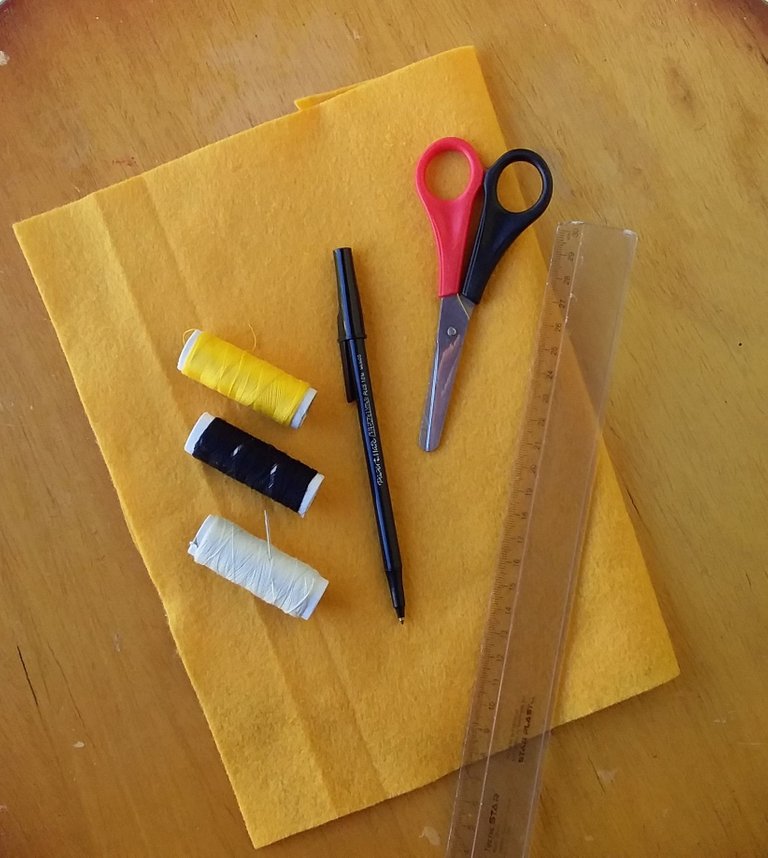
| Fieltro amarillo | Hilos y aguja | Lápiz |
|---|---|---|
| Regla | Tijeras |
| Yellow felt | Threads and needle | Pencil |
|---|---|---|
| Ruler | Scissors |
🥚Proceso | Process🥚
Paso 1 | Step 1
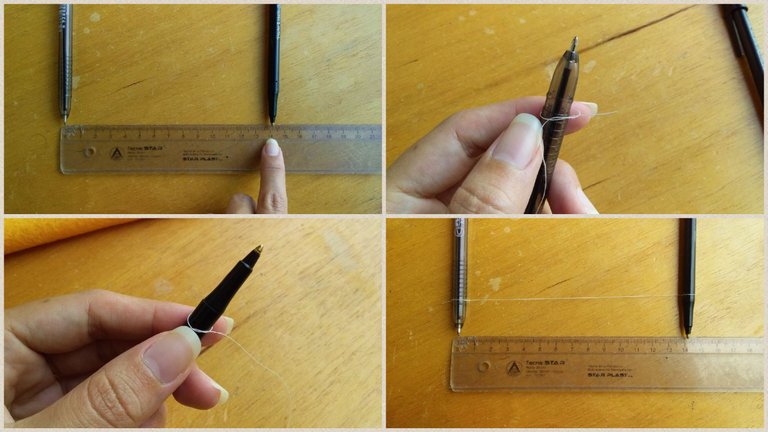
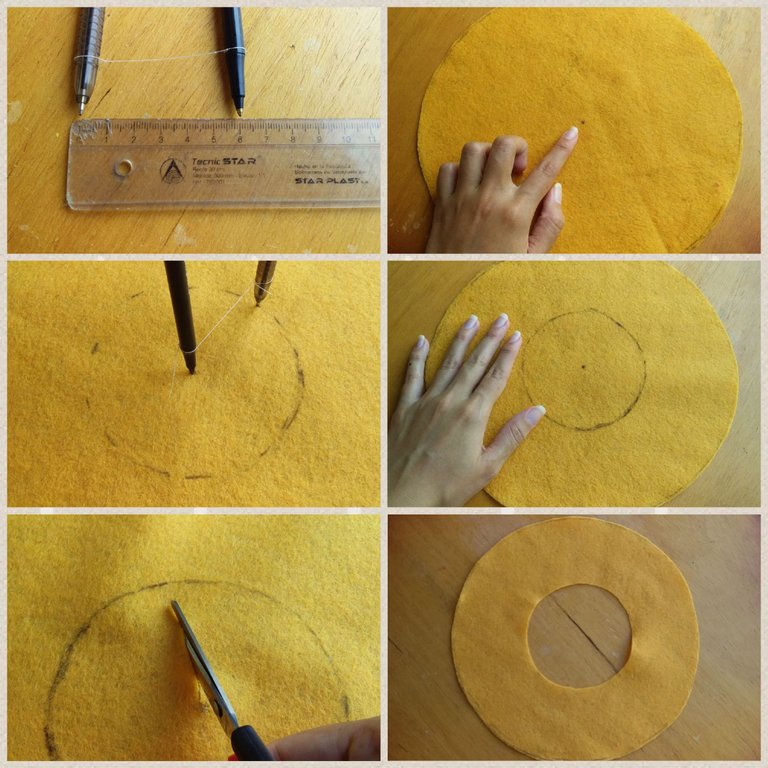
Bueno, lo primero que hice fue improvisar un compás porque no tenía uno en casa.😅😂😂
Tomé 2 lápices y una regla, puse uno de los lápices sobre el 0cm y el otro donde marcaba los 14cm, até un trozo de hilo en cada extremo intentando que quededara lo más tenso posible y listo. 😁
Well, the first thing I did was to improvise a compass because I didn't have one at home 😅😂😂😂.
I took 2 pencils and a ruler, I put one of the pencils on the 0cm and the other one where it marked the 14cm, I tied a piece of thread at each end trying to keep it as taut as possible and that was it. 😁
Paso 2 | Step 2
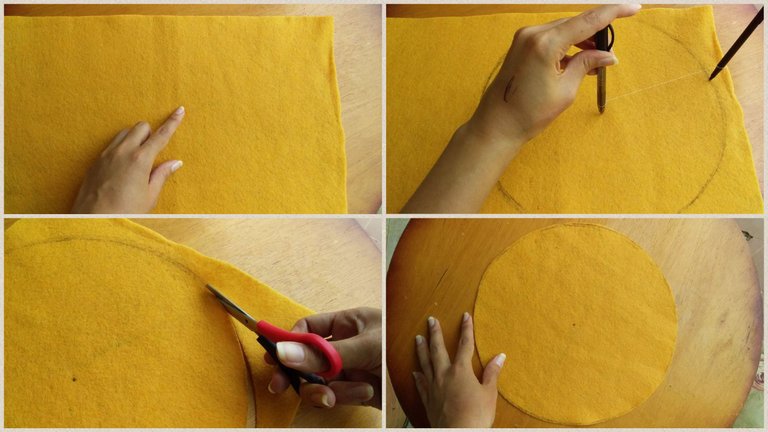
Empecé a trazar un círculo sobre la tela y luego lo recorté.
I started tracing a circle on the fabric and then cut it out.
Paso 3 | Step 3
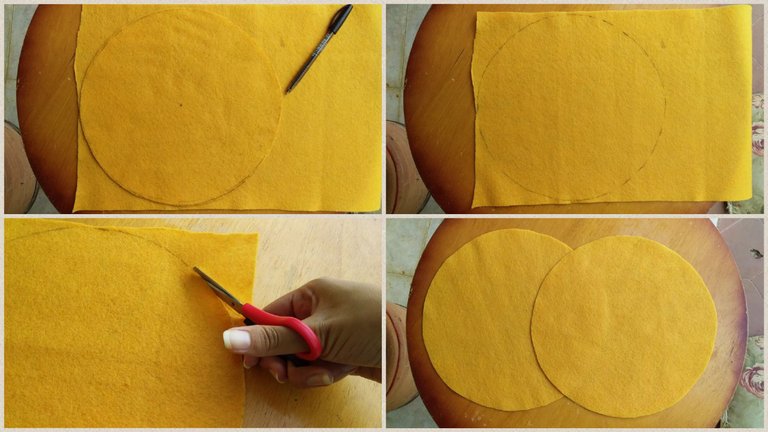
Puse la pieza ya cortada sobre la tela y marqué su contorno. Luego corté.
I placed the cut piece on the fabric and marked its outline. Then I cut.
Paso 4 | Step 4
Lo siguiente que hice fue ajustar mi "compás" a unos 6cm.
Tomé la primera pieza que había hecho y ubiqué el centro, tracé un círculo con el compás y luego lo corté.
The next thing I did was to adjust my "compass" to about 6cm.
I took the first piece I had made and located the center, traced a circle with the compass and then cut it out.
Paso 5 | Step 5
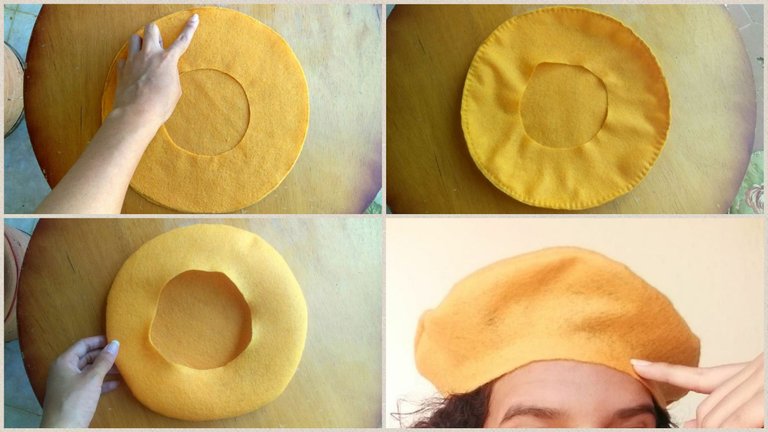
Junté ambas piezas y cosí alrededor, les di vuelta y me lo probé para ver si me quedaba bien o si tenía que cortar un poco más.
I put the two pieces together and sewed around them, turned them inside out and tried it on to see if it fit or if I needed to cut a little more.
Paso 6 | Step 6
Luego, le cosí un pequeño dobladillo.
Then, I sewed a small hem.
Paso 7 | Step 7

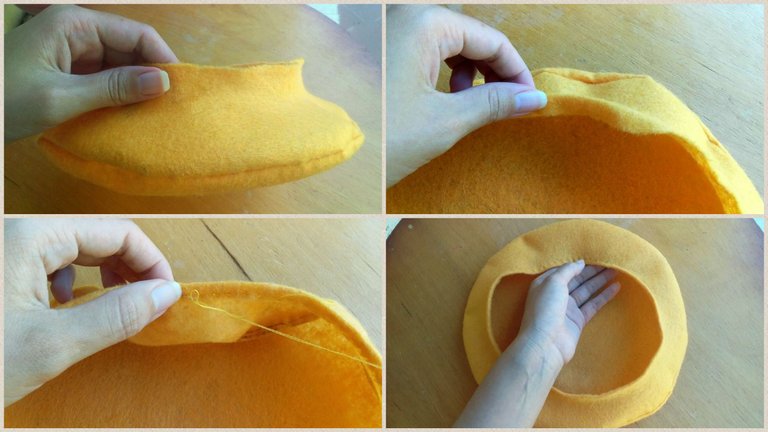
Dibujé la cara de Gudetama y con hilo negro bordé el contorno de la boca y ojos, luego con blanco rellené la boca.
I drew Gudetama's face and with black thread I embroidered the outline of the mouth and eyes, then with white I filled in the mouth.
Paso 8 | Step 8
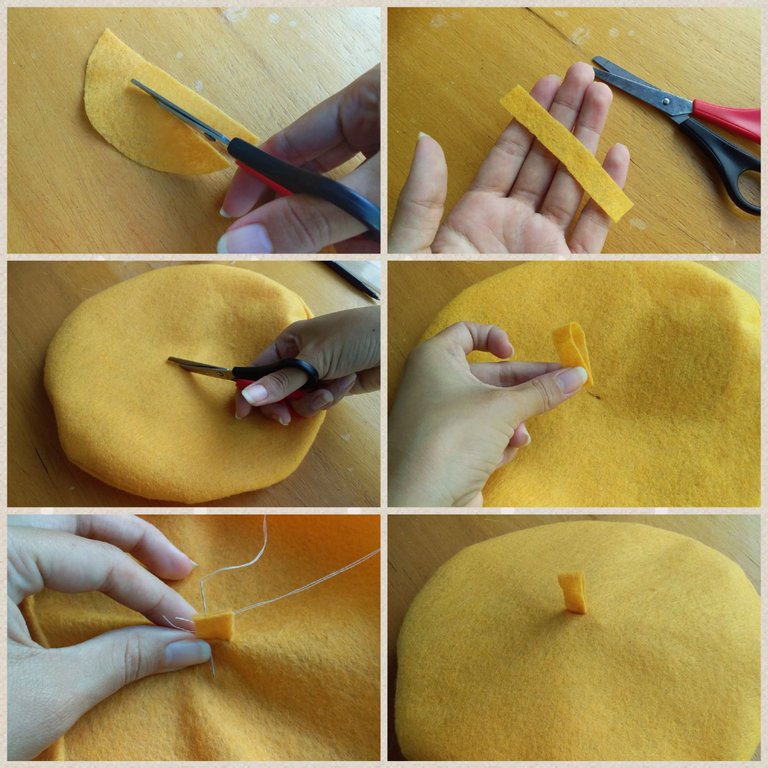
Con la tela sobrante corté una pequeña tira.
Hice un corte en el centro de la boina y luego cosí la tira desde el interior.
With the leftover fabric I cut a small strip.
I made a cut in the center of the beret and then sewed the strip from the inside.
🍳Resultado | Result🍳
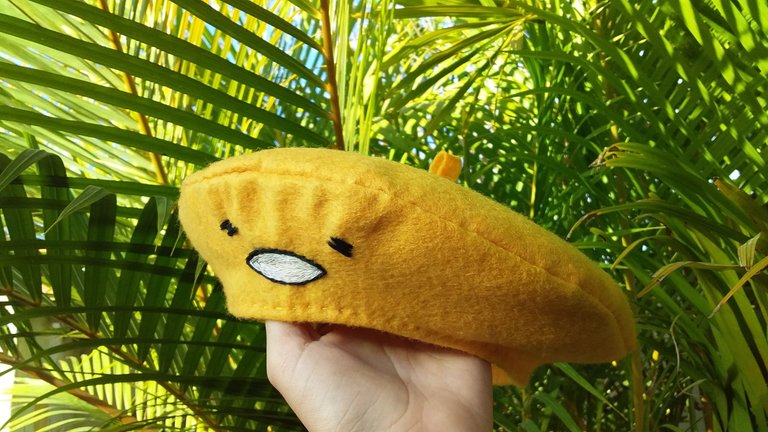

Y listo! Este fue el resultado de mi boina Gudetama 🥚🍳😁 espero que les haya gustado y si gustan, puedo traerles más diseños. 💕
Muchas gracias por leerme.💕
And that's it! This was the result of my Gudetama beret 🥚🍳😁 I hope you liked it and if you like, I can bring you more designs. 💕
Thank you very much for reading me.💕

Electronic-terrorism, voice to skull and neuro monitoring on Hive and Steem. You can ignore this, but your going to wish you didnt soon. This is happening whether you believe it or not. https://ecency.com/fyrstikken/@fairandbalanced/i-am-the-only-motherfucker-on-the-internet-pointing-to-a-direct-source-for-voice-to-skull-electronic-terrorism
I tried that improvised compass before, I couldn't make a perfect circle out of it. Haha. Good job!
HAHAHA thank you very much.💕
Hola. Me gusta mucho tu boina amarilla.
No pensé nunca en hacer una con fieltro, se ve bastante bien.
👍 Gracias por compartirnos el paso a paso. Saludos.
Muchas gracias, me alegra que te haya gustado 😁💖
Wow so this how a beret is usual made wow I didn't really see this coming it like so simple but I know it wasn't 😂 in fact I think, it was hard to make forget the picture 😂 but thanks for sharing regardless
Hahaha thanks for reading me 💖😊.
Congratulations @paugomez! You have completed the following achievement on the Hive blockchain and have been rewarded with new badge(s):
Your next target is to reach 3500 upvotes.
You can view your badges on your board and compare yourself to others in the Ranking
If you no longer want to receive notifications, reply to this comment with the word
STOPCheck out the last post from @hivebuzz:
Support the HiveBuzz project. Vote for our proposal!
Hi! @paugomez I stumbled across you in the needlework community, first of all that beret really fits you well, looks very cute:)I also wanted to ask you, how did you post that article in your blog and in the community at the same time? Because I dont really understand how it works.. Thanks and cheers
Hi, I'll be glad to help you! 😊 when you press the pencil to write, you will see "Write a new post in". , you select the community to publish and when you do it, below will appear the option "Also include in my blog:" press "yes" and that's it!
aalright, thank you!:)
Hi, I liked your post and the tutorial is very good, I congratulate you for your work.
Hi, thank you very much 💖😊.
Es demasiado hermoso y adorable, grandioso trabajo
Muchas gracias💖💖😊