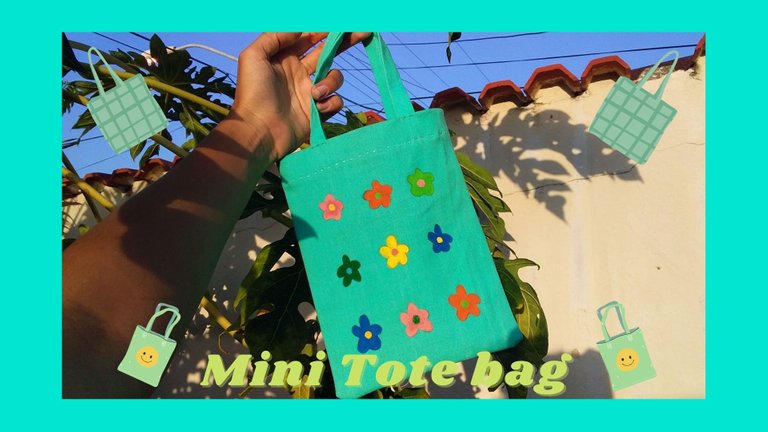
[ESP/ENG] 🌼👜 Haciendo un mini bolso de mano | Making a mini tote bag 👜🌼
🌼 BIENVENIDOS A MI BLOG | WELCOME TO MY BLOG 🌼
Saludos, gente linda de hive, espero se encuentren muy bien. El día de hoy compartiré con ustedes el proceso de cómo elaboré un mini tote bag. Soy amante de este tipo de bolsas por su diseño tan simple, que puede ser decorados de cualquier forma y que últimamente han estado en tendencia. La idea de jugar con el tamaño me pareció interesante, así que me animé a realizar uno pequeño con un par de jeans viejos que tenía por allí y el resultado me encantó. Así que sin más, empecemos con los materiales.
Greetings, beautiful people of hive, I hope you are doing well. Today I will share with you the process of how I made a mini tote bag. I love this kind of bags because of their simple design, that can be decorated in any way and that lately have been in trend. The idea of playing with the size seemed interesting to me, so I decided to make a small one with a pair of old jeans I had lying around and I loved the result. So without further ado, let's start with the materials.
Materiales | Materials:
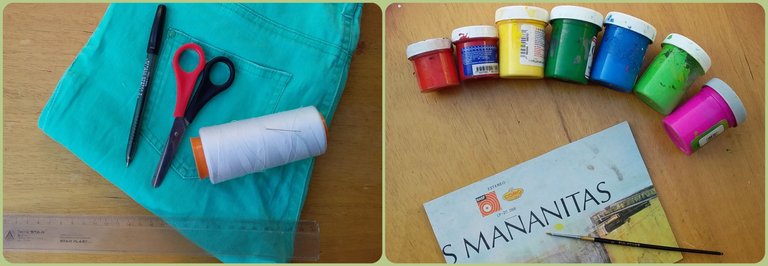
| Jeans viejo | Hilo y aguja | Tijeras |
|---|---|---|
| Regla | Lápiz | Pintura textil |
| Trozo de cartón | Pincel |
| Old jeans | Thread and needle | Scissors |
|---|---|---|
| Ruler | Pencil | Textile painting |
| Piece of cardboard | Brush |
🌼 PROCESO | PROCESS 🌼
Paso 1 | Step 1
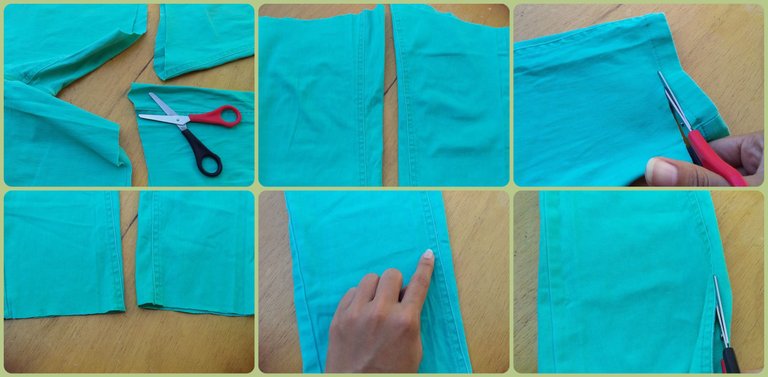
Lo primero que hice fue cortar ambas piernas del pantalón, luego fui por el dobladillo de abajo y por último corté las piezas en un solo lado, usando como guía el margen de costura.
The first thing I did was to cut both pant legs, then I went for the bottom hem and finally I cut the pieces on one side only, using the seam allowance as a guide.
Al abrir, quedaron así. De este modo se aprovecha al máximo la tela.
When opened, they look like this. In this way the fabric is used to the maximum.
Paso 2 | Step 2
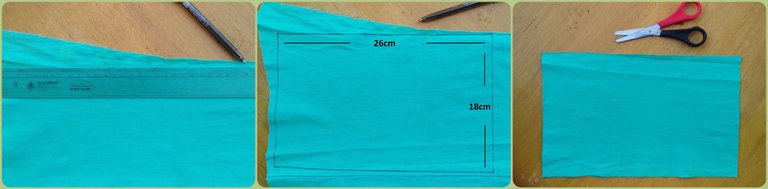
En una de las piezas, tracé un rectángulo de 26cm x 18cm y luego lo corté.
On one of the pieces, I traced a 26cm x 18cm rectangle and then cut it out.
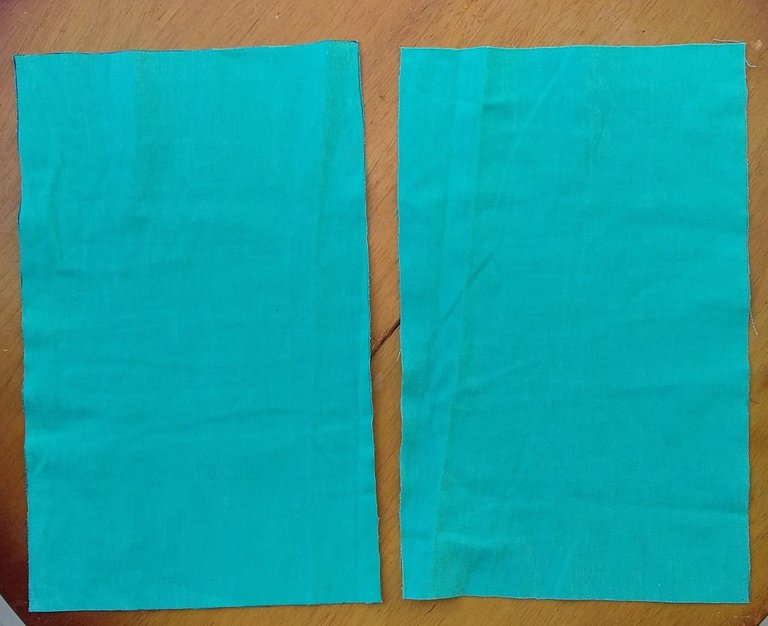
Repetí este proceso en la otra pieza de tela y así me quedaron 2 rectángulos iguales.
I repeated this process on the other piece of fabric and so I had 2 equal rectangles.
Paso 3 | Step 3
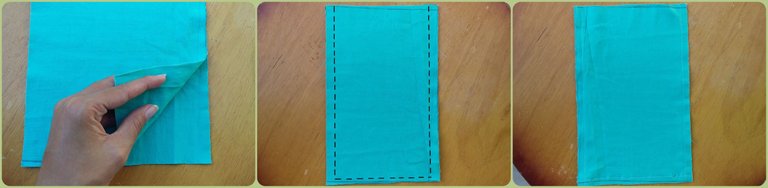
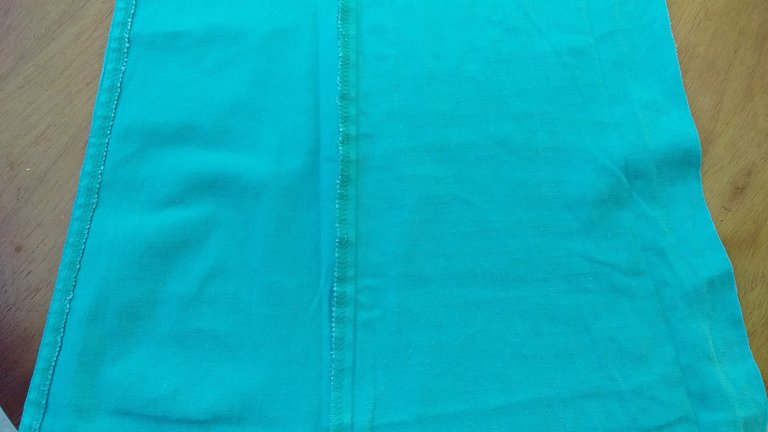
Junté ambos rectángulos (con el derecho hacia dentro) y los cosí a los lados y abajo.
I joined both rectangles (right side in) and sewed them together at the sides and bottom.

Hice un doblez de unos 2,5cm en la parte superior del bolsito, después uno más pequeño hacia adentro (como se ve en las fotos) y finalmente cosí.
I made a fold of about 2.5 cm at the top of the bag, then a smaller fold inwards (as shown in the photos) and finally sewed.
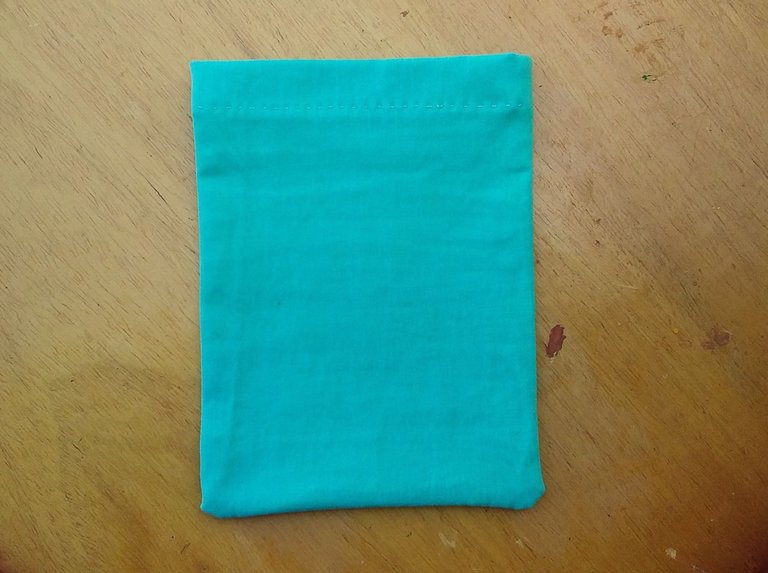
Di vuelta y así fue como quedó.
I turned it over and that's how it looked.
Paso 4 | Step 4
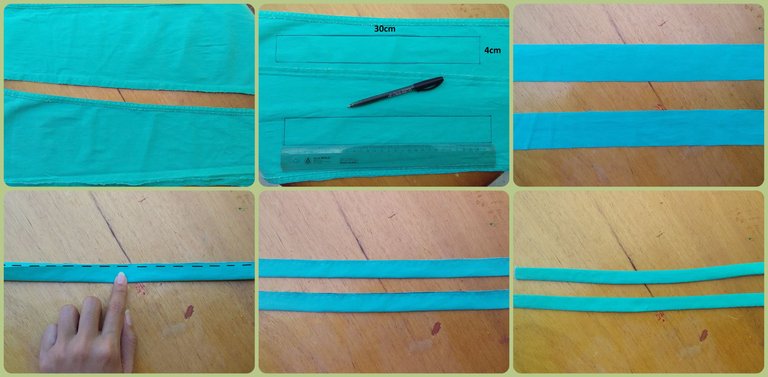
Con las partes que sobraron, tracé 2 rectángulos de 30cm x 4cm y los corté. Los doblé a la mitad, cosí y les dí vuelta.
With the leftover pieces I traced 2 rectangles of 30cm x 4cm and cut them. I folded them in half, sewed and turned them over.
Paso 5 | Step 5
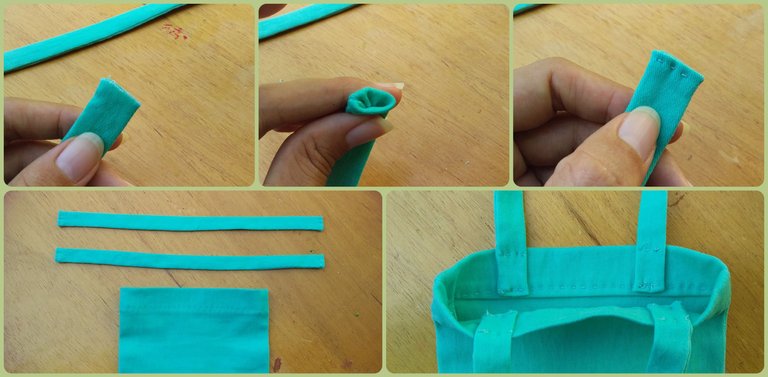
A cada extremo de las tiras les hice un doblez hacia adentro y los cosí para cerrar. Al terminar, las uní al bolsito.
I folded each end of the strips inward and sewed them closed. When finished, I attached them to the bag.
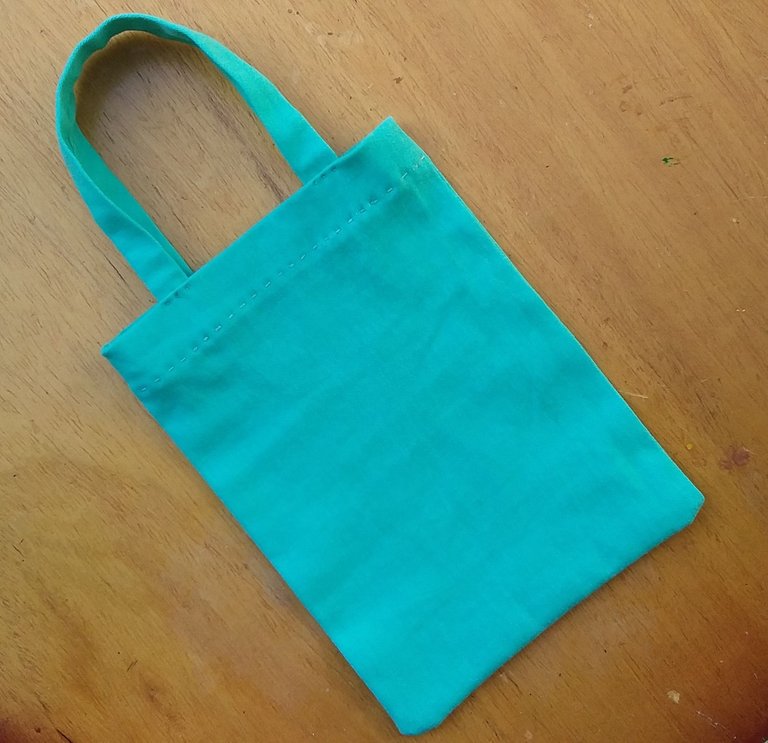
Así quedó
This is how it looked
Paso 6 | Step 6
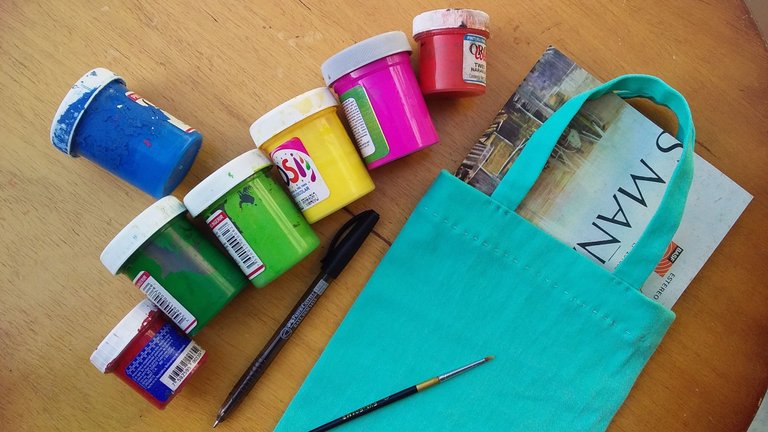
Como último paso, opté por pintarle algún diseño.
As a last step, I chose to paint a design on it.
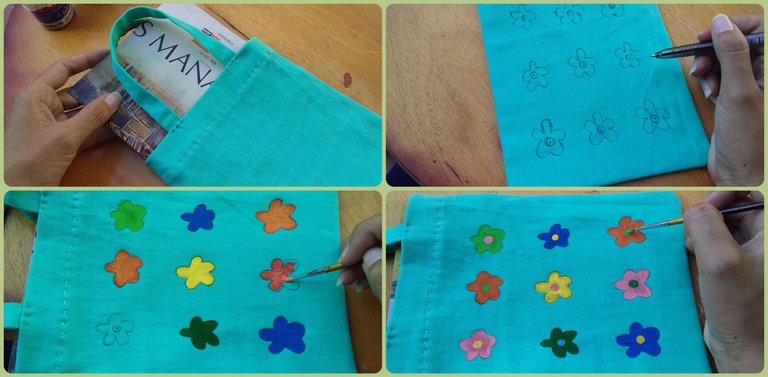
Empecé por colocar el trozo de cartón dentro del bolso para que la pintura no traspasara, luego con un lápiz dibujé unas pequeñas flores y pinté cada una de un color diferente.
I started by placing the piece of cardboard inside the bag so that the paint would not go through, then with a pencil I drew some small flowers and painted each one in a different color.
🌼👜 RESULTADO | RESULT 👜🌼
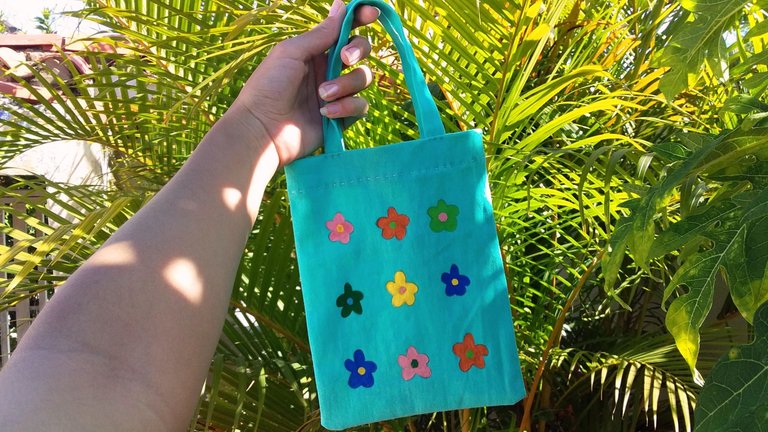
Y listo, este fue el resultado final. Espero les haya gustado y que este tutorial les haya servido de inspiración.
Muchas gracias por leerme.
And ready, this was the final result. I hope you liked it and that this tutorial has inspired you.
Thank you very much for reading. 👜🌼
Te ha quedado muy bonito, una vez realice uno mas grande también con un jean viejo jajaja a eso se le conoce como upcycling. Saludos desde oriente 😁
Estoy segura de que te quedó hermoso😊 Saludos igual desde oriente!! jiji 💓
Muy bonito 👏🏻👏🏻 y todo explicadito 🤗
Muuuchas graciass💓
Congratulations @paugomez! You have completed the following achievement on the Hive blockchain and have been rewarded with new badge(s) :
Your next target is to reach 2250 upvotes.
You can view your badges on your board and compare yourself to others in the Ranking
If you no longer want to receive notifications, reply to this comment with the word
STOPThis is so beautiful and cute thanks @paugomez for sharing
Thanks to you for reading and supporting me 💓💓💓