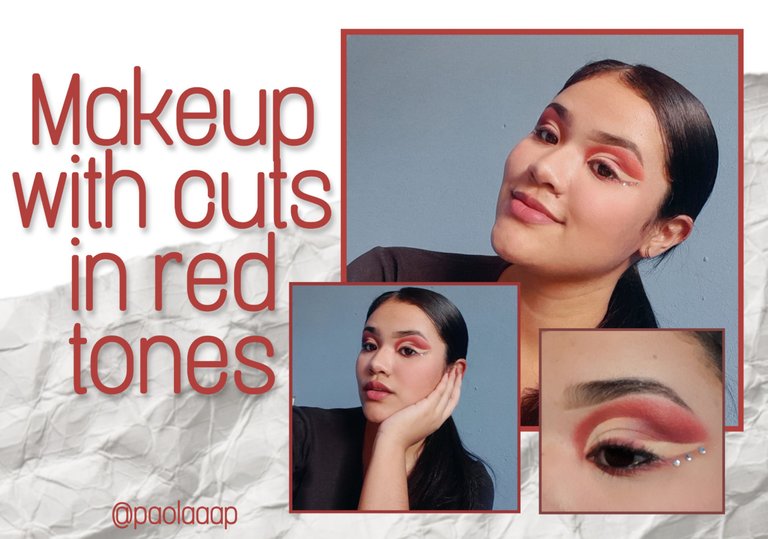
[ESP-ENG] Makeup with Cuts in Red Tones. | Maquillaje con Cortes en Tonos Rojos.
¡Saludos, Hivers!
Espero que se encuentren muy bien. El día de hoy les compartiré un tutorial de un maquillaje que me dejó totalmente encantada. Intenté hacer algo un poco más elaborado, convafios cortes, variando la posición de las sombras y con algunas piedras brillantes. Puede ser un poco cargado pero de igual forma queda hermoso.
Les mostraré un poco el proceso, ¡comencemos!
Greetings, Hivers!
I hope you are feeling great. Today I will share with you a tutorial of a makeup that I was totally enchanted by. I tried to do something a little more elaborate, with cut out shadows, varying the position of the shadows and with some sparkling stones. It can be a bit heavy but it still looks beautiful.
I'll show you a little bit of the process, let's get started!
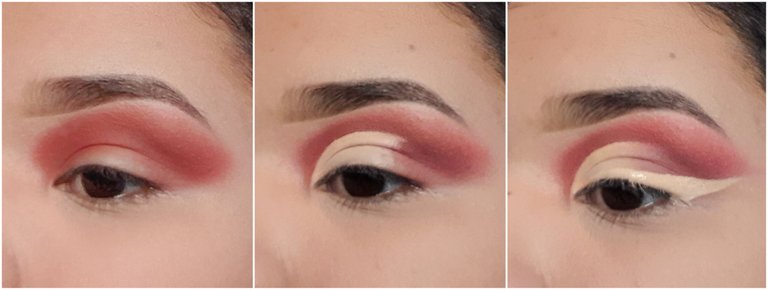
Como normalmente lo hago, comencé haciendo mis cejas con sombra y definiendolas un poco con corrector. Apliqué el miismo corrector en mi párpado para crear una base para las sombras y obtener una mayor pigmentación de las mismas.
Comencé aplicando una sombra roja en mi párpado, desde mi cuenca y llevando hacia arriba. Para dar profundidad tomé un tono marrón la apliqué en mi cuenca y difuminé bien ambas sombras.
Realice el primer corte de cuenca normal, con corrector hasta la mitad de mi párpado. Lo selle con una sombra beige.
Difumine los bordes del medio con un poco de la sombra marrón y comencé a hacer el segundo corte.
As I usually do, I started by doing my brows with shadow and defining them a bit with concealer. I applied the same concealer on my eyelid to create a base for the shadows and get more shadow pigmentation.
I started by applying a red shadow on my eyelid, starting at my eye socket and working my way up. To give depth I took a brown shade and applied it in my socket and blended both shadows well.
I did the first cut of the normal socket, with concealer up to the middle of my eyelid. I sealed it with a beige shadow.
I smudged the middle edges with a bit of the brown shadow and started to do the second cut.
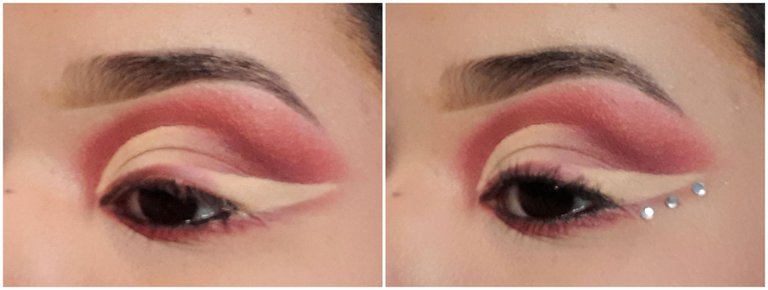
Con corrector hice un delineado más grande de lo normal, el cual comenzaría a rellenar con las sombras roja y marrón, solo hasta la mitad del delineado, en la otra mitad apliqué sombra beige.
Apliqué la sombra roja en mis pestañas inferiores, lápiz negro en la línea del agua y rimel. Finalice pegando tres piedras brillantes debajo del delineado.
With concealer I made a bigger eyeliner than normal, which I would start to fill in with the red and brown shadows, only up to the middle of the eyeliner, on the other half I applied beige shadow.
I applied the red shadow on my lower lashes, black pencil on the waterline and mascara. I finished by gluing three glitter stones under the eyeliner.
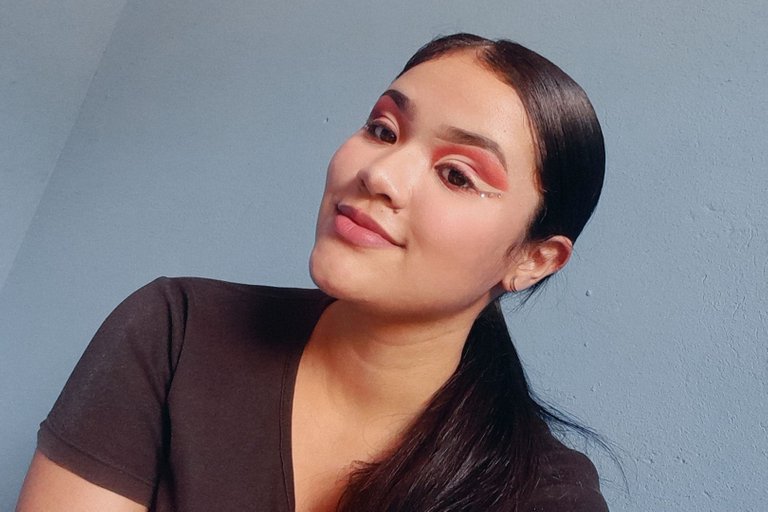
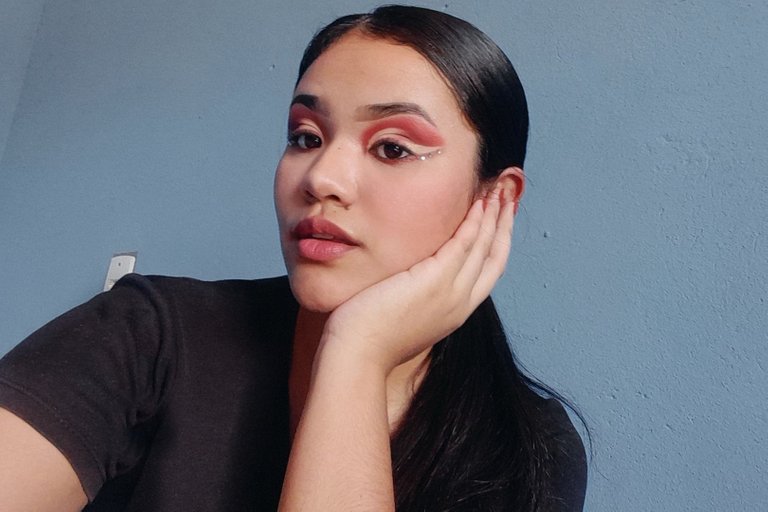
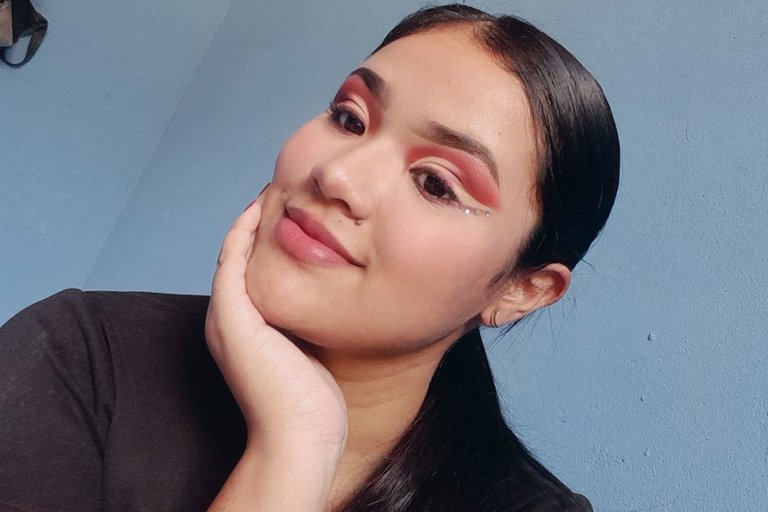
Es un maquillaje muy bonito y se ve un poco diferente por todos los detalles, al ser tan cargado queda hermoso con tonos claros en los labios, y es perfecto para usar en un evento de noche.
Espero les haya gustado tanto como a mi. ❤
¡Gracias por leer!
It's a very pretty makeup and looks a little different because of all the details, being so heavy it looks beautiful with light tones on the lips, and it's perfect to wear for an evening event.
I hope you liked it as much as I did. ❤
Thanks for reading!

Fotos editadas en PicsArt | Photos edited in PicsArt
Traducción DeepL | Translation DeepL
Hermoso ❤️
¡Gracias!💜
Me encanta la elección de colores! No lo hace cargado sino todo lo contrario, es elegante. Hermoso trabajo 👏
Tienes toda la razón, ¡Muchas gracias!😊