Restaurando la gaveta de un escritorio de escuela, que estaba súper deteriorado [ESP-ENG]
Hola amigos, hoy voy a restaurar una gaveta de un escritorio, al cual se le desprendió el frontal y sus manillas. Mi esposa es Maestra de cuarto grado, y el día viernes me trajo esta gaveta para que se la reparara, la verdad es que estaba muy deteriorada, me dice mi esposa que este escritorio lo trajeron hace 8 años al salón, en realidad había durado mucho porque esta hecho con el material MDF el cual es muy delicado, sobre todo cuando le cae agua.
Pero bueno, así trabajan los maestros, ellos mismos tratan de reparar sus equipos para poder cumplir con su admirable trabajo, que no es otra que enseñar. Así que le dije a mi esposa que iba a tratar de reparar esta gaveta, sabía que la reparación no era fácil, porque las mayoria de las piezas tenían los extremos muy débiles, por lo que tenia que usar mucho pegamento y tornillos para reforzar esas esquinas, pero bueno, este es un reto que hoy me ha tocado superar.
Restaurando la gaveta de un escritorio de escuela, que estaba super deteriorado
Como les decia, la gaveta que voy a restaurar, es del escritorio del salón de la escuela donde mi esposa da clases, el material de esta gaveta es MDF, ya las esquinas de cada pieza no se pueden fijar con clavos, por lo que ahora las voy las quiero unir con tornillos para que quede más fuerte.
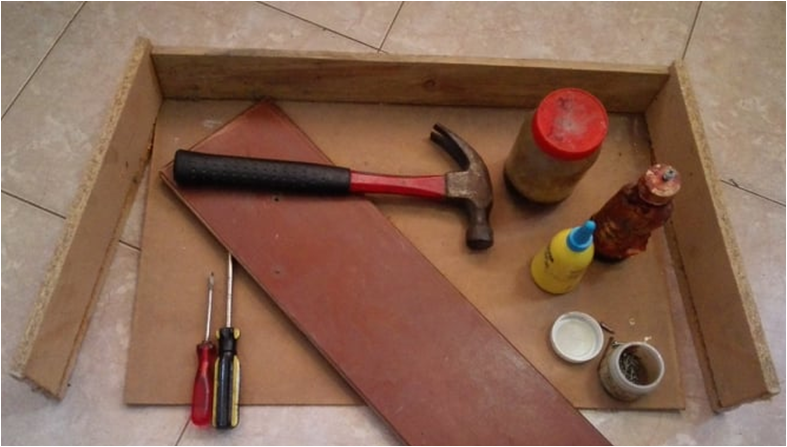
Materiales y herramientas a utilizar:
- Cola blanca
- lija
- Tinte caoba para maderas
- Tinte negro para maderas
- Barniz transparente
- Taladro
- Tornillos
- Martillo
- Navaja
- Destornilladores
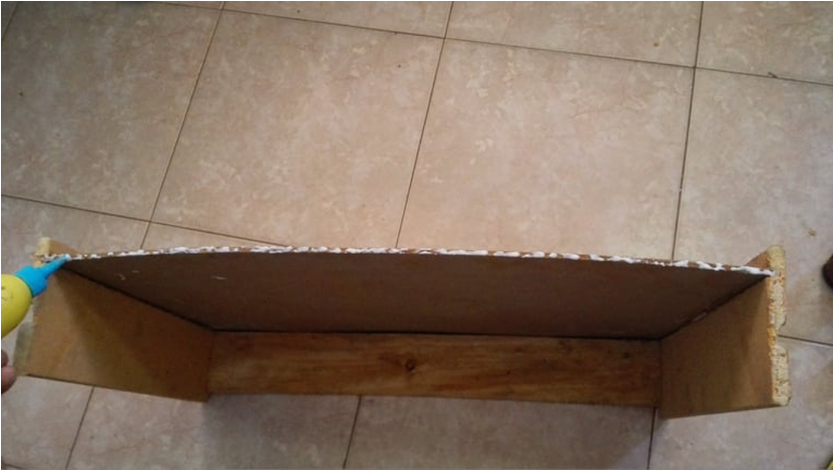
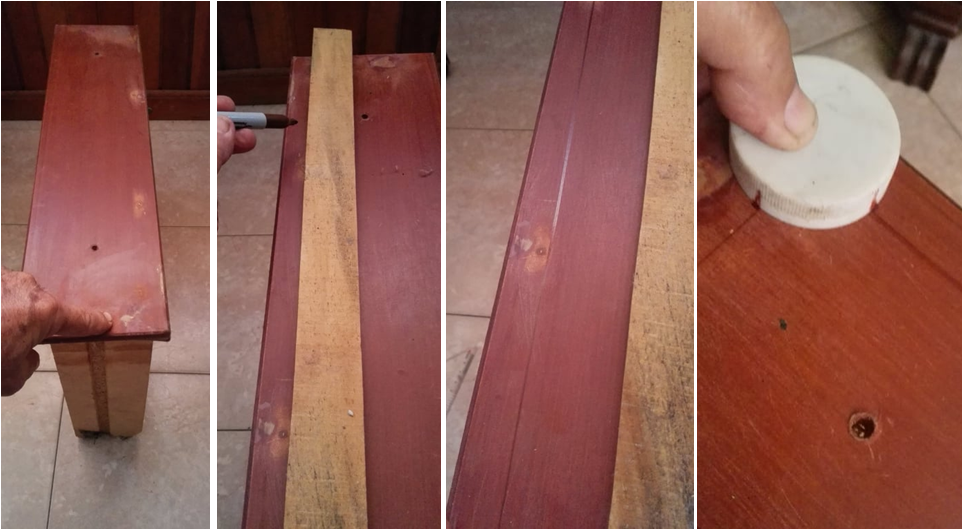
Así recibi la gaveta:
Pasos para la Reparación de la gaveta:
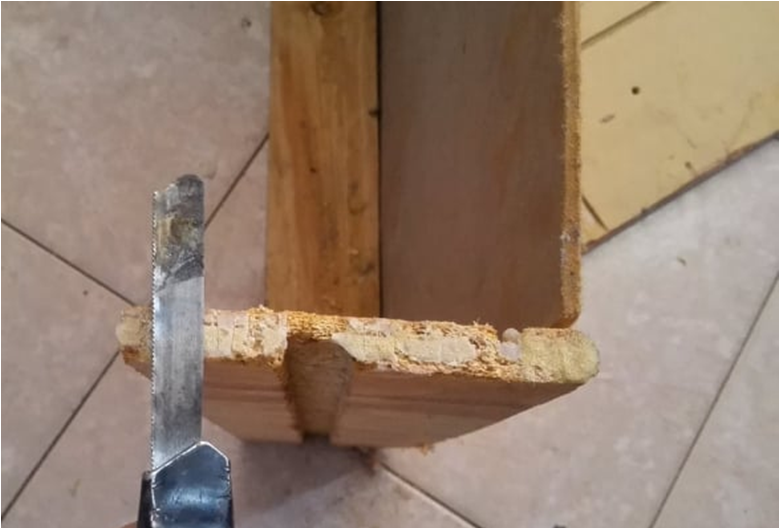
- Lo primero que hice fue remover los residuos de cola vieja que estaban adheridos a las piezas, lo malo fue que en la medida que iba quitando este pegamento, el material MDF se iba desprendiendo, porque este tipo de tablas es de material comprimido, creo que lo elaboran con los restos de aserrín mezclado con otras cosas más, por esta razón es muy delicado, así que tuve que remover la cola con mucho cuidado:
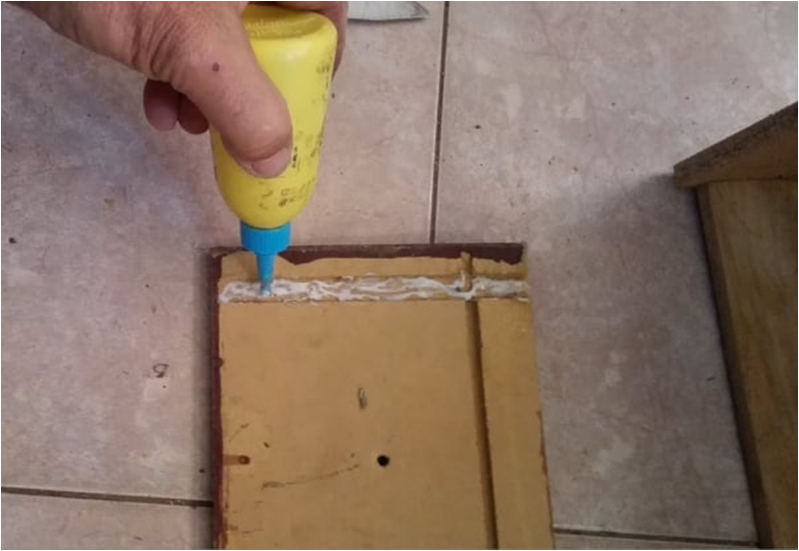
- Bueno amigos, ahora voy a ponerle el pegamento a todas las piezas, para comenzar a unirlas, pero primero le voy a colocar la cola a la lámina de madera que le sirve de fondo a la gaveta:
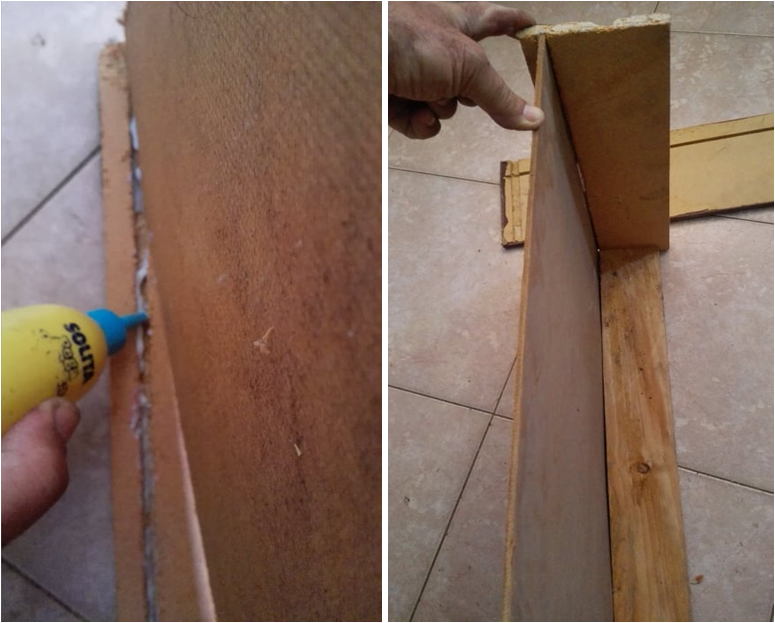
- Ahora le pondré el pegamento al borde de la lámina del fondo para que se pueda adherir a la tapa de la gaveta:
- En este paso, voy a ponerle el pegamento a todas las ranuras de la tapa para unirla con los laterales:
- Aquí estoy fijando la tapa rectangular con los laterales de la gaveta:

- A la tapa de la gaveta le voy a colocar dos tornillos a en cada lado para que la unión quede más fuerte, para hacer esto, primero haré los huecos con el uso de un taladro, procurando ensanchar la parte superior del hueco para que la cabeza del tornillo quede oculta:
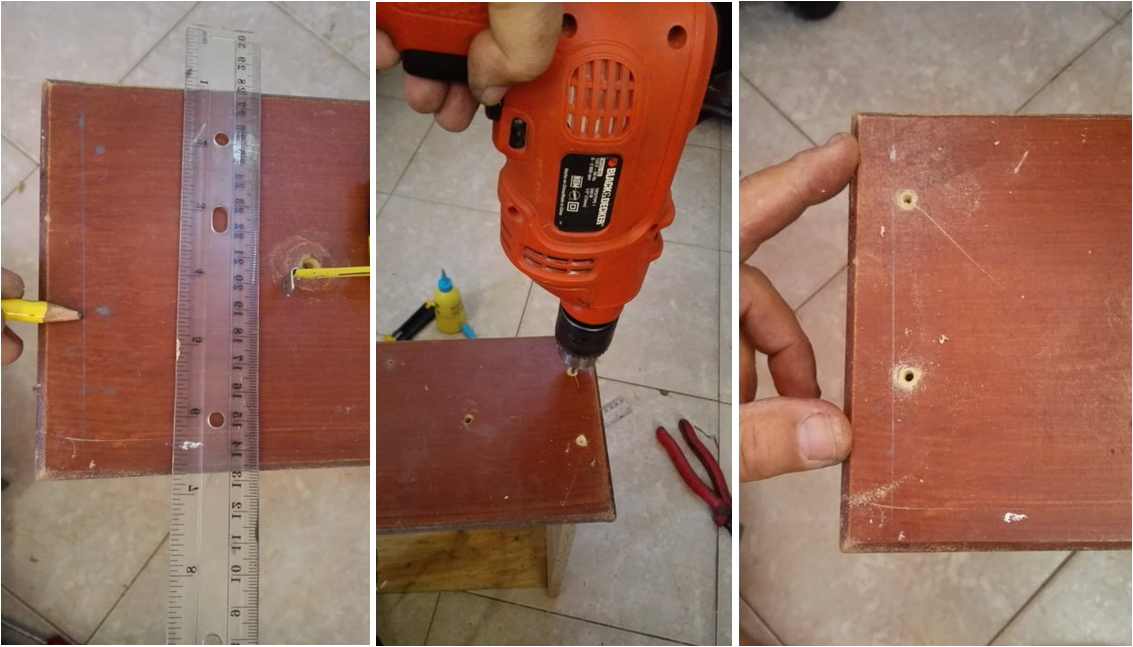
- Ahora voy a colocar los tornillos para que la tapa se adhiera con más firmeza con los laterales de la gaveta:
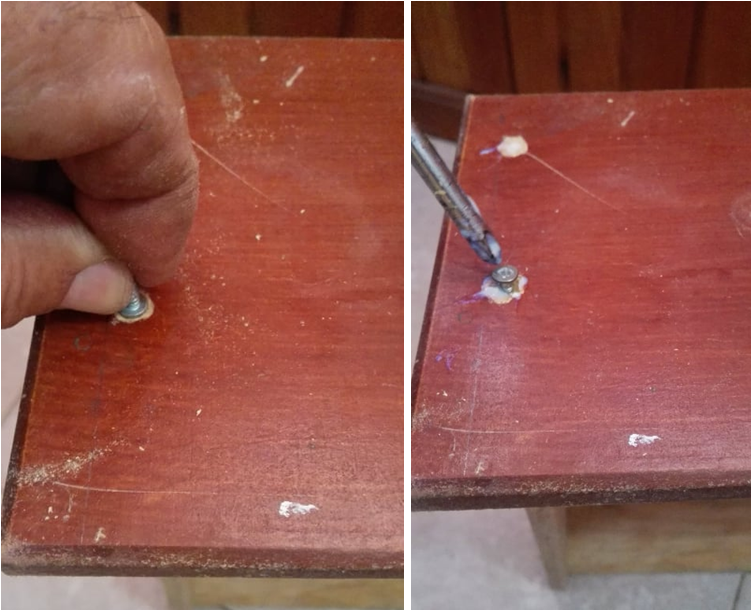
¡Señores! Surgió un pequeño problema, pero con creatividad, lo puedré resolver:
Les cuento, una vez que coloqué los tornillos cubrí los huecos con una pasta de aserrín con pegamento, esto lo hice para que ocultar las cabezas de esos tornillos, pero cuando comencé a lijar la pasta, la la lámina de la tapa perdió el color que hace que parezca madera, en realidad yo pensé que era una lámina tipo formica, pero esto era solo un papel cuyo color semejaba el acabado de la madera:

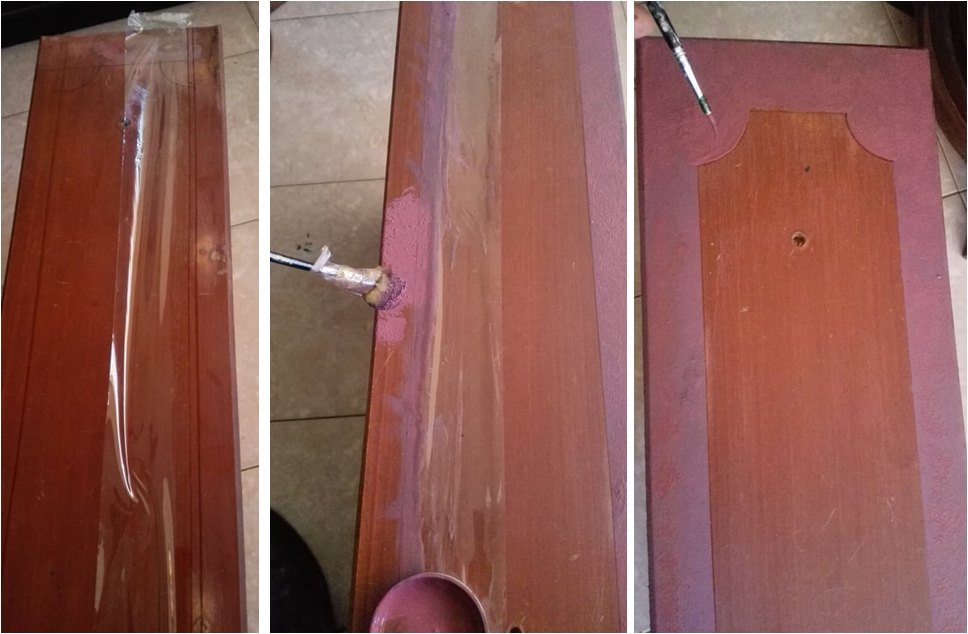
Bueno amigos, con el arte, todo tiene solución, lo que hay es que activar la imaginación y seguro que inmediatamente llegan las ideas, así que pensando y pensando se me ocurrió ponerle un borde decorativo a la gaveta, para cubrir las manchas que quedaron; El trabajo consiste en pintar una banda de color rosado pastel por toda la orilla de esta tapa, antes de comenzar a pintar, trasé una linea con una separación dos centimetros de la orilla, tanbién le hice unas media luna en cada esquina del dibujo.***
- Lo primero que haré será trazar las lineas alrededor de la tapa de la gaveta, con una separación de 2 centimetros del borde, también le haré un dibujo de media luna en las cuatro esquinas:
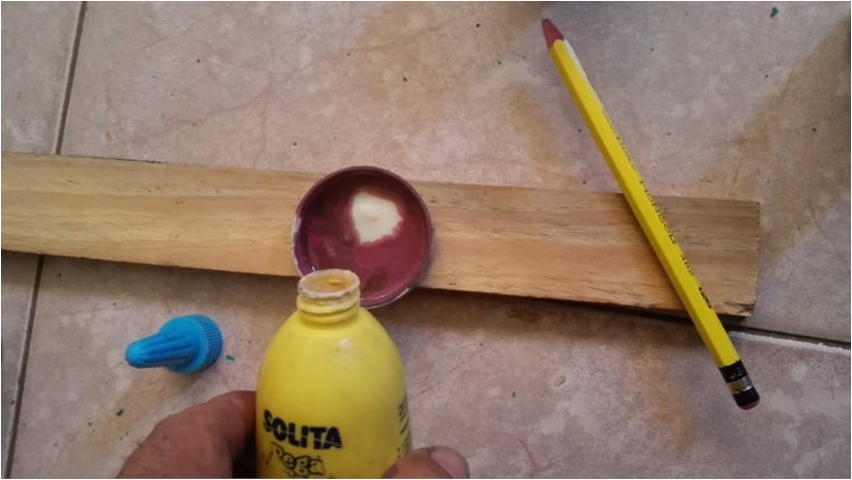
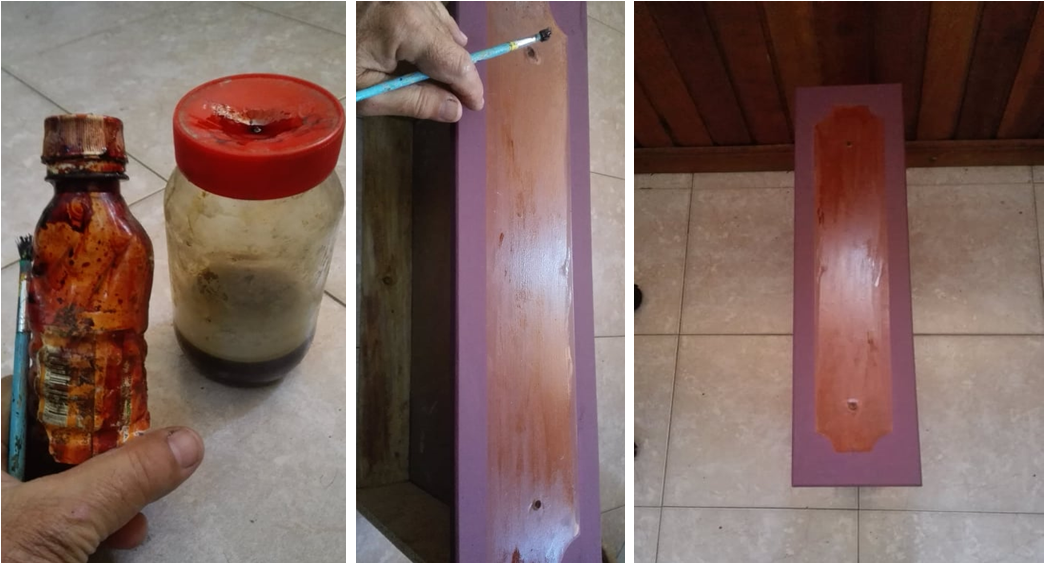
- Voy a preparar una mezcla de pintura rosada, marrón y un poquito de cola blanca, la cola es para que la pintura tenga más adherencia y brillo:
- Bueno, ahora a pintar la franja, para esto improvisé un pincel con un pequeño pedazo de esponja en la punta, pero antes de comenzar a pintar le puse una cinta adhesiva por toda la linea del dibujo:
- En este paso, le daré un poquito de brillo a la tapa con barniz y tinte caoba:
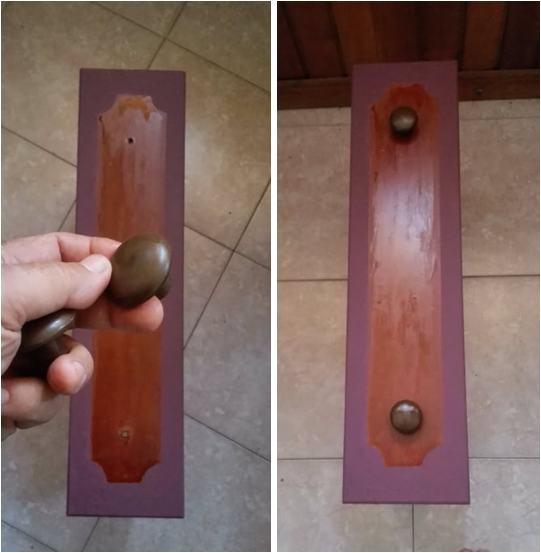
- Para terminar esta interesante restauración ahora le pondré unas manillas o tirantes a la gaveta:
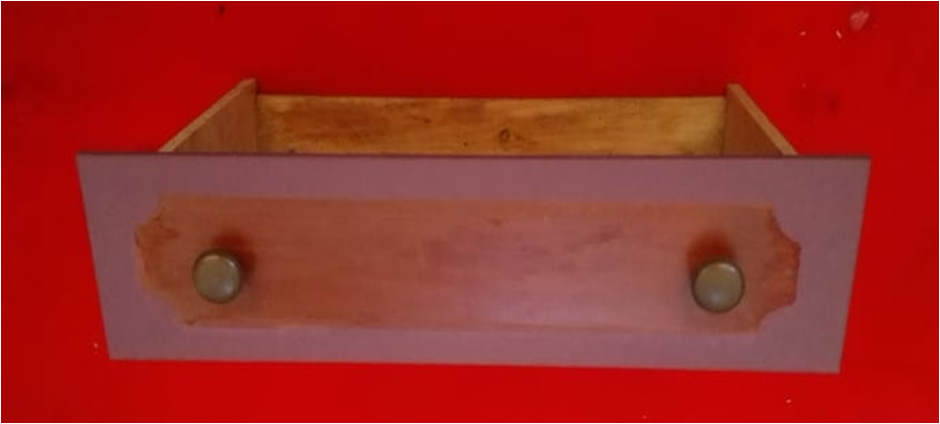
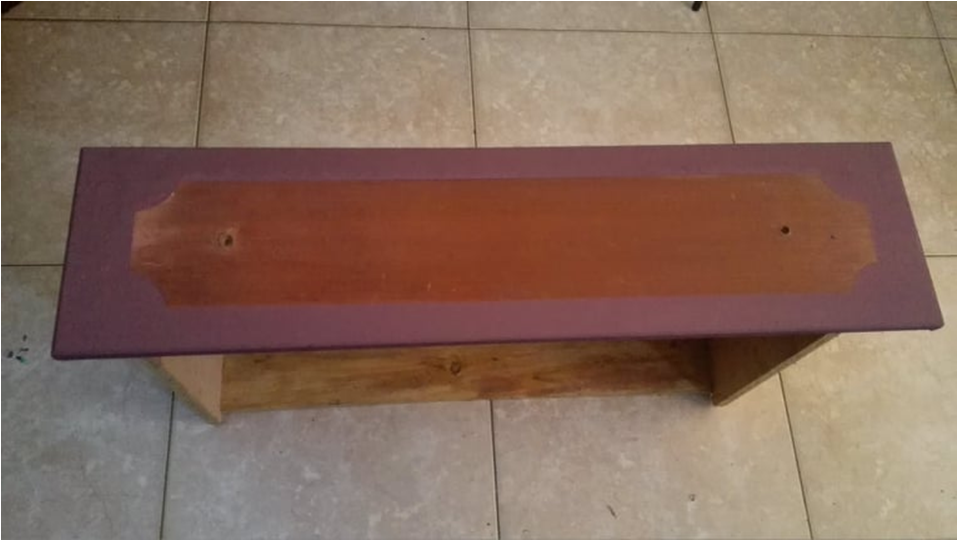
Después de este interesante trabajo este es el resultado:
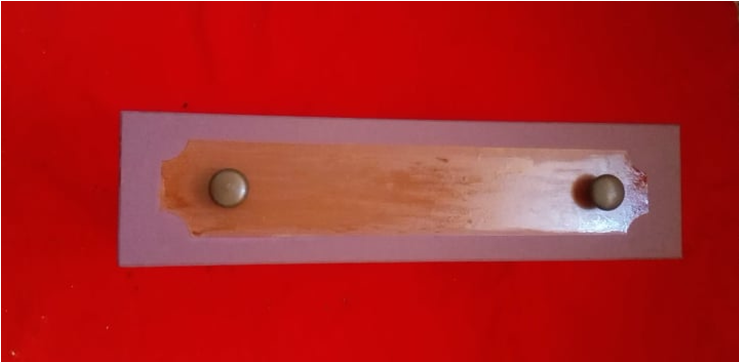
Espero que les haya gustado la restauración de esta gaveta, esto lo logré hacer en tiempo record, lo hice en dos horas y medias, y para lo rápido que la reparé, creo que quedó muy bien, así que mañana lunes mi esposa se puede llevar esta gaveta.

IN ENGLISH:
Hello friends, today I am going to restore a desk drawer, from which the front and its handles came off. My wife is a fourth grade teacher, and on Friday she brought me this drawer to be repaired. The truth is that it was very damaged. My wife tells me that this desk was brought to the classroom 8 years ago. In fact, it had lasted a long time. because it is made with MDF material which is very delicate, especially when water falls on it.
But hey, that's how teachers work, they themselves try to repair their equipment to be able to carry out their admirable job, which is none other than teaching. So I told my wife that I was going to try to repair this drawer, I knew that the repair was not easy, because most of the pieces had very weak ends, so I had to use a lot of glue and screws to reinforce those corners. , but hey, this is a challenge that I had to overcome today.
Restoring the drawer of a school desk, which was very deteriorated
As I was telling you, the drawer that I am going to restore is from the desk in the school room where my wife teaches. The material of this drawer is MDF, and the corners of each piece cannot be fixed with nails, so now I want to join them with screws so that it is stronger.
Materials and tools to use:
- White glue
- sandpaper
- Mahogany wood stain
- Black wood stain
- Transparent varnish
- Drill
- Screws
- Hammer
- Knife
- Screwdrivers
This is how I received the drawer:
Steps to Repair the drawer:
- The first thing I did was remove the old glue residue that was attached to the pieces, the bad thing was that as I was removing this glue, the MDF material was coming off, because this type of boards is made of compressed material, I think They make it with the remains of sawdust mixed with other things, for this reason it is very delicate, so I had to remove the glue very carefully:
- Well friends, now I'm going to put the glue on all the pieces, to start joining them, first I'm going to put the glue on the wooden sheet at the bottom of the drawer:
- Now I will put the glue on the edge of the bottom sheet so that it can adhere to the drawer lid:
- In this step, I am going to put glue on all the slots of the lid to join it with the sides:
- Here I am joining the rectangular lid with the sides of the drawer:
- So that the union of the drawer lid is stronger, I am going to place two screws on each side. To do this, I will first make the holes with the use of a drill, trying to widen the upper part of the hole so that the screw head is hidden:
- Now I am going to place the screws so that the cover adheres more firmly to the sides of the drawer:
Sirs! A small problem arose, but with creativity, I can solve it:
I tell you, once I placed the screws I covered the gaps with a paste of sawdust and glue, I did this to hide the heads of those screws, but when I started sanding the paste, the cover sheet lost the color it had. It makes it look like wood, actually I thought it was a Formica-type sheet, but this was just a paper whose color resembled the finish of the wood:
Well friends, with art everything can be solved, what you have to do is activate your imagination and the ideas will surely come right away, so thinking and thinking it occurred to me to put a decorative border on the drawer, to cover it the stains that remain; The job is to paint a pastel pink band along the entire edge of this lid. Before I started painting, I drew a line two centimeters from the edge, and also made half-moons in each corner of the drawing.***
- The first thing I will do is draw the lines around the lid of the drawer, with a separation of 2 centimeters from the edge, I will also make a half-moon drawing in the four corners:
- I am going to prepare a mixture of pink and brown paint and a little bit of white glue, the glue is so that the paint has more adhesion and shine:
- Well, now to paint the strip, for this I improvised a brush with a small piece of sponge on the tip, but before starting to paint I put an adhesive tape along the entire line of the drawing:
- In this step, I will give the lid a little shine with varnish and mahogany stain:
- To finish this interesting restoration, I will now add some handles to the drawer:
After this interesting work this is the result:
I hope you liked the restoration of this drawer, I managed to do it in record time, I did it in two and a half hours, and because of how quickly I repaired it, I think it turned out very well, so tomorrow, Monday, my wife can take it to school.
Congratulations @oscarcede!
You raised your level and are now a Minnow!
Check out our last posts: