[ENG-ESP] Preventive maintenance of my "Bosch" Reversible Percussion Drill / Mantenimiento preventivo de mi Taladro Percutor Reversible "Bosch"
IN ENGLISH::
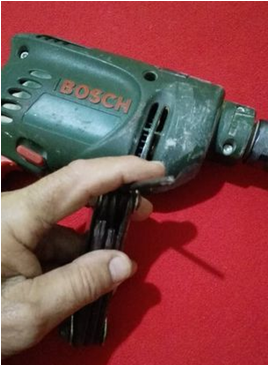
Hello my friends, today I bring you a new experience, it is about the preventive maintenance of my Reversible Hammer Drill, BOSCH brand, this drill has been with me for about 25 years and has never required a repair, maintenance is bad, because I have been very jealous with this tool, I have rarely lent it, because my father said that "No one takes care of someone else's", and that is true, because two weeks ago my son lent this drill to a friend and when I checked it it was full of particles of cement and dust, in addition to this, at the tip of the mandrel remains of paint and concrete are observed, from the wall they were drilling, which means that there was a lot of friction with the wall, a situation that we must avoid.
Well friends, the truth is that when I saw my drill in those conditions, I got a bit upset, I think the best thing is not to lend it anymore, because I have to take care of it, so today I decided to give it good maintenance.
Preventive maintenance of my "Bosch" Reversible Percussion Drill
The maintenance consists of removing all the dust particles that are inside its internal parts, I will do this work with a vacuum cleaner and a small brush, maybe I will use a brush for the most difficult parts, after this I will put a little bit of fine grease in the gears.
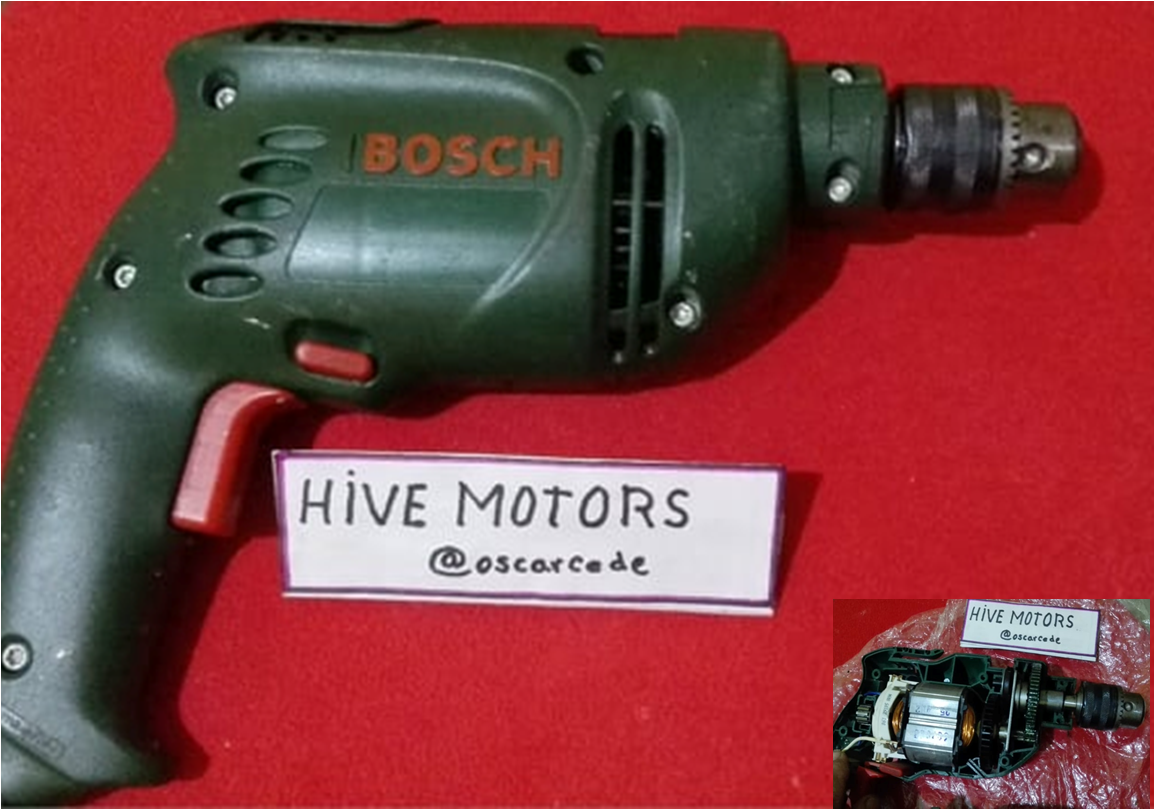
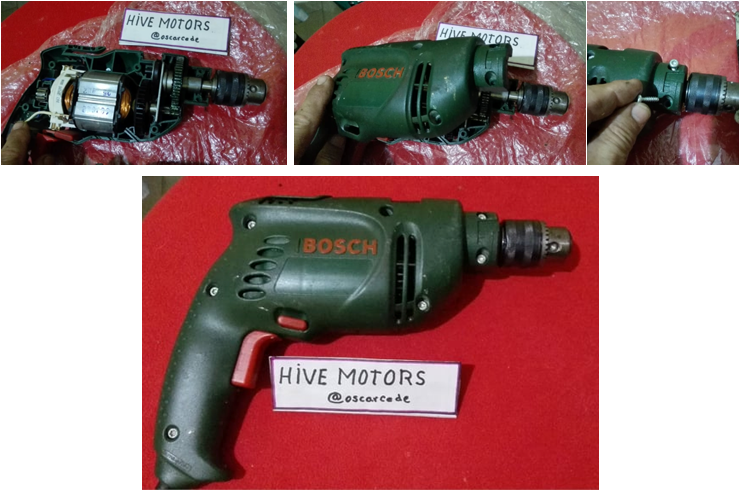
This is my Bosch drill
This is how they returned the drill to me:
Drill maintenance steps:
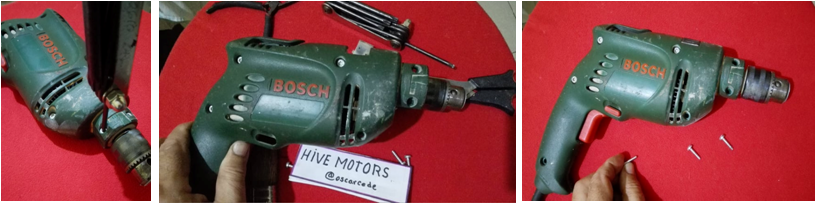
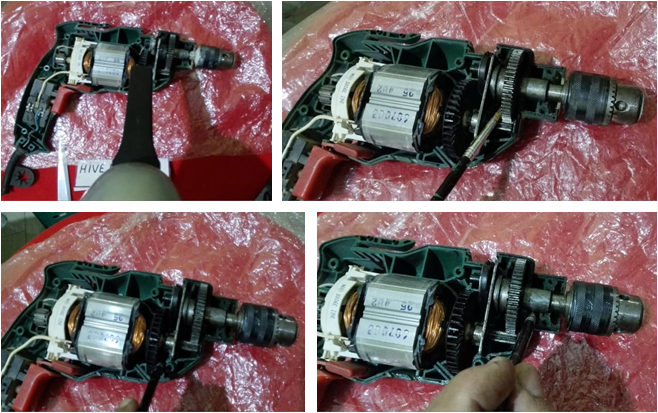
- The first thing I will do is remove the screws that hold the two covers of the casing:
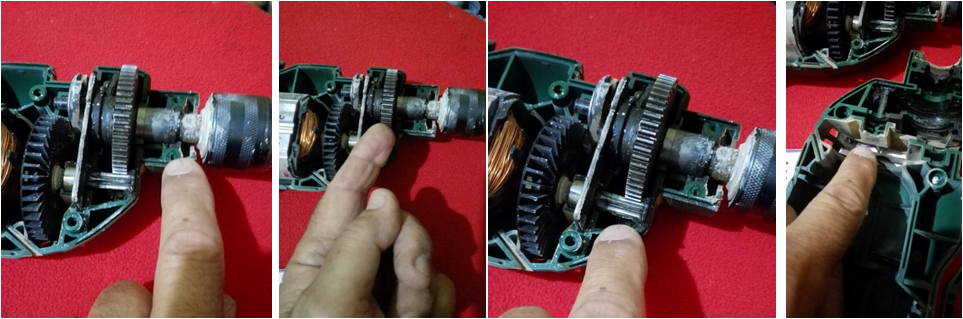
- Now I will remove a part of the casing, making sure that the pieces are fixed in the other part, we can already see the amount of dust, I could also see that the grease that lubricates the pieces was dry and mixed with dust, therefore I had a good decision to do this maintenance:
- Next I am going to suck the dirt with the vacuum cleaner and with the use of a brush and a brush, I am also going to remove the grease residues, to place new grease:
Look how the cleaning has turned out:
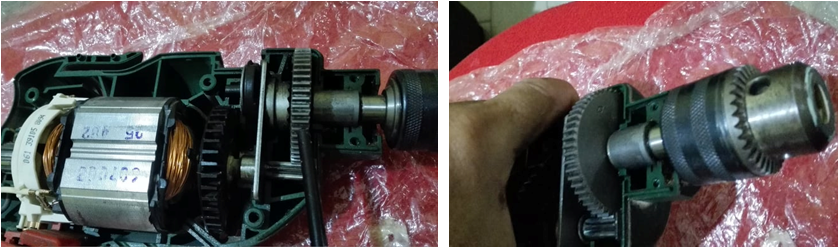
- The following will be to lubricate the gears with grease and oil 3 in 1:
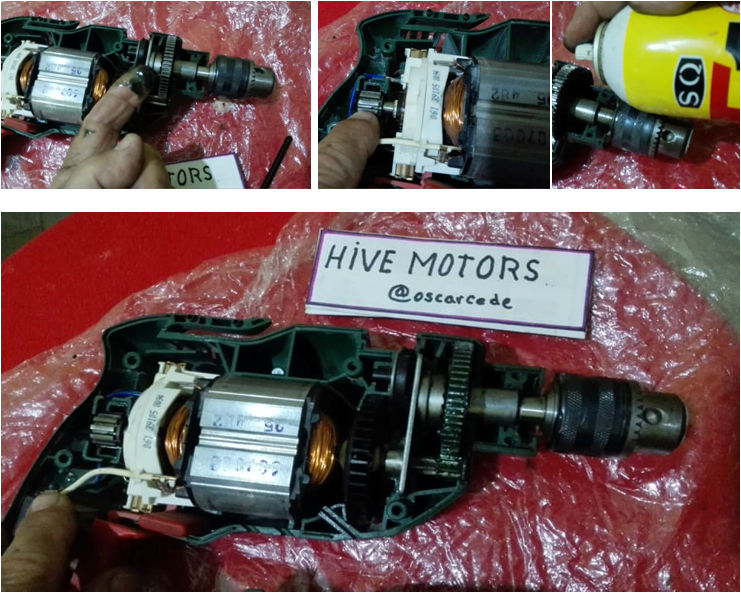
- The next step is to replace the casing cover and that's it:
Well friends, as the saying goes: there is no harm that does not come for good, I say this because, due to the state in which the drill was delivered to me, he decided to compromise maintenance and look, the drill needed urgent maintenance, because the grease that lubricated the gear looked like an almost solid paste, since it had mixed with the dust, you will not believe it, but, this is the third maintenance that I have done on this drill in 25 years, because in reality, this I use this drill only for my work around the house, such as putting a shelf on the wall, repairing a chair, mostly for simple jobs at home, although it is an ideal drill for a workshop, because it is very good and from a good brand , with this maintenance I will extend its useful life, that's all, Regards and until another opportunity.
Note: All images are my own.

EN ESPAÑOL:
Hola mis amigos, hoy les traigo una nueva experiencia, se trata del mantenimiento preventivo a mi Taladro Percutor Reversible, marca BOSCH, este taladro tiene conmigo unos 25 años y jamás ha requerido una reparación, dolo el mantenimiento, porque he sido muy celoso con esta herramienta, en pocas ocasiones lo he prestado, porque mi papa decía, que "Nadie cuida lo de otro", y eso es verdad, porque hace dos semanas mi hijo le prestó este taladro a un amigo y cuando lo revisé estaba lleno de partículas de cemento y polvo, además de esto, en la punta del mandril se observa restos de pintura y de concreto, de la pared que estaban taladrando, lo que significa que hubo mucha fricción con la pared, situación que debemos evitar.
Bueno amigos, lo cierto es que cuando vi mi taladro en esas condiciones, me molesté un poco, creo que lo mejor es no prestarlo más, porque tengo que cuidarlo, así que hoy decidí hacerle un buen mantenimiento.
Mantenimiento preventivo de mi Taladro Percutor Reversible "Bosch"
El mantenimiento consiste en remover todas las partículas de polvo que estan dentro de sus partes internas, este trabajo lo haré con una aspiradora y una pequeña brocha, quizás utilice un pincel para las partes más difíciles, luego de esto le colocaré un poquito de grasa fina en los engranajes.
Este es mi taladro Bosch
Así me lo devolvieron:
Pasos para el mantenimiento del taladro:
- Lo primero que haré será quitar los tornillos que sujetan las dos tapas de la carcasa:
- Ahora quitaré una parte de la carcasa, procurando que las piezas queden fijas en la otra parte, ya podemos ver la cantidad de polvo, también pude observar que la grasa que lubrica las piezas estaba seca y mezclada con polvo, por lo tanto tuve una buena decisión en hacer este mantenimiento:
- A continuación voy a succionar el sucio con la aspiradora y con el uso una brocha y un pincel, también voy a remover los residuos de grasa, para colocar grasa nueva:
Miren como ha quedado la limpieza:
- Lo siguiente será lubricar los engranajes con grasa y aceite 3 en 1:
- El siguiente paso consiste en colocar nuevamente la tapa de la carcasa y listo:
Bueno amigos, como dice el dicho: no hay mal que por bien no venga, digo esto porque, a causa del estado en que me entregaron el taladro, decidí hacerle el mantenimiento y fíjense, que el taladro necesitaba un mantenimiento urgente, porque la grasa que lubricaba el engranaje parecía una pasta casi solida, ya que se había mezclado con el polvo, no lo van a creer, pero, este es el tercer mantenimiento que le hago a este taladro en 25 años, porque en realidad, este taladro lo uso solo para mis trabajos en la casa, como colocar una repisa en la pared, reparar una silla, mas que todo en trabajos sencillos en el hogar, aunque es un taladro ideal para un taller, porque es muy bueno y de buena marca, con este mantenimiento le alargaré su vida útil, Esto es todo, Saludos y hasta otra oportunidad.
Su post ha sido valorado por @ramonycajal
Hola, me da mucho gusto saludarte, gracias por tu apoyo en nombre de ese gran equipo de cervantes, gracias, Dios te bendiga.
Thank you for sharing this post on HIVE!
Your content got selected by our fellow curator hafizullah & you just received a little thank you upvote from us for your great work! Your post will be featured in one of our recurring compilations which are aiming to offer you a stage to widen your audience within the DIY scene of Hive. Next time make sure to post / cross-post your creation within the DIYHub community on HIVE and you will receive a higher upvote ;) Stay creative & HIVE ON!
Please vote for our hive witness <3
Thank you for your support, I will take your suggestions into account, regards.
You're welcome.
You are doing a great job
Que tal oscarcede, grato el saludarte y ver que con tu ejemplo nos motivas a realizar tareas sencillas que de seguro le alargaran la vida a herramientas de casa, aunque como lo mencionas son herramientas de buena marca que implica alta calidad, muy aparte que, desde mi punto de vista, lo fabricado hace esa cantidad de años son mejores que los de hoy dia.
Solo curiosidad: las bocinas del rotor tambien las lubricastes? Lo pregunto ya que no leí o vi que mencionastes algo al respecto y éste es el corazón del movimiento.
Saludos