[ENG-ESP] Change of brake pads of my Optra car and painting of calipers
IN ENGLISH:
A cordial greeting to the entire community of
Hive Motors This time I want to share with you a new experience, it is about changing the brake pads of my Optra car, but in addition to this, my son told me to paint the calipers, actually my son is the one who uses this car the most, so I accepted this suggestion.
Well friends, it is important that our children learn to repair the simple things that are most damaged in cars, such as brakes, belts, engine oil change, replacement of tires, installation of light bulbs, etc., because whoever has a car must learn some mechanics, well friends, the truth is that I have always liked my children to help me with car repairs, in this way they are learning.

Change of brake pads of my Optra car and painting of calipers
Yes friends, today I decided to change the pads in the car, because the metal plate that indicates that the paste in the block is already at a minimum was already ringing, so it is recommended to take this signal into account, to avoid the iron. of the pads rub against the record, because if we are careless, we will surely damage the record.
Process:
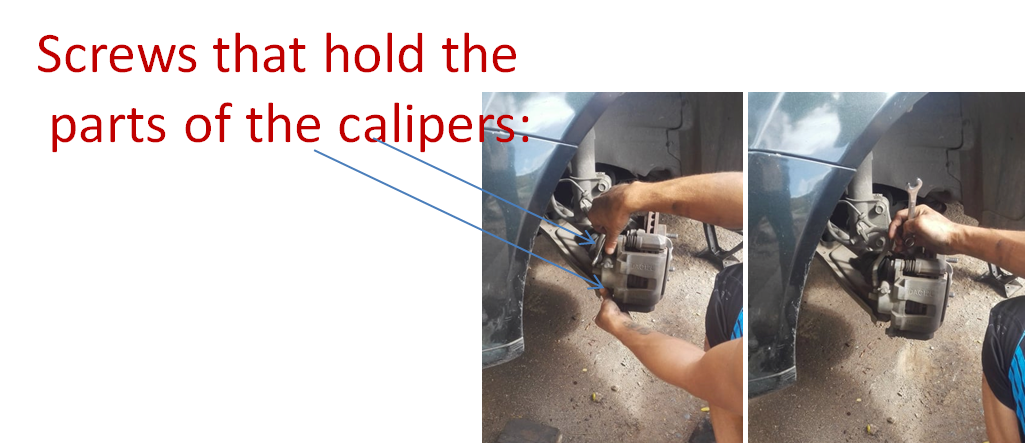
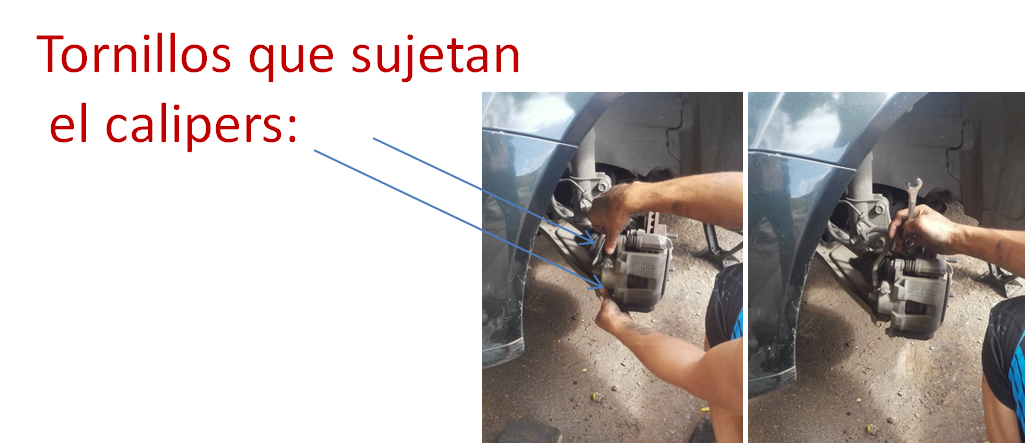
- After lifting the car, I am going to proceed to remove the two screws that hold the calipers, when removing this piece we can see the two brake pads, which have slots that fit into the lower base:
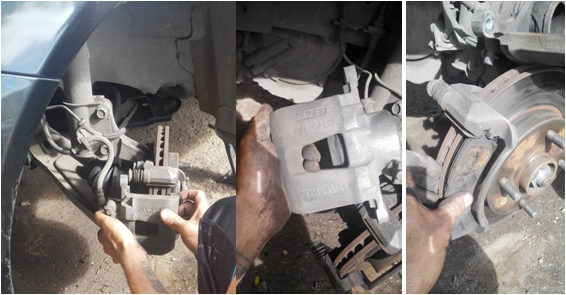
- Now I am going to remove the upper part to remove the brake pads:
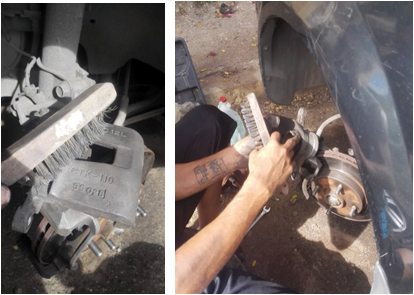
- As I said at the beginning, we are going to paint the two pieces that make up the calipers, we will also paint the center of the disc, therefore it is necessary to clean all these pieces well so that the paint adheres well to the metal, this work is done we will do to the front and rear brakes:
- These pieces will be painted with light red spray paint, for high temperatures:

- After painting the pieces, now we are going to place the new brake pads to proceed to assemble the pieces again:
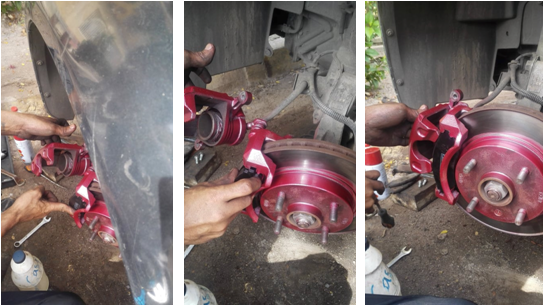
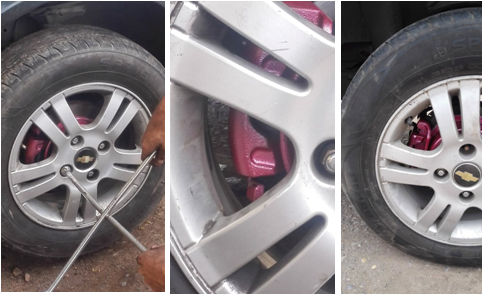
- Well friends, we already changed the front pads of the car, but we painted the 4 calipers, that is, front and rear, then I will show you how they look with the tires mounted:
As you have seen, changing the pads of a Chevrolet Optra is quite easy, this system is the same as that of the Aveo car, there are two ways, we can remove the lower screw and loosen the upper one and lift the calipers, there you can see the pads, they are easy to remove, another important detail is that we must open the piston a little more so that the new pads can enter, all this is very simple, well friends this has been all, greetings.

EN ESPAÑOL:
Un cordial saludo para toda la comunidad de
Hive Motors En esta ocasión quiero compartir con ustedes una nueva experiencia, se trata del cambio de las pastillas de frenos de mi carro Optra, pero además de esto, mi hijo me dijo para pintar el calipers, en realidad mi hijo es quien más usa este carro, por lo que acepté esta sugerencia.
Bueno amigos, es importante que nuestros hijos aprendan a reparar las cosas sencillas que más se dañan en los carros, como los frenos, correas, cambio del aceite del motor, sustitución de cauchos, instalación de bombillos etc, porque el que tiene carro debe aprender algo de mecánica, bueno amigos, lo cierto es que siempre me ha gustado que mis hijos me ayuden con las reparaciones del carro, de esta manera ellos van aprendiendo.
Cambio de pastillas de freno de mi carro Optra y pintura del Calipers
Si amigos, hoy decidí cambiar las pastillas del carro, porque ya estaban sonando la platina metálica que indica que la pasta del taco ya está en el mínimo, por lo que es recomendable, tomar en cuenta esta señal, para evitar que el hierro de las pastillas hagan fricción con el disco, porque si nos descuidamos, seguro que dañamos el disco.
Proceso:
- Después de levantar el carro, voy a proceder a quitar los dos tornillos que sujetan el calipers, al quitar esta pieza podemos ver los dos tacos de las pastillas, los cuales poseen unas ranuras que encajan en la base inferior del calipers:
- Ahora voy a quitar la parte superior para retirar las pastillas de frenos:
- Como les decía al comienzo, vamos a pintar las dos piezas que forman el calipers, también pintaremos, el centro del disco, por lo tanto es necesario limpiar bien todas estas piezas para que la pintura se adhiera bien al metal, este trabajo se lo haremos a los frenos delanteros y traseros:
- Estas piezas la pintaremos con pintura en spray color rojo claro, para altas temperaturas:
- Después de pintar las piezas, ahora vamos a colocar las nuevas pastillas de frenos para proceder a armar nuevamente las piezas:
- Bueno amigos, ya le cambiamos las pastillas delanteras del carro, pero pintamos los 4 calipers, es decir, delanteros y traseros, a continuación les mostraré como se ven con los cauchos montados:
Como han podido ver, el cambio de pastillas de un Chevrolet Optra es bastante fácil, este sistema es igual al del carro Aveo, hay dos maneras, podemos quitar el tornillo inferior y aflojar el superior y levantamos el calipers, allí podrán ver las pastillas, luego retiramos las viejas, otro detalle importante es que debemos abrir un poco más el pistón para que las nuevas pastillas puedan entrar, todo esto es muy sencillo, bueno amigos esto ha sido todo, saludos.