Correcting an oil spill from the car engine valve cover / Corrigiendo un derrame de aceite por el tapa-válvula del motor del carro
IN ENGLISH:
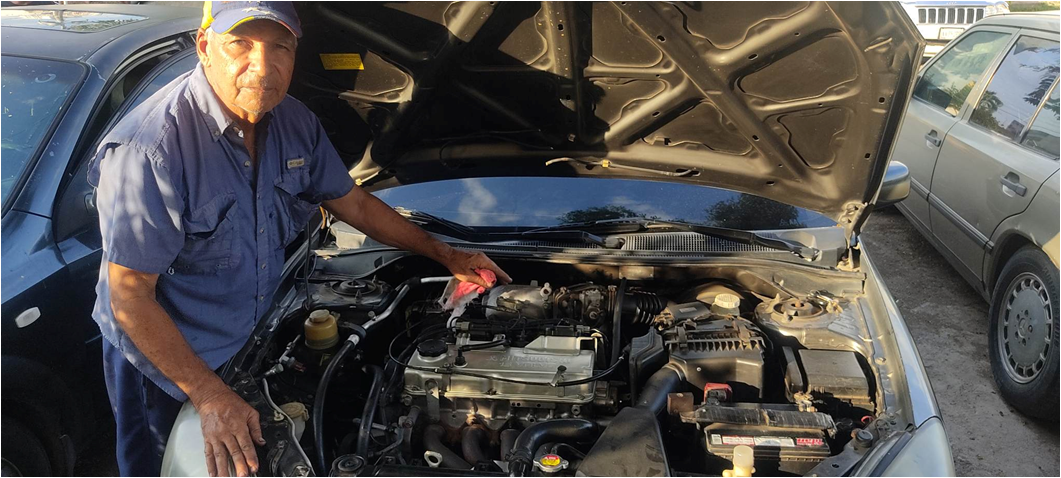
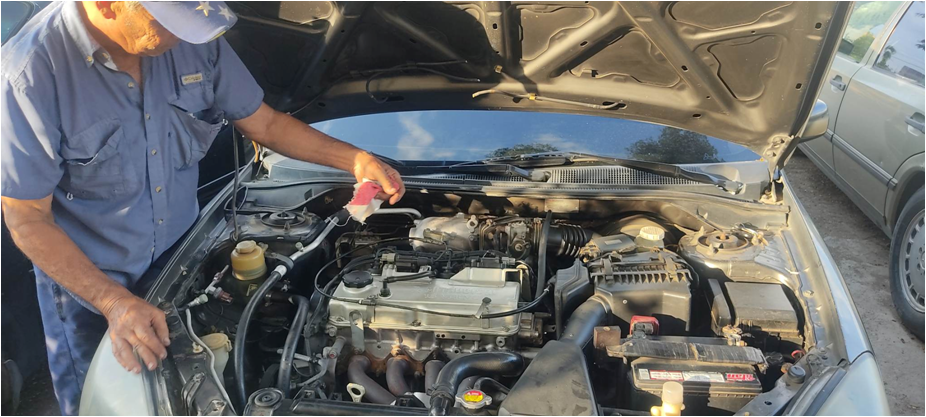
Hello friends, here I am again to share a new experience with you, I tell you that yesterday my son told me that for a few days he had felt a smell of smoke inside the car, and this morning he felt it stronger, so He opened the hood and smoke came out of the manifold side and he noticed that it was an oil spill that was coming out of the valve cover, so we decided to correct that oil spill.
EN ESPAÑOL:
Hola amigos, aquí estoy de nuevo para compartir con ustedes una nueva experiencia, les cuento que ayer mi hijo me dijo que desde hace unos días sentía dentro del carro un olor a humo, y hoy en la mañana lo sintió mas fuerte, por lo que abrió el capot y salió humo por el lado del múltiple y notó que era un derrame de aceite que salia por el tapa válvula, así que decidimos corregir ese derrame de aceite.
Correcting an oil spill from the car engine valve cover / Corrigiendo un derrame de aceite por el tapa-válvula del motor del carro
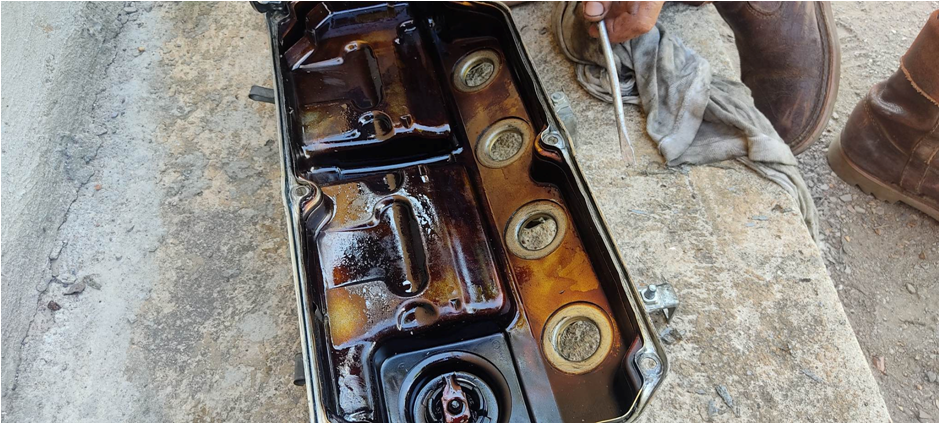
My son's car is a mitsubishi lancer touring 2.0, he tells me that two months ago he changed the gasket and the spark plug tube seals and he doesn't understand why it is leaking oil, well friends, many times new gaskets are mounted and yes They do not tighten well, after a few days they present oil leaks, these leaks can also occur when the edge of the cover is bent, for this reason it is advisable to apply it around the edge of the combustion chamber and on the gasket itself. a little bit of silicone sealant for high temperatures, to avoid these oil leaks, I repeat, just a little bit, because we must avoid silicone residues getting on the inside of the chamber.
El carro de mi hijo es un mitsubishi lancer touring 2.0, me dice que hace dos meses le cambió la empacadura y los sellos del tubo de las bujias y no entiende porque esta fugando aceite, bueno amigos, muchas veces se montan las empacaduras nuevas y si no se aprietan bien, a los pocos días presentan fugas de aceite, estas fugas también se pueden presentar cuando el borde de la tapa esta doblada, por esta razón es recomendable aplicar en todo el borde de la cámara de combustión y en la propia empacadura, un poquito de sellador de silicon para altas temperaturas, para evitar estas fugas de aceite, repito, solo un poquito, porque debemos evitar que le caiga restos de silicon en la parte interna de la cámara.
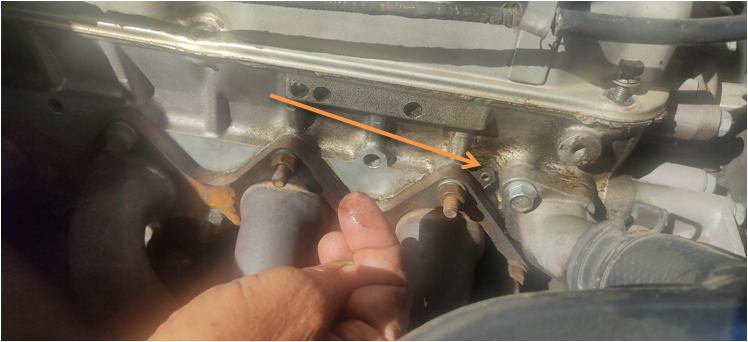
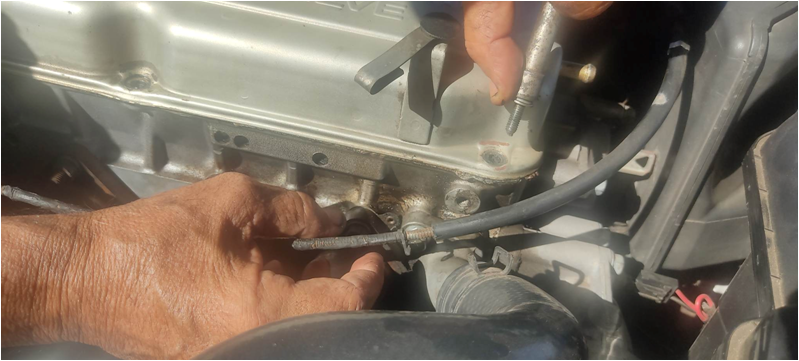
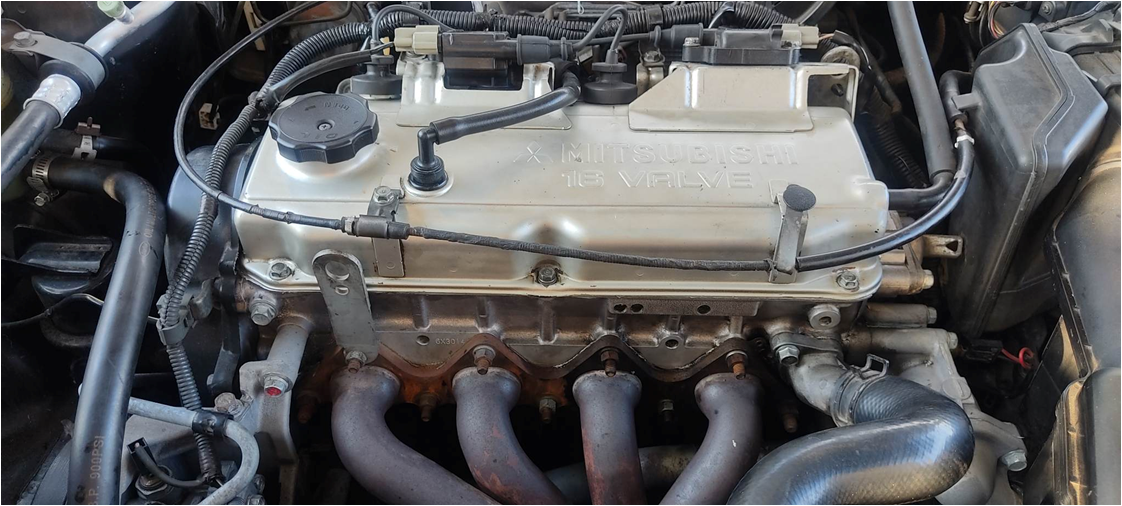
In the following image we can see the oil leak / En la siguiente imagen podemos observar el derrame de aceite:
Removing the valve cover / Desmontaje de la tapa-válvula
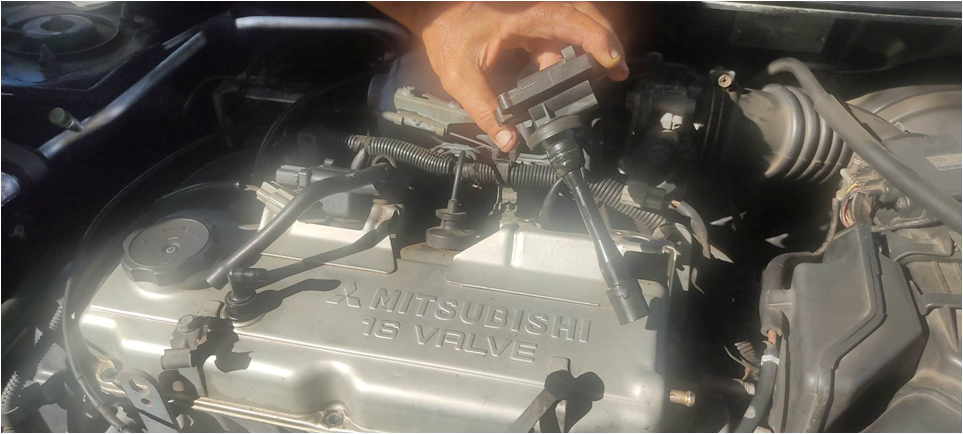
- The first thing to do is remove the coils, the spark plug wires and the hose from the PCV valve,
- Lo primero que hay que hacer es retirar las bobinas, los cables de bujías y la >manquera de la válvula PCV,
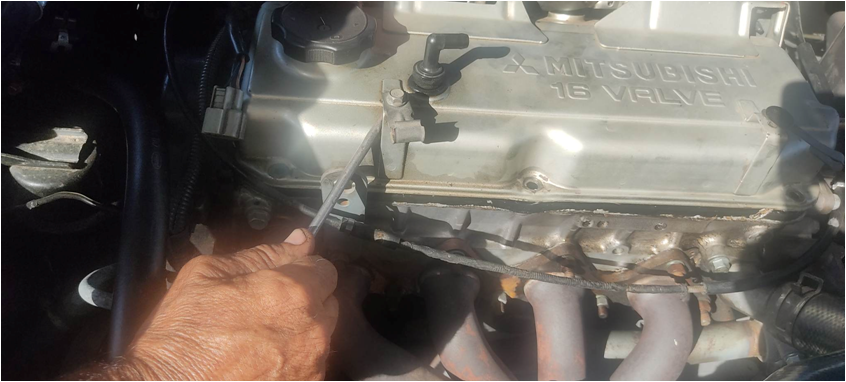
- Now to remove the cover screws:
- Ahora a retirar los tornillos de la tapa:
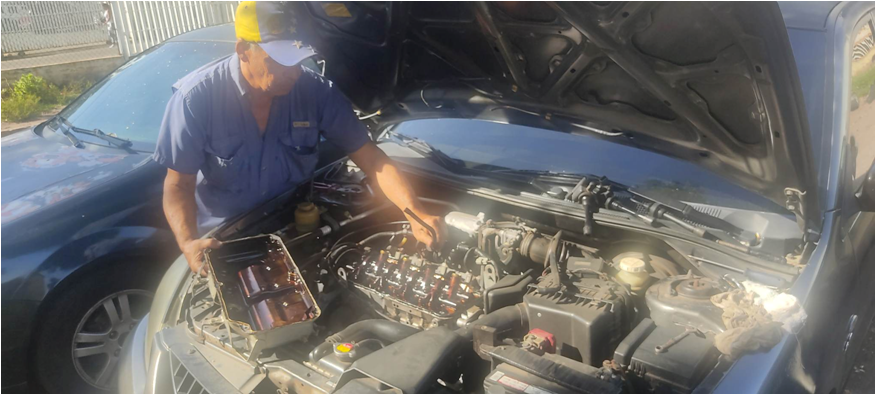
- Once the screws have been removed, carefully lift the cover, trying to lift it little by little on several sides until it releases from the edge of the camera, I say this so that it does not bend:
- Una vez quitados los tornillos, con mucho cuidado levantamos la tapa, intentando levantarla poco a poco por varios lados hasta que se suelte del borde de la cámara, digo esto para que no se doble:
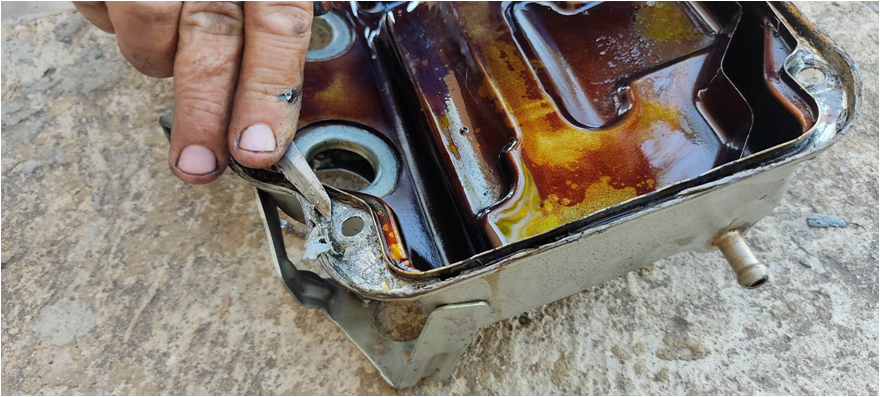
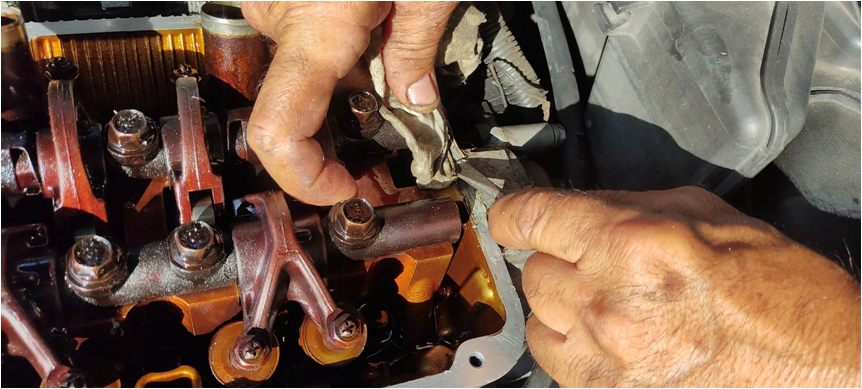
- The next step will be to clean the lid, I could see that silicone had been placed on it, perhaps that silicone did not seal well, that is why it is important to clean both the edge of the chamber and the lid well, we must eliminate the remains of old silicone and oil residues, so that the silicone adheres well:
- El siguiente paso será la limpieza de la tapa, pude observar que le habían colocado silicón, quizás ese silicón no selló bien, por eso es importante limpiar bien tanto el borde de la cámara como la tapa, debemos eliminar los restos de silicon viejo y los residuos de aceites, para que el silicón se adhiera bien:
Cleaning the edge of the lid: / Limpiando el borde de la tapa:
Cleaning the edge of the camera: / Limpiando el borde de la cámara:
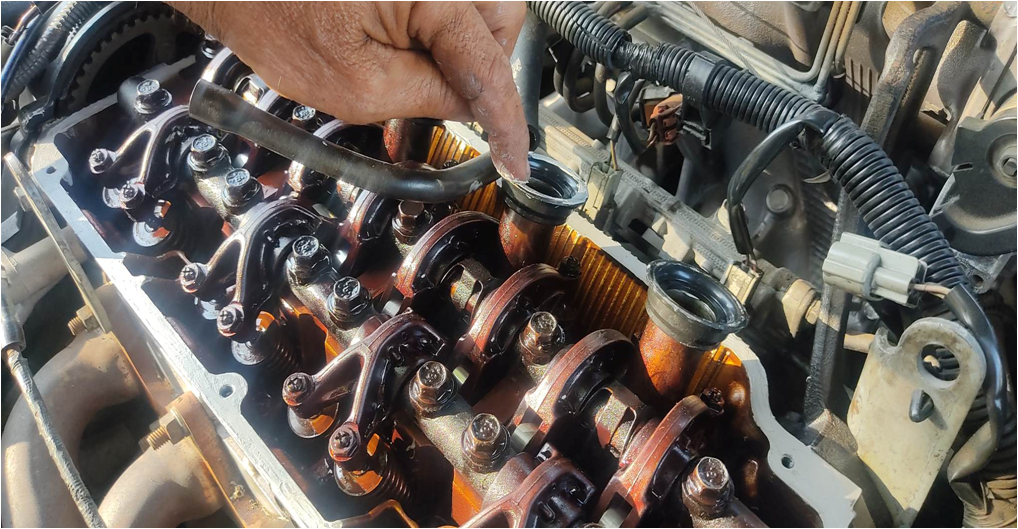
- Now I am going to place the same gasket since it feels soft, but I am going to spread a little bit of silicone sealant on it:
- Ahora voy a colocar la misma empacadura ya que se siente suave, pero le voy a untar un poquito de sellador de silicon:

- I am also going to put a thin layer of silicone sealant around the edge of the tube:
- También le voy a colocar una capa delgada de sellador de silicon en todo el borde de la cámara:

- Regarding the four rubber seals of the spark plug tube, they are really quite soft, my son had changed them two months ago when he changed the gasket, so I am only going to put a little bit of silicone sealant to avoid an oil leak towards the spark plugs.
- En cuanto a los cuatro sellos de gomas del tubo de las bujías, en verdad están bastante suaves, mi hijo los había cambiado hace dos meses cuando cambió la empacadura, de manera que solo le voy a colocar un poquito de sellador de silicon para evitar una fuga de aceite hacia las bujías.
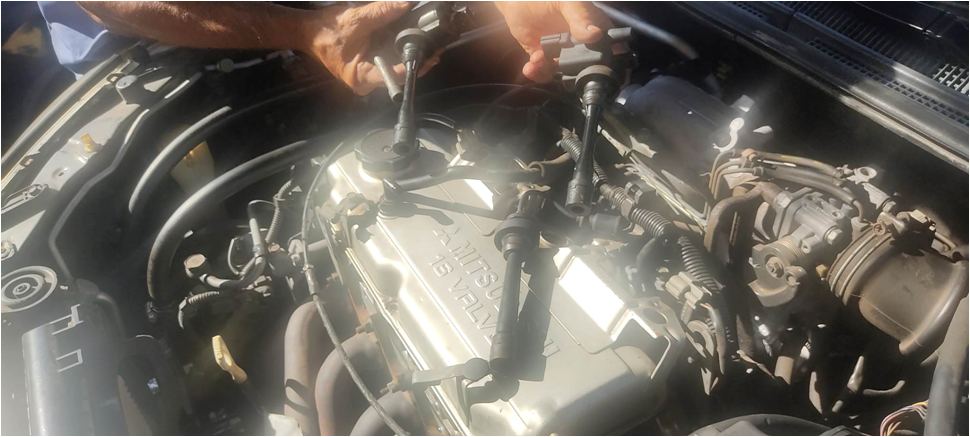
- The next step will be to put the cover back on the camera, and then start and adjust the screws:
- El siguiente paso será, colocar nuevamente la tapa sobre la cámara, para luego comenzar y ajustar los tornillos:
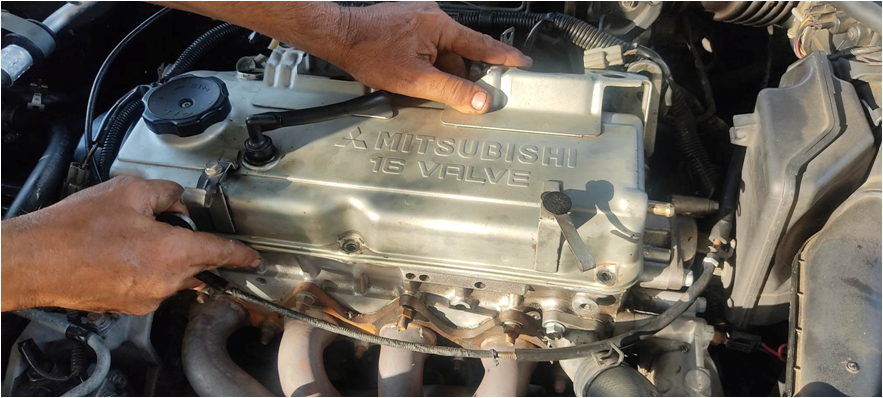
Well friends, now I am going to put the different accessories like the two coils, the two spark plug wires and the PCV valve hose again and that's it:
Bueno amigos, ahora voy a colocar nuevamente los diferentes accesorios como las dos bobinas, los dos cables de las bujías y la manguera de la válvula PCV y listo:

I'm done, everything turned out great: / Ya terminé, todo quedó muy bien:
This is a fairly simple job that we can do ourselves, I always tell my children that when you have a car you have to learn some mechanics, like changing the brake pads, changing the headlight bulbs, check the fuses, the front axle, above all learn about light mechanics, look at how easy it was to correct the oil leak from the valve cover and just like this there are many simple things that we can repair.
Este es un trabajo bastante sencillo que nosotros mismos podemos hacer, yo siempre e digo a mis hijos que cuando se tiene un carro hay que aprender algo de mecánica, como cambiar las pastillas de los frenos, cambiar las bombillas de los focos, revisar los fusibles, el tren delantero, más que todo aprender sobre la mecánica ligera, fíjense lo fácil que fue corregir la fuga de aceite del tapa-válvula y así como esto hay muchas cosas sencillas que podemos reparar.
Se ve bastante limpio luego del trabajo, me encanta que los carros no tengan esas coberturas plásticas sobre el tapa válvulas, en mi caso la admisión pasa por encima y es molesto quitarla. También. Debe hacer este trabajo, quedo fino sr Oscar.
Hola Daniel, si amigo la mecánica de estos carros son sencillas, no hay que quitar tantos accesorios como en otros, lo ideal es que el trabajo se vea limpio, hay quienes le ponen demasiado silicon que al apretarlo se sale,y así lo dejan, afeando el trabajo, bueno amigo, gracias por tu comentario, te deseo lo mejo para ti y tu familia, saludos.
Congratulations @oscarcede! You received a personal badge!
You can view your badges on your board and compare yourself to others in the Ranking
Check out our last posts: