[ESP-ENG] Tutorial: Reciclando Materiales Elaboré Un Original Y Decorativo Imán./: Recycling Materials I made an Original and Decorative Magnet.//
Holaaa! Saludos, mis vecinos hivedianos como pasaron este miércoles? Ya vamos de nuevo por la mitad de semana y como decía el slogan de aquella línea aérea " el tiempo pasa volando" y a nosotros no nos queda más remedio que sacar también nuestras alitas para poder llevar el ritmo.
Ya nos vamos desocupando de las tantas celebraciones de estos primeros seis meses del año abriendo cancha para cuando nos toque celebrar la navidad, pues ya no falta mucho.
Cómo siempre les comento, mi trabajo es en comunidades rurales dónde los recursos monetarios son escasos y cuando nos toca las artes manuales; hay que sacar a flote el ingenio y a trabajar con lo que tengamos a mano, en esta área realizamos muchas creaciones utilizando el reciclaje asi además de ayudar a evitar la contaminación del ambiente damos vida a materiales que están para el desecho convirtiéndolos en material de provecho.
Hoy voy a compartir una sencilla manualidad realizada con una caja de cartón y de la que hice varias figuritas para convertirlas en imanes decorativos .
Sigan leyendo para ver el paso a paso de cómo las hice:
Hellooo! Greetings, my Hivedian neighbors, how did you spend this Wednesday? We're going again for the middle of the week and as the slogan of that airline said "time flies" and we have no choice but to take out our wings too to be able to keep up.
We are already getting rid of the many celebrations of these first six months of the year, opening the court for when we have to celebrate Christmas, because there is not much left.
As I always tell you, my work is in rural communities where monetary resources are scarce and when we have to do manual arts; we have to bring out the ingenuity and work with what we have at hand, in this area we make many creations using recycling so, in addition to helping to avoid contaminating the environment, we give life to materials that are for disposal, turning them into useful material.
Today I am going to share a simple craft made with a cardboard box and from which I made several figures to turn them into decorative magnets.
Keep reading to see the step by step of how I made them:
MATERIALES QUÉ USÉ
EN SU ELABORACIÓN
Una caja de carton.
Lápiz.
Regla.
Tijeras.
Retazos de foamis.
Un imán.
Silicón al frío.
MATERIALS I USED
IN ITS PREPARATION
A cardboard box.
Pencil.
Rule.
Scissors.
Scraps of foam.
A magnet.
Cold silicone.

*** PARA REALIZAR LOS IMANES UTILICE ESTOS SENCILLOS PASOS:***
- PRIMER PASO:
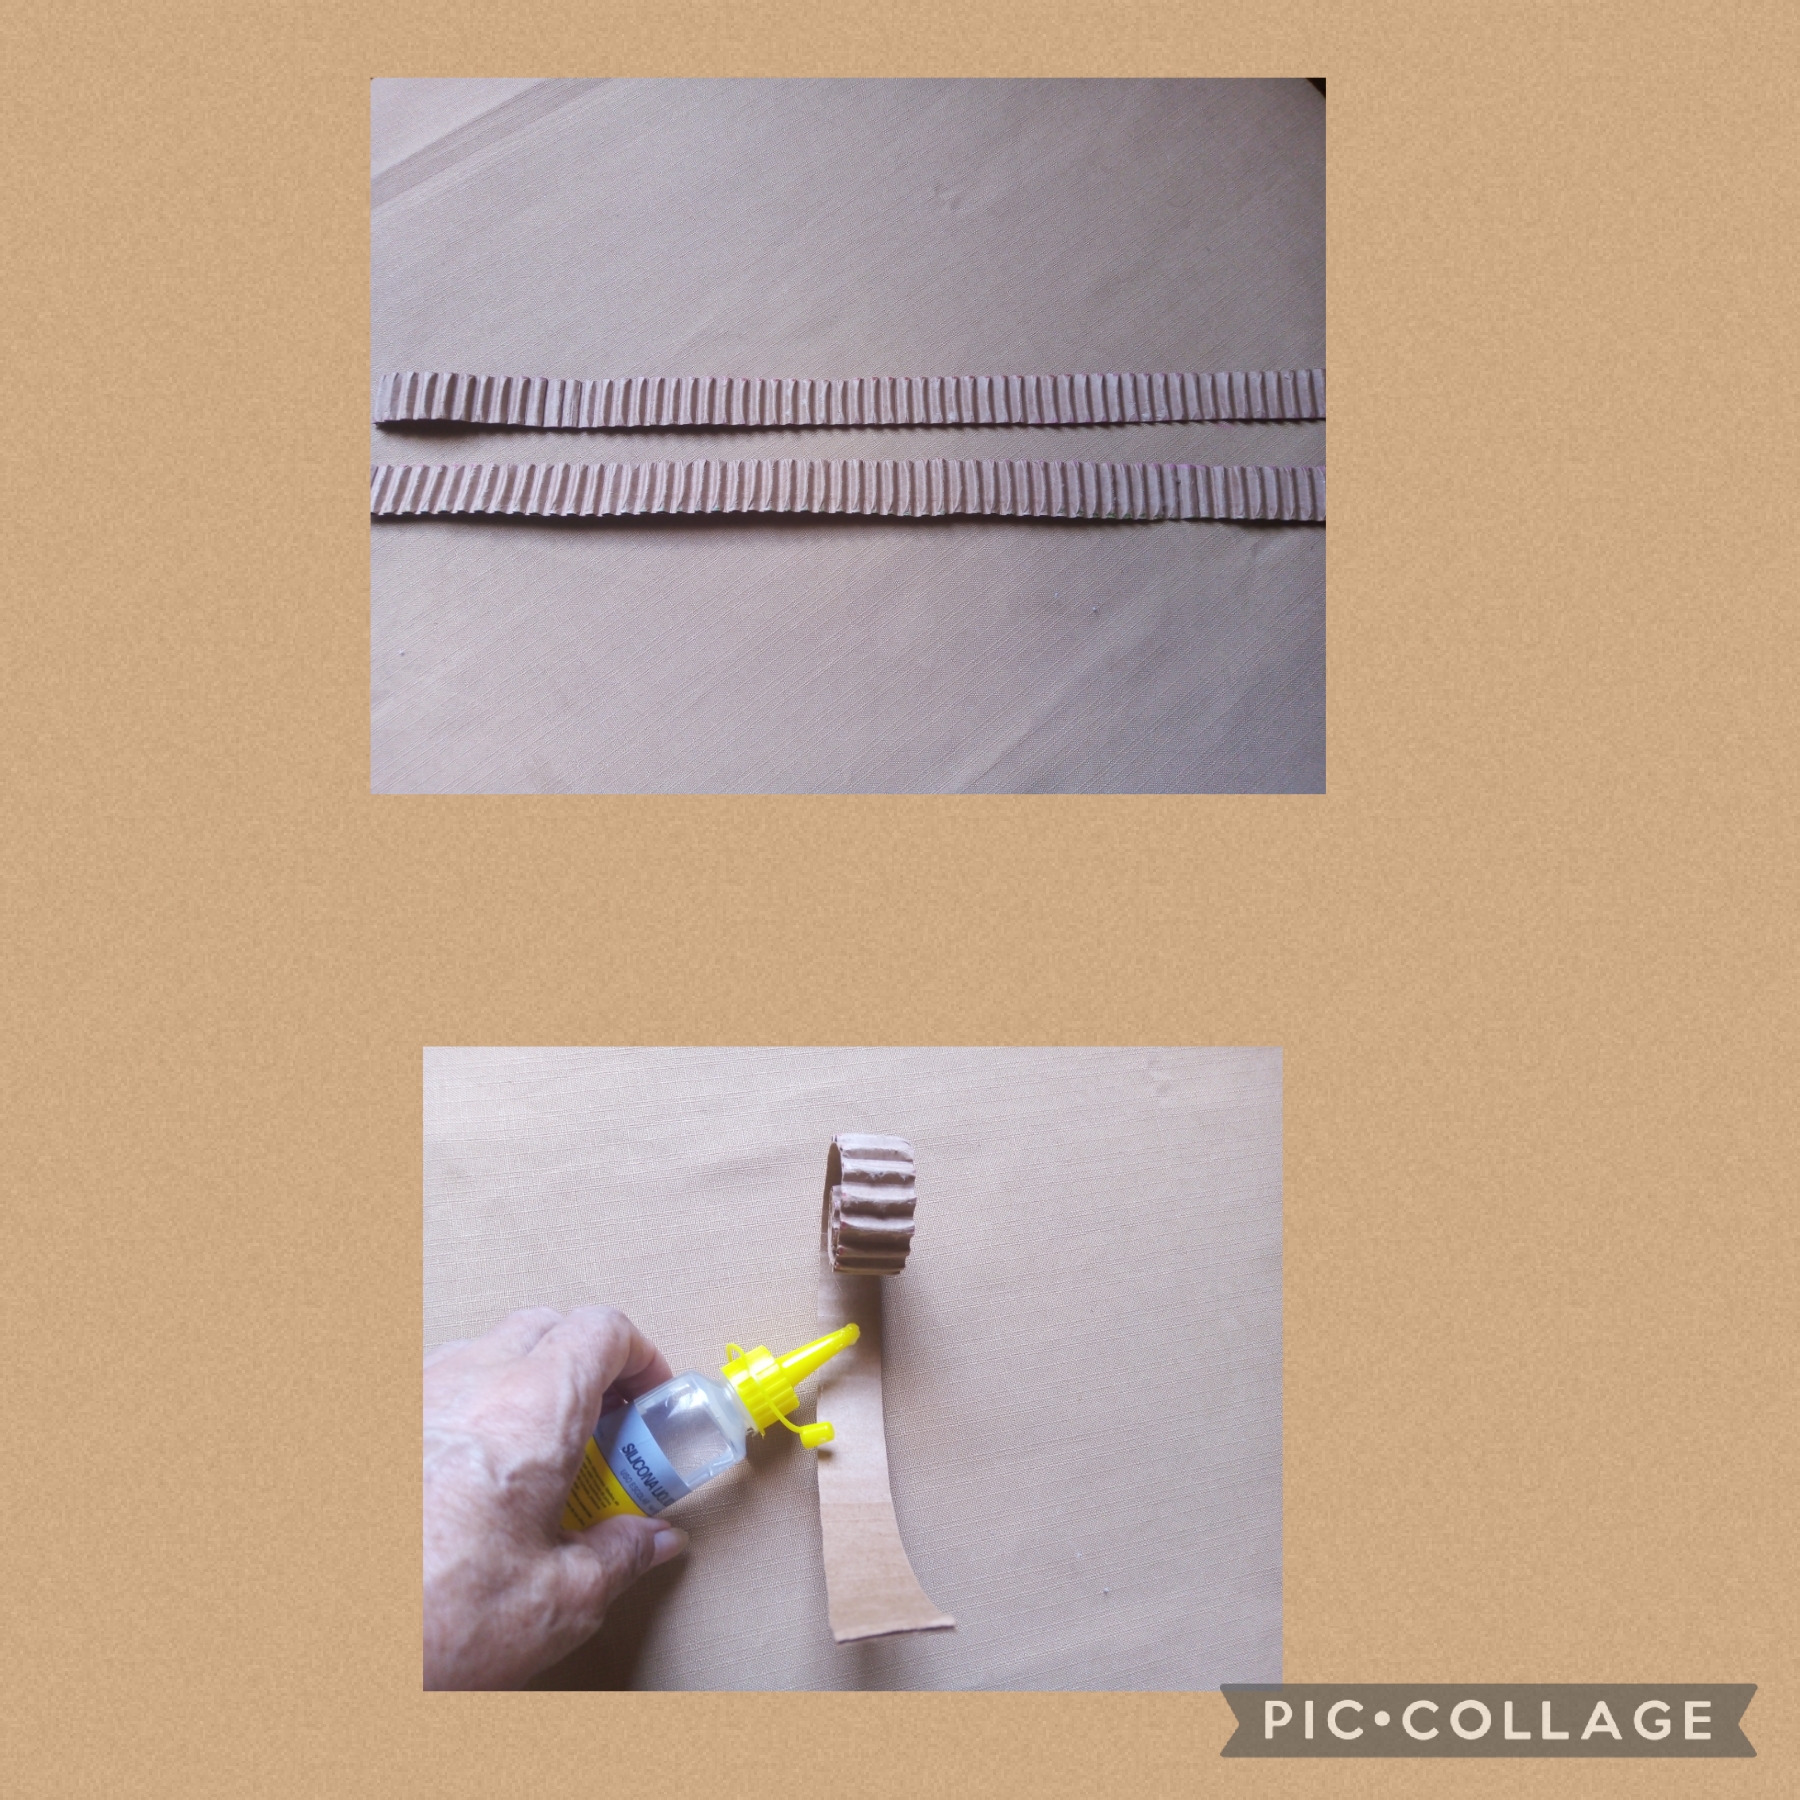
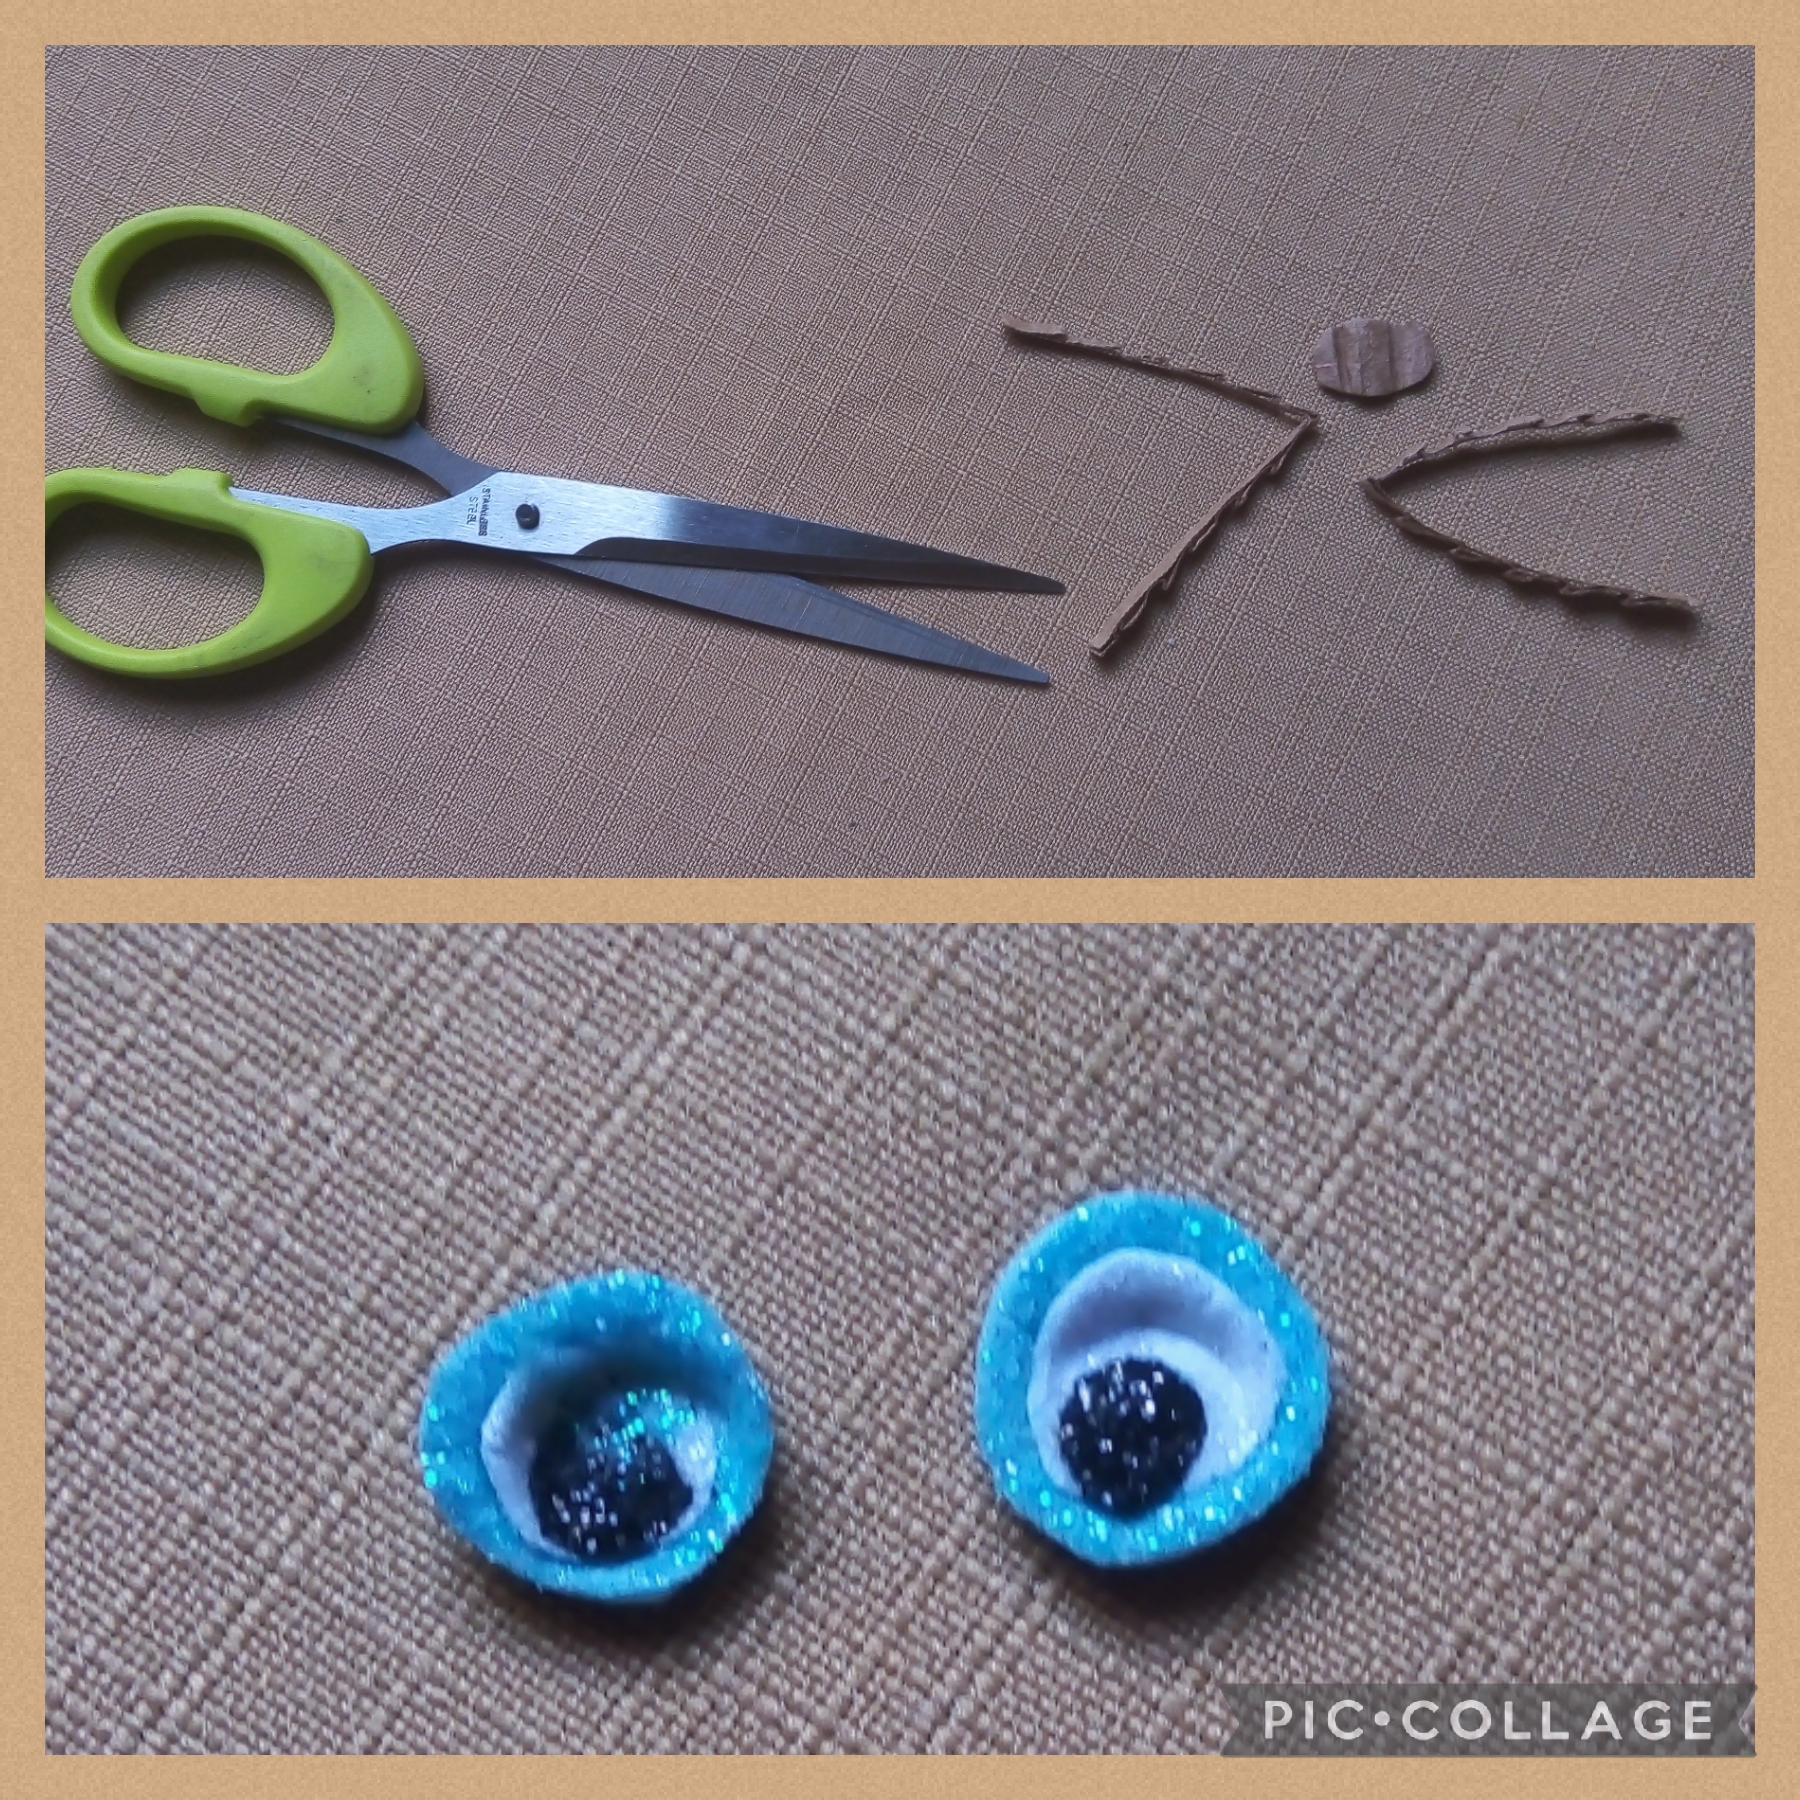
En este paso, quito una tapa de la caja de cartón y desprendo una de las capas y así me queda una lámina de cartón corrugado; luego uso la regla y mido dos tiras del cartón de 45x2cms, las corto usando las tijeras; como en las fotos.
*** TO MAKE THE MAGNETS USE THESE SIMPLE STEPS:***
-FIRST STEP-
In this step, I remove a lid from the cardboard box and peel off one of the layers, leaving me with a sheet of corrugated cardboard; then I use the ruler and measure two 45x2cm strips of cardboard, I cut them using scissors; as in the photos.

-SEGUNDO PASO:-
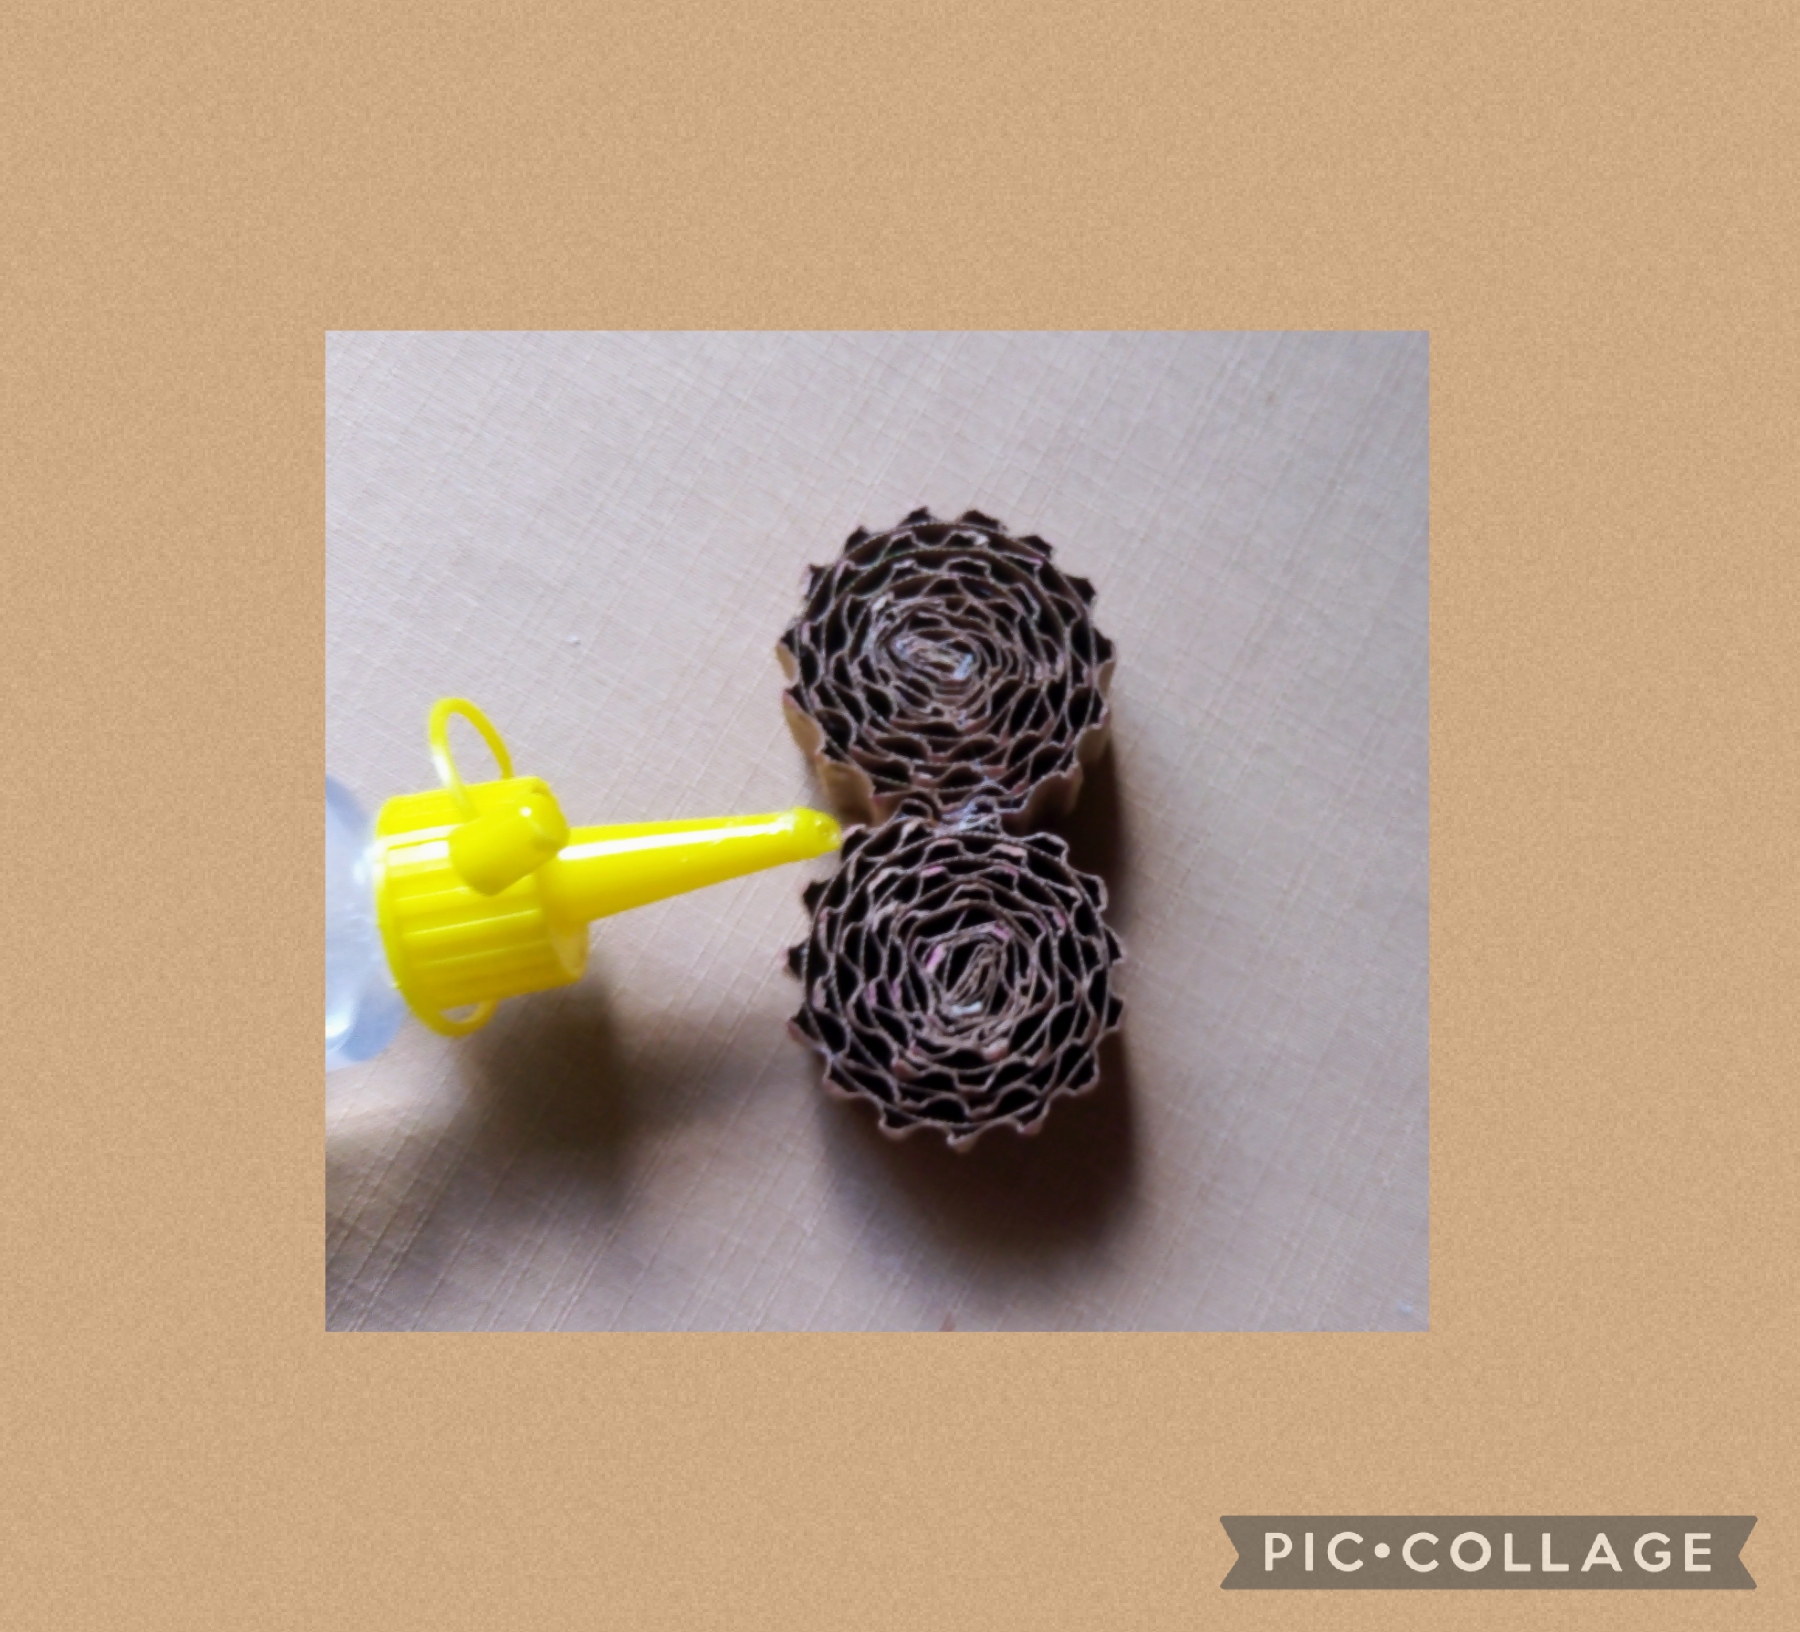
Ahora después de cortar los listones, empiezo a enrrollarlos y los fijos con el silicón al frío.
-SECOND STEP:-
Now after cutting the slats, I begin to roll them up and fix them with silicone to the cold.
-TERCER PASO-
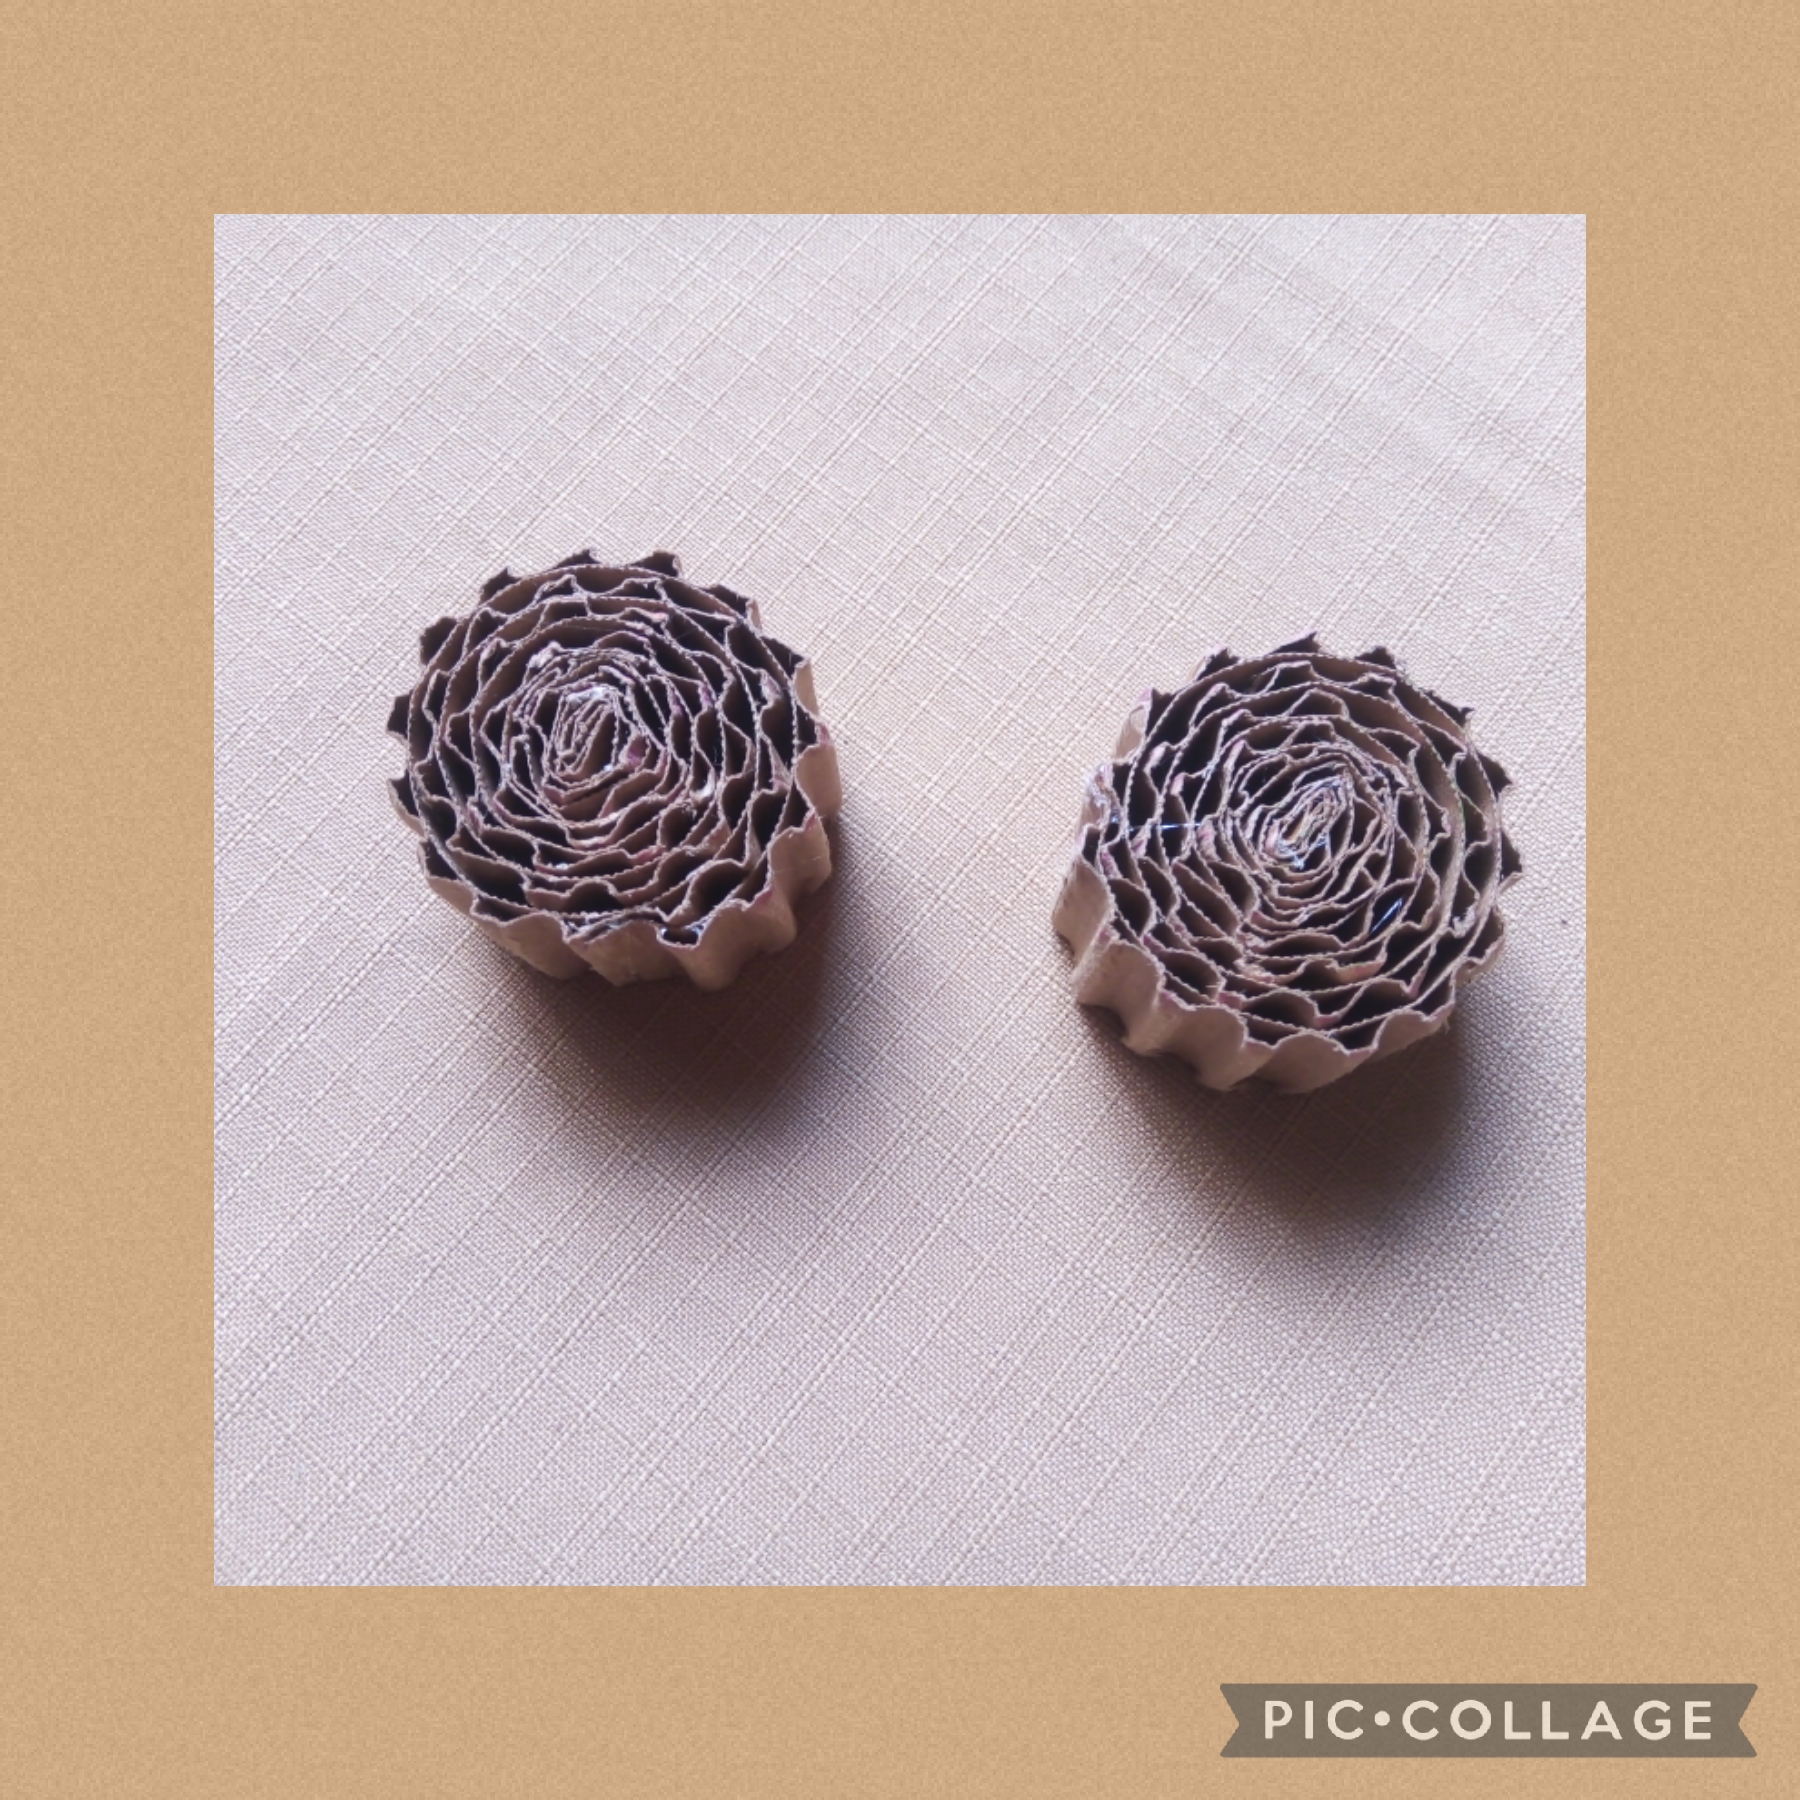
De la misma forma enrrollo el otro listón y así quedan (como muestro en las fotos)
-THIRD STEP-
In the same way I roll the other ribbon and that's how they stay (as I show in the photos)
-CUARTO PASO-
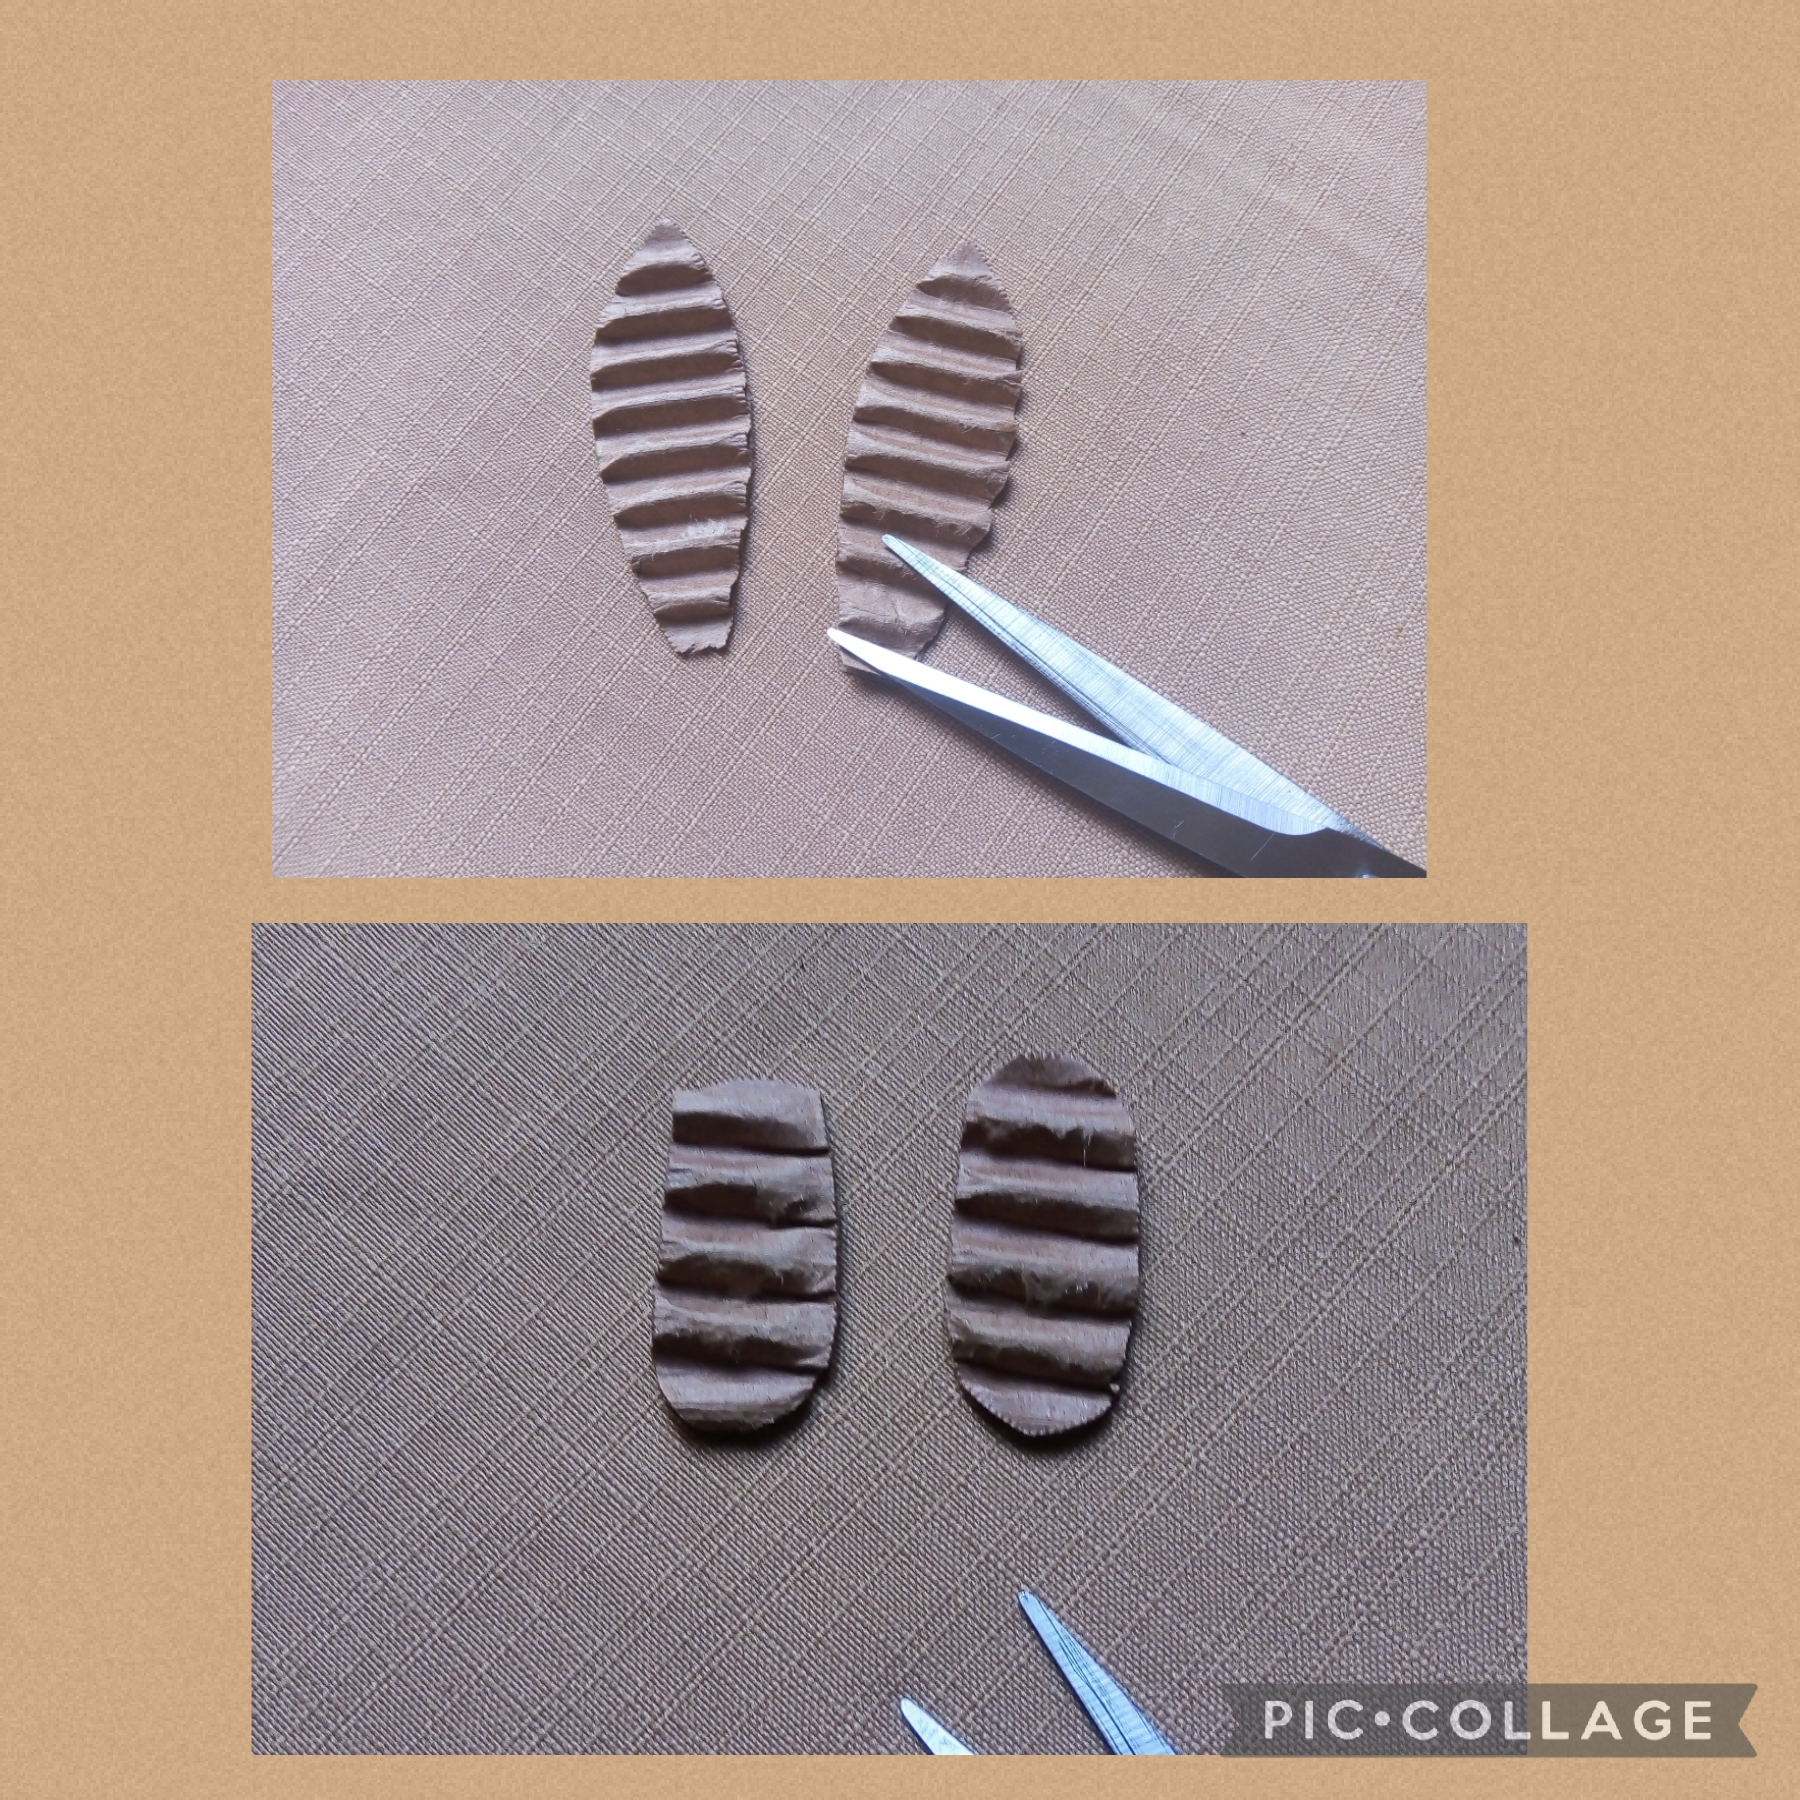
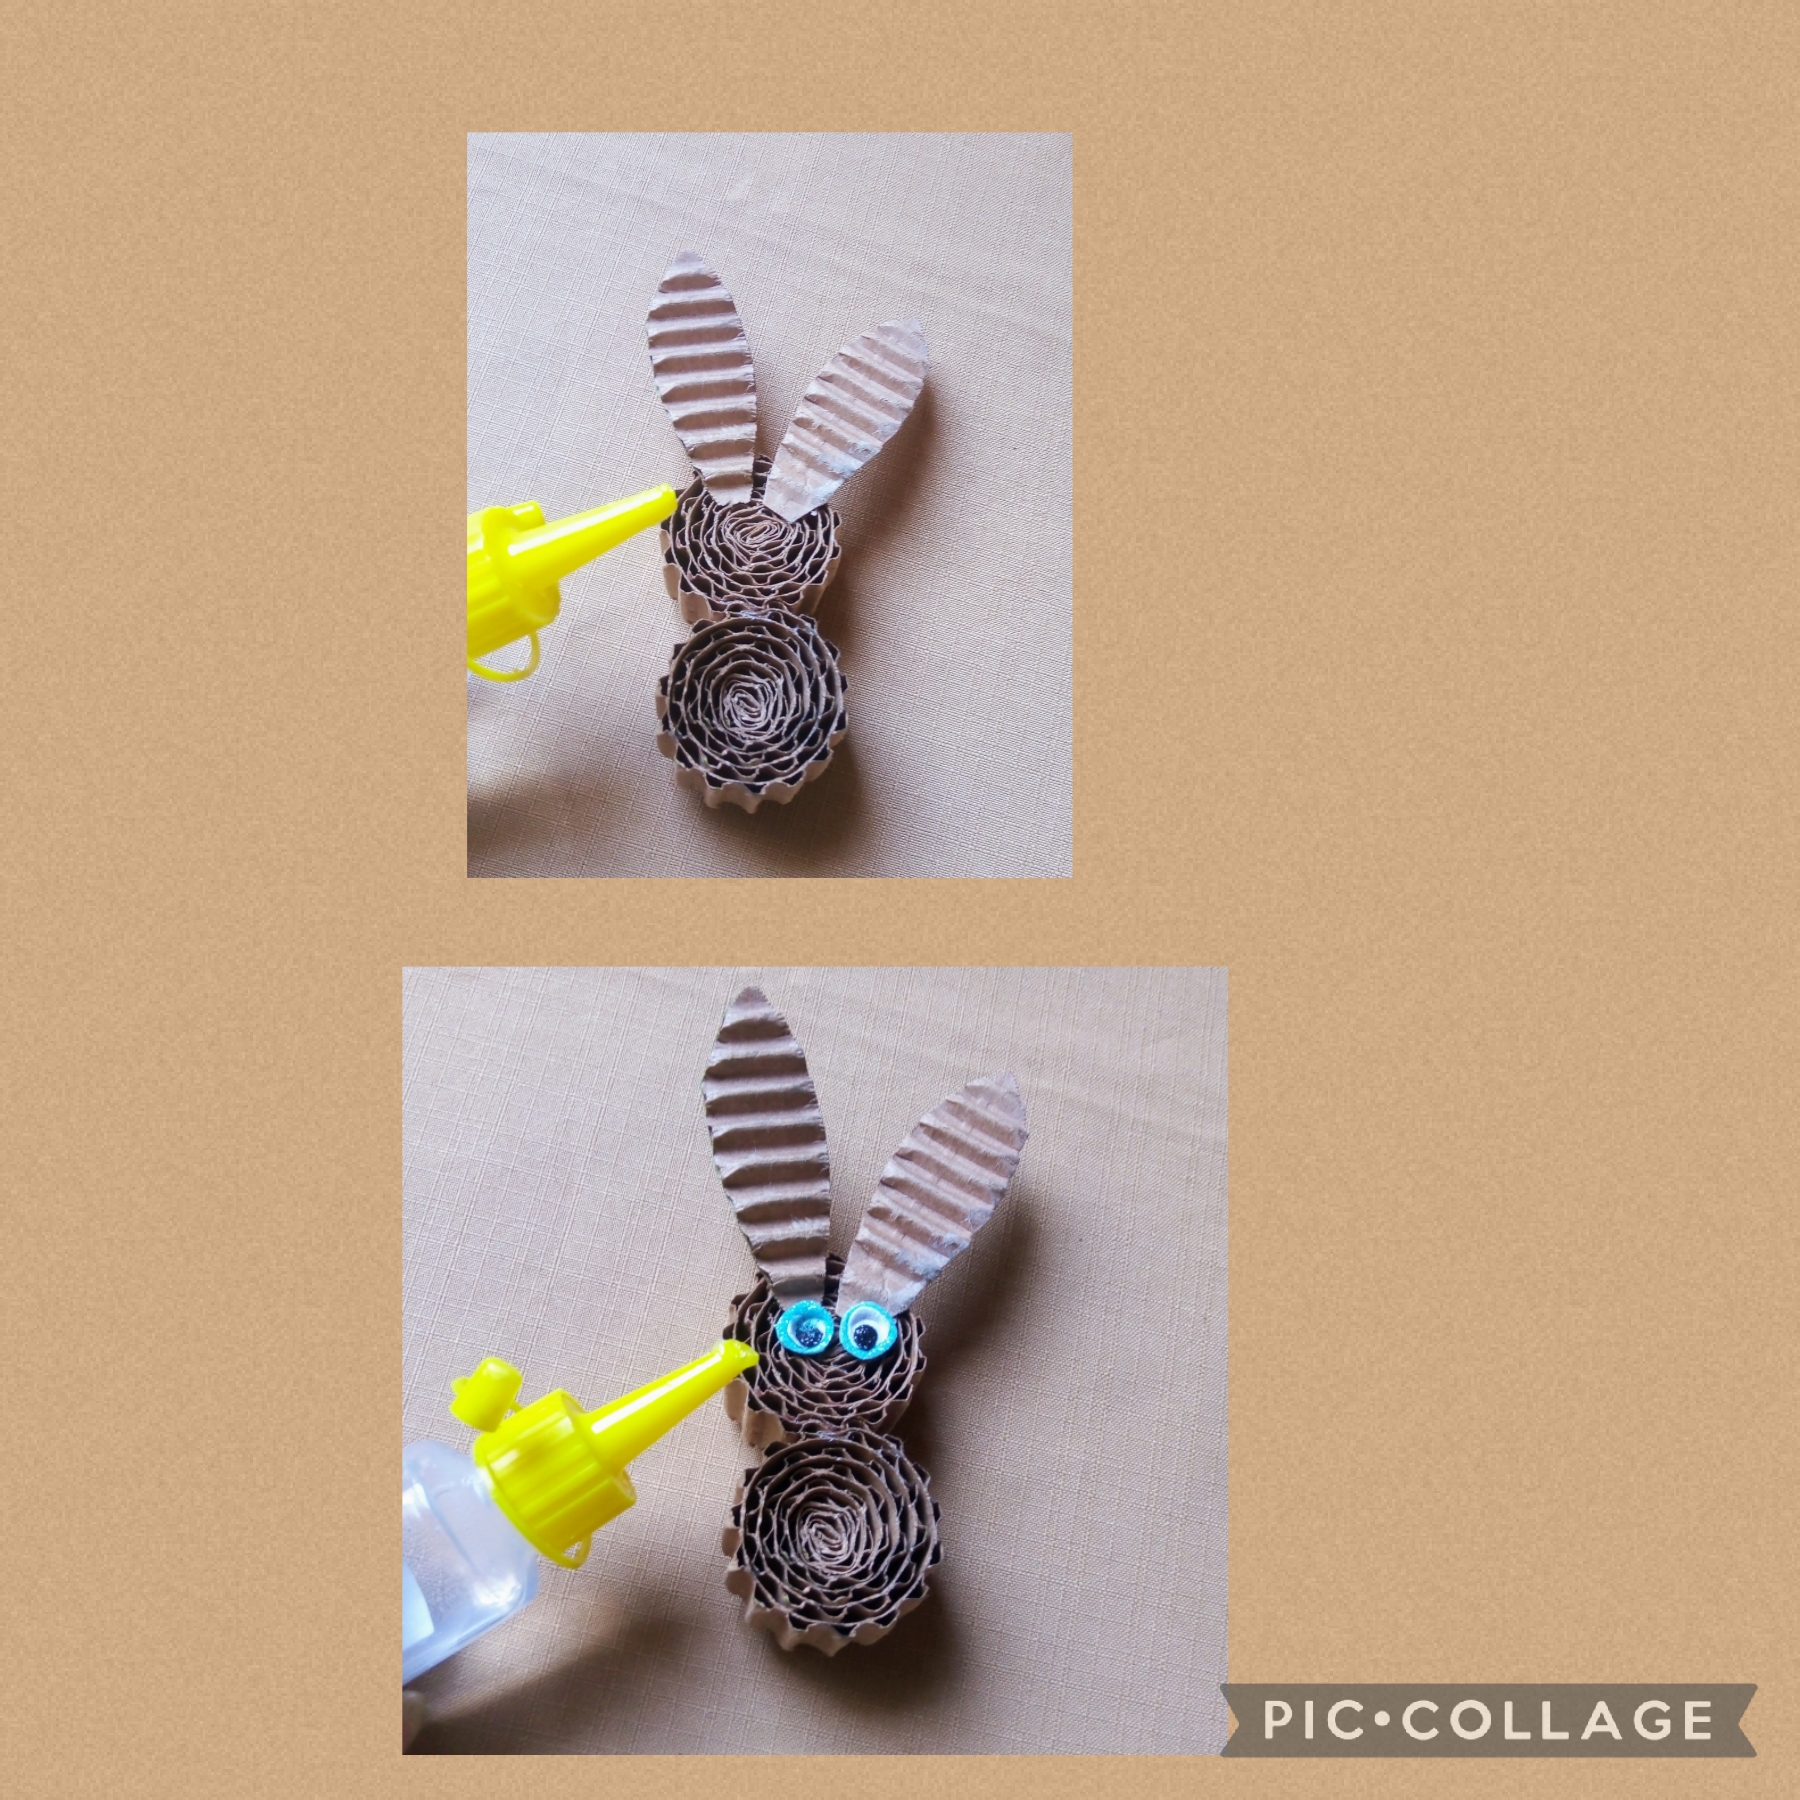
Ahora corto cuatro formas del cartón corrugado: dos para las orejas y dos para las paticas.
-FOURTH STEP-
Now I cut four shapes out of the corrugated cardboard: two for the ears and two for the paws.
-QUINTO PASO-
En este paso, elaboró los bigotes la nariz y los ojos (ver fotos).
-FIFTH STEP-
In this step, she made the whiskers, nose and eyes (see photos).
-SEXTO PASO-
Ya tengo listas todas las piezas, para comenzar armar la figura; pegó con el silicón los dos círculos formados y moldeo con las manos para delinear el cuerpo.
-STEP SIX-
I already have all the pieces ready, to start assembling the figure; he glued the two formed circles with the silicone and molded with his hands to outline the body.
-SEPTIMO PASO-
Aquí usando el silicón frío, pego las orejas y luego los ojos como en las fotos.
-SEVENTH STEP-
Here using the cold silicone, I stick the ears and then the eyes as in the photos
-OCTAVO PASO-
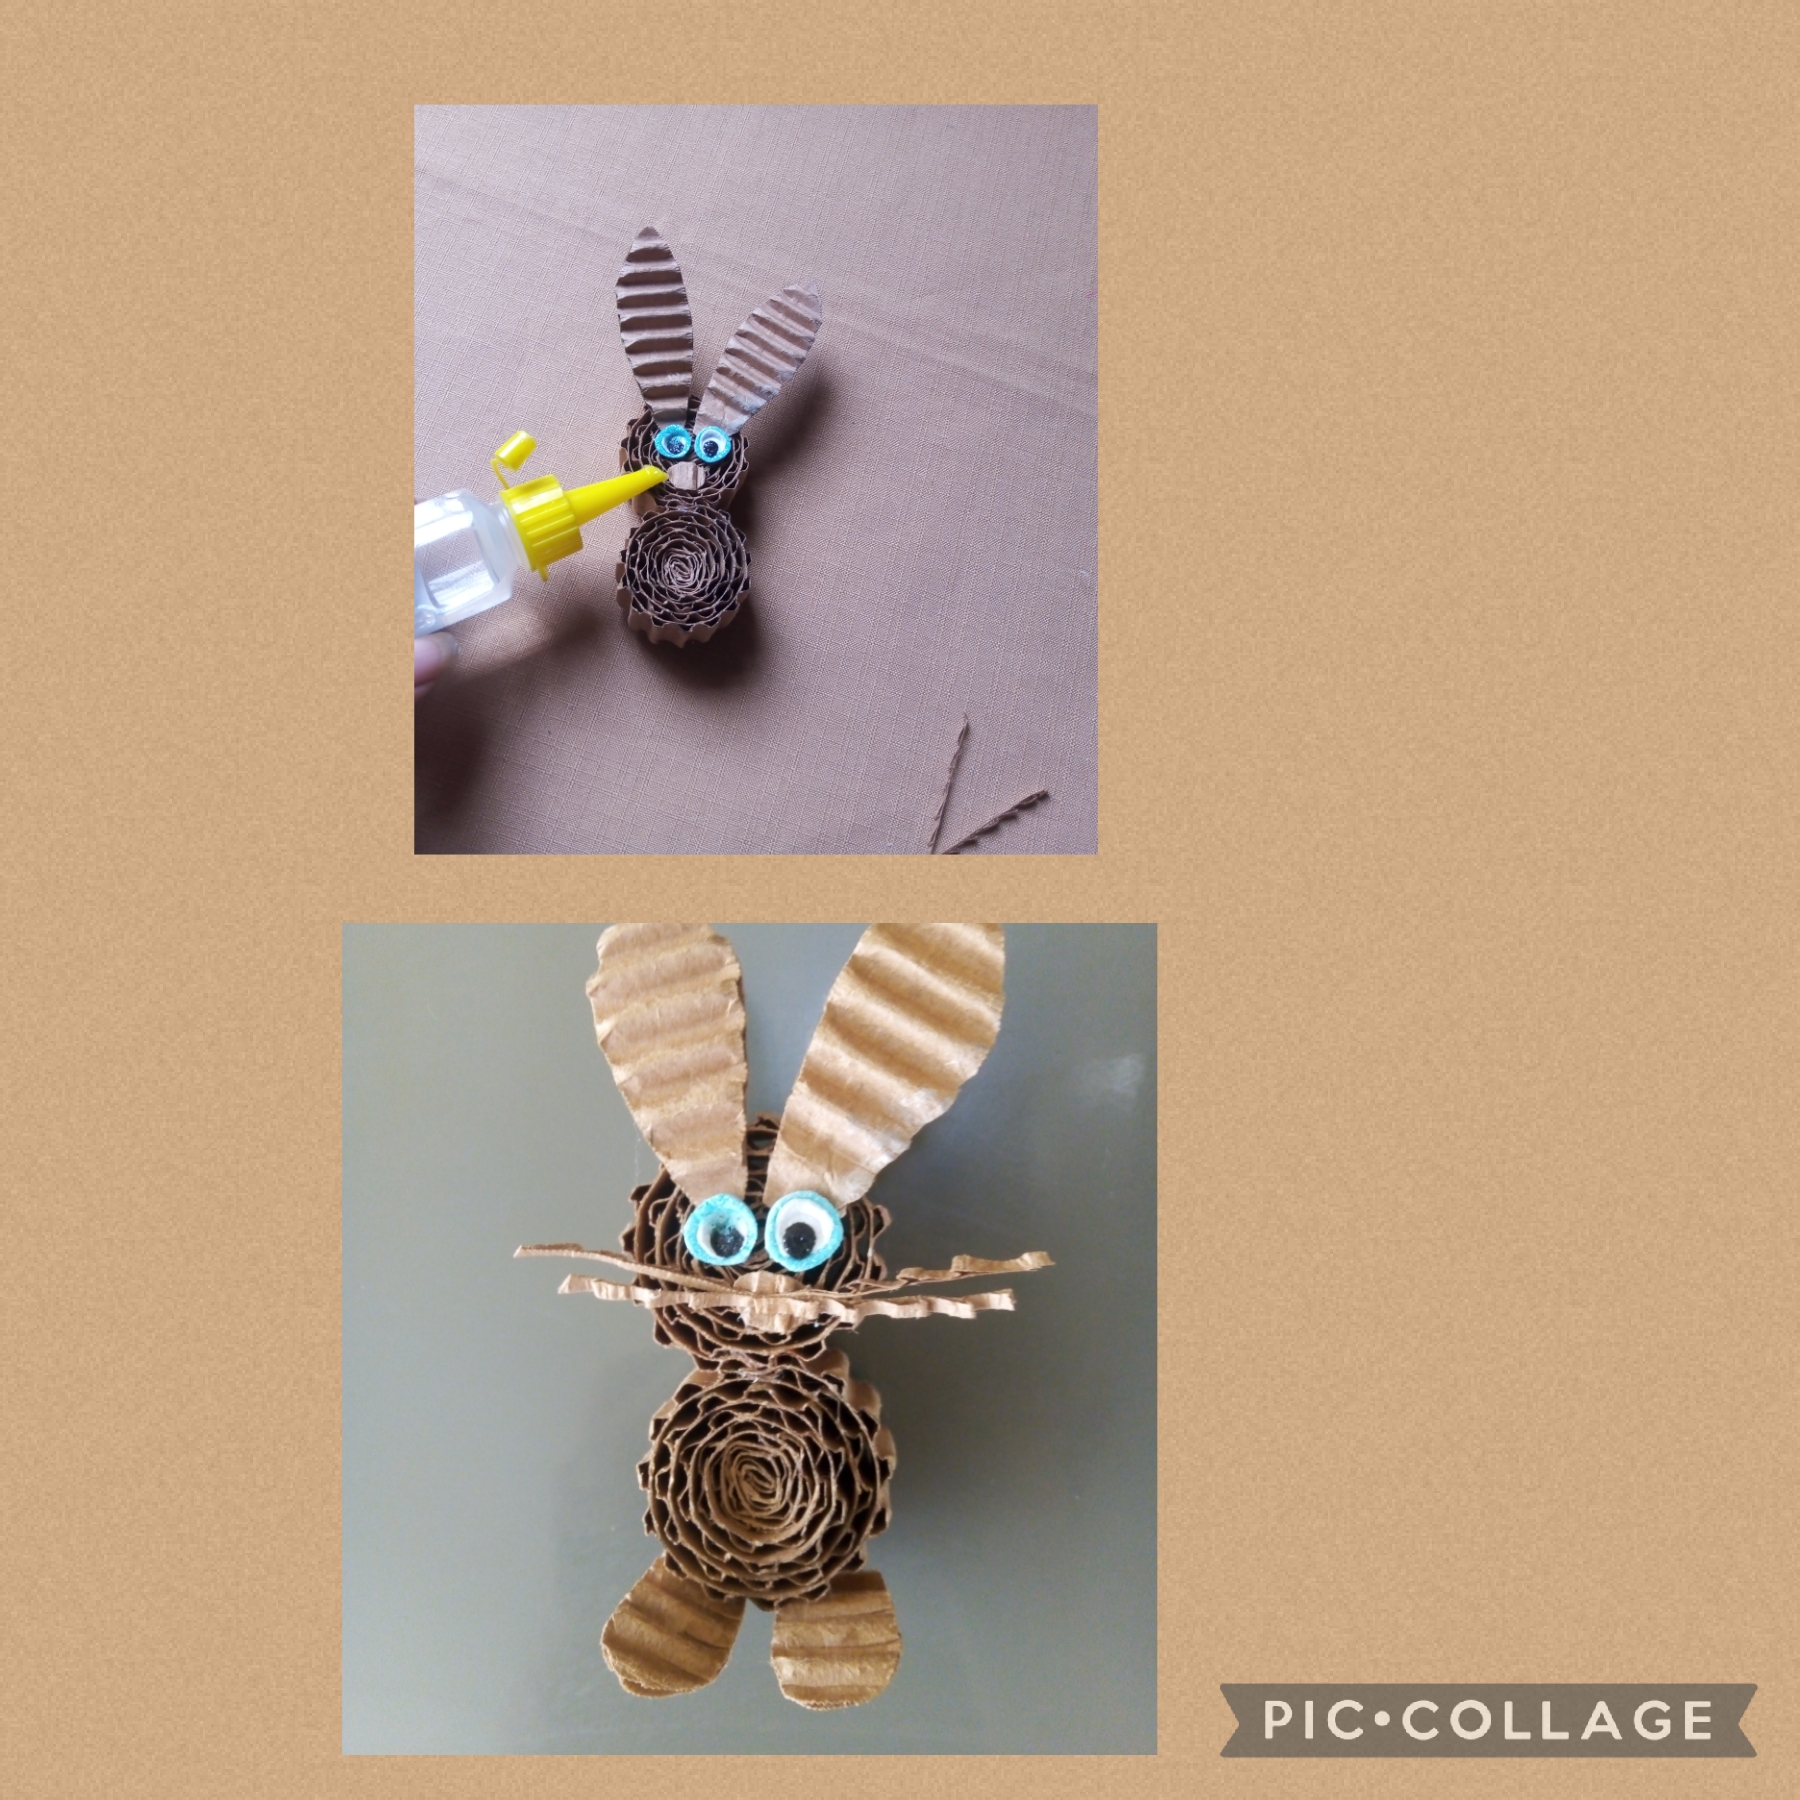
Vamos en este octavo paso, a colocar la nariz y los bigotes fijando las piezas con el silicon al frío (fotos)
-EIGHTH STEP-
We are going in this eighth step, to place the nose and the mustaches fixing the pieces with the silicone to the cold (photos)
-NOVENO PASO-
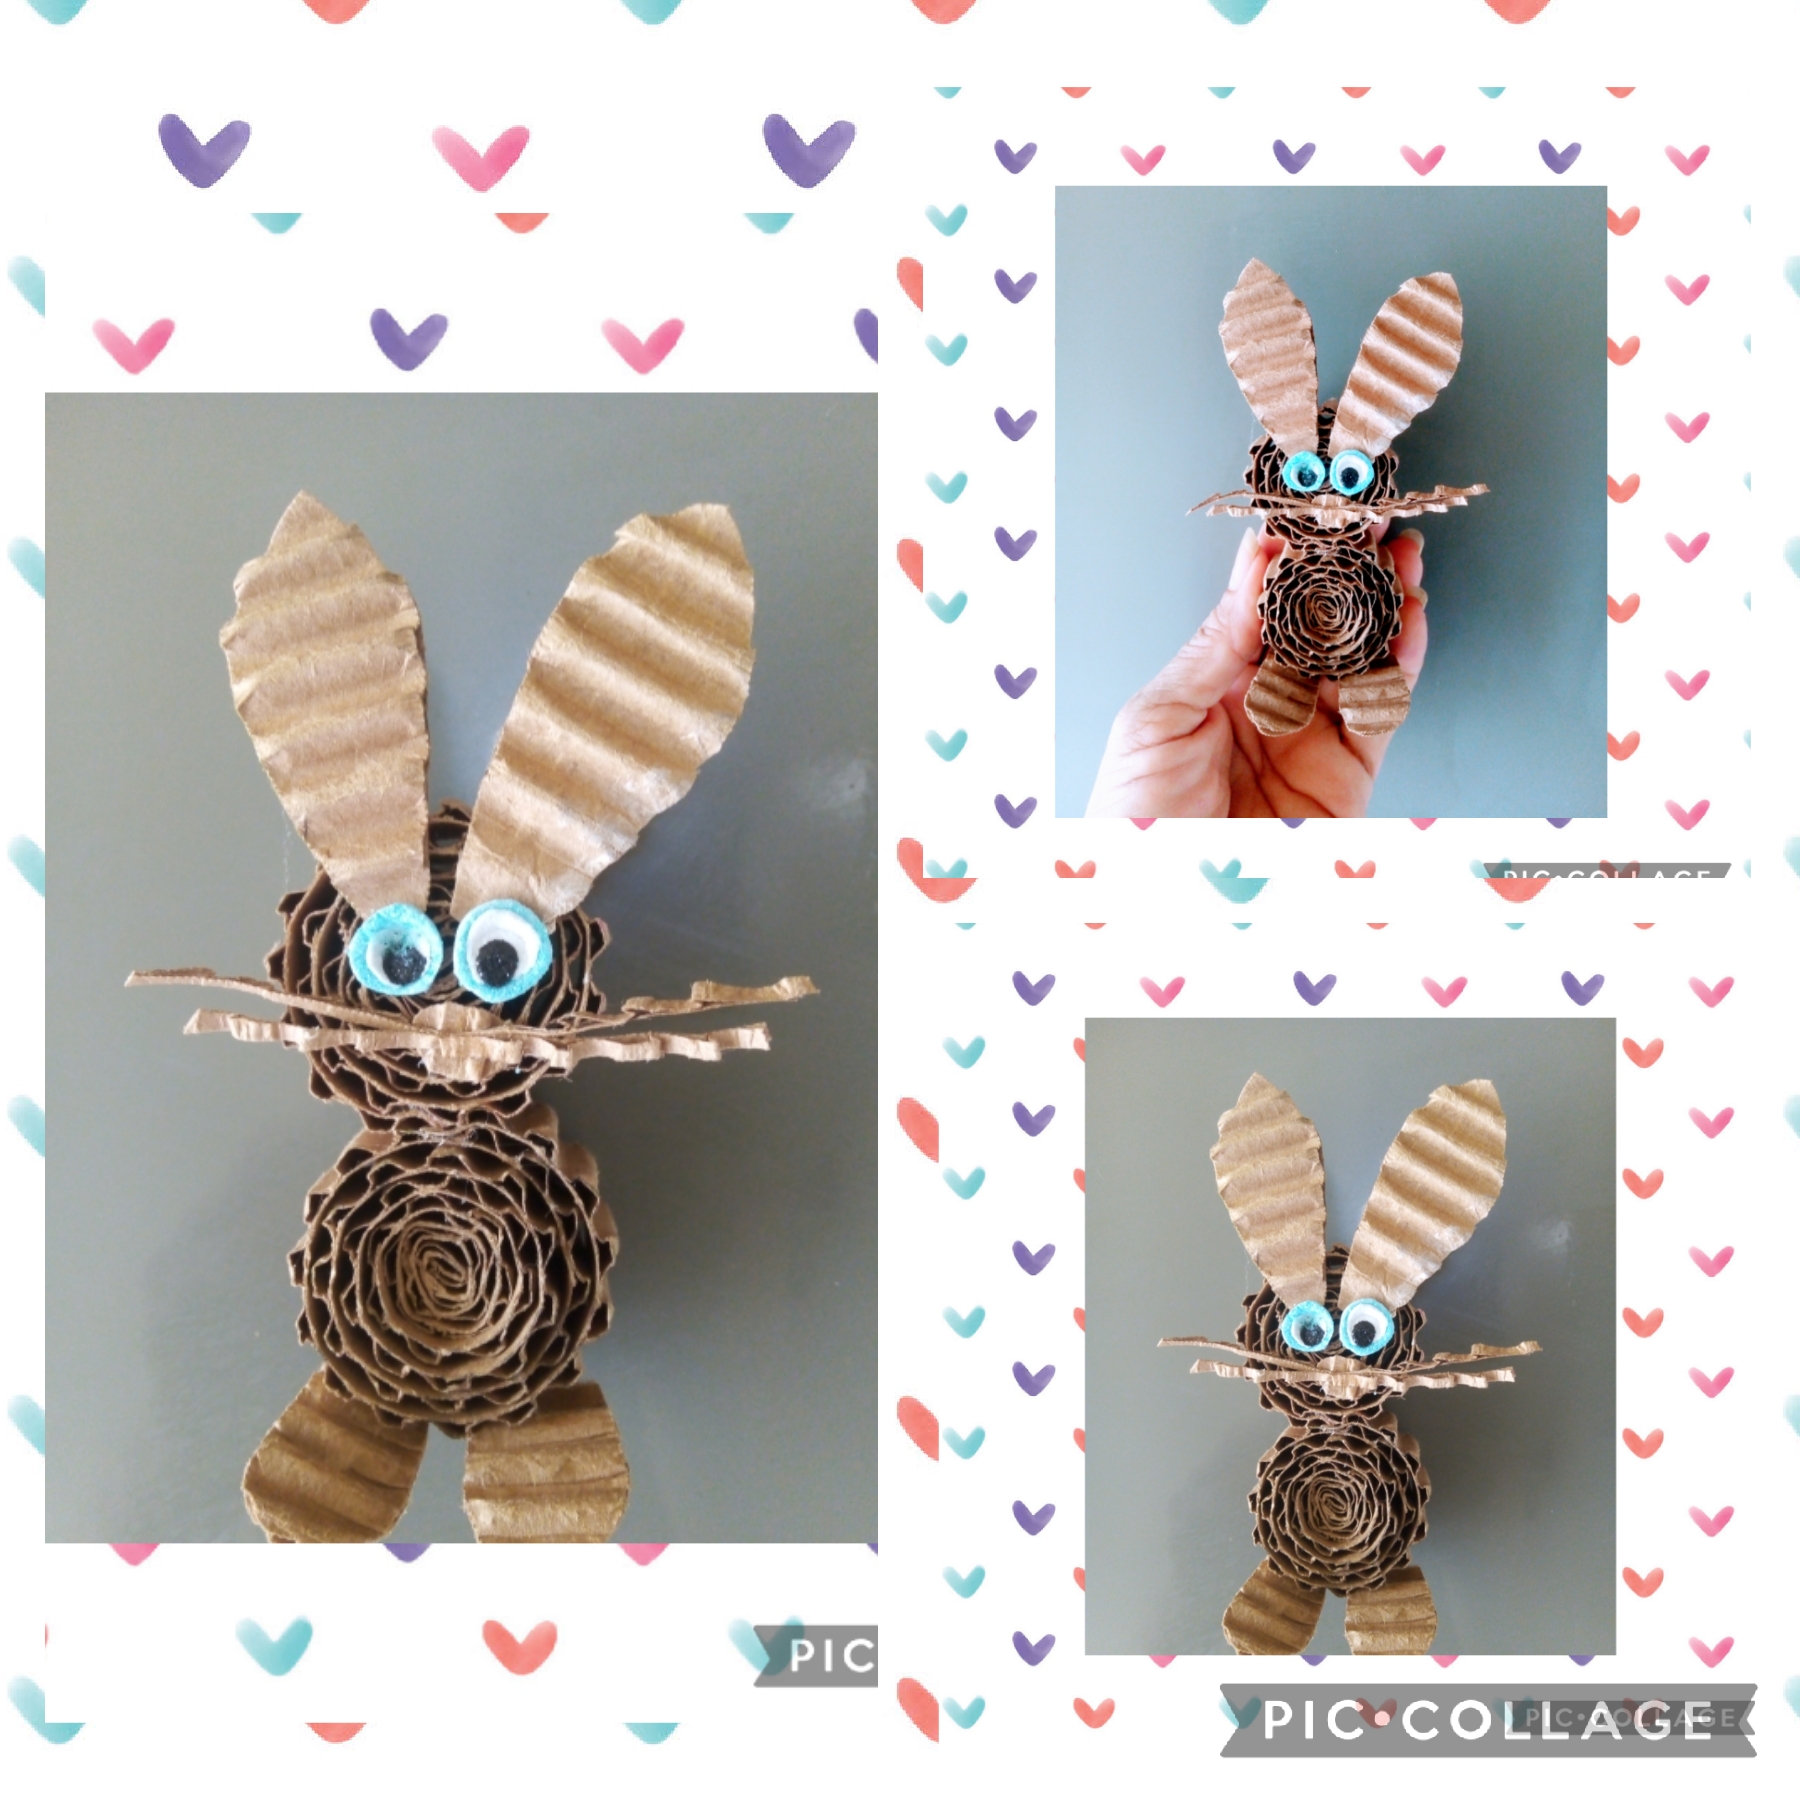
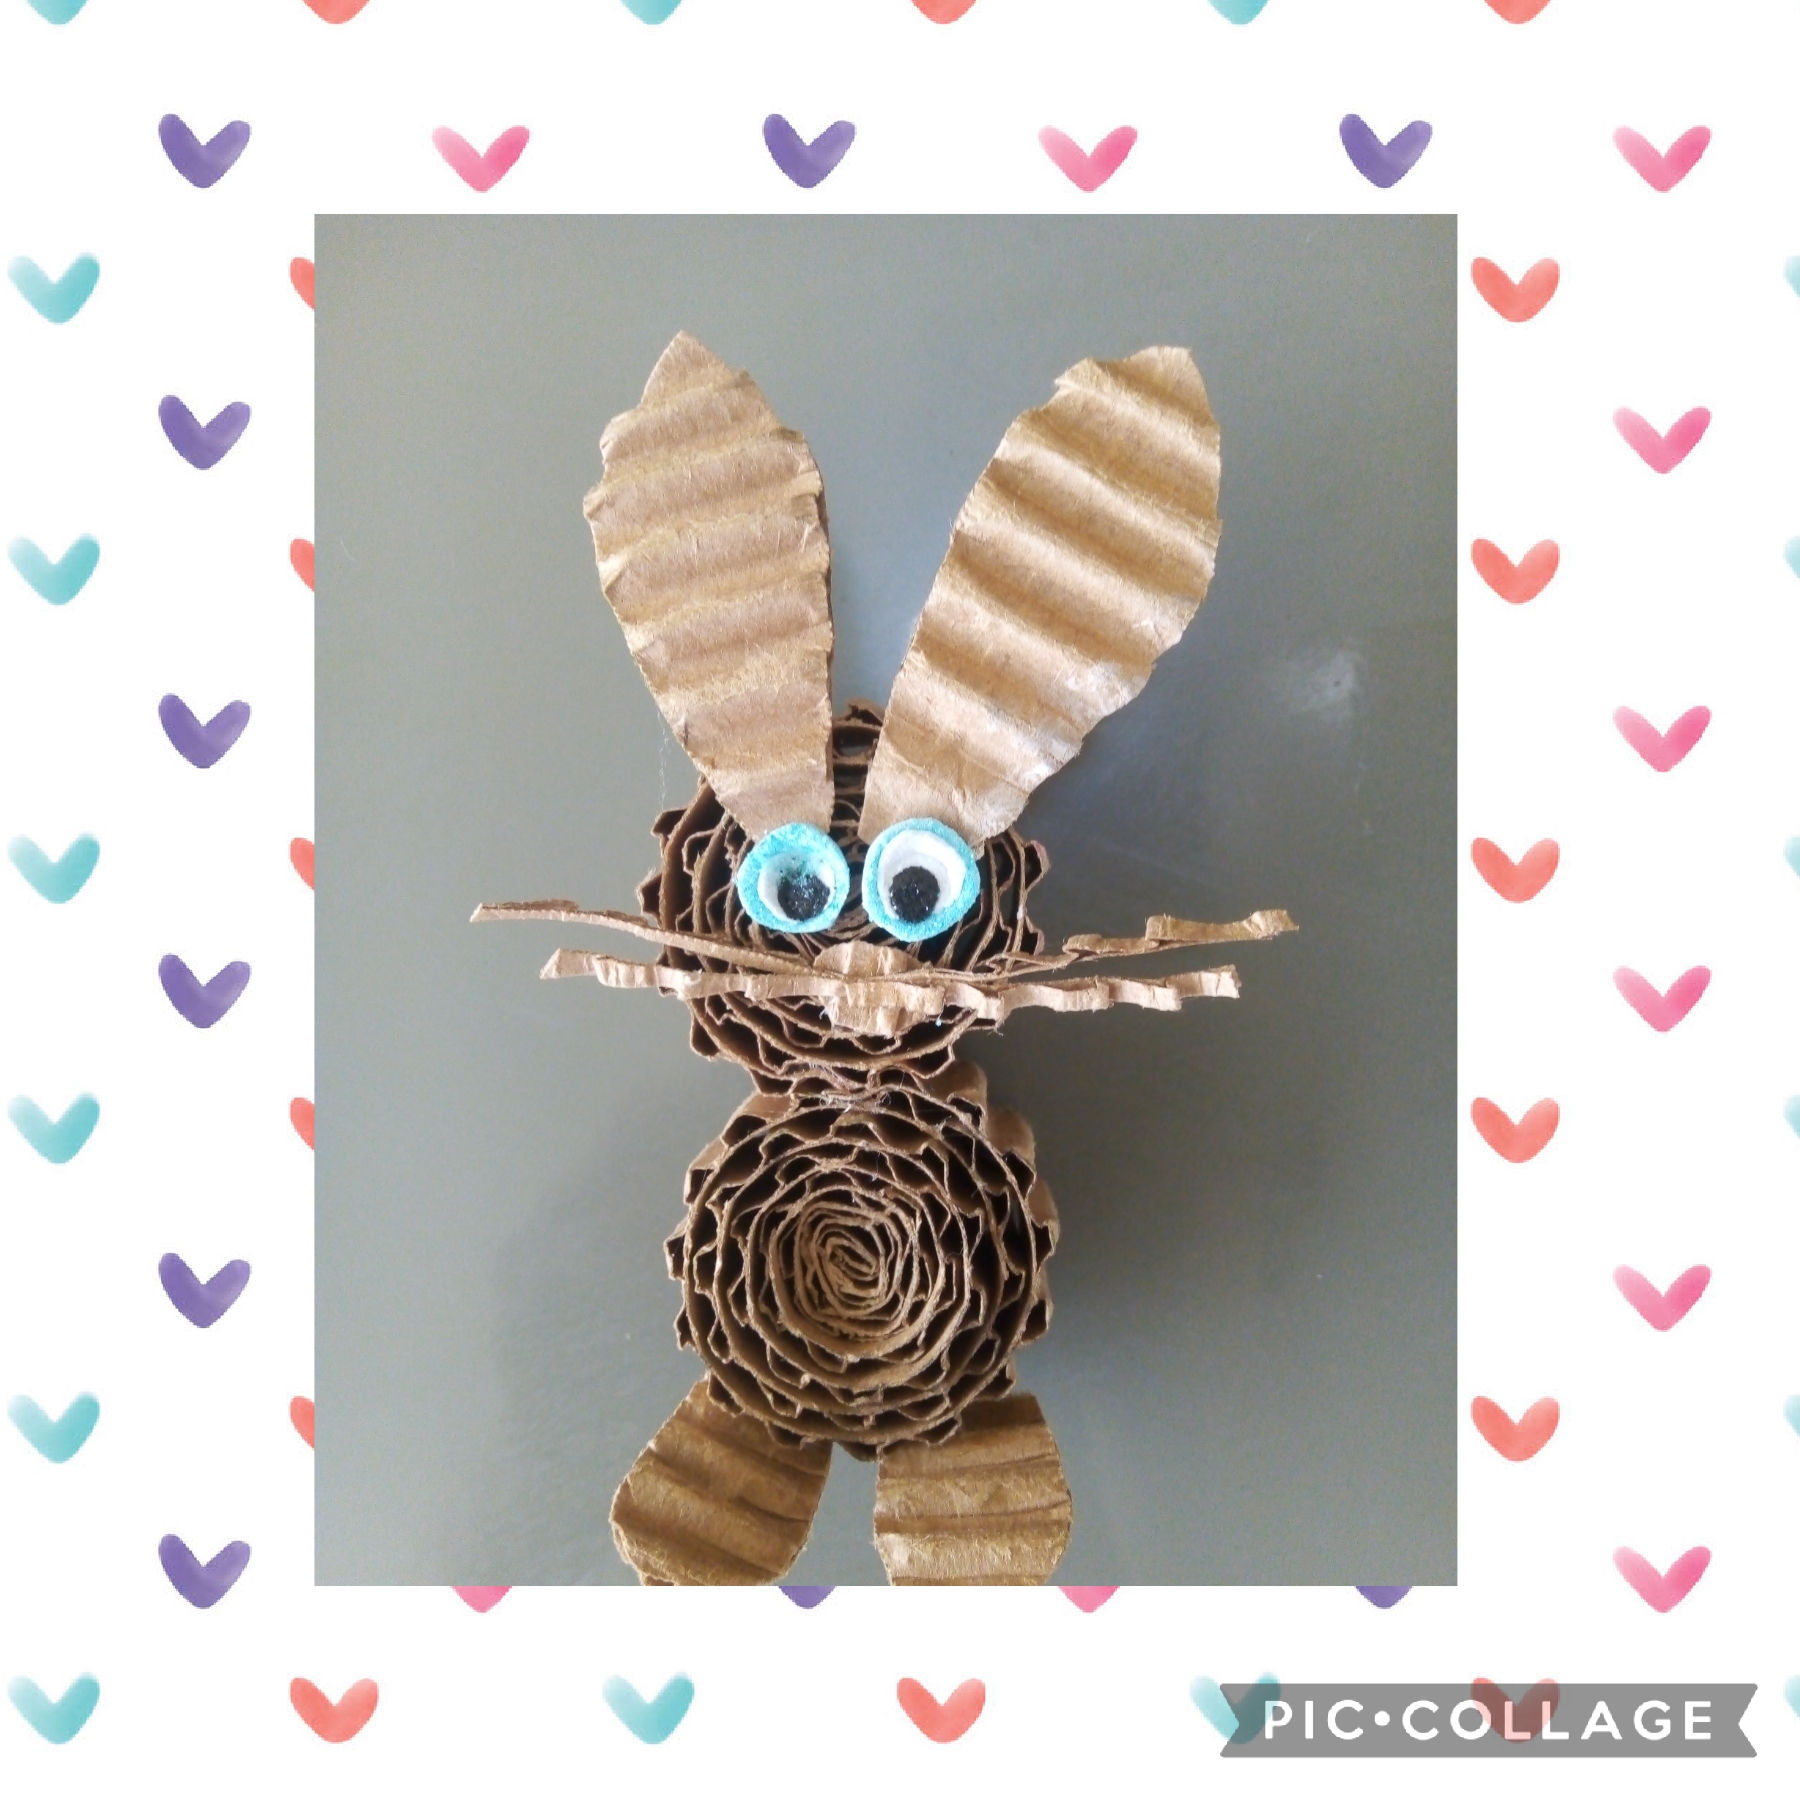
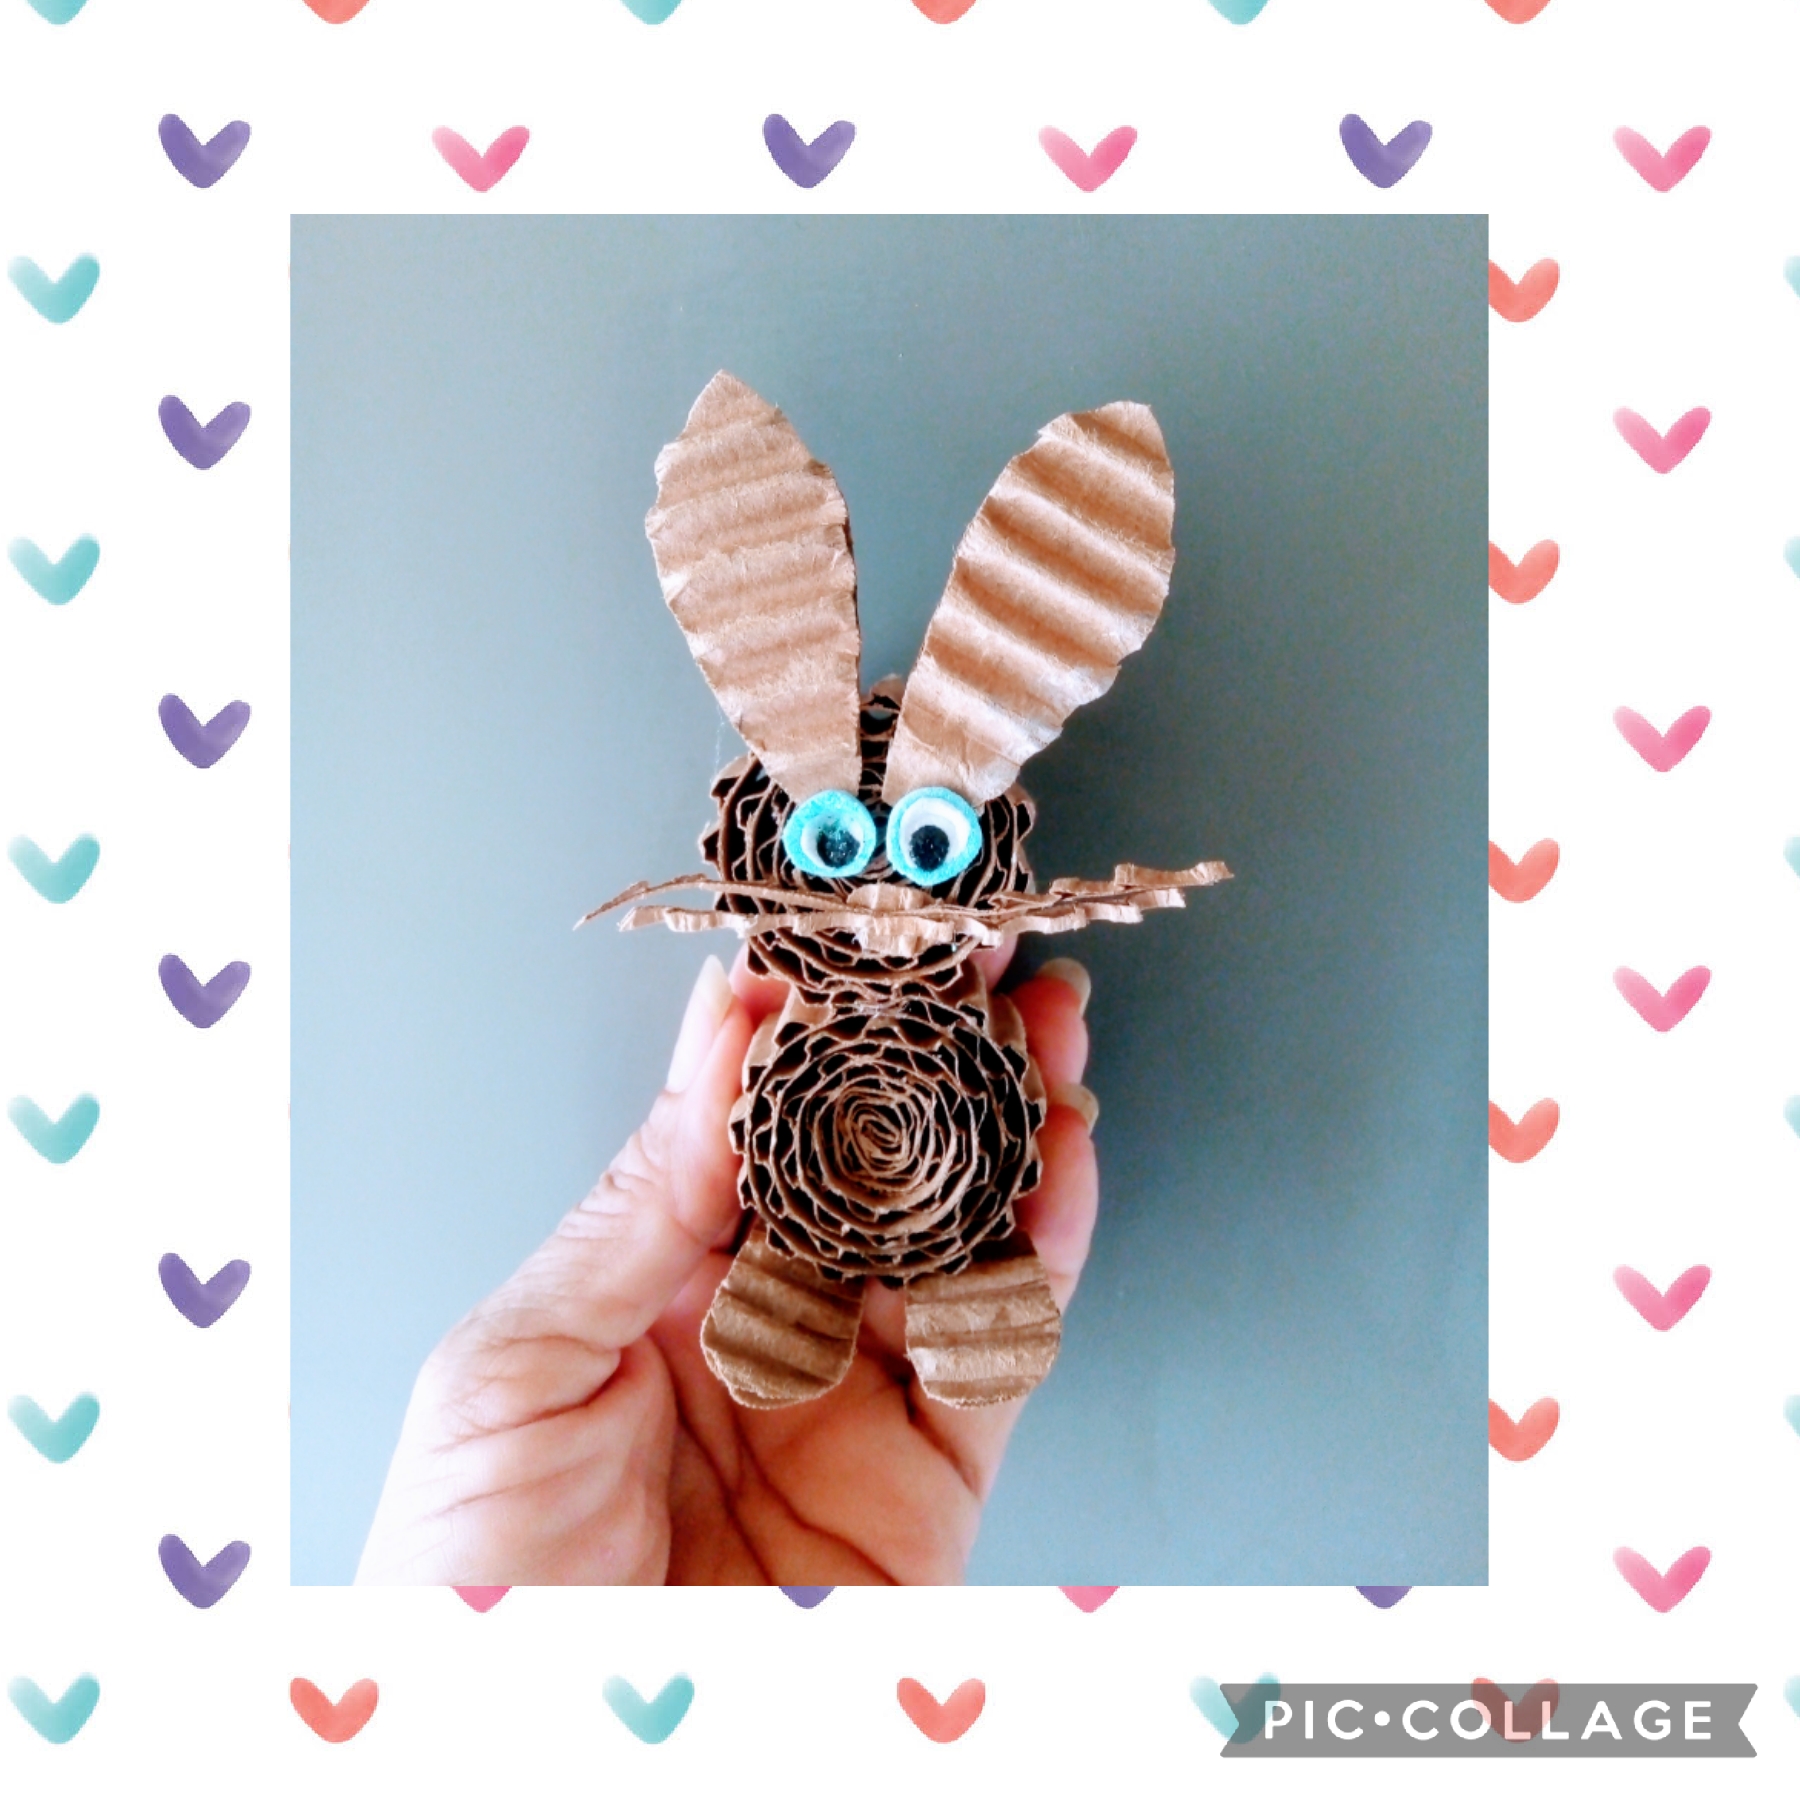
En este último paso coloco las paticas y usando el silicón al frío pego en la parte posterior el imán y así va quedando un lindo conejito que es la figura que identifica mi manualidad creativa de hoy. (Vean las fotos).
-NINETH STEP-
In this last step I place the paws and using the cold silicone I stick the magnet on the back and thus a cute bunny is left, which is the figure that identifies my creative craft today. (See the photos).
 ]
]
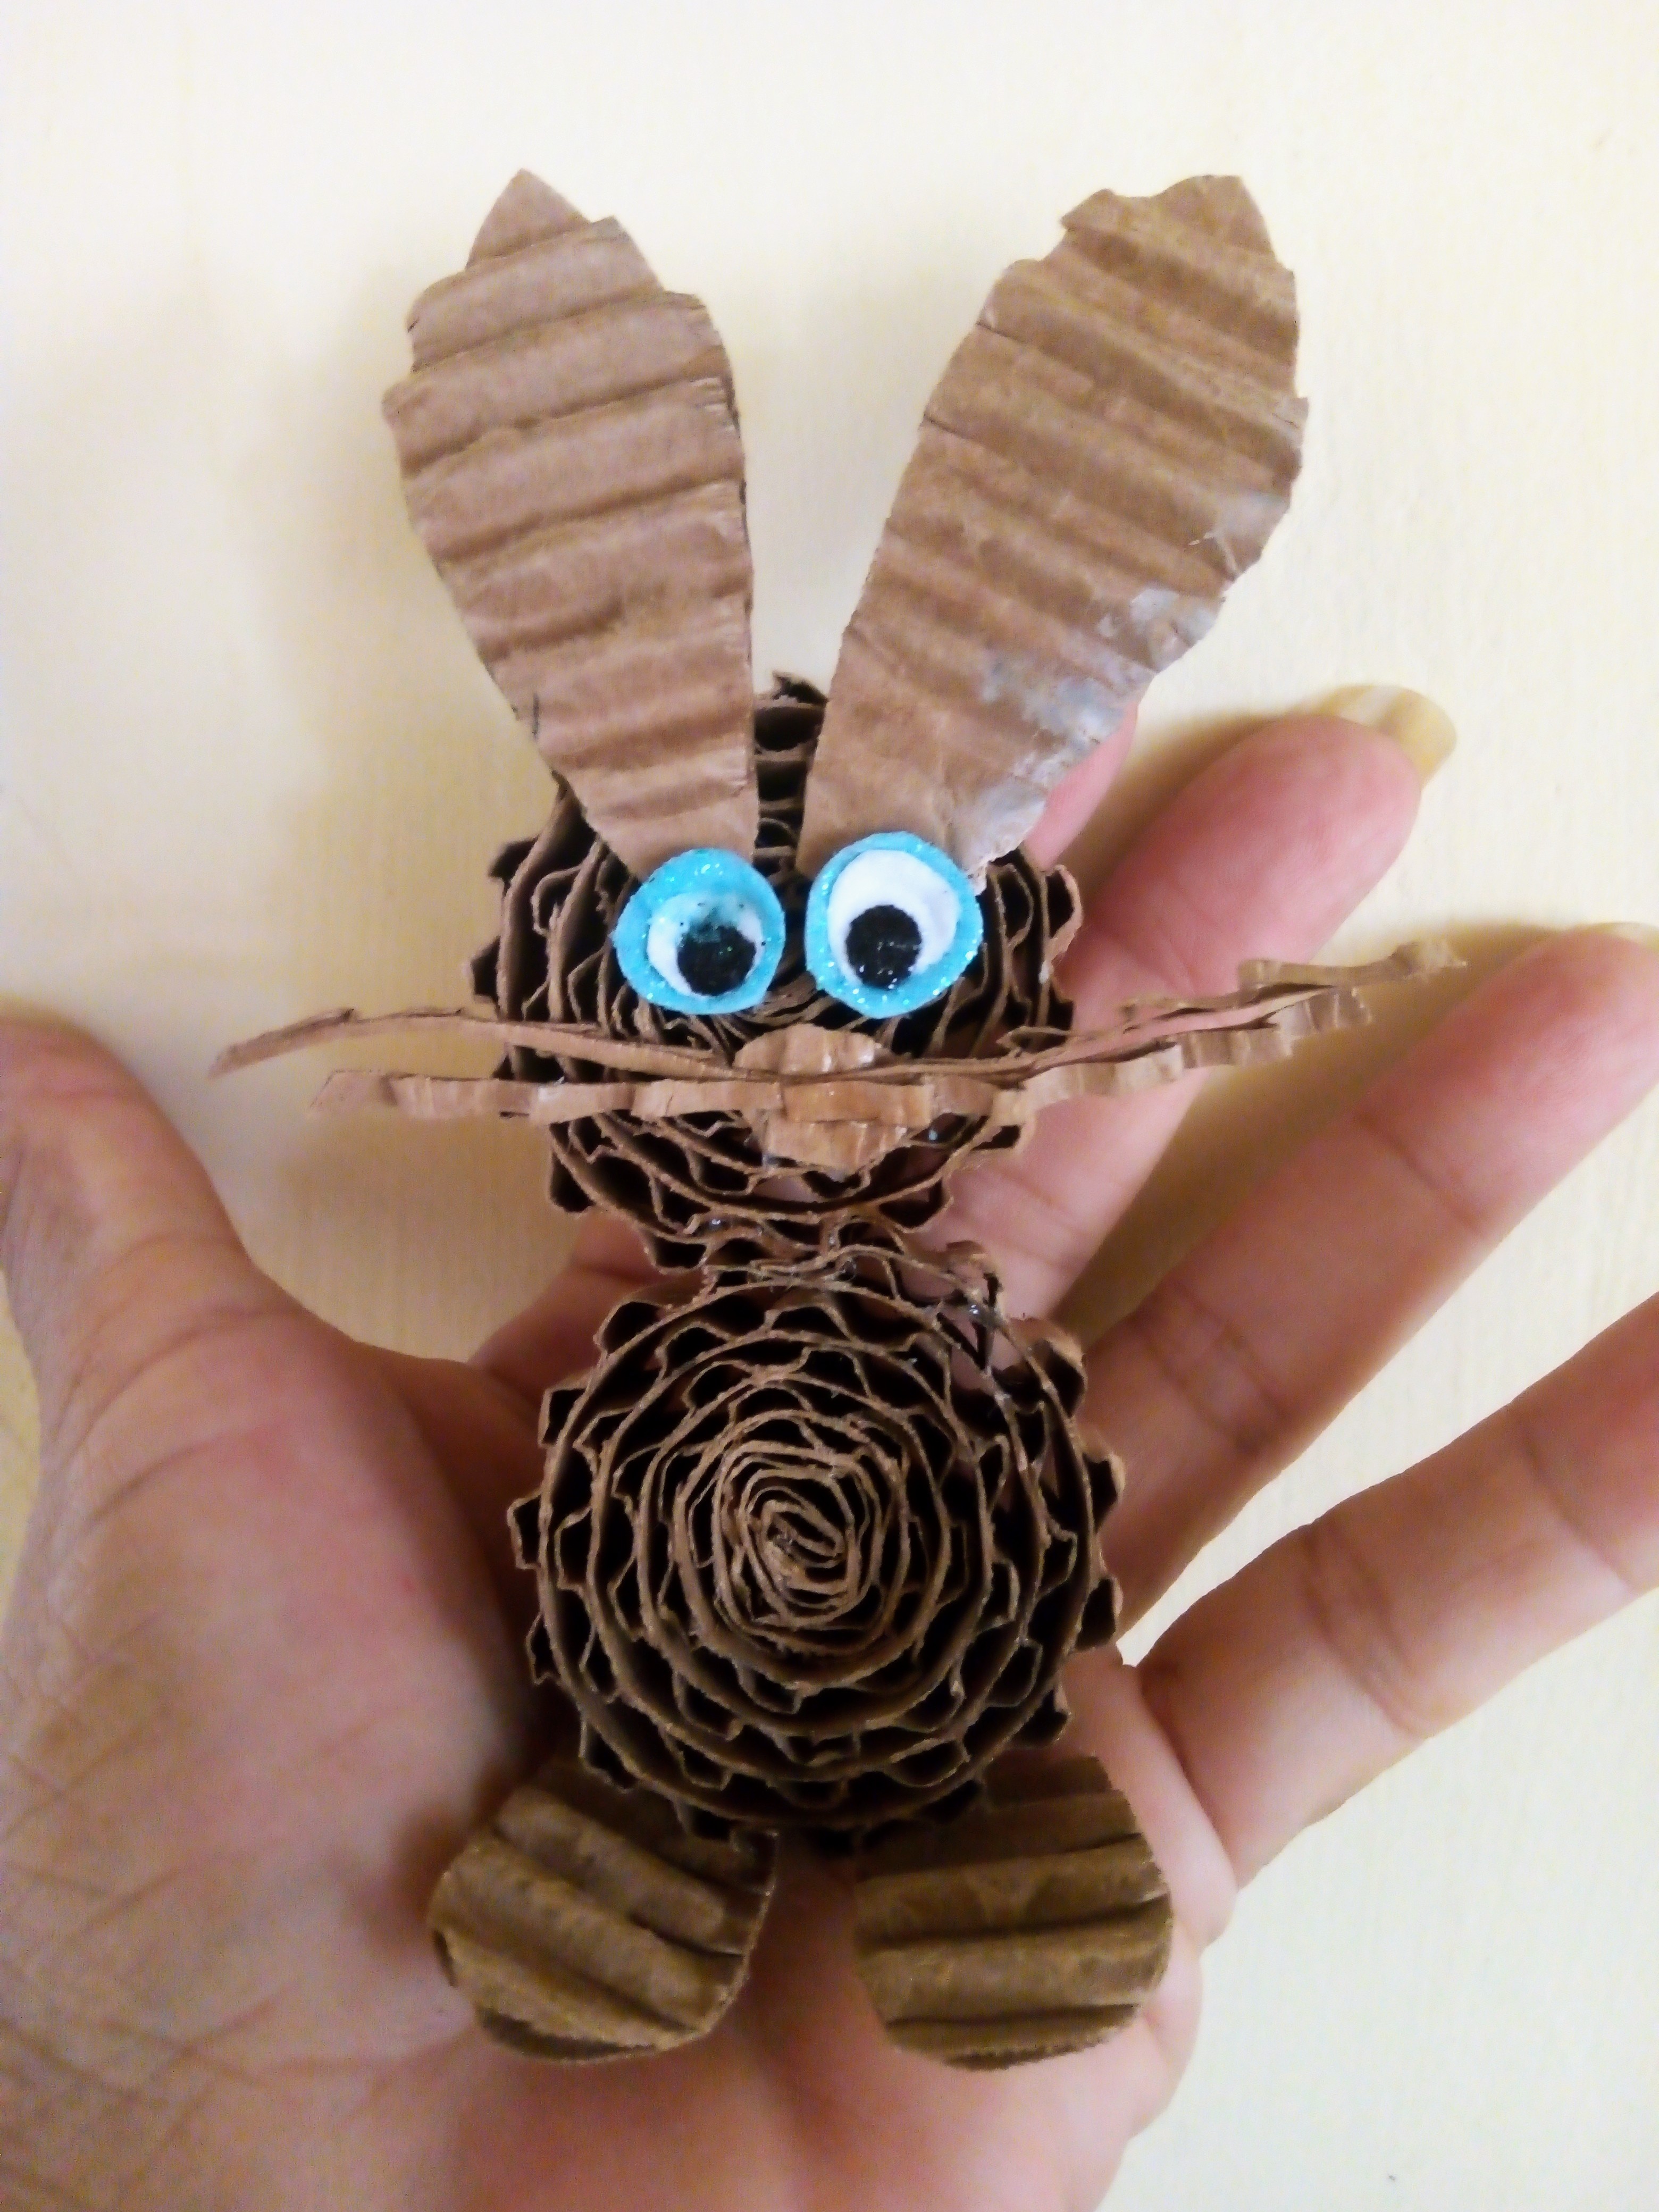
Artistas Creativos este es el resultado final de mi publicación de contenido en el día de hoy; espero que les guste; este sencillo pero muy original imán, que como pueden ver solo necesite una caja de cartón que ya había sido desechada. Gracias, de verdad a todos los que leen y comentan mis post; hasta la próxima manualidad, by bye.
Creative Artists this is the end result of my content post today; hope you like; this simple but very original magnet, which as you can see only needs a cardboard box that had already been discarded. Thanks, truly, to all those who read and comment on my post; Until the next craft, by bye.
Las imágenes de este tutorial son de mi propiedad las fotos fueron tomadas con mi celular Motorola E6 y las edite con una aplicación gratis del mismo.
Para traducir texto usé geogle traduuctor.
The images in this tutorial are my property, the photos were taken with my Motorola E6 cell phone and I edited them with a free application of the same.
To translate text I used geogle translator.

Hola, muy bonito esto que compartes con nosotros. Yo recuerdo que antes , cuando era chiquito, no tenía demasiados recursos ni figuritas ni muchos juguetes, así que me hacía mis propios juguetes con distintas cosas. Cierta ocasión apareció lo de los beyblade, esos "trompos" que eran de una serie de anime que se trasmitía en tv en aquellos tiempos.
No tenía dinero mi mamá para comprarmelo, pero yo sí tenía creatividad para hacerme mis cosas así que me fabriqué unos beyblade de cartón, canicas y una tapita de regresco. Lo recuerdo muy bien y cómo eran las cosas en esos tiempos y se me pone el corazón chiquitito.
Que hagas este tipo de manualidades en comunidades con bajos recursos está genial, es una manera de aún mantener el espíritu de las manualidades a pesar de no tener ciertos tipos de materiales para hacerlas. Es genial. Gracias por compartir.