Bolsa de Papel/Paper Bag [ESP][ENG]
Estas bolsas de papel son muy fáciles de realizar y con pocos materiales, lo que sí debemos tener en cuenta es que no resisten un peso muy exagerado, pero si son funcionales espero me acompañes hasta el final.
These paper bags are very easy to make and with few materials, what we must keep in mind is that they do not withstand a very exaggerated weight, but if they are functional I hope you will join me until the end.

MATERIALES:
- papel periódico o diario
- tijeras
- cinta adhesiva trasparente
MATERIALS:
newsprint or newspaper
scissors
transparent adhesive tape

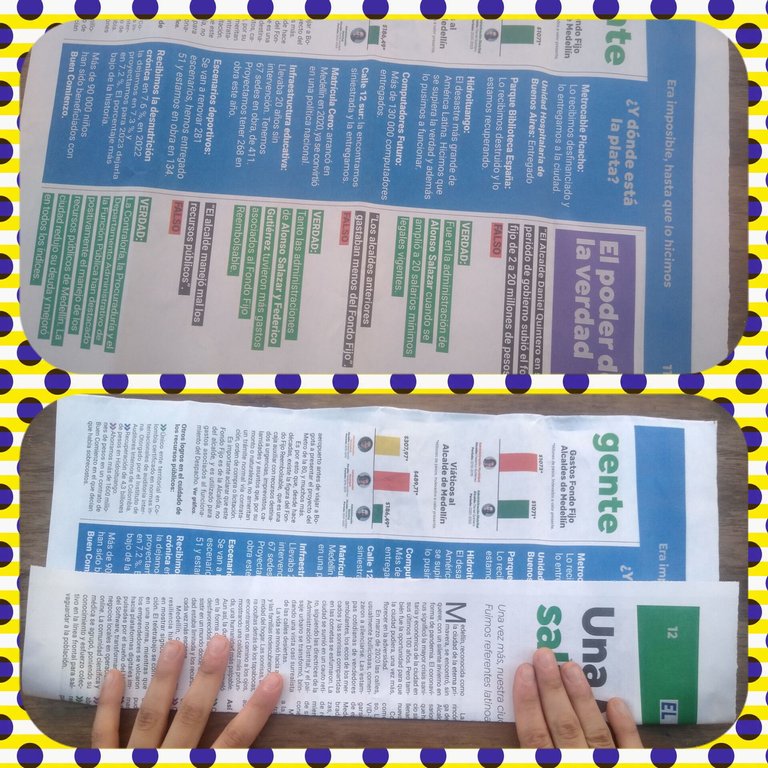
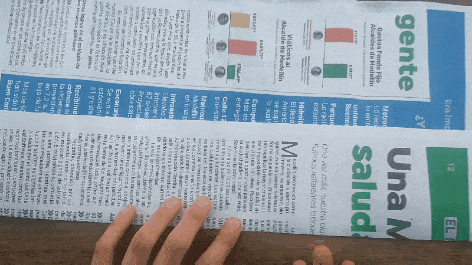
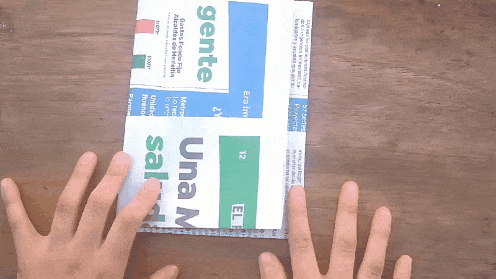
PASO 1
Acá lo que haremos será extender bien la hoja sobre una superficie plana y doblar un cuarto de la hoja del diario o prensa escrita, debes procurar que el doblez quede lo más parejo posible ,posterior volteamos la hoja por el lado contrario como puedes observar.
Here what we will do is to extend the sheet well on a flat surface and fold a quarter of the sheet of newspaper, you must ensure that the fold is as even as possible, then flip the sheet on the opposite side as you can see.
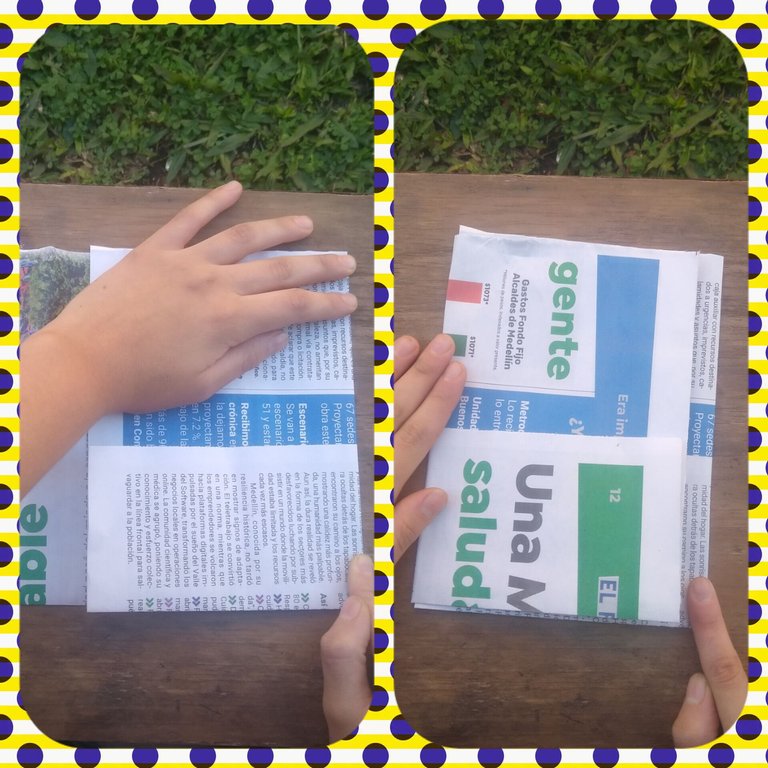
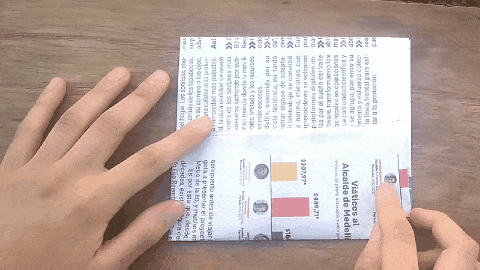
PASO 2
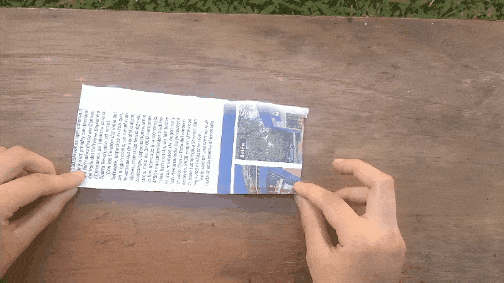
Teniendo la hoja lista doblamos una parte hasta la mitad y luego traemos la parte sobrante también hacia el centro, y cuando estén así, entonces levantamos una mitad y la pondremos dentro del cuarto de papel que habíamos doblado en el primer paso. Seguido de esto doblamos la pieza y el sobrante lo encajamos en la abertura, queda justo en frente del mismo doblez.
Having the sheet ready we fold one part to the middle and then we bring the excess part also to the center, and when they are like that, then we lift one half and we will put it inside the quarter of paper that we had folded in the first step. After this we fold the piece and the excess we fit it into the opening, it is just in front of the same fold.
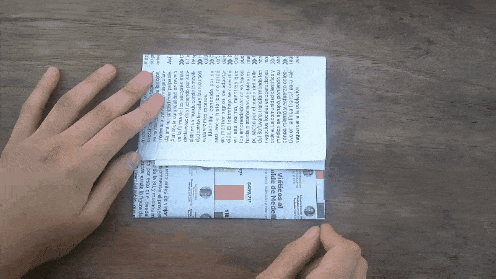
PASO 3
Luego a esta pieza le haremos a cada lado un doblez de 2 cm aprox. Así como puedes observar en el GIF
deberás marcar muy bien con tus dedos este procedimiento, ya que lo siguiente será doblar en cada esquina, sonde hicimos el paso anterior una pestaña como la que puedes ver.
Then on each side of this piece we will make a fold of about 2 cm. As you can see in the GIF
you will have to mark this procedure very well with your fingers, since the next step will be to fold in each corner, where we did the previous step a tab like the one you can see.
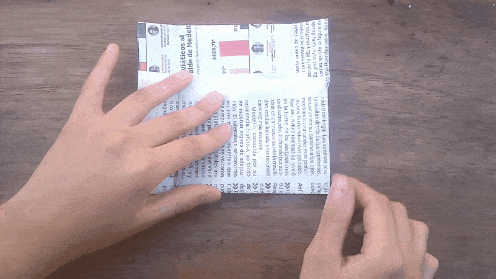
PASO 4
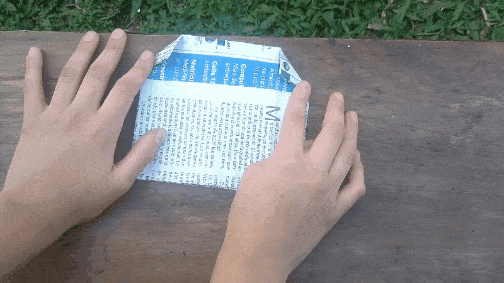
Procedemos abrir la bolsa y las esquinas que teníamos previamente bien marcadas con un buen doblez, las traemos hacia el centro y aseguramos con cinta adhesiva transparente y también pegamos el costado que está abierto, la misma pieza te va guiando donde debes asegurarla, ya que deja cabos sueltos.
We proceed to open the bag and the corners that we had previously well marked with a good fold, we bring them to the center and secure with transparent adhesive tape and also glue the side that is open, the same piece will guide you where you should secure it, as it leaves loose ends.
PASO 5
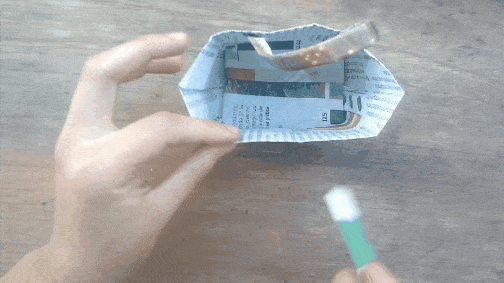
Haremos entonces las tiras que sujetaran la bolsa, corte un pedazo de hoja de 10 cm aprox de largo y de ancho unos 5 cm aprox. Doblaremos la pieza así como observas en el GIF teniendo en cuenta que cada doblez no te quede muy grueso para que puedas darle varias vueltas y procura que cada vuelta quede bien apretada, sujetamos con cinta cada una de nuestras tiras para darles forma y posterior las pegamos en la bolsa por la parte interior de esta.
Then we will make the strips that will hold the bag cut a piece of sheet of 10 cm approx. long and about 5 cm approx. wide. We will fold the piece as you can see in the GIF taking into account that each fold is not too thick so you can give several turns and make sure that each turn is tight, we tape each of our strips to give them shape and then glue them on the bag on the inside of it.
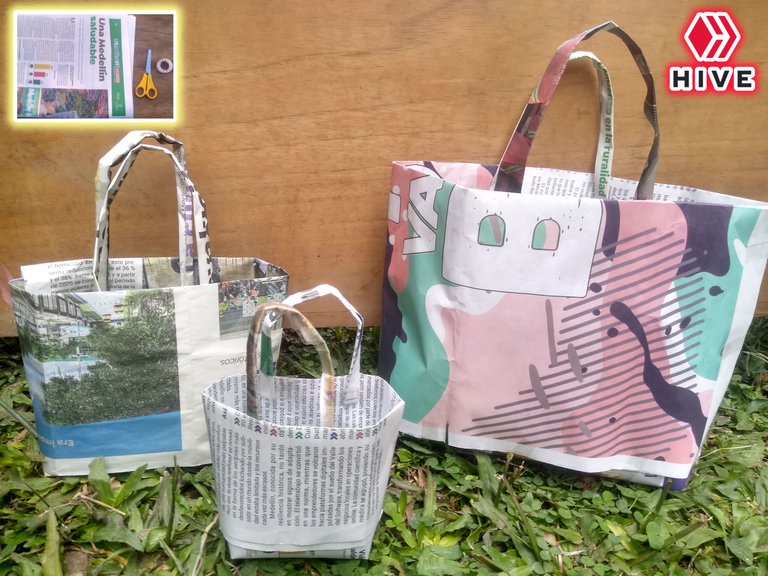
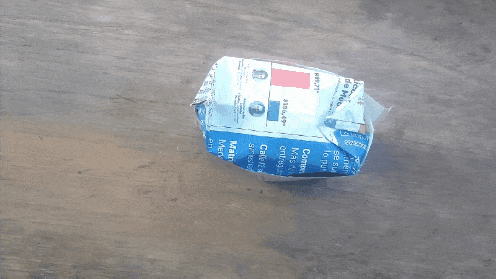
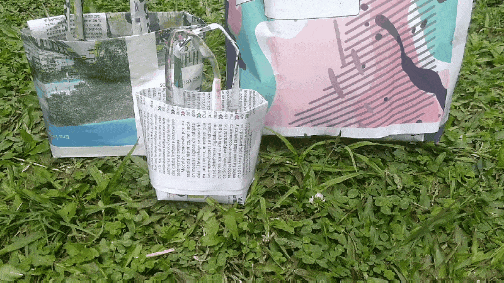
En este paso a paso te mostré como hice la más pequeña de las bolsas, pero detrás de cámaras se antojó hacer otras dos de diferentes tamaños, aquí debes tener en cuenta que las medidas varían según el tamaño de cada bolsa y mira el resultado de las bolsas que hice para compartir contigo al ser de papel, pues no son muy resistentes sirven para guardar cositas que sean livianas pero quedan hermosas.
In this step by step I showed you how I made the smallest of the bags, but behind the scenes I wanted to make two other bags of different sizes, here you must keep in mind that the measures vary according to the size of each bag and look at the result of the bags I made to share with you, as they are not very resistant, they are good to keep small things that are light but they are beautiful.
gracias por llegar hasta aquí y leer, nos vemos pues.
Thank you for coming here and reading, See you then.
fotos tomadas por mi
traducido en deepl
separador hive
Quedaron muy lindas, pueden servir de adorno también ☺️
siii que buena idea se les puede dar ese uso ,tu visita es muy agradable para mi bienvenida por estos lados cuando quieras
aha the bag looks great,thanks for sharing.
sii las bolsas quedaron muy lindas gracias por venir y apoyarme
Que super creativas estas bolsitas 😍 no resistiran mucho peso pero sin duda son coquetas y se pueden usar para transportar Buhitos jeje
Estan muy bonitas amiga, me encantaron ❤️
si quedaron lindas mi buhito creo que si cabes perfectamente jajaja
This is unique I love it, I should try this out soon
Sii que bueno te animes a realizarlo verás que te gustará te expreso mi agradecimiento por venir apoyarme
ye quedaron realmente hermosas 😍
Me encantaro...!!! 😁
Muchas gracias por tus lindas palabras y por pasarte por acá ,eso me da mucho gusto
Que chevere amiga super lindas quedan, lastima que ya no veo por acá periódicos necesito hacer una para un detalle 🤩
Si muchachona quedan súper bonitas,puedes hacerlo con otro tipo de papel si gustas
These are so beautiful. Would have never thought it was possible to make them.
sii son bellos y fáciles de hacer ,gracias por pasarte por acá y brindarme tu apoyo
Que super fabuloso Mónica, me encanta! Además el papel que elegiste esta buenísimo, la verdad me sorprendiste!! Genial genial!❤️
si fue bueno darle un segundo uso al papel periódico, gracias por tu bello comentario amonet
Una trabajo... increíble, en serio, quiero más de estas cosas. Gracias Mónica!😀
Que lindas amiga exitos
gracias me gusta saber que te pareció lindo nuestro trabajo igualmente éxitos para ti y los tuyos
Gracias, bendiciones 💕✨🤗
Creo que pudieran servir para hacer pequeños cotillones en las fiestas infantiles, usando papeles de colores, deben verse genitales. Saludos @monipk35
Uyyy si esa idea está genial @alborhada para una fiesta 🥳 infantil gracias por venir
me imagine yo toda picadisima por alla con ese bolso a puedes creer eso mejor dicho una diva caminando como en pasarela toda coqueta con ese si levanto uuuu me tapo de seguidores jajaj fuera de broma quedo bacano la verdad me gusto mucho
Jajaja podría pasar 🤣🤣 la bolsa de periódico que lleva a la fama a la muchachona Stella
Guaooo que maravilla, quedé enamoradas de estás bolsas tipo bolsos. Excelente muchas gracias por compartir
gracias a ti por apreciar mi trabajo que bien que te gusto bienvenida por estos lados cuando quieras ,una feliz tarde
que bello te quedo waoo eres una crack

gracias muchachona por pasarte por acá,si quedaron lindas