Aplicando efectos a mi Avatar Miguelstar de Gacha Club
Español
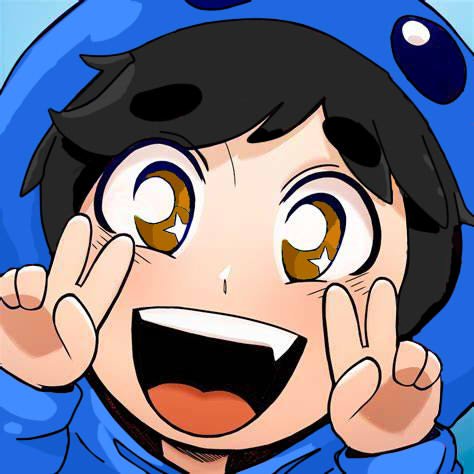
Hola amigos de HiveArte, hace un tiempo atrás les compartí un diseño que hice de Mario Bros aplicando varios efectos en la imagen. Hoy quise probar esos mismos efectos en mi Avatar d programa de Gacha Club donde creo mis historias.
En esta oportunidad no lo hice con mi tableta gráfica, sino que lo hice en una aplicación que descargué recientemente en el celular que se llama: Ibis Paint X, disponible en la play store para androids.
English
Hello friends of HiveArte, some time ago I shared with you a design I made of Mario Bros applying several effects on the image. Today I wanted to try those same effects on my Avatar of the Gacha Club program where I create my stories.
This time I didn't do it with my graphic tablet, but I did it in an application that I recently downloaded to my cell phone called: Ibis Paint, available in the play store for androids.
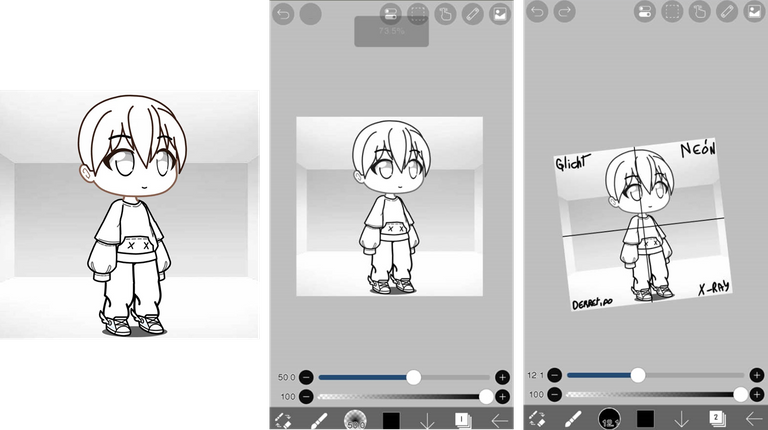
A continuación les voy a mostrar el paso a paso de mi dibujo, partiendo del diseño de mi Avatar Miguelstar.
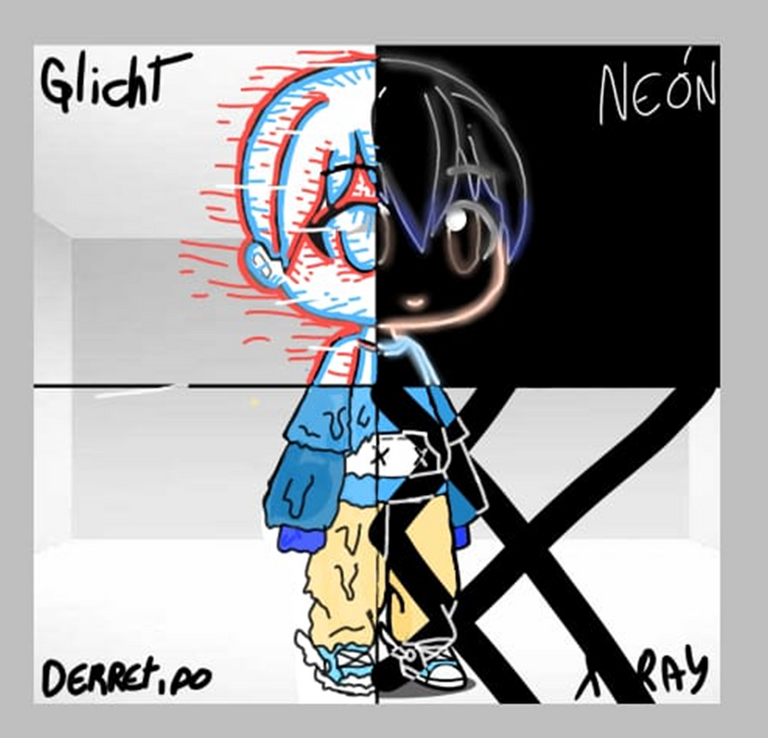
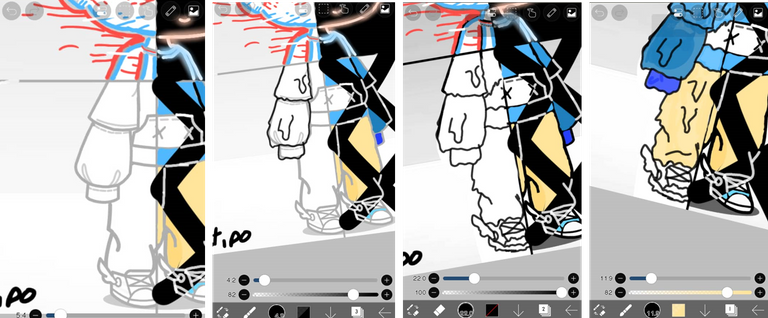
En este primer paso dibuje la silueta del avatar y la dividi en 4 para aplicar en cada segmento cada uno de los efectos: glitch, neón, derretido y x-ray. En esta ocasión hice el efecto derretido, para variar un poco mi diseño anterior y probar como se veía.
Next I am going to show you the step by step of my drawing, starting from the design of my Avatar Miguelstar. In this first step I drew the avatar silhouette and divided it in 4 to apply in each segment each of the effects: glitch, neon, melted and x-ray. This time I did the melted effect, to vary a little my previous design and test how it looked.
Del primer efecto que sería el Glitch les tengo que confesar que olvidé hacer los captures de pantalla del paso a paso, pero con el color rojo y azul lo que buscaba era generar una distorsión que le diera un poco de movimiento a la imagen.
For the first effect which would be the Glitch I have to confess that I forgot to make the screenshots of the step by step, but with the red and blue color what I was looking for was to generate a distortion that would give a little movement to the image.
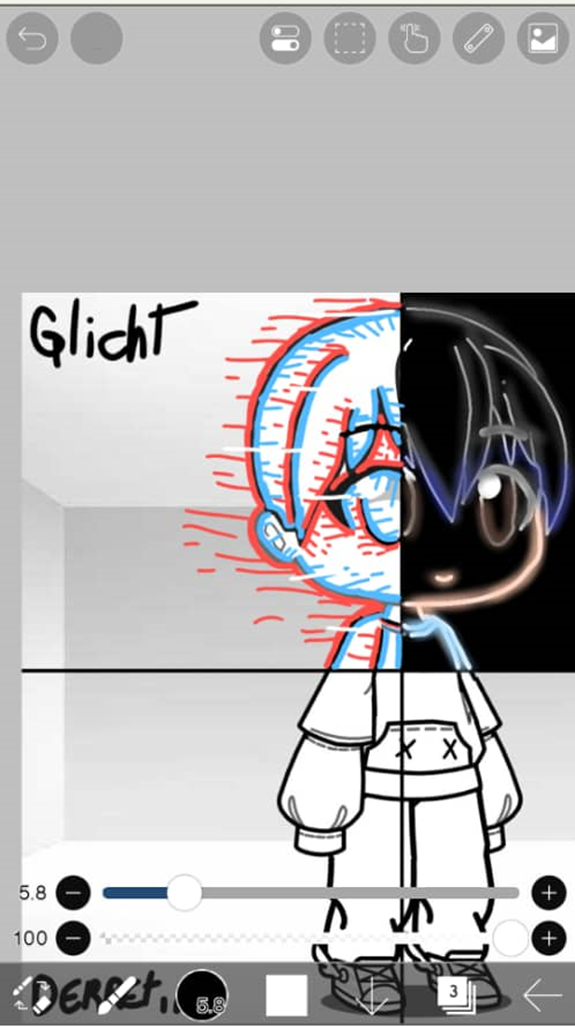
Luego apliqué el efecto neón, para ello, se coloca un fondo negro para luego delinear la figura con el color blanco y destacar con toques como el azul del cabello el efecto de neón.
Then I applied the neon effect, for this, a black background is placed to then outline the figure with white and highlight the neon effect with touches such as the blue of the hair.
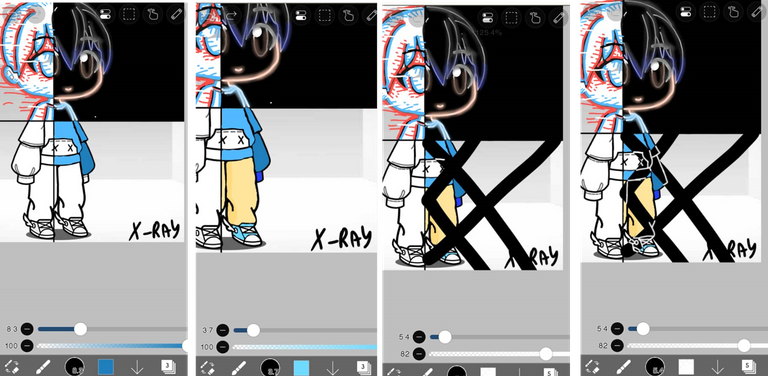
Luego mi favorito, el efecto de Rayos X, aplica un poco la técnica del color negro, solo que en este caso no está en el fondo de manera uniforme sino que pasa por arriba de la imagen en un par de líneas que se cruzan y sobre la parte negra se resaltan los bordes de la figura en color blanco para que parezca que estuvieras viendo una fotografía.
Then my favorite, the X-Ray effect, applies a little bit of the black color technique, only in this case it is not in the background in a uniform way but goes over the top of the image in a couple of lines that cross and over the black part the edges of the figure are highlighted in white to make it look like you are looking at a photograph.
Para terminar hice el efecto derretido, aquí son las líneas de los bordes la que dan ese efecto de que se va derritiendo esa parte del cuerpo.
¿Cuál de estos efectos te gusta más?
Gracias por apoyarme y nos vemos pronto en mi próximo diseño o historia, lo que haga primero. Chaito.
To finish I did the melted effect, here it is the lines of the edges that give the effect of melting that part of the body.
Which of these effects do you like the most?
Thanks for your support and see you soon in my next design or story, whichever comes first. Bye.

- Traducción realizada con www.DeepL.com / Translated with www.DeepL.com/Translator
- App utilizada: Ibis Paint X de la Play Store / App used: Ibis Paint X from the Play Store
se ve bonito el avatar no se hacer eso pero quedo re genial ^^
Muchas gracias!!! esa app es fácil y amigable, puedes intentarlo
Hola que tal, muy buenos efectos y demostración, yo dibujo en Paint y Paint 3D, me encantaron mucho todos los efectos pero mi favorito fue el x ray, felicidades 🙂
no lhe usado el paint 3D, voy a revisar a ver que tal, muchas gracias por apoyar
Congratulations @miguelstar! You have completed the following achievement on the Hive blockchain And have been rewarded with New badge(s)
Your next target is to reach 3500 upvotes.
You can view your badges on your board and compare yourself to others in the Ranking
If you no longer want to receive notifications, reply to this comment with the word
STOPCheck out our last posts:
Hola @miguelstar, me gusta que hagas este tipo de publicaciones, ya había visto tu publicación con mi hijo Alan, pero no te dejé mi comentario el momento. Bueno te cuento que los efectos que más llamaron mi atención son, el llamado glitch y el derretido, están muy cool 😊
Un abrazo virtual ❤️💙
a mi también me gusta mucho el derretido 😊
😊
Bienvenidas las Delegaciones / Welcome Delegations
Trail de Curación / Curation Trail
Hola @miguelstar que trabajo tan bueno y cuanta destreza, cada día mejor, mejor, 🙂💚
@tipu curate 8
Upvoted 👌 (Mana: 0/75) Liquid rewards.
Graciasssss