Photography: The Making Of A Model's Photoshoot And Lighting
Hello everyone!
Here is another amazing Photograph I shot lately, I took some of my time to take the best shots of the model and edited one of the best. I used a black Model for this photoshoot. The photoshoot was done Indoors. The model had a mild make-up on which was done under my supervision, because I really didn't want something odd or any excessive makeup which may put me in a horrid situation whereby I will have to take some minutes to blend skin tone together which must look adequately look like. As you all know that in most cases, when we take an adequate analytical surveyance of our body, we will notice the differential colour skin tones of our body and the textures of the skin which may likely to be different from other part of the body. In other words, in every part of the body-skin, there are always differences in terms of skin tones and textures; some parts of the skin surface (of the body) may not likely look the same. If you doubt me, you could take a minute of your time to survey your body. In Photography, blending of skin tones with other physical part(s) is the work of the editor — so there will be uniformity and balancing in editing
The Making of the Photoshoot and Light Set-up.
I made use of the Indoors — a studio — for this Photoshoot. The model stated that she would prefer using the studio due to some personal reasons (probably, she's a shy-type haahhahaaha... 😂😂😂).
Here, I had two STROBE LIGHTS effectively used while photographing. I made two Lights appeared at the front of the Model. I made her to sit on a Studio Chair and brought the Studio Light a bit closer (not too close) to the model: one light at the right hand-side, and the other at the left hand-side; and I made sure she got some of best unique style. I shot many portraits and full shots with only one backdrop The background is a multicoloured type: it is a mix of light-black, blue, light-brown and gray. These mixtures made the result of the image look much better for editing. I actually blurred the background using Gaussian Blur, and I unmasked and painted the visible area so as to blur the background. As you can see, it looks amazing with the background on blurry mode, leaving only the subject to be more visible than anything else.
The Major Problem with Editing of Photographs on Photoshop (PS)
The major problem here is the ‘Photo-editing’ which is the colour-grading part. This poses problem for most editors generally. This is the reason why in most cases, a professional photographer may be better in ‘photographing' (taking pictures) than editing [of images]. Notwithstanding, colour-grading, such as adding of different colours and reduction of saturations in image in other to get a good taste may be a problem. If an editor is not careful enough with editing of an image, a person having dark or brown skin tone may have a dark or light skin tone.
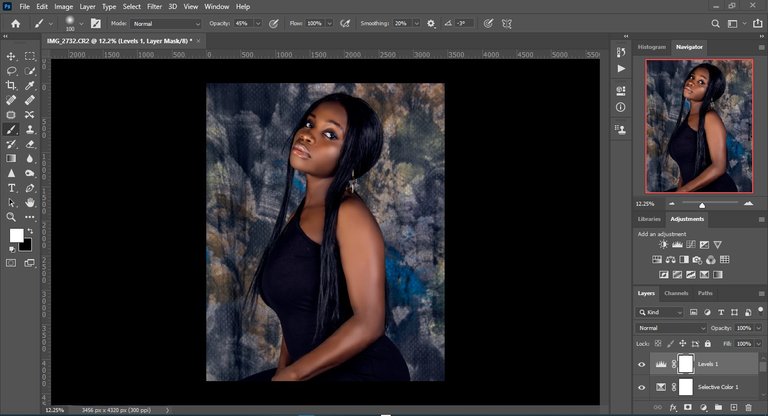
Here is the Model before editing

I did some cropping before Colour-grading
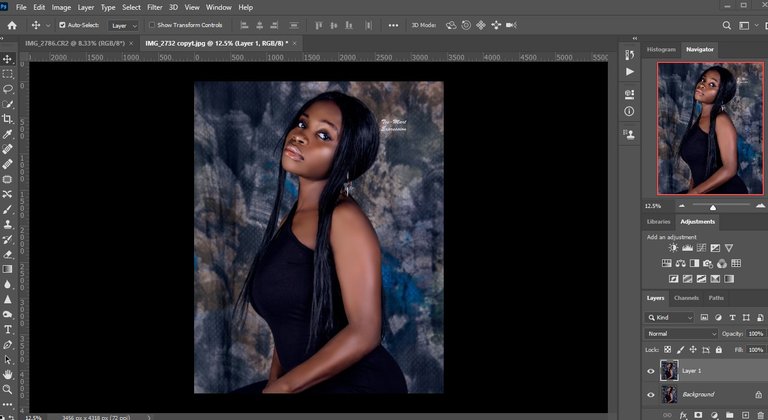
I made the same picture passed through different channels of colour. Pertaining to the colour effects on the subject, if you take a closer look at the images, you will notice some unique things, which are the Skin Textures and Colour-looks. The Skin Textures and the Colour-looks are popping out well. I added brightness and contrast, gradient map, vibrance filter and cooling filter for the betterment of the outlook.
This is the result here — from the original version to the edited version:
The picture is somehow large to some extent (20.6 MB version), which made my editing look better unlike editing on JPEG FORMAT. Shooting on RAW FORMAT will definitely increase the image size and help to make editing processes easier.
The first result:
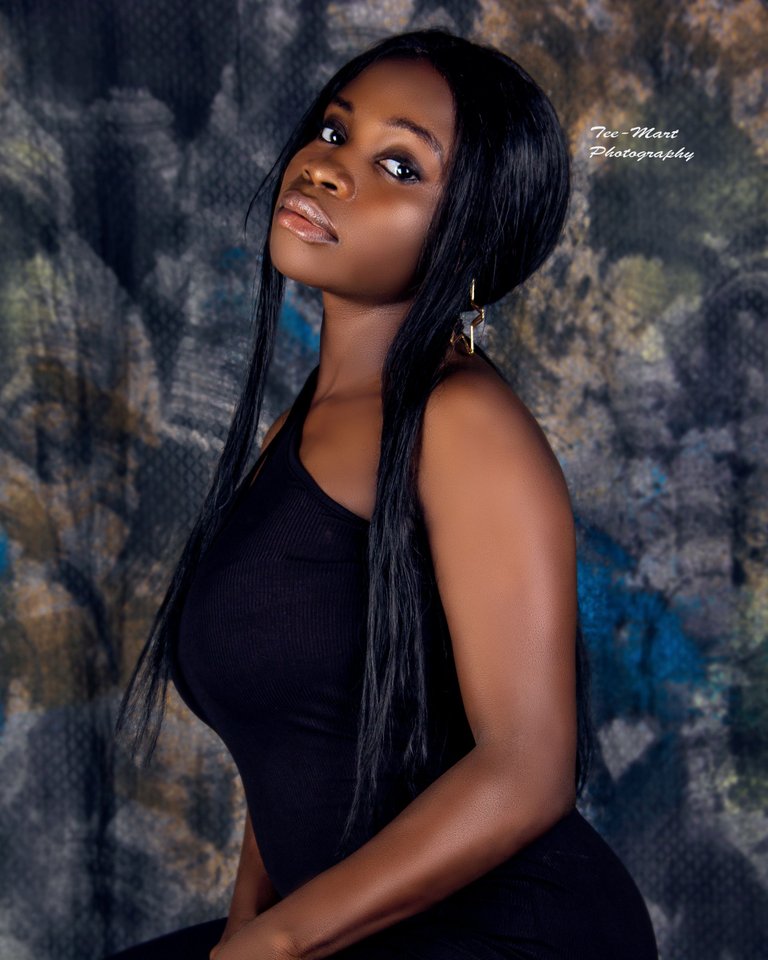
The first result seems to be okay; but I didn't just stop here — I took it to the next level. I went ahead to filter the image by adding ‘colour filter coolnessfrom the Photo Filter Selections' to make the image cool
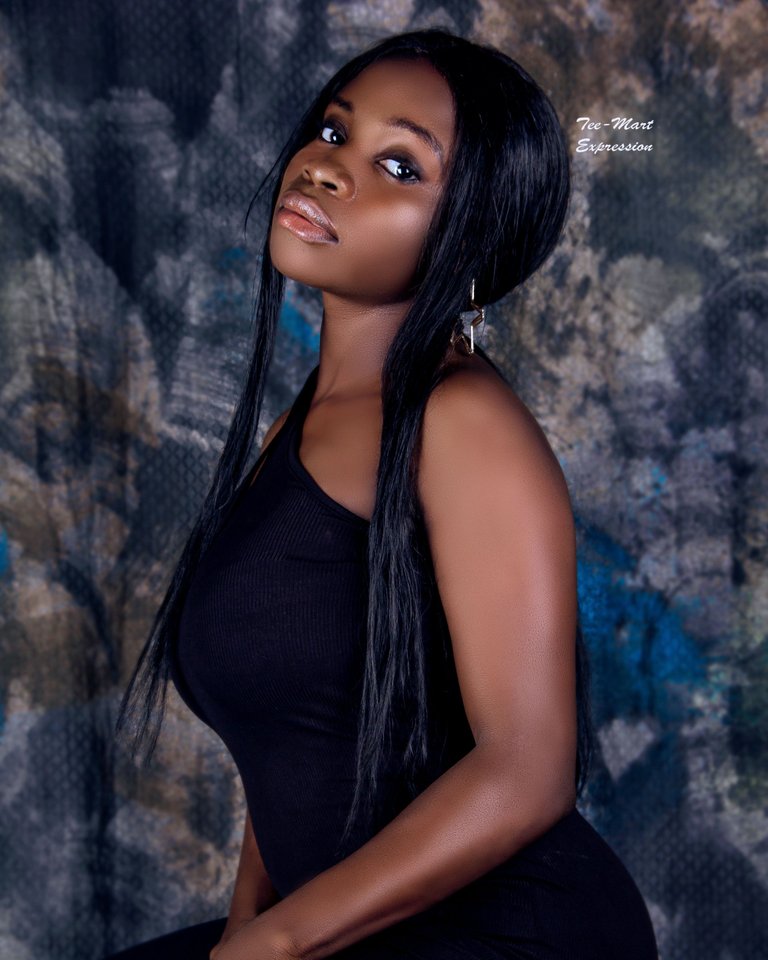
The final result:
The final result looks much better to me, and it made the image to be flawless and captivating. If you zoom the image well, you will notice its sharpness and richness
PHOTOS DIMENSIONS : 3456 x 5184
Size: 20.6 MB
CAMERA MAKER: CANON
CAMERA MODEL: CANON EOS 60D
ISO SPEED: ISO-160
F-STOP: F/7.1
EXPOSURE TIME:. 1/100 SEC
EXPOSURE BIAS:. 0 STEP
EXPOSURE PROGRAM: MANUAL
METERING MODE: PATTERN
FLASH MODE: NO FLASH
FOCAL LENGTH: 52 MM
Thanks for reading my Post

This post is totally plagiarism free & all the photographs were shot & edited by me @martinstomisin (20/09/2021)
Interested in some of my write-ups?
A Beautiful Portrait Picture
Accreditation of Poetic Convention and License Exhibition by Poets
One Of The Best Catfish Pepper Soup Outdoors, Prepared And Served In A Clay Pot
Music — A Natural Therapy For Upliftment Of Mood And Alleviation Of Stress
An Overview of a Song “The Sound of Silence” covered by Disturbed
Some Reasons Why most People Shy Away from Poetry which Led to the Fall of Demand [for Poetry] in the Market
The Flawlessness of your Body(Poetry)

Electronic-terrorism, voice to skull and neuro monitoring on Hive and Steem. You can ignore this, but your going to wish you didnt soon. This is happening whether you believe it or not. https://ecency.com/fyrstikken/@fairandbalanced/i-am-the-only-motherfucker-on-the-internet-pointing-to-a-direct-source-for-voice-to-skull-electronic-terrorism
Electronic-terrorism, voice to skull and neuro monitoring on Hive and Steem. You can ignore this, but your going to wish you didnt soon. This is happening whether you believe it or not. https://ecency.com/fyrstikken/@fairandbalanced/i-am-the-only-motherfucker-on-the-internet-pointing-to-a-direct-source-for-voice-to-skull-electronic-terrorism
Electronic-terrorism, voice to skull and neuro monitoring on Hive and Steem. You can ignore this, but your going to wish you didnt soon. This is happening whether you believe it or not. https://ecency.com/fyrstikken/@fairandbalanced/i-am-the-only-motherfucker-on-the-internet-pointing-to-a-direct-source-for-voice-to-skull-electronic-terrorism
Electronic-terrorism, voice to skull and neuro monitoring on Hive and Steem. You can ignore this, but your going to wish you didnt soon. This is happening whether you believe it or not. https://ecency.com/fyrstikken/@fairandbalanced/i-am-the-only-motherfucker-on-the-internet-pointing-to-a-direct-source-for-voice-to-skull-electronic-terrorism
Electronic-terrorism, voice to skull and neuro monitoring on Hive and Steem. You can ignore this, but your going to wish you didnt soon. This is happening whether you believe it or not. https://ecency.com/fyrstikken/@fairandbalanced/i-am-the-only-motherfucker-on-the-internet-pointing-to-a-direct-source-for-voice-to-skull-electronic-terrorism
Congratulations @martinstomisin! You received a personal badge!
You can view your badges on your board and compare yourself to others in the Ranking
Check out the last post from @hivebuzz:
Electronic-terrorism, voice to skull and neuro monitoring on Hive and Steem. You can ignore this, but your going to wish you didnt soon. This is happening whether you believe it or not. https://ecency.com/fyrstikken/@fairandbalanced/i-am-the-only-motherfucker-on-the-internet-pointing-to-a-direct-source-for-voice-to-skull-electronic-terrorism