[ENG/ESP] Splinterlands Art Contest Week 217- My version of DOCTOR BLIGHT
A great greeting to all of you users of the #Blockchain community of #Splinterlands. It's been a while since my last job, about a month now. I had been working on an idea I had planned for Halloween but due to lack of time I couldn't submit it, that in a way gave me some frustration but in the end I took strength to finish what I had started, so this time I want to finally share my entry for the #217 art contest for this week, so I will be showing you a bit of the procedure I took to make this illustration.
The character I chose this time for the contest is called DOCTOR BLIGHT, a character corresponding to the Neutral element. This time I wanted to try a new colouring style, so I tried to make the character without a final lineart as I was doing before. Again this was a big challenge for me as I have never painted a character without a final line. I think this was the reason why I couldn't finish the drawing on time but I was still surprised by the final work I managed to do. So without further ado, let's get started!
Un gran saludo para todos ustedes usuarios de la comunidad #Blockchain de #Splinterlands. Ha pasado algo de tiempo desde mi último trabajo, concretamente hace ya un mes. Había estado trabajando en una idea que tenía prevista para Halloween pero por falta de tiempo no pude presentarla, eso de cierto modo me dio algo de frustración pero al final tome fuerzas para terminar lo que había empezado, por lo que en esta oportunidad quiero compartir finalmente mi entrada para el concurso de arte #217 correspondiente a esta semana, por lo que les estaré mostrando un poco el procedimiento que lleve a cabo para realizar esta ilustración.
El personaje que elegí esta vez para el concurso es la llamado DOCTOR BLIGHT, personaje correspondiente al elemento Neutral. Esta vez quise probar un nuevo estilo de coloreado, por lo que trate de realizar el personaje sin un lineart final como lo venía haciendo antes. Una vez más esto supuso un gran reto para mí ya que nunca he pintado un personaje sin una línea final. Creo que este fue el motivo de que no pudiera terminar el dibujo a tiempo pero aun así me sorprendió el trabajo final que logre hacer. Así que sin más preámbulos ¡Comencemos!
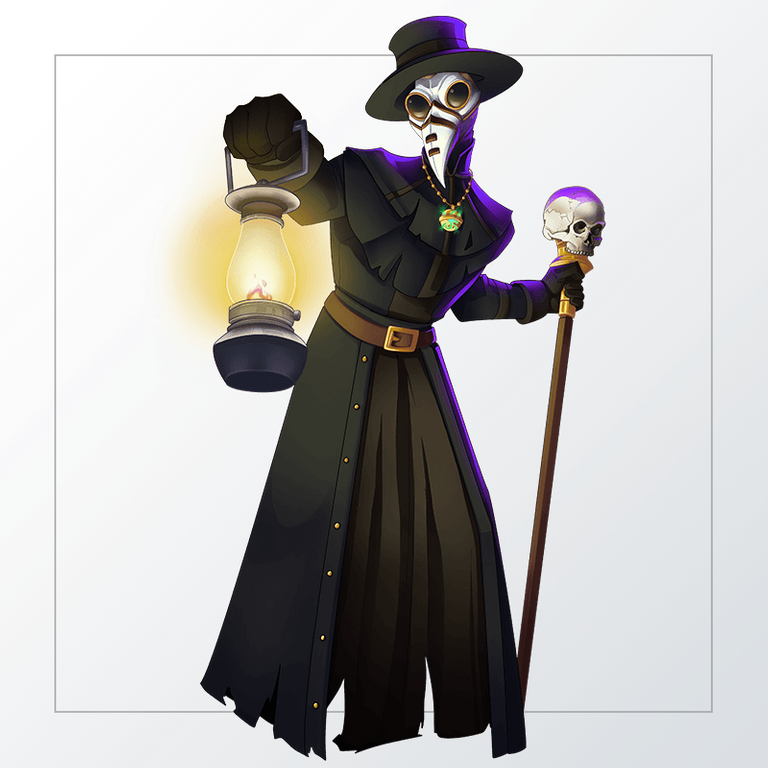
REFERENCE

Process | Procedimiento
- Step #1:
I started by making a sketch of the character in a traditional way, I did this to guide me when drawing the main lines. I used the character as a reference and adapted it to a more chibi or kawaii style. Once the sketch was finished the next thing was to add the main lines to form a lineart not very worked because the idea was to try to erase the line when I applied the colour.
- Paso #1:
Comencé realizando un boceto del personaje de manera tradicional, esto lo hice para guiarme a la hora de trazar las líneas principales. Para el mismo utilice como referencia al personaje y lo adapte a un estilo un poco más chibi o kawaii. Una vez terminado el boceto lo siguiente fue agregar las principales líneas hasta formar así un lineart no muy trabajado ya que la idea era tratar de ir borrando la línea cuando aplicara el color.
- Step #2:
Once this basic lineart of the character was finished, the next thing I did was to apply the base colours to the character, in which I used the most predominant tones of the reference character so that the colour would not be too different from the original.
- Paso #2:
Culminado este lineart básico del personaje lo siguiente que hice fue ir colocando los colores base al personaje, en el cual utilice los tonos más predominantes del personaje de referencia para que el color no fuera muy diferente del original.
- Step #3:
After placing the base colours the next thing to do was to disappear the lineart I had made. This with the purpose of being able to degrade the colours and to join all the parts of the
all the parts of the character, playing with the shadows and some lights to create a sensation of volume. I also made some changes to the pumpkin I had made as I didn't like it very much and I wanted it to have a darker and more evil design, so my character was finally ready.
- Paso #3:
Luego de colocar los colores bases lo siguiente fue desaparecer el lineart que había hecho. Esto con la finalidad de poder degradar los colores y unir
todas las partes del personaje, jugando con las sombras y algunas luces para poder crear una sensación de volumen. También hice algunos cambios a la calabaza que había hecho ya que no me gustaba mucho y quería que esta tuviese un diseño más oscuro y malvado, de este modo mi personaje finalmente estaba listo.

- Step #4:
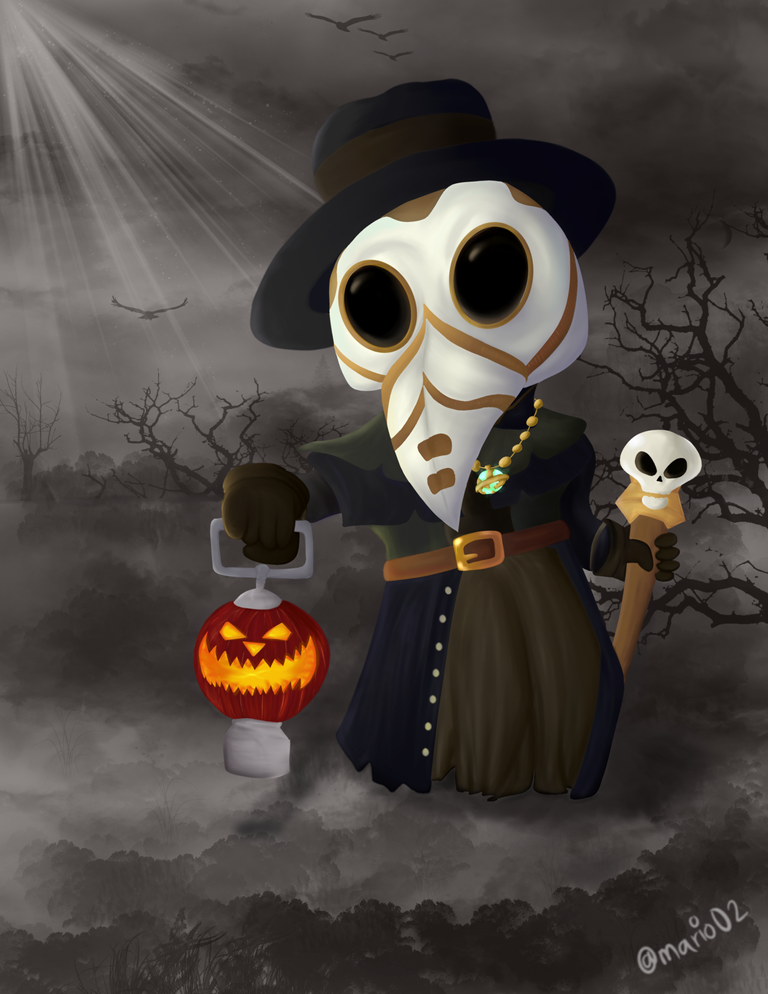
Once the character was finished I wanted to make a background for it, in which I tried to recreate a scene in which this doctor was the hope against an apocalypse or something like that, although the final result was something very different to the idea I had in the beginning, the truth is that I'm very happy with the result.
- Paso #4:
Finalizado el personaje quise realizar un fondo para este, en el que trate de recrear una escena en el que este doctor fuera la esperanza ante un apocalipsis o algo así, aunque el resultado final fue algo muy diferente a la idea que tenía en un principio la verdad estoy muy contento con el resultado.
And that's the end of this illustration for the contest. I am very happy with the final result, despite not completely mastering the style and having a thousand flaws in the anatomy this experience helps me to continue advancing in my self-learning and also gives me great pleasure to share it with all of you. I hope you liked it, if you want you can support me and/or leave me a comment with some advice and I will be very grateful, this would be very helpful for me. Thank you very much for watching to the end and see you in a future contest!
Y así doy por culminada está ilustración para el concurso. Estoy muy contento con el resultado final, a pesar de no dominar completamente el estilo y de tener mil fallos en la anatomía esta experiencia me sirve para seguir avanzando en mi autoaprendizaje y también me da mucho gusto compartirlo con todos ustedes. Espero que haya sido de tu agrado, si deseas puedes apoyarme y/o dejarme un comentario con algún consejo y con gusto lo agradeceré, esto sería de mucha ayuda para mí. Muchas gracias por ver hasta el final y nos vemos en un próximo concurso!
Tools Used | Herramientas Utilizadas:
- Medibang Paint Pro PC version 64 bits
- Photoshop CC 2015
- Huion H610 PRO V2

Translated with DeepL (free version)
I love that you drew a very good picture. You keep drawing such good pictures.
Thank you very much for your comment and support! Greetings and thank you very much
Ests buenísimo tw felicito, buen trabajo, ese estilo de dibujo me gusta.
Mil gracias por el apoyo!! 🙏
!HUESO
Conoce el Proyecto Big Dog Bone lee su White Paper aquí.
Si deseas ganar Tokens del Proyecto Big Dog Bone, usa en tus post las etiquetas #hueso y #mundovirtual
Apoya nuestro trail de votación aquí mv-curacion
Por cada 10k de hueso en tu cartera puedes usar 2 veces al día el comando !HUESO en los comentarios de los post.
Learn about the Big Dog Bone Project read their White Paper here.
If you want to win Big Dog Bone Project Tokens, use the hashtags #hueso and #mundovirtual in your posts.
Support our voting trail here mv-curation
For every 10k of hueso in your wallet you can use 2 times a day the command !HUESO in the comments of the posts.
Thanks for sharing! - castleberry#6859

Thanks!!