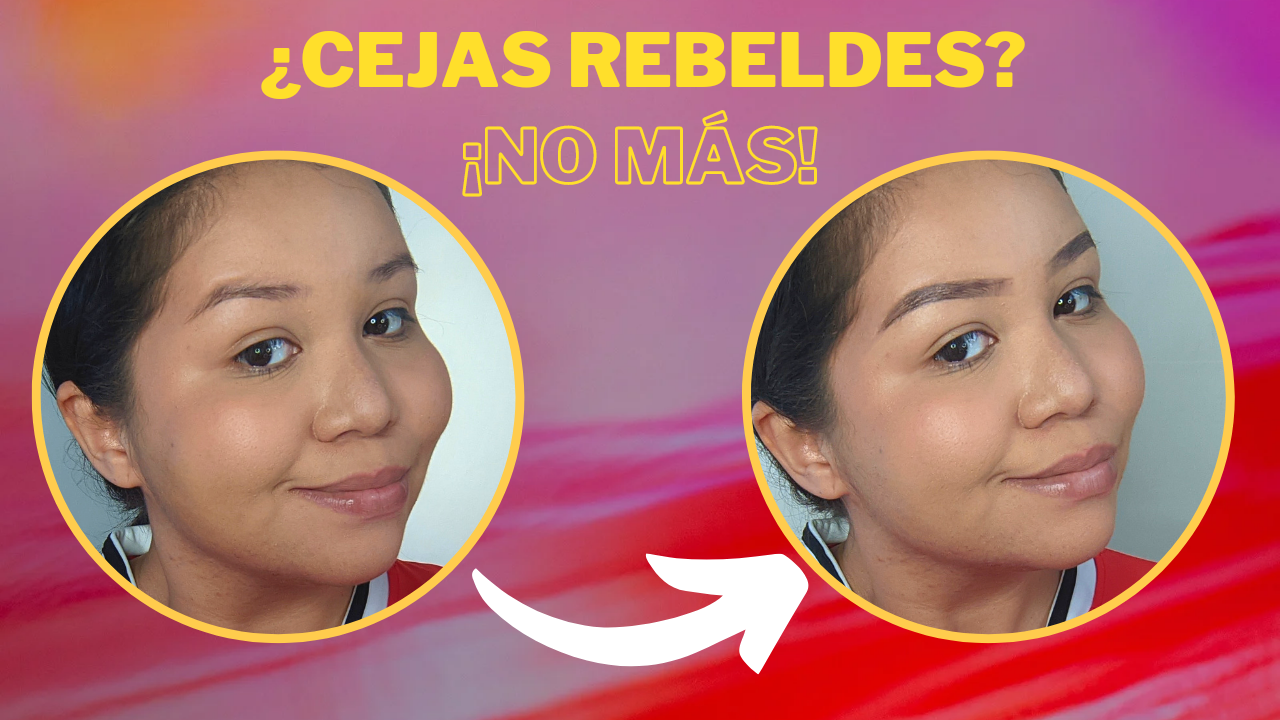
[ESP | ENG] ¿Cejas rebeldes? ¡Ya no más! Tips para cejas sombreadas y duraderas💕 | Por: @marilegny.
¡Hola hola, queridos amigos de Hive y Makeup Power! Estoy muy feliz de estar nuevamente con ustedes y hoy quiero compartirles mi rutina más actualizada de cejas ya que, mis cejas son demasiado rebeldes y últimamente he aplicado ciertos tips que me han funcionado mucho para domarlas y estoy segura que para ustedes también serán súper útiles, así que sin más, comencemos💕
Hello hello, dear friends of Hive and Makeup Power! I'm very happy to be with you once again and today I want to share my most updated eyebrow routine since my eyebrows are too unruly and lately I have applied certain tips that have worked a lot to tame them and I'm sure that they will also be super useful for you, so, let's begin💕
💎 Paso a paso | Step by Step 💎
Lo primero que haremos será empezar cepillando muy bien nuestras cejas con un spoolie y esto no será únicamente para poner los pelitos en orden, sino para eliminar cualquier resto de skincare, base o corrector que haya en ellas, ya que es primordial que esté muy limpia la zona para el siguiente paso.
The first thing we will do is start by brushing our eyebrows very well with a spoolie and this will not only be to put the hairs in order, but to eliminate any rest of skincare, foundation or concealer that is on them, since it is essential that the area is very clean for the next step.
Luego tomaremos nuestro gel estilizador favorito, puede ser de cejas o de cabello, cómo usaré en este caso, pero lo importante es que tenga una buena fijación. Tomaremos una pequeña cantidad y dejaremos reposar unos segundos para que tome más espesor, y luego con nuestro spoolie tomamos una poca cantidad y lo distribuimos sobre nuestras cejas, peinándolas en su dirección natural:
Then we will take our favorite styling gel, it can be for eyebrows or hair, how I will use it in this case, but the important thing is that it has a good fixation. We will take a small amount and let it sit for a few seconds so that it thickens, and then with our spoolie we take a small amount and distribute it over our eyebrows, combing them in their natural direction:
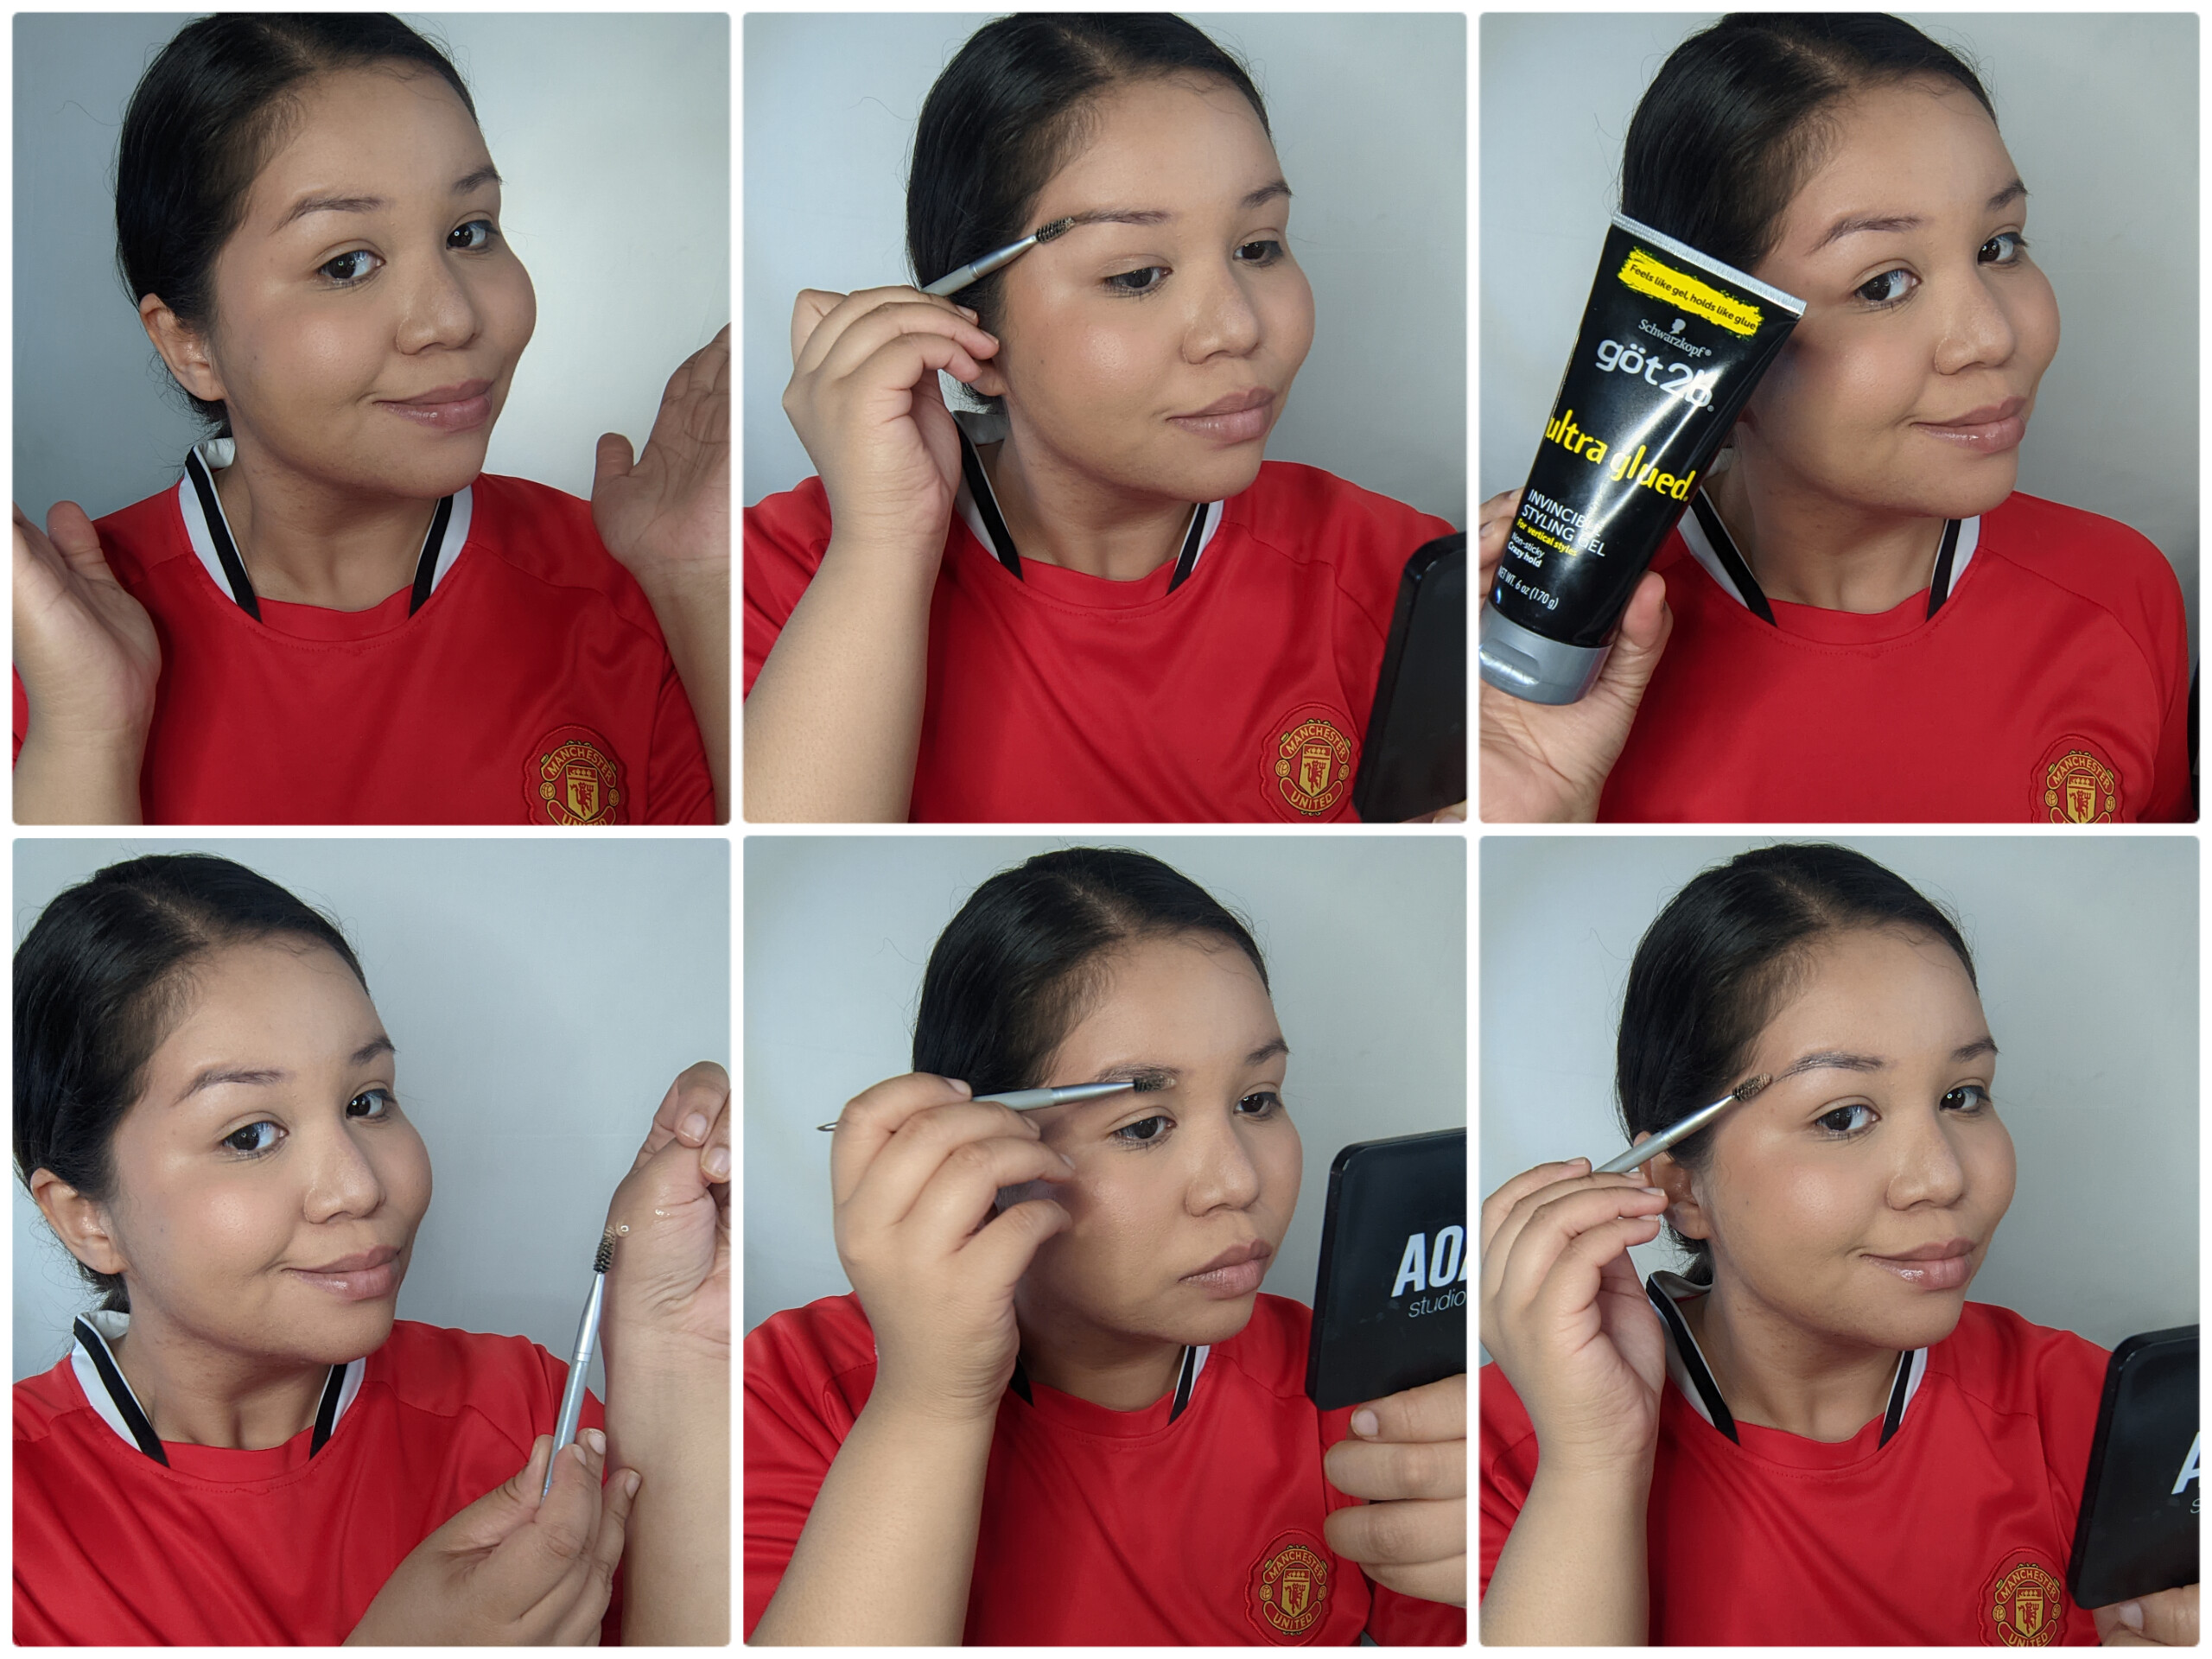
Esperamos a que nuestro gel se absorba por completo y notaremos cómo los pelitos se quedan en su lugar, lo que nos facilitará muchísimo el próximo paso que es definirlas y rellenarlas a nuestro gusto. En este caso, utilicé una pomada que realmente es grasosa y no solía usar por este motivo, pero desde que implementé este tip funciona mucho mejor ya que nuestro gel funciona como una base para adherirse, y ahora mis cejas duran absolutamente todo el día gracias a esto💕
We wait for our gel to be completely absorbed and we will notice how the little hairs stay in place, which will make the next step much easier for us, which is to define and fill them to our liking. In this case, I used a pomade that is really greasy and I don't used to use it for this reason, but since I implemented this tip it works much better since our gel works as a base to adhere, and now my eyebrows last absolutely all day thanks to this💕
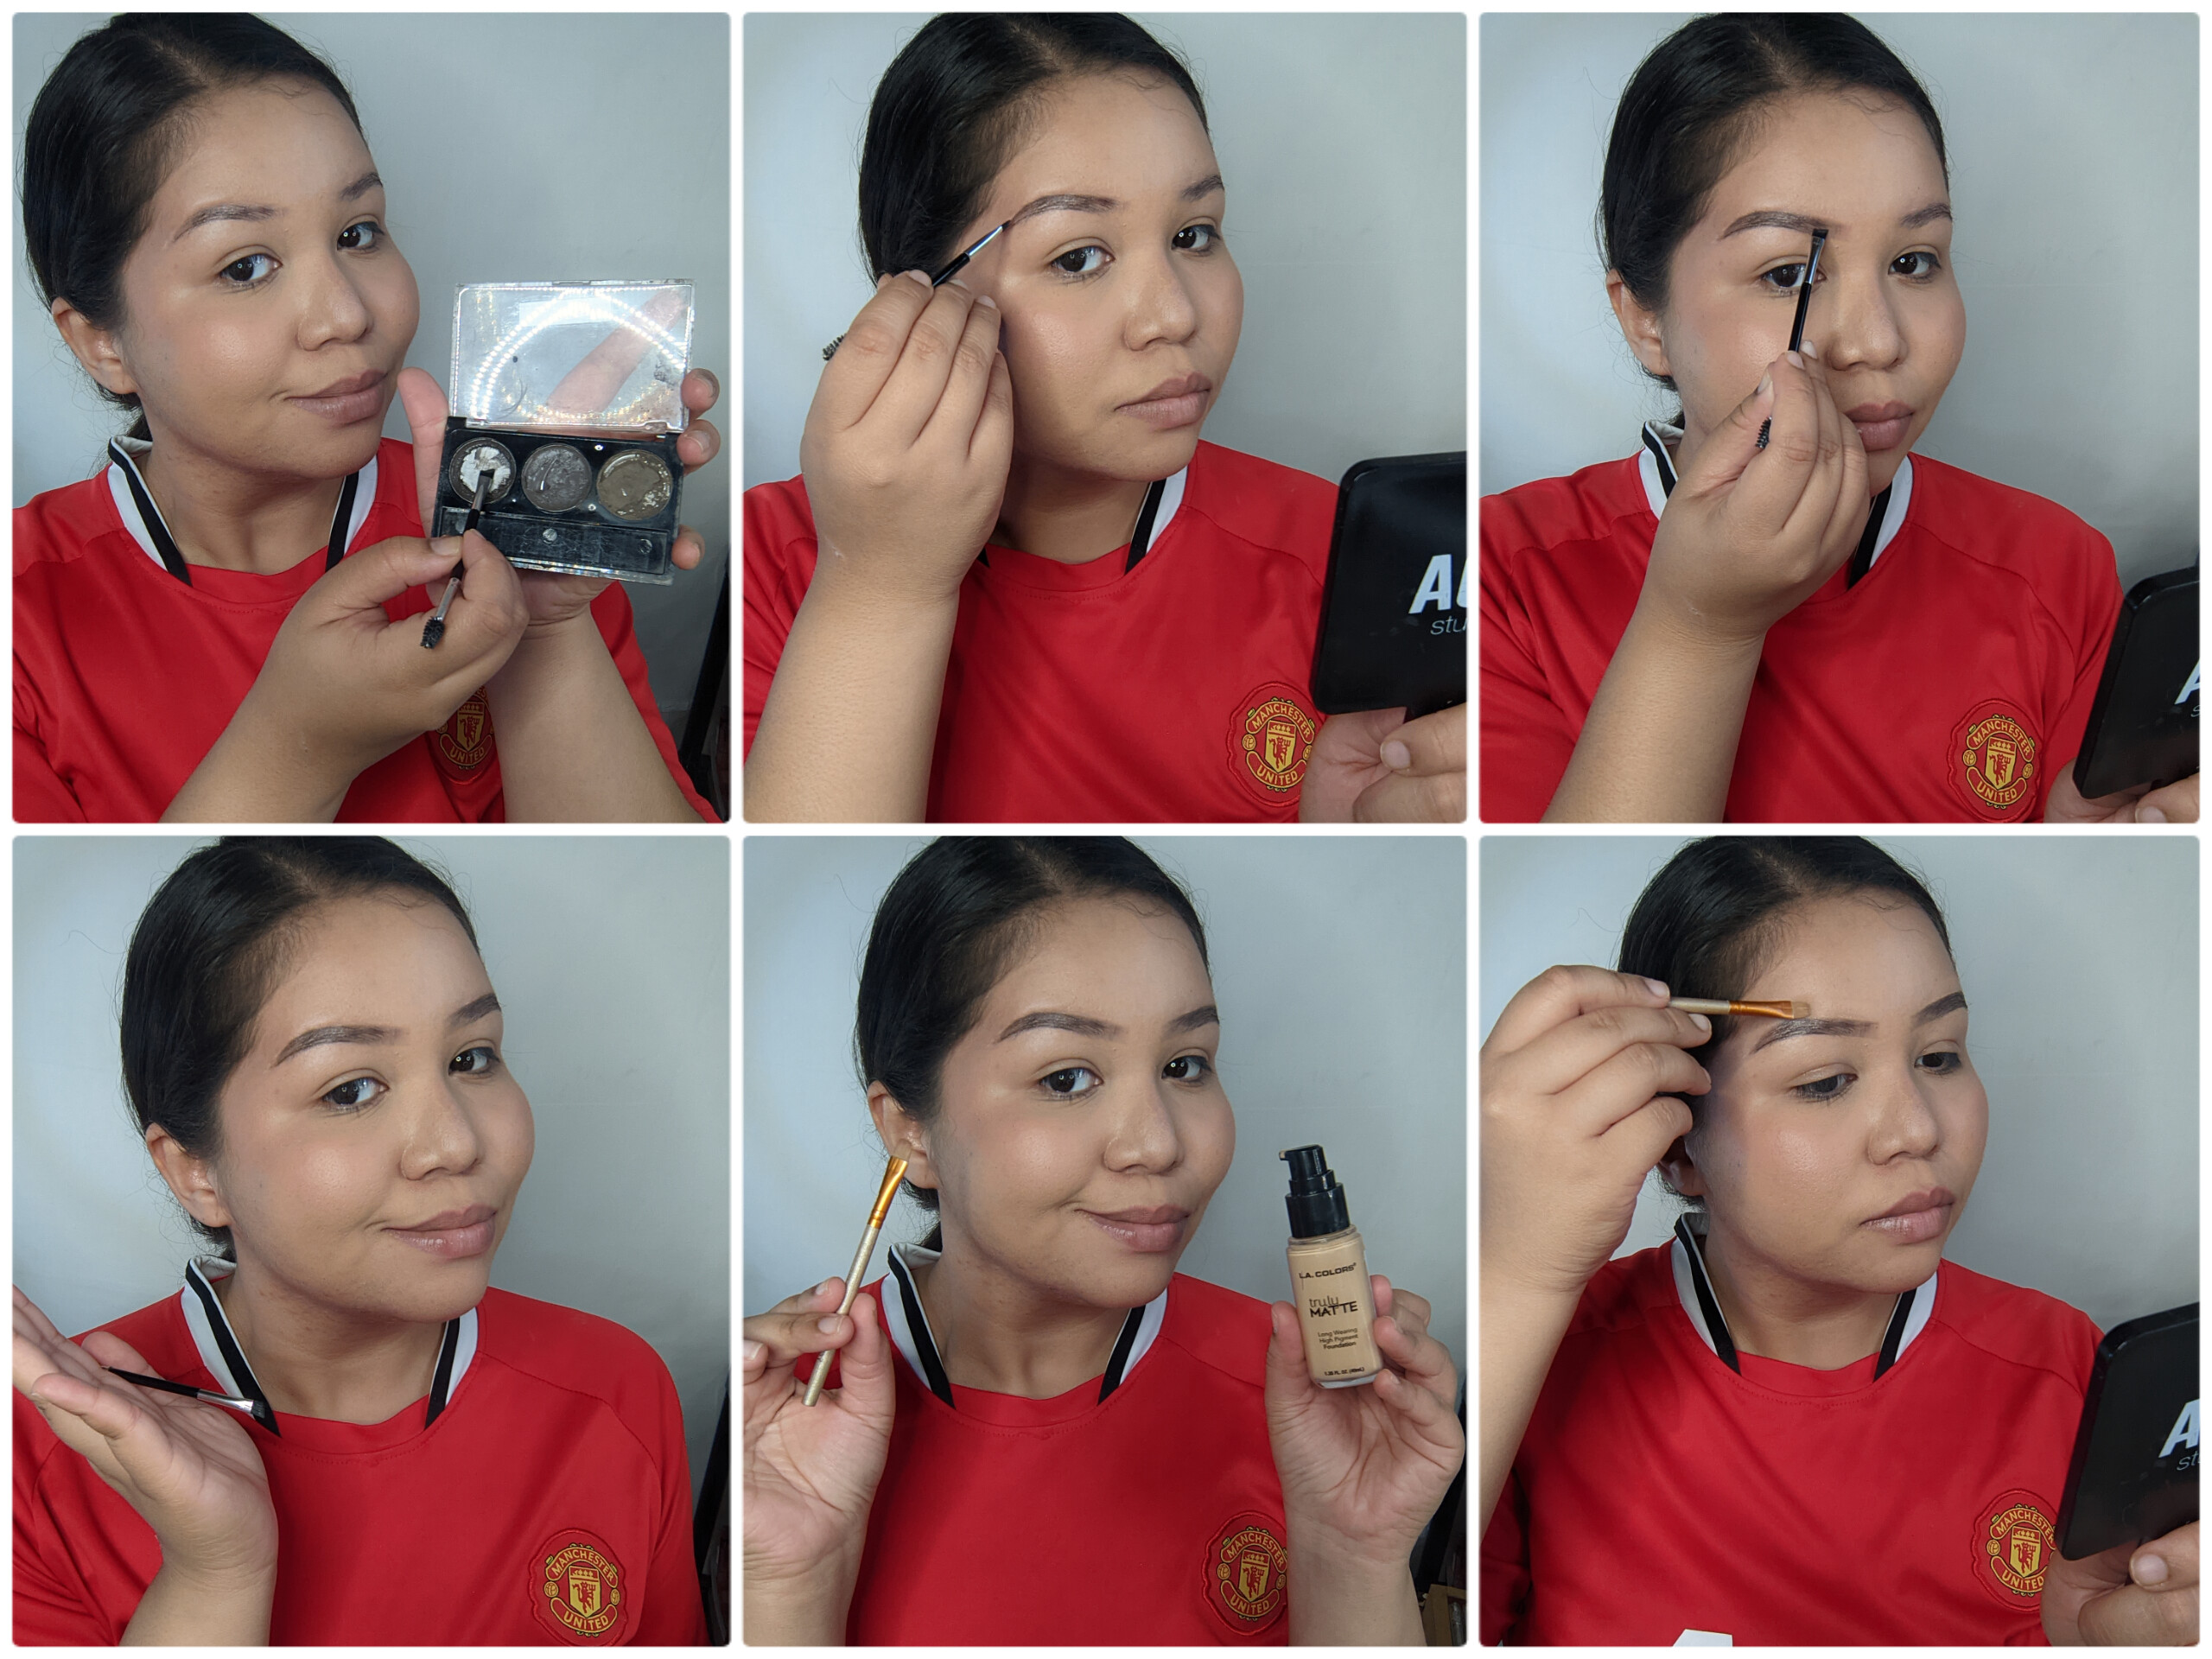
Pero bueno, continuamos tomando una pequeña cantidad de pomada con nuestro pincel angular y definimos nuestra ceja, delineando la parte superior e inferior, y rellenando desde la cola hasta el inicio, para que la mayor cantidad de pomada se concentre al final y así lograr un bonito efecto ombrè o degradado, bastante lindo y favorecedor.
But, we continue taking a small amount of pomade with our angled brush and we define our eyebrow, outlining the upper and lower part, and filling from the tail to the beginning, so that the greatest amount of pomade is concentrated at the end and thus achieve a nice ombré or gradient effect, quite cute and flattering.
De ser necesario o de buscar un resultado aún más prolijo, podemos limpiar y definir aún más nuestra ceja en especial si cometimos algún error, utilizando una brocha plana y nuestra base de maquillaje, bordeando la parte superior e inferior de nuestra ceja. Les recomiendo que lo hagan con base y no con corrector para que la corrección se vea más natural, al ser el mismo tono que llevábamos previamente en la piel:
If necessary or to get an even neater result, we can clean and define our eyebrow even more, especially if we made a mistake, using a flat brush and our makeup base, bordering the upper and lower part of our eyebrow. I recommend that you do it with a foundation and not with a concealer so that the correction looks more natural, as it is the same tone that we previously had on our skin:
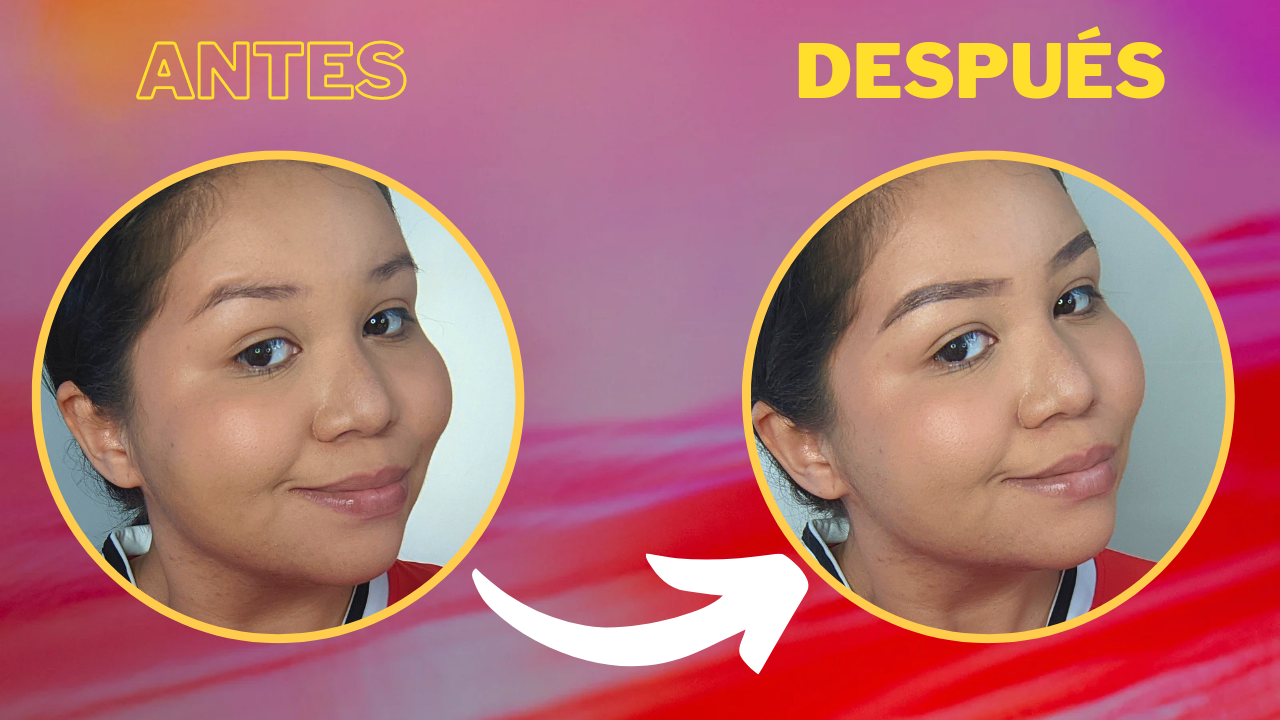
Al finalizar estos pasos, lograremos unas lindas cejas definidas que nos duraran absolutamente todo el día y en su debido lugar💕 Soy muy fan de esta técnica porque me ha permitido hacer mis cejas muy rápido y con un resultado realmente duradero:
At the end of these steps, we will achieve beautiful defined eyebrows that will last absolutely all day and in their proper place💕 I am a big fan of this technique because it has allowed me to do my eyebrows very quickly and with a really long-lasting result:
Espero que les haya gustado mucho este tutorial lleno de tipcitos que espero sean de ayuda y cabe destacar que esto pueden realizarlo con los productos que tengan a la mano, lo importante es la técnica y el cariño que le pongan a lo que hagan🥰 Nos vemos en un próximo post💕
I hope you liked this tutorial full of tips that I hope will be helpful to you and it should be noted that this can be done with the products you have on hand, the important thing is the technique and the love you put into what you do 🥰 See you in a future post
https://twitter.com/203709975/status/1628807769422692352
The rewards earned on this comment will go directly to the people sharing the post on Twitter as long as they are registered with @poshtoken. Sign up at https://hiveposh.com.
Amigaaa que bueno verte de nuevo por acá