I thought I would lose my job trying to knit my dream crop top (EN/ES)
Hace unas semanas me dio la "fiebre" de hacer un crop top tejido. No se por qué, pues la verdad no me gusta usar prendas de ropa demasiado pequeñas. No son de mi estilo. Sin embargo, a diario comentaba que haría uno de estos a crochet, pero no tenía la más mínima idea de cómo hacerlo.
Empecé a buscar videos en la plataforma YouTube y después de empezar a ver muchos -unos menos atrayentes que otros-, vi un modelo que me llamó bastante la atención. Así que decidí ver completo el vídeo para seguir los pasos.
Se trata de un modelo que en principio me pareció de estilo deportivo muy bonito. En cuanto lo vi lo imaginé en color lila, una tonalidad suave de morado que me gusta bastante. pero no tenía hilo sintético para crochet ni lana para empezar a tejer.
Para ese momento llegaba muy tarde del trabajo y tuve que esperar el fin de semana para ir a la tienda del pueblo a buscarlo. Me llamó la atención un color rosa tipo neón, muy llamativo. Compré dos rollos y me fui a casa con la ilusión de empezar mi proyecto.
Así, día a día iba tejiendo un poco. Muy poco la verdad, y sentía que no avanzaba casi nada. Esta sensación la tuve hasta que por fin pude terminar la parte de la cintura para poder iniciar el tejido de la parte del busto. Allí avancé más rápido y sentí que la puntada era mucho más ligera y fácil de hacer, pese a ser un punto en relieve.
How did I start knitting my crop top? / ¿Cómo empecé a tejer mi crop top?
As I told you, I was guided by an audiovisual material available on Youtube, specifically from the Nirvana Crochet channel. By the way, very well explained. Thanks to this video I learned how to knit the spring stitch and the high relief stitch.
Como ya les dije, me guie por un material audiovisual disponible en Youtube, específicamente del canal de Nirvana Crochet. Por cierto, muy bien explicado. Gracias a este video aprendí a tejer el punto resorte y el punto alto en relieve.
Next, I detail a little bit of the process: / A continuación, les detallo un poco del proceso:
Lo primero que hice fue medir el contorno debajo del busto. En mi caso, la medida es de 71 centímetros.
En segundo lugar, fue necesario calcular que tan largo (o corto) quería mi prenda. Según los vídeos consultados, la recomendación es calcular 10 centímetros bajo el busto, pero eso me parecía demasiado corto. Por lo que decidí hacerlo más largo, exactamente de 15 centímetros.
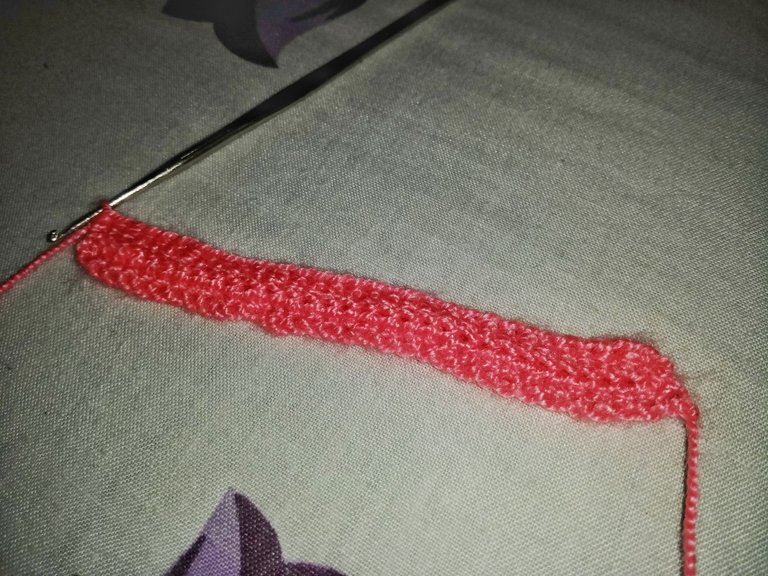
Al tener las medidas, empecé mi labor a crochet. Inicié con la cantidad de 50 cadenas, las necesarias para completar los 15 centímetros. Al finalizar esa primera vuelta subí una cadenita, enlacé la hebra en la aguja y empecé a hacer medio punto alto en cada punto hasta el final de la vuelta.
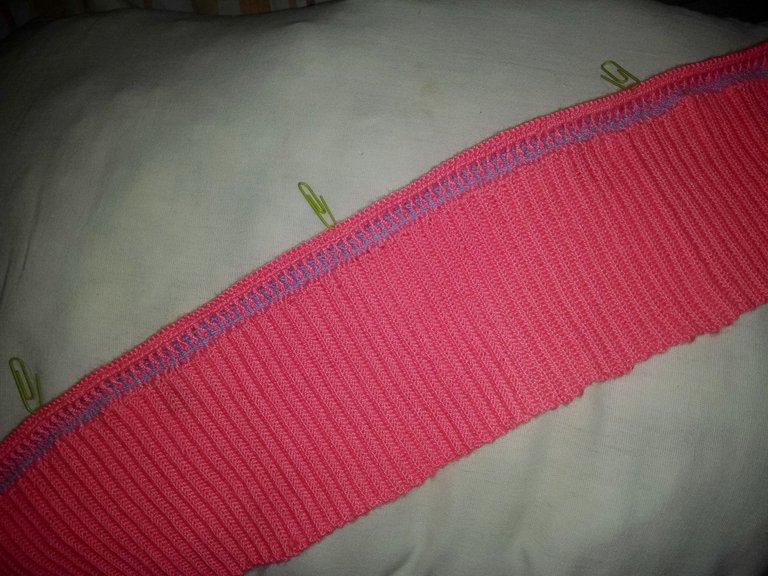
Para continuar, tejí una cadenita para dar altura, giré y di inicio al punto elástico, tal como se muestra el video que consulté en Youtube. El punto elástico consiste en introducir la aguja en el aro que se forma en la parte de arriba del punto de la vuelta anterior, en lugar de tomar el que se ubica en la parte lateral. Así repetí los puntos hasta el final de la vuelta.
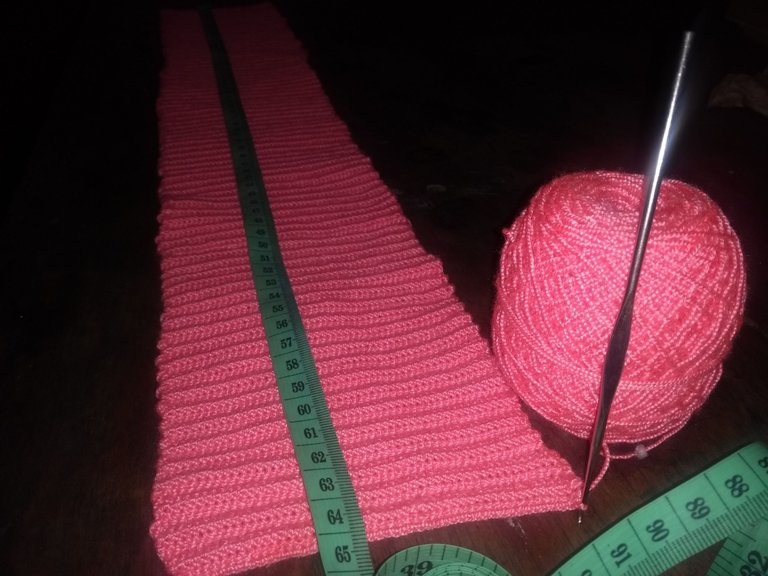
Las siguientes vueltas son iguales. Así tuve que continuar hasta completar 61 centímetros (10 menos de los que mide mi contorno bajo el busto). Y, se preguntarán el por qué no se deben tejer por completo los 71. En principio porque el punto resorte tiende a ser elástico, cede un poco, y además porque en los bordes se deberán tejer más adelante los ojales por donde se entrelazarán las tiras de nuestro crop top tejido a crochet.
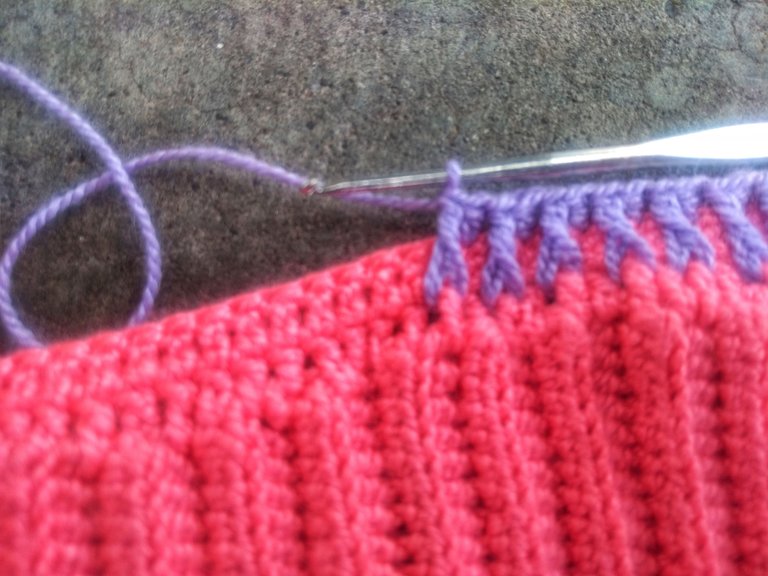
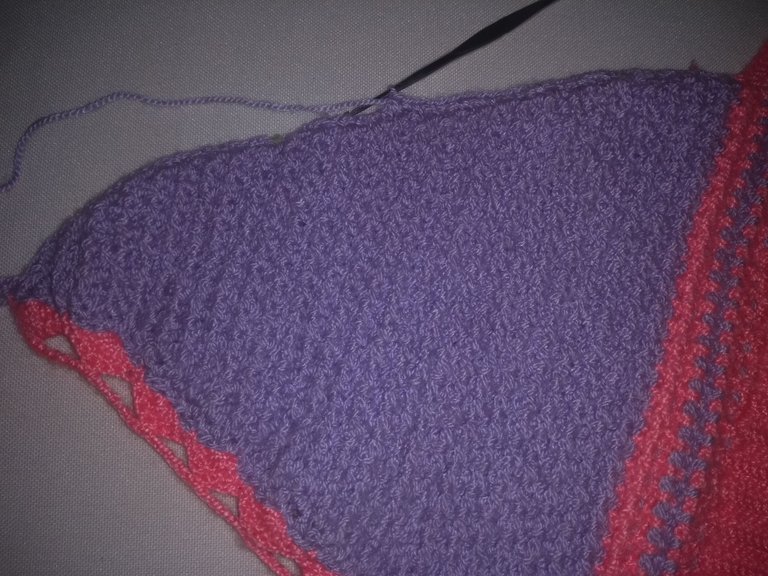
Una vez culminada esa tira -que me pareció una eternidad terminarla ya que solo podía dedicarle unos minutos cada día-, el siguiente paso fue iniciar la secuencia de punto alto en relieve para la zona del busto. Para ello, antes es necesario tomar la tira y empezar a tejer a lo largo de esta una hilera de puntos altos en cada uno de los espacios que se marcaron al borde de la tira formada con el punto resorte.
Seguidamente, para iniciar la segunda vuelta de esta parte se requiere subir dos cadenitas (que contarán como el primer punto alto). En el segundo agujero siguiente se iniciará otra vuelta de puntos altos hasta culminar en el otro extremo.
In my case I decided to knit two rounds of raised stitch in front before separating and starting the knitting of the cups. So this was the next step. To knit this type of stitch you start with a high stitch, leave a gap st and the stitch that follows is knitted by completely interlocking the stitch of the second row down. The next stitch will be a normal double crochet, leaving free the hole that corresponds to the one we knit in relief in the back and so on until the end of the row (I recommend you to watch minute 11.39 of the video.
En mi caso decidí tejer dos vueltas de punto en relieve por delante antes de separar e iniciar el tejido de las copas. Así que este fue el siguiente paso. Para tejer este tipo de punto se inicia con un punto alto, se deja un puesto de separación y el punto que sigue se teje entrelazando por completo el punto de la segunda fila de abajo. El siguiente será un punto alto normal, dejando libre el agujero que corresponde al que tejimos en relieve en la parte posterior y así sucesivamente hasta finalizar la vuelta (Les recomiendo ver el minuto 11.39 del video).
La próxima vuelta corresponde únicamente a puntos altos. Siempre será una vuelta en relieve por el derecho y una vuelta de puntos altos.
Una vez listas estas dos vueltas es hora de marcar la distancia de las copas. Para ello medí 17 centímetros desde la base en el centro de mi pecho hasta el borde cerca a la axila. Tomé el tejido y lo doblé por la mitad para saber con precisión cuál era el centro del mismo. Seguidamente, marqué 17 centímetros a la derecha y 17 a la izquierda.
Una vez marcados los puntos empecé a tejer una de las copas con el mismo punto en relieve. Ya sabemos, siempre será una vuelta en relieve por el derecho intercalada por una vuelta de puntos altos. Precisamente, en cada vuelta de puntos altos se irán haciendo las disminuciones, una en cada extremo. Esto permitirá que la copa finalice en una punta donde se tejerá el cordón para sujetar la prenda y entrelazar en la parte de la espalda.
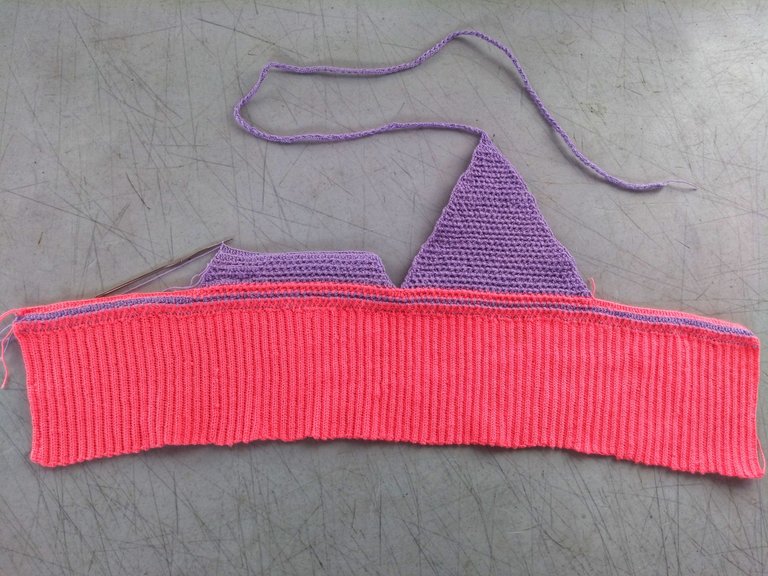
Confieso que, a diferencia de lo explicado en el video, cuando ya había subido unos 13 centímetros desde la base de la copa empecé a hacer dos disminuciones en cada extremo de cada vuelta de puntos altos, debido a que como soy de talla pequeña sentía que quedaría demasiado alta.
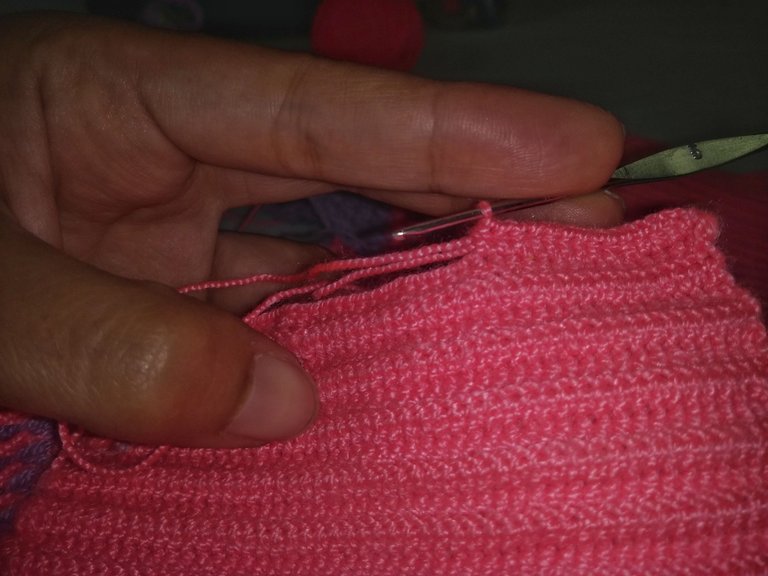
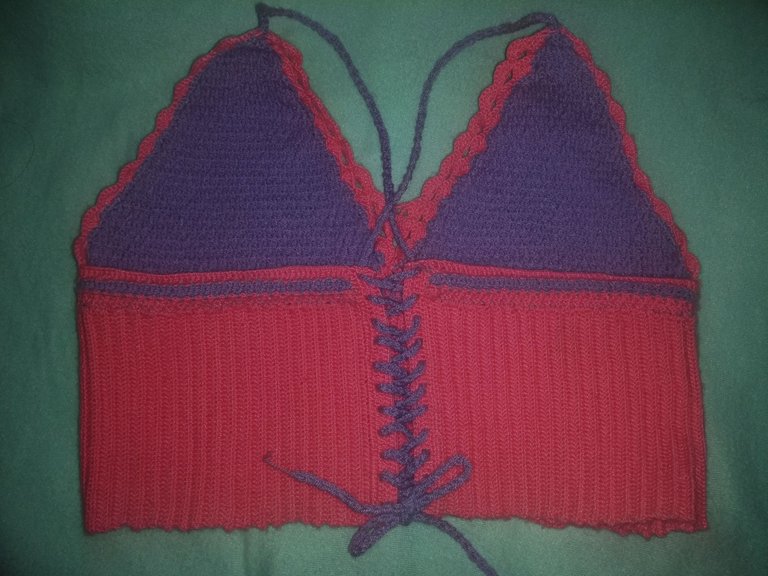
Al llegar a la cima de la copa, empecé a tejer el cordón. Para ello inicié levantando dos cadenitas (equivalentes a un punto alto) más un punto alto. Di la vuelta y levanté otras dos cadenitas y tejí el punto alto en medio de los de la vuelta anterior y así sucesivamente hasta terminar una tira de unos 90 centímetros. Repetí los pasos de la copa en el otro lado.
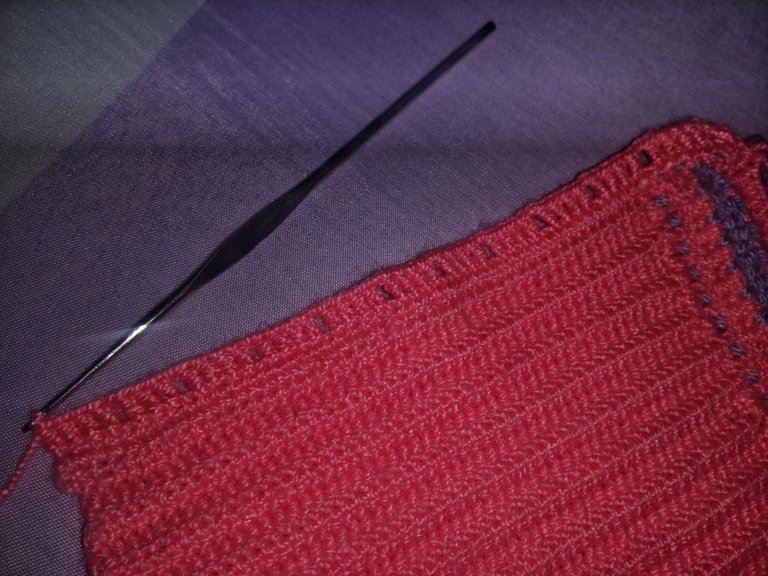
Después volví al extremo de los ojales en la parte de la espalda. Para reforzar tejí una vuelta de puntos medios altos. Este le proporciona mayor firmeza al tejido. La siguiente vuelta consistió en tejer dos cadenas y un punto alto con una cadena de separación para tejer el siguiente punto alto dejando un agujero libre. Luego, cuatro puntos altos, una cadena y cuatro puntos altos más luego de dejar el agujero bajo la cadena libre. Esa es la secuencia de los ojales. Al finalizar tejí otra vuelta de puntos medios bajos para reforzar. Ese extremo ya quedó listo. Se debe repetir el procedimiento con el otro extremo.
Mi crop top casi estaba listo, al menos según el video ya lo estaba. Pero, era tan plano y tieso el tejido que cuando quise medírmelo fue horrible. Sentí que no tenía forma y que, lamentablemente, mi cuerpo no encajaba allí. En ese momento sentí que había perdido el trabajo. Claro está que el conocimiento adquirido durante esas semanas y la práctica no, pero el resultado que esperaba no lo había logrado.
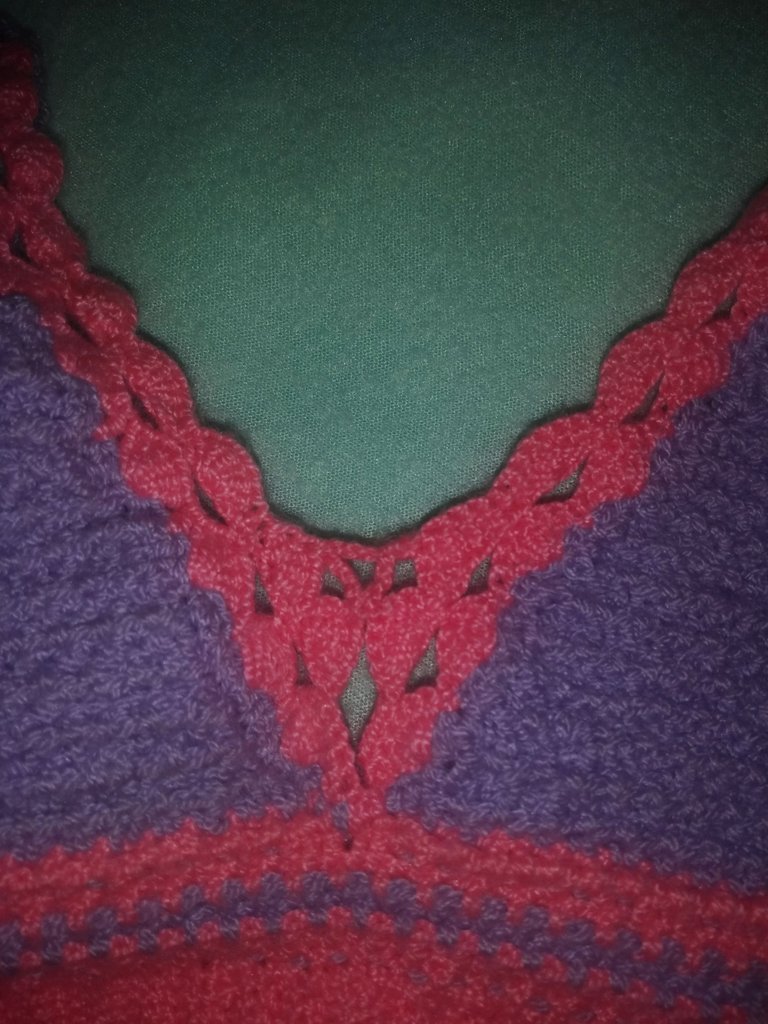
Pasaron unos días antes de volver a tomar el proyecto. Tenía que hacer algo para remediar el inesperado resultado. Imaginaba puntos en abanico que adornaran la parte interna del busto y a la vez minimizaran el escote.
No sabía cómo iniciar, pero mi imaginación seguía adelante. Tejí abanicos de seis puntos altos, dejando de separación de cuatro puntos divididos pon un punto bajo. Al finalizar la vuelta de los abanicos decidí hacer una línea de cadenitas marcando puntos bajos en el centro de cada abanico. Creo que esta decisión fue muy acertada, pues al realizar solo cinco cadenitas entre los abanicos se creaba una evidente disminución, que daba forma a la cavidad de la copa del crop top.
Hice otra vuelta de abanicos para un acabado más completo. Como no quería demasiada abertura en el escote hice unas cadenitas en diagonal para unir los abanicos 2 y 3 de la segunda hilera de cada copa. Este detalle también me llevó algo de tiempo, después de varios intentos quedé satisfecha con el resultado.
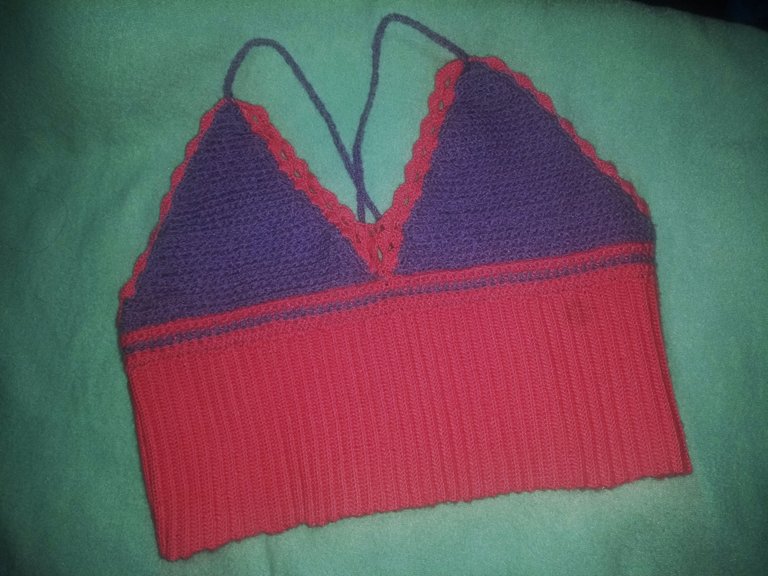
Por los laterales también tejí una línea de abanicos, de manera que las copas quedaran enmarcadas en el color rosa neón. Vale destacar que las mismas fueron tejidas en hilo lila, pues los dos rollitos que adquirí cuando emprendí este proyecto estaban a punto de acabarse cuando finalicé la parte posterior del crop top y cuando fui a comprar el tercer rollo ya no había en ese color. Por suerte conseguí el color lila y pude combinarlo como pueden observarlo en las imágenes que aquí les he compartido.
You should know that if you have come this far I am very grateful for having dedicated your time to read this post. I hope you find the content useful and maybe you will be encouraged to make a nice crop top. Best regards.
Debes saber que si has llegado hasta aquí estoy muy agradecida por haber dedicado tu tiempo a la lectura de este post. Espero que el contenido te sea útil y tal vez te animes a hacer un lindo crop top. Un saludo cordial.
Traducido al inglés con Deepl / Translated to English with Deepl
Fotografías: propias / Photographs: own
Congratulations @mariavargas! You have completed the following achievement on the Hive blockchain and have been rewarded with new badge(s):
Your next target is to reach 60 posts.
You can view your badges on your board and compare yourself to others in the Ranking
If you no longer want to receive notifications, reply to this comment with the word
STOPTo support your work, I also upvoted your post!
Check out the last post from @hivebuzz:
Support the HiveBuzz project. Vote for our proposal!
Hola @mariavargas te felicito porque te animaste a hacer el proyecto de tus sueños y modificaste el patrón según tus necesidades, creo que ya con esto tendrás más confianza para hacer lo que se te antoje.
El punto elástico suele ser un poco tedioso e interminable pero el acabado es realmente hermoso con esta técnica.
El top te quedó muy hermoso y me agrada como explicas tu proceso creativo, gracias por compartir.
Saludos!
Holaa @kattycrochet
Gracias a ti por leer y dejarme tan bonito comentario. Un saludo 🌞🌻
Thank you for sharing this amazing post on HIVE!
Your content got selected by our fellow curator @rezoanulvibes & you just received a little thank you via an upvote from our non-profit curation initiative!
You will be featured in one of our recurring curation compilations and on our pinterest boards! Both are aiming to offer you a stage to widen your audience within and outside of the DIY scene of hive.
Join the official DIYHub community on HIVE and show us more of your amazing work and feel free to connect with us and other DIYers via our discord server: https://discord.gg/mY5uCfQ !
If you want to support our goal to motivate other DIY/art/music/homesteading/... creators just delegate to us and earn 100% of your curation rewards!
Stay creative & hive on!
Thanks!
Es tan hermoso! Aunque tampoco lo usaría 😁 pero a mi hija si le quedaría perfecto
Such a great, detailed article, @mariavargas ! I don't crochet (yet!!), but love reading about how you approached this, as it is inspiring to see others improving their skills and sharing their struggles to learn! Blessings and thanks for sharing this!
Dear @mariavargas, we need your help!
The Hivebuzz proposal already got important support from the community. However, it lost its funding a few days ago and only needs support to get funded again.
May we ask you to support it so our team can continue its work?
You can do it on Peakd, Ecency, Hive.blog or using HiveSigner.
https://peakd.com/me/proposals/199
All votes are helpful and yours will be much appreciated.
Thank you!