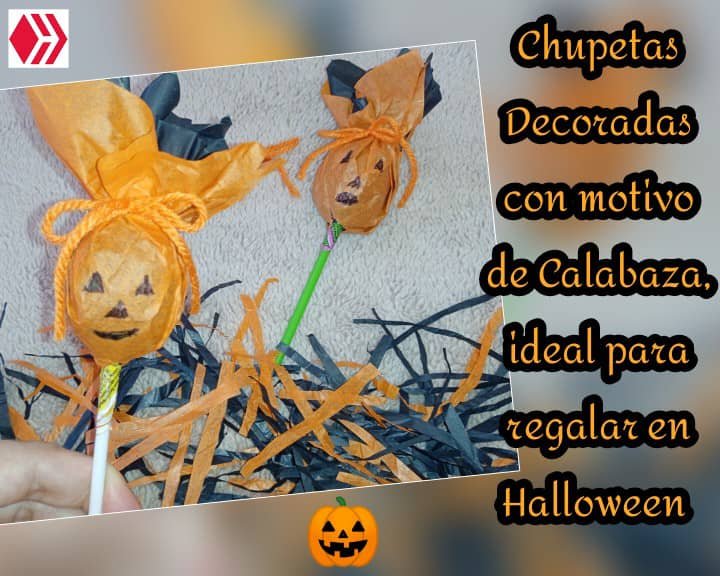
[ESP-ENG] Chupetas Decoradas con motivo de Calabaza, ideal para regalar en Halloween 🎃/Decorated Pumpkin Lollipops, ideal for giving as a Halloween gift 🎃
Hola! Cómo están todos por acá, un gusto saludarles, gente de la comunidad de Hive diy, en esta ocasion, les compartiré como decore unas Chupetas con motivo de Calabaza 🎃, ideal para regalar en las próximas celebraciones de Halloween, es muy fácil de hacer y con pocos materiales, aquí les muestro.
Hello! How are you all here, a pleasure to greet you, people from the Hive diy community, on this occasion, I will share with you how to decorate some Pumpkin Lollipops 🎃, ideal to give as a gift at the upcoming Halloween celebrations, it is very easy to make and with few materials, here I show you.
Diy: Chupetas Decoradas con motivo de Calabaza, ideal para regalar en Halloween 🎃
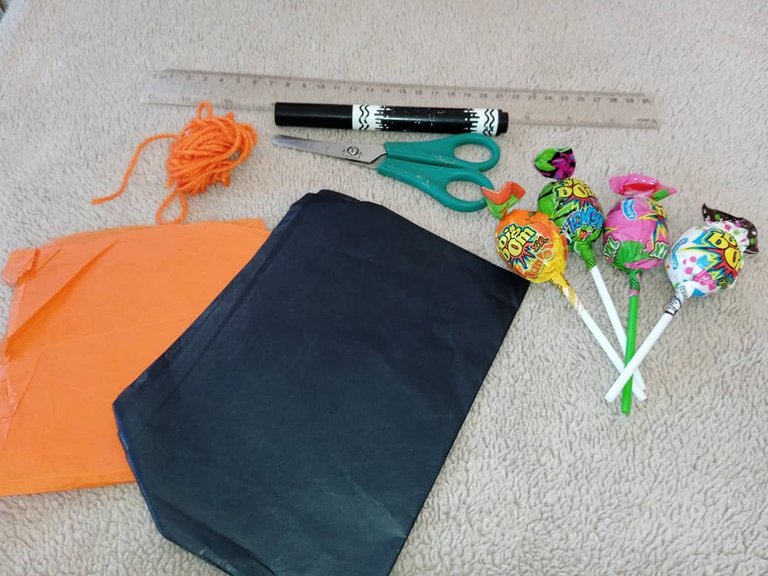
Materiales:
Chupetas
Papel de seda anaranjado y negro
Estambre color anaranjado
Tijera
Marcador negro
Regla
Diy: Decorated Pumpkin Lollipops, ideal for giving as a Halloween gift 🎃
Materials:
Lollipops
Orange and black tissue paper
orange stamen
Scissors
black marker
Ruler
Paso a Paso
Paso 1
Primero vamos a medir en el papel de seda negro un rectángulo de medidas 18x13 cm aproximadamente, hacemos lo mismo con el color anaranjado.
Step by Step
Step 1
First we are going to measure a rectangle measuring approximately 18x13 cm on the black tissue paper. We do the same with the orange color.

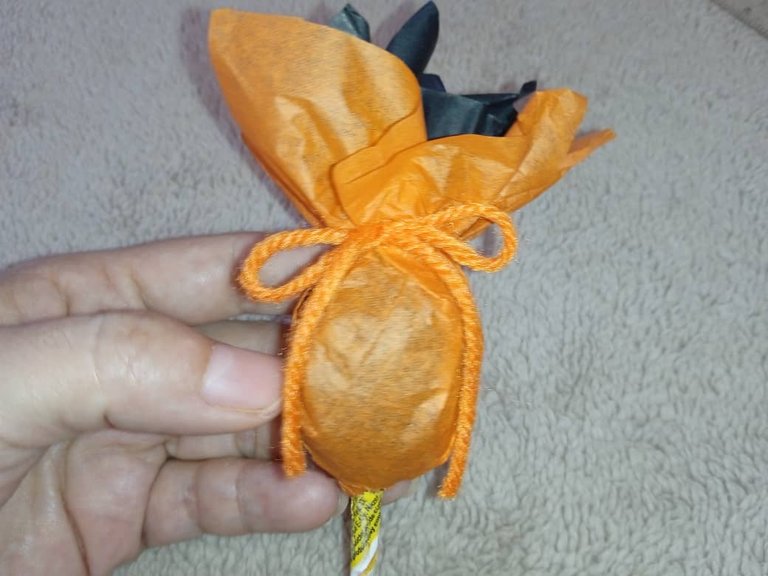
Paso 2
Luego vamos a colocar el rectángulo negro que obtuvimos encima del anaranjado, doblamos para visualizar el centro del papel y hacemos un pequeño corte.
Step 2
Then we are going to place the black rectangle that we obtained on top of the orange one, we fold it to visualize the center of the paper and we make a small cut.

Paso 3
Seguidamente en ese corte que hicimos introducimos el palo de la chupeta y doblamos el papel hacia arriba, el color anaranjado debe quedar por la parte externa.
Step 3
Next, in that cut we made, we inserted the lollipop stick and folded the paper upwards, the orange color should remain on the outside.

Paso 4
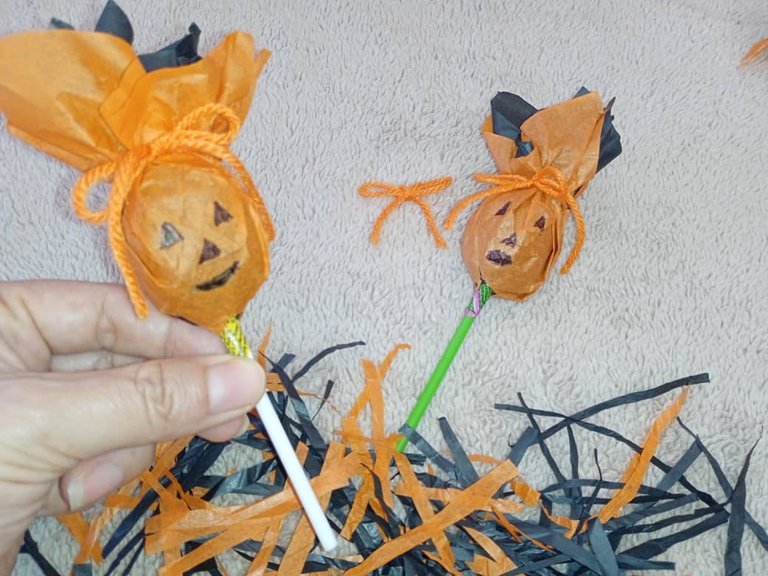
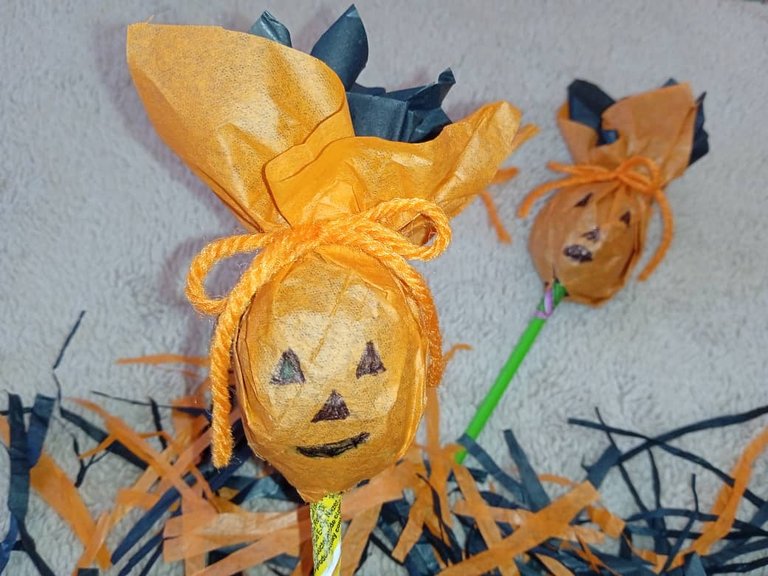
Luego cortamos 20 cm de estambre anaranjado y dónde unimos el papel, hacemos un pequeño lazo.
Step 4
Then we cut 20 cm of orange yarn and where we join the paper, we make a small bow.
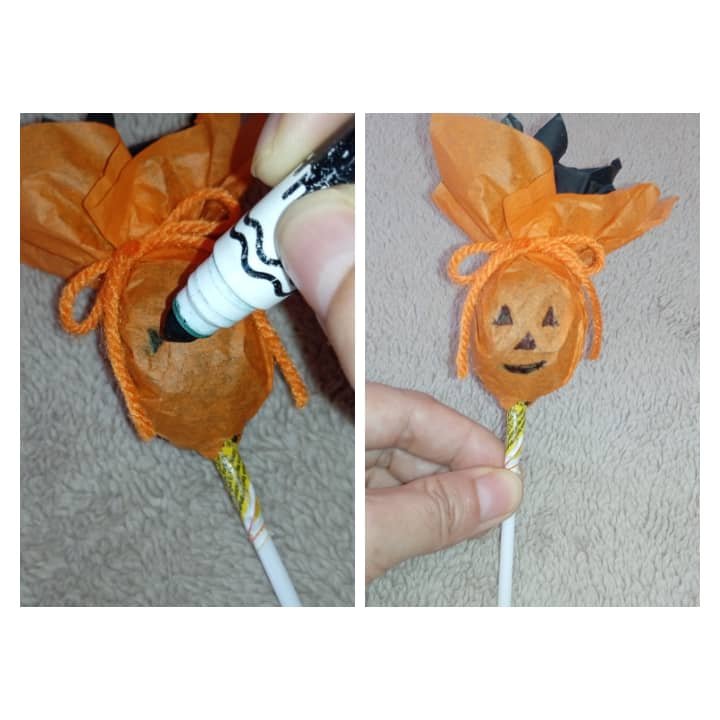
Paso 5
Por último, con el marcador negro, pintamos los ojos, nariz y boca y lista la calabaza para halloween.
Step 5
Finally, with the black marker, we paint the eyes, nose and mouth and the pumpkin is ready for Halloween.
Lista!
Hasta aquí mi Proyecto de este día, espero les haya gustado, muchas gracias por el apoyo brindado. Saludos 🎃
So Project for this day, I hope you liked it, thank you very much for the support. Greetings 🎃
Todas las imágenes son de mi autoria por @mariarodriguez, tomadas especialmente para esta publicación.
All images are my own by @mariarodriguez, taken especially for this publication.

Saludos amiga, me gustó mucho tu idea para adornar las chupeticas, a los niños seguro les encantaría.
@mariarodriguez
https://inleo.io/threads/view/hive-130560/re-leothreads-2qnazhttz
https://twitter.com/hivediy47901/status/1715820569176993806
Muy hermosas y originales!