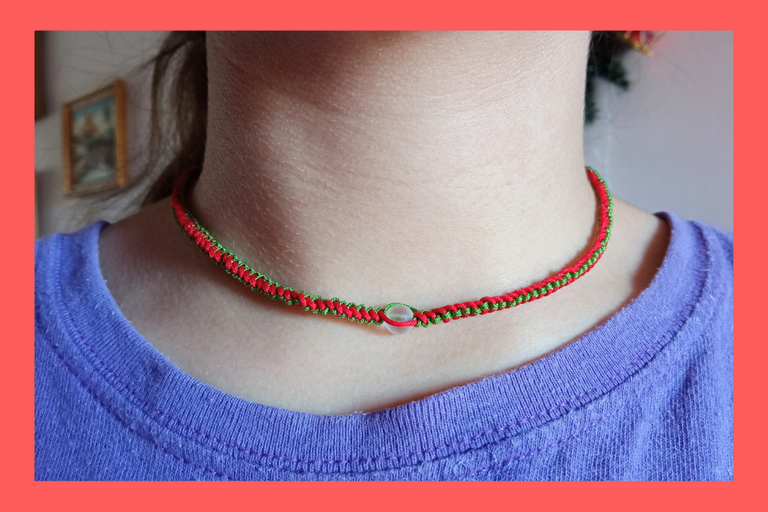
[ESP|ENG] Choker using macramé technique. 🎄 "Christmas with María" #18 || Gargantilla usando técnica de macramé. 🎄 "Navidad con María" #18
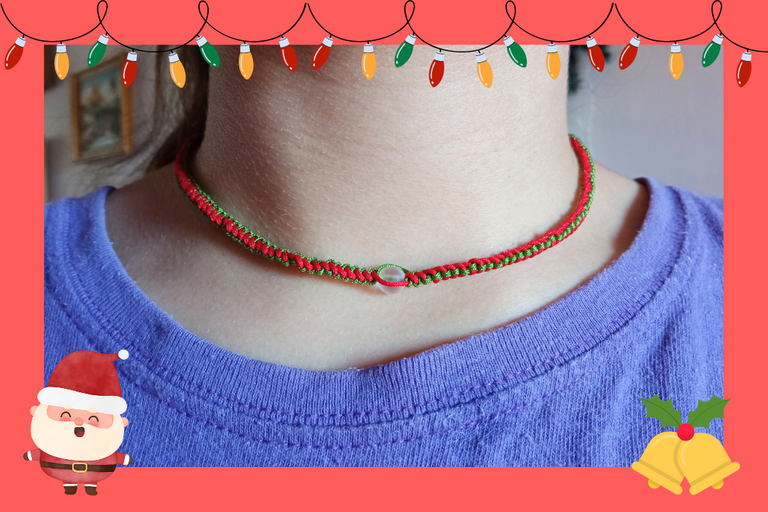
Espero que estén pasando un lindo martes chicosss, por aquí yo nuevamente aparezco para traerles el paso a paso de cómo realicé esta linda gargantilla con temática navideña, no sé si recuerdan que al principio de la serie hice una pulsera con estos mismos colores pero a esa le agregué balines dorados, este proyecto quise hacerlo más sencillo y le coloqué una cuenta transparente en el centro. Este nudo no lo había intentado hacer anteriormente, así que aproveché la oportunidad y lo intenté para elaborar esta gargantilla. Espero que les guste mucho este post, a continuación les indicaré los materiales y cómo la hice:
I hope you guys are having a nice Tuesday, here I am again to bring you the step by step of how I made this nice choker with Christmas theme, I don't know if you remember that at the beginning of the series I made a bracelet with these same colors but I added golden beads, this project I wanted to make it simpler and I placed a transparent bead in the center. I had not tried this knot before, so I took the opportunity and tried it to make this choker. I hope you like this post very much, below I will tell you the materials and how I made it:
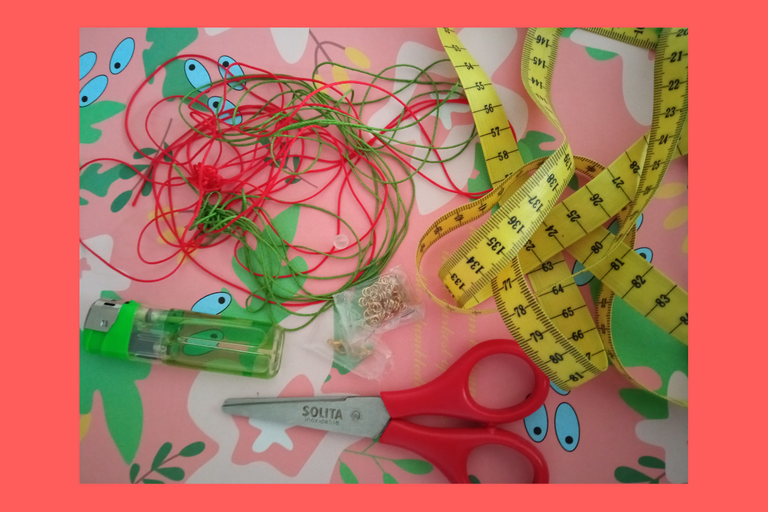
📌 Materiales:
- Hilo chino o macramé, colores: rojo y verde.
- Encendedor.
- Cinta métrica.
- Tijera.
- Argollas pequeñas.
- Ganchito de cierre.
- Cuenta transparente o dije de tu preferencia.
📌 Materials:
- Chinese thread or macramé, colors: red and green.
- Lighter.
- Tape measure.
- Scissors.
- Small rings.
- Hook clasp.
- Transparent bead or charm of your choice.
Lo primero que hice fue cortar dos trozos de hilo verde de 70 centímetros de largo. Estos serán los de la base.
The first thing I did was to cut two pieces of green thread 70 centimeters long. These will be the ones for the base.
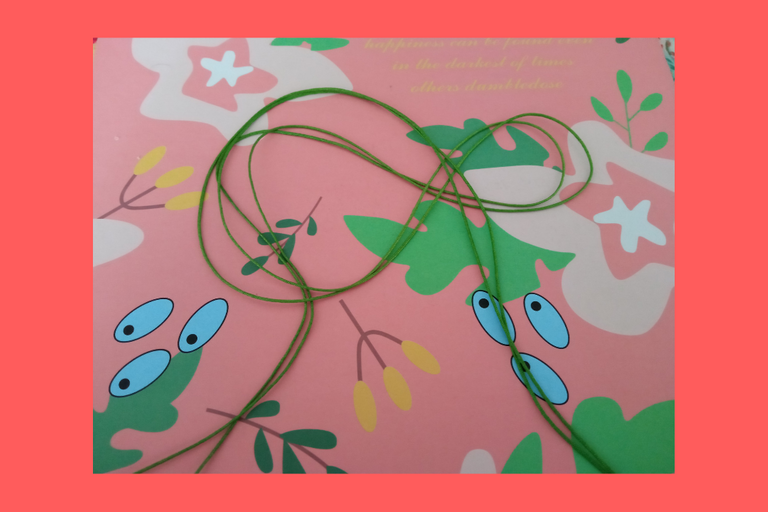
Luego corté dos trozos más, uno de color rojo, y el otro de color verde, cada uno con la medida de 130 centímetros de largo. Estos son los que usaremos para tejer.
Then I cut two more pieces, one red and the other green, each measuring 130 centimeters long. These are the ones we will use for weaving.
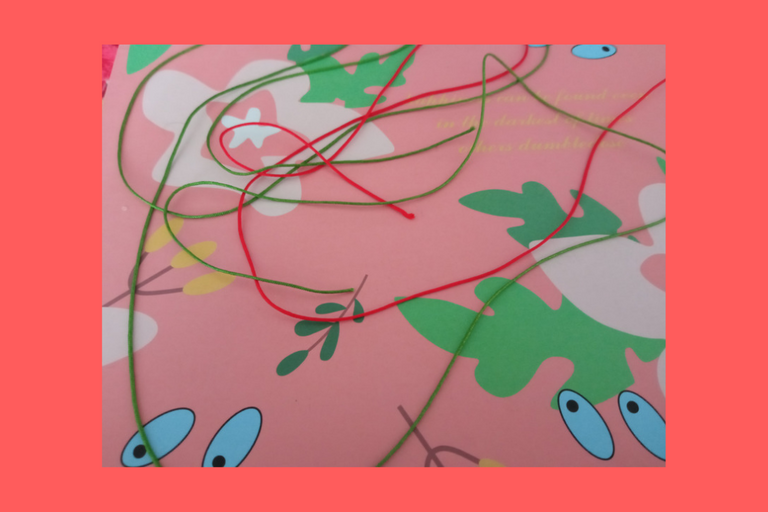
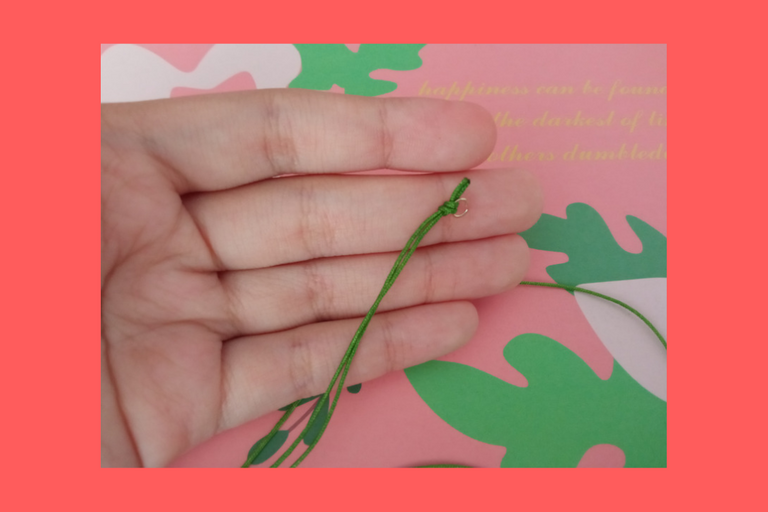
Introducimos una argolla pequeña en los dos hilos de la base, hacemos un nudo simple, y quemamos para sellar.
We introduce a small ring in the two threads of the base, make a simple knot, and burn to seal.
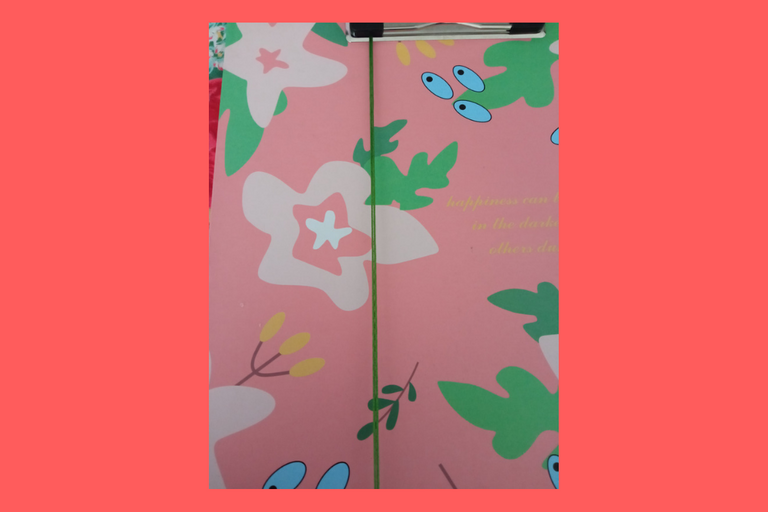
Colocamos los dos hilos en la base que siempre utilizamos para hacer nuestros tejidos.
We place the two threads on the base that we always use to make our weavings.
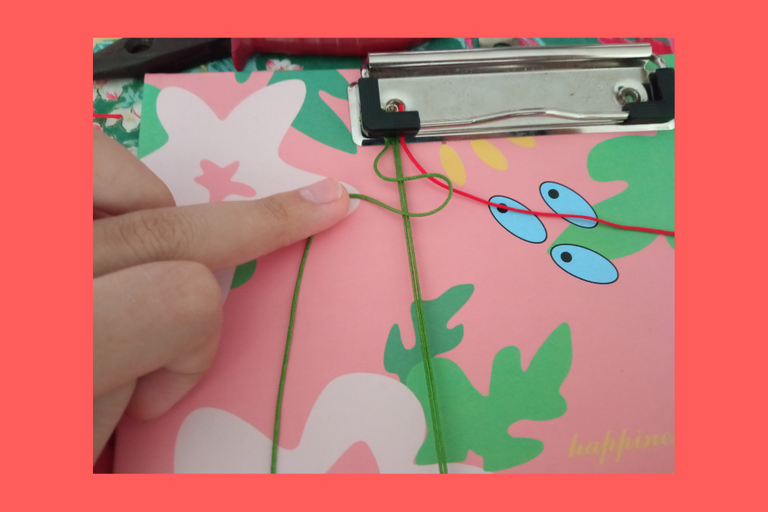
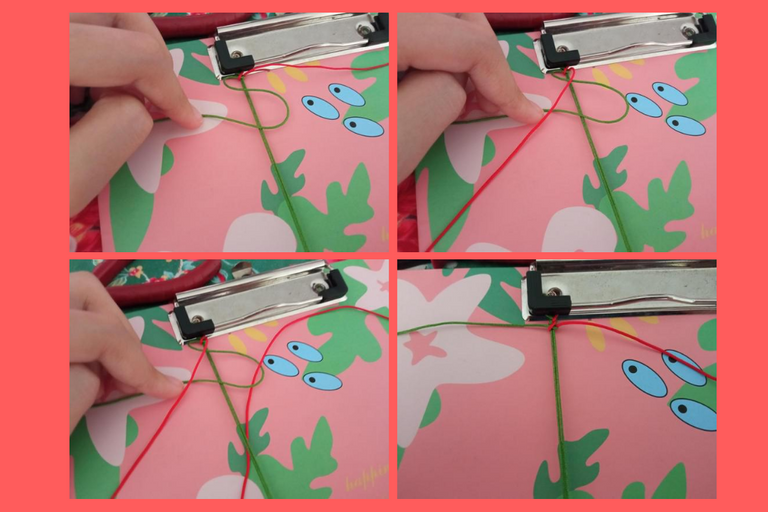
Y sin hacer ningún nudo, posicionamos el hilo verde a la izquierda de los dos base, y el otro de color rojo a la derecha de todos.
And without making any knot, we place the green thread to the left of the two base yarns, and the other red one to the right of all of them.

Empezamos a tejer, primero tomamos el hilo verde de la izquierda y formamos una "S" encima de los dos de la base.
We begin to weave, first we take the green thread on the left and form an "S" on top of the two of the base.
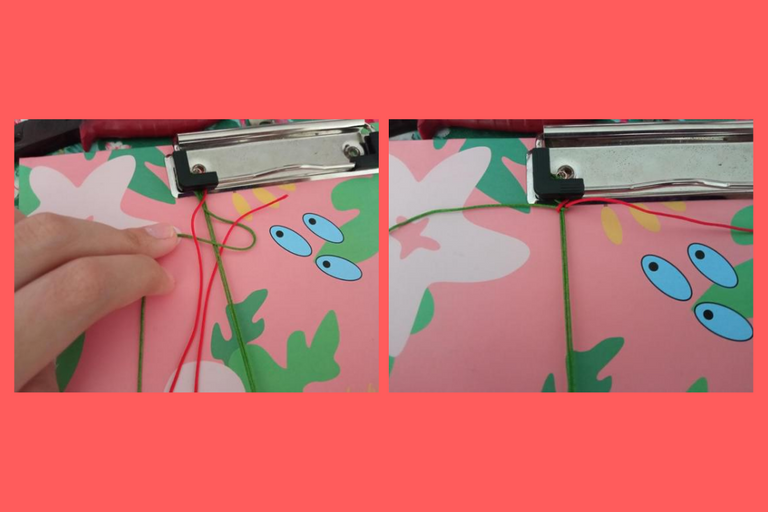
Tomamos el hilo rojo, lo pasamos por encima de la figura que hicimos hasta llegar al otro extremo, luego lo pasamos hacia la derecha nuevamente por debajo de los dos de la base y lo sacamos por el centro del agujero que queda en la derecha. Y ajustamos.
We take the red thread, we pass it over the figure we made until we reach the other end, then we pass it to the right again under the two of the base and we pull it through the center of the hole that remains on the right. And we adjust.
Volvemos a repetir el proceso, formamos una "S" con el hilo verde, después pasamos el hilo rojo por encima. Luego lo pasamos por debajo de los hilos base y lo sacamos por el agujero. Ajustamos nuevamente.
We repeat the process again, we form an "S" with the green thread, then we pass the red thread over it. Then we pass it under the base yarns and pull it through the hole. We adjust it again.
Y así vamos tejiendo, hasta obtener el largo de la mitad de nuestra gargantilla.
And so we go on weaving, until we get the length of half of our choker.
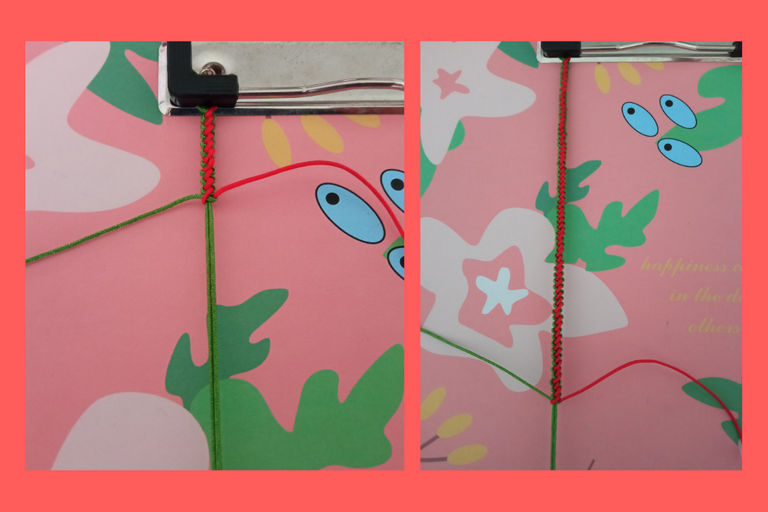
Cuando tengamos el largo que creemos que es suficiente para ser la mitad, introducimos la cuenta o el dije de nuestra preferencia, yo quería comprar uno con temática de navidad, estaba buscando en las tiendas de la ciudad donde vivo pero no encontré. Si ustedes tienen lo pueden usar. Seguimos tejiendo hasta que esté del mismo largo que del otro extremo.
When we have the length that we think is enough to be half, we introduce the bead or the pendant of our preference, I wanted to buy one with Christmas theme, I was looking in the stores of the city where I live but I did not find. If you have it you can use it. We continue weaving until it is the same length as the other end.
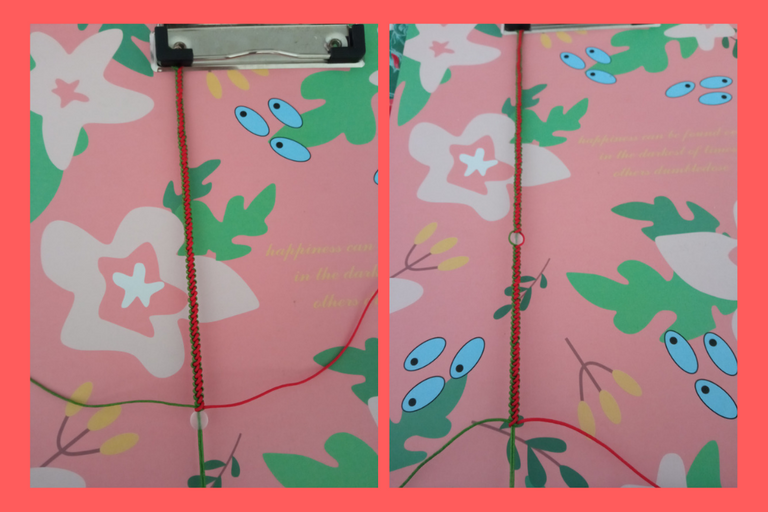
En el otro extremo de la gargantilla colocamos un ganchito de cierre.
At the other end of the choker we place a small hook for closure.
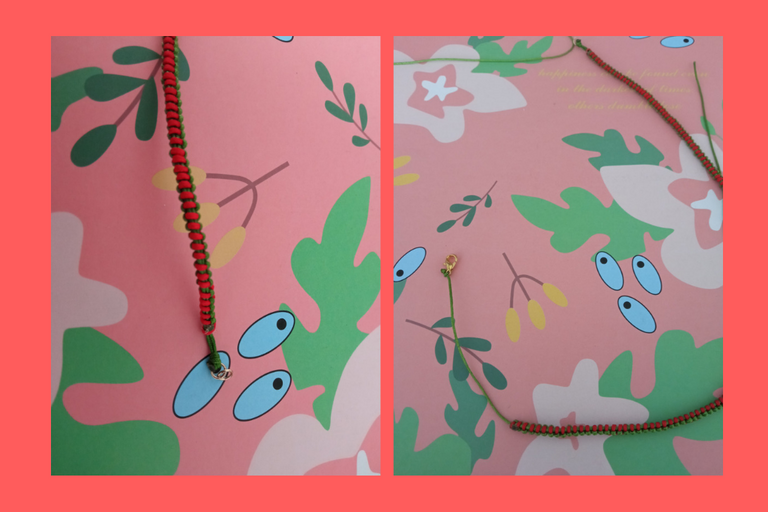
Este fue el resultado de la gargantilla chicosss, ojalá que les haya gustado y que la puedan realizar en casa para lucirla en estas bonitas fechas. Me alegra volver a compartir contenido en esta increíble comunidad ❤️❤️. Gracias por leer, hasta una próxima oportunidad!!❤️
This was the result of the choker guysss, I hope you liked it and that you can make it at home to wear it in these beautiful dates. I'm glad to share content again in this amazing community ❤️❤️. Thanks for reading, until a next opportunity!!!❤️

Todas las imágenes son de mi autoría @mariamglow, tomadas con mi teléfono Redmi 9, editadas en Canva, texto traducido en DeepL.
All images authored by me @mariamglow, taken with my Redmi 9 phone, edited in Canva, text translated at DeepL.

Una linda gargantilla navideña, se ve muy bien el tejido y la piedra central quedó muy bien, buen trabajo.
Graciaass, me alegra que les haya gustadoo!!
Saludoss!!❤️❤️
Thank you for sharing this post on HIVE!
Your content got selected by our fellow curator stevenson7 & you just received a little thank you upvote from us for your great work! Your post will be featured in one of our recurring compilations which are aiming to offer you a stage to widen your audience within the DIY scene of Hive. Stay creative & HIVE ON!
Please vote for our hive witness <3
Está muy lindo y delicado, me gusta ✨✨✨
Graciaas, qué alegría que te haya gustado, a mí me encanta tu trabajo!
Saludoss!!❤️❤️